Creating/Editing User Roles
-
From the Oracle Retail Xstore Office menu, select System, then Xadmin Users, or click the Xadmin Users link in the System panel.
-
At the Xadmin Users page, click User Roles.
Figure 2-1 Xadmin Users Page

-
At the User Roles page, create a new User Role, edit an existing User Role, or delete an existing User Role:
-
To create a new Role, click Add New. The User Roles window displays and the fields are blank.
-
To edit an existing User Role, select the Role from the list. The User Roles window displays and the fields are populated with the current Role information.
-
To delete a User Role, select the Delete icon (X).
-
-
Complete the required fields. (All fields are required.)
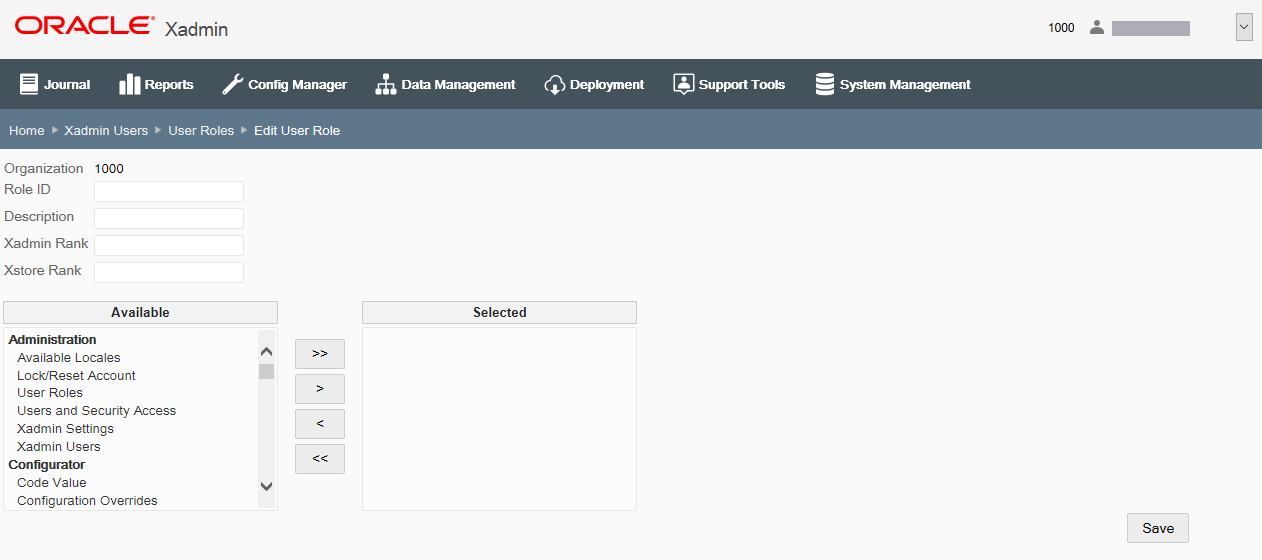
Figure 2-2 User Roles Window - Add New Role Example

-
Organization - Select the Organization ID and name from the list.
-
Role ID - Type the role identifier. Spaces and special characters are not allowed in this field. When editing an existing role, this field cannot be changed.
-
Description - Type a description for the role.
-
Xadmin Rank - Type a numeric rank number for Oracle Retail Xstore Office. This rank is evaluated when creating a new Oracle Retail Xstore Office user in User and Security Access. An Oracle Retail Xstore Office user cannot assign a role to a new user that has a greater numeric rank than his/her Xadmin rank. For example, a logged-in user with a rank role of 50 cannot edit or create a rank role of 51 and above.
-
Xstore Rank - Type a numeric rank number for Oracle Retail Xstore Point of Service. This value is the rank associated to the user within the Oracle Retail Xstore Point-of-Service application and corresponds to the role the user holds within Oracle Retail Xstore Point of Service. This rank is evaluated when creating or editing an Oracle Retail Xstore Point-of-Service employee in Data Manager - Employees. An Oracle Retail Xstore Office user cannot assign Oracle
Retail Xstore Point-of-Service security groups to an employee that is ranked higher than his/her Oracle Retail Xstore Point-of-Service rank.
-
Privileges - Select each role privilege from the list of Available options and click the arrow button to move the role or roles to the Selected window:
-
 Double
right arrows - Add all privileges to the Selected window.
-
 Single
right arrow - Add selected privilege to the Selected window.
-
 Single
left arrow - Remove selected privilege from the Selected window.
-
 Double
left arrows - Remove all privileges from the Selected window.
-
To select several privileges at the same time, hold down the [Ctrl] key on the keyboard while selecting each privilege you want to assign to the role you are creating or editing. Click the single right arrow button to move the privileges from the Available window to the Selected window.
-
You can also hold down the [Shift] key in the same manner to select all the privileges between the first privilege you select and the last privilege you select. Click the single right arrow button to move the privileges from the Available window to the Selected window.
-
-
-
Click Save to create or update the role.
Note:
A Delete icon (X) is available for roles you create. However, if a role has been assigned to a user it cannot be deleted.