Uploading Configuration Files
-
Click Upload New. The window appears.
-
Click Choose File.
-
Select a file and click OK.
-
Click Upload to upload the selected file.
-
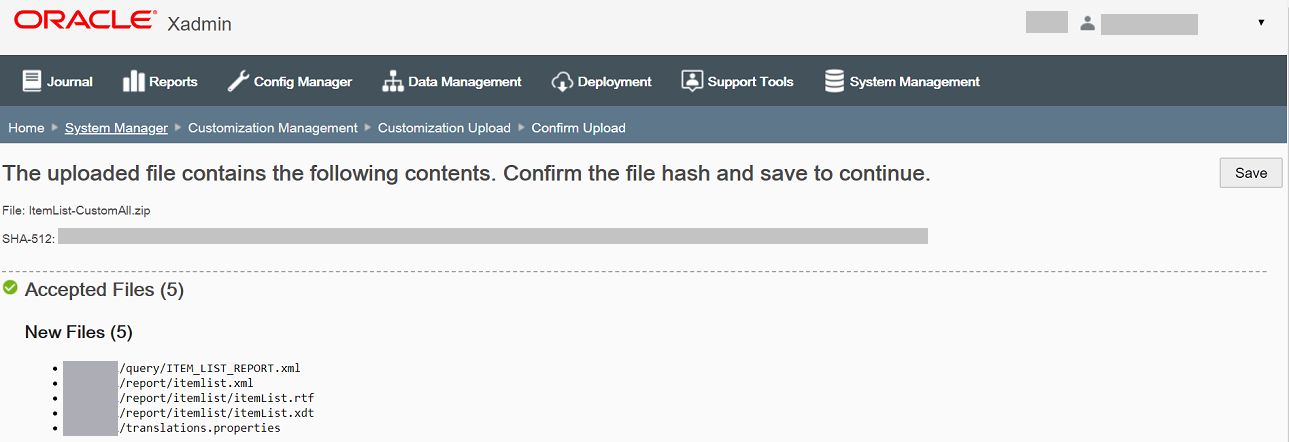
The system displays the Confirm Upload page.
Figure 3-2

The Confirm Upload page shows the following sections:
-
SHA Signature
The SHA signature is a hash of the file that was uploaded so the user can confirm that the server received what the user uploaded.
-
Failed Validations
This section shows files with validation errors. The total number of failed files, the file name and a short description of the error are displayed. The files must be updated and re-uploaded to be accepted.
-
Accepted Files
This section shows the accepted uploaded files. The total number of accepted files, the file name, along with the information that this file will replace the existing one, are displayed.
-
Unchanged Files
This section identifies unchanged files. The system will recognize the file contents as unchanged and do not need to be uploaded again, and therefore will bypass them during the upload process.
-
Unacceptable Files
This section shows files containing an unsupported file type or location. The total number of unacceptable files and the file name are displayed.
-
-
Click Save.
-
Your are prompted to confirm the upload. Click Yes.
-
The system saves the configurations to the database. On the Customization Management page the accepted files are listed.
Figure 3-3 Customization Management
