10 Advanced Management Console Migration
The migration of the Advanced Management Console to the latest available version involves redeploying the latest Enterprise Archive (EAR) file over the previous Advanced Management Console version within the WebLogic Server Administrator Console. The migration process is facilitated by an update wizard, where the Advanced Management Console server updates the database either manually or automatically. The Advanced Management Console agent is then updated to the latest version to be consistent with the redeployed Advanced Management Console server.
Note:
- Migration of higher version of Advanced Management Console to lower version is not supported.
- As a best practice, always ensure to take a back up or a snapshot of the existing database before you continue with the upgrade process. If there is no back up, then you can’t go back and try to upgrade subsequently, in case an error occurs at any point.
During the migration process, the Advanced Management Console server stops processing requests from the agent, processing Java Usage Tracker records, and updating security baseline records.
This topic contains the following sections that describe the Advanced Management Console server upgrade to the latest version, the Advanced Management Console database update, and the Advanced Management Console agent update:
Note:
Ensure to always clear browser cache and cookies, after the Advanced Management Console is updated to a new version.Uploading a New Version of Advanced Management Console Server
To upload the Advanced Management Console over the previous version:
- Enter
https://wls-hostname:/port/consolein a web browser, wherewls-hostnameandportare the DNS name and SSL listen port number of the Administration Server. - Authenticate using your administrator credentials.
- Select the Deployments option from the Domain Structure panel.
- In the right panel, select the check box for the Advanced Management Console application.
- Click Update.
- In the navigation panel, locate the EAR file for the latest version of the Advanced Management Console file and check it
in. For example, the EAR file for the 2.20 version is
JavaAMC-2_20.ear. - Click Next. Use the default values.
- Click Finish.
- Restart the WebLogic Server after Advanced Management Console is deployed.
Updating the Advanced Management Console Database
After you have uploaded a new version of the Advanced Management Console EAR file, for example,
JavaAMC-2_20.ear to WebLogic Server, the Advanced Management Console administrator must update the Advanced Management Console database.
Note:
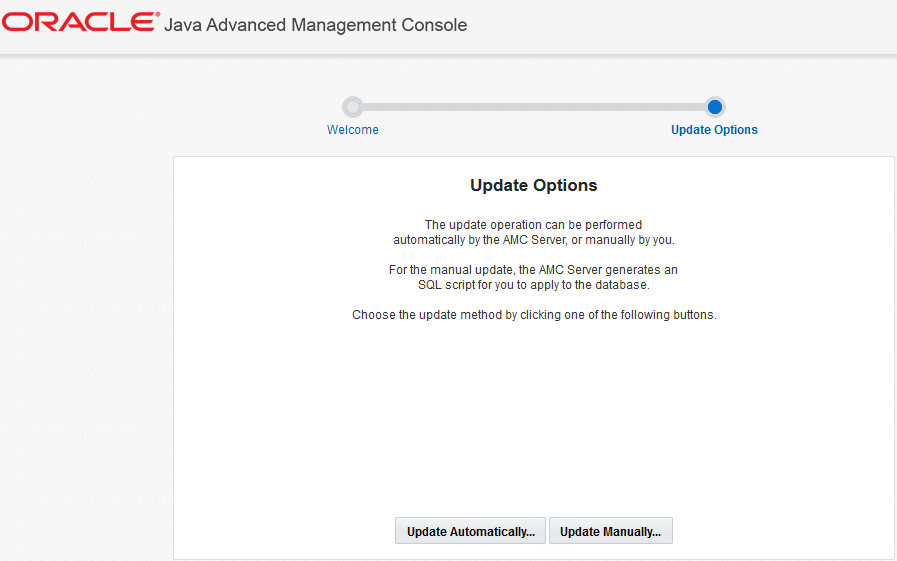
You need not update the database if there are no changes to the database between the previous and the later AMC versions.To update the database, load the /amcwebui and check whether or not the Advanced Management Console Database Update screen (update wizard) is displayed. If the screen is not displayed, then no changes are required, and the Advanced Management Console is fully operational. If the screen is displayed, then it guides you to perform database updates.
The database can be updated either manually or automatically using administrator credentials. If no database updates are required from the current AMC version to the latest one, then the update wizard is not displayed and you do not need to explicitly perform any task. Follow these topics to update the Advanced Management Console :
Automatic Update of the Database
To do an automatic update of the Advanced Management Console database:
When the update is completed, a screen is displayed indicating that the AMC database is successfully updated.
Setting up Security Questions
After setting up the database successfully, access Advanced Management Console . You will be prompted to set up the security questions. Select any three questions from the drop-down and provide your answers. You will then be redirected to the login page.
Updating the Advanced Management Console Agent
After you update the database, update the Advanced Management Console agent to the latest release to be consistent with the redeployed Advanced Management Console server.
You can update the Advanced Management Console agent manually or automatically. However, Oracle recommends automatic updates.
Manually Updating the Advanced Management Console Agent Version 2.0
Learn more about how to manually update Advanced Management Console version 2.0 to be consistent with the Advanced Management Console server.
To manually update Advanced Management Console agent version 2.0:
Manually Updating the Advanced Management Console Agent Version 2.1 and later
Learn more about how to manually update Advanced Management Console agent version 2.1 and later to be consistent with the Advanced Management Console server.
To manually update Advanced Management Console agent version 2.1 and later:
Automatic Update of Advanced Management Console Agent
Starting version 2.1, when you update the Advanced Management Console to a higher release, the agent automatically updates itself to that specific version.
