Note:
- This tutorial requires access to Oracle Cloud. To sign up for a free account, see Get started with Oracle Cloud Infrastructure Free Tier.
- It uses example values for Oracle Cloud Infrastructure credentials, tenancy, and compartments. When completing your lab, substitute these values with ones specific to your cloud environment.
Provision an Oracle Autonomous Database in Oracle Database@Azure
Introduction
In this tutorial, we will go through the entire process of provisioning an Oracle Autonomous Database in Oracle Database@Azure.
Objectives
- Provision an Oracle Autonomous Database in Oracle Database@Azure.
- Place it in your desired resource group and Microsoft Azure region.
- Configure it according to your requirements.
Prerequisites
- Access to Microsoft Azure cloud, OCI tenancy, and Oracle Database@Azure.
- An Azure resource group.
- An Azure Virtual Network (VNET) within your resource group.
- A subnet within your VNET that is delegated to the
Oracle.Database/networkAttachmentsservice.
Task 1: Provide Basics Information
Log in to the Microsoft Azure portal, navigate to Oracle Database@Azure, select Oracle Autonomous Database Service and click Create to start the process.
-
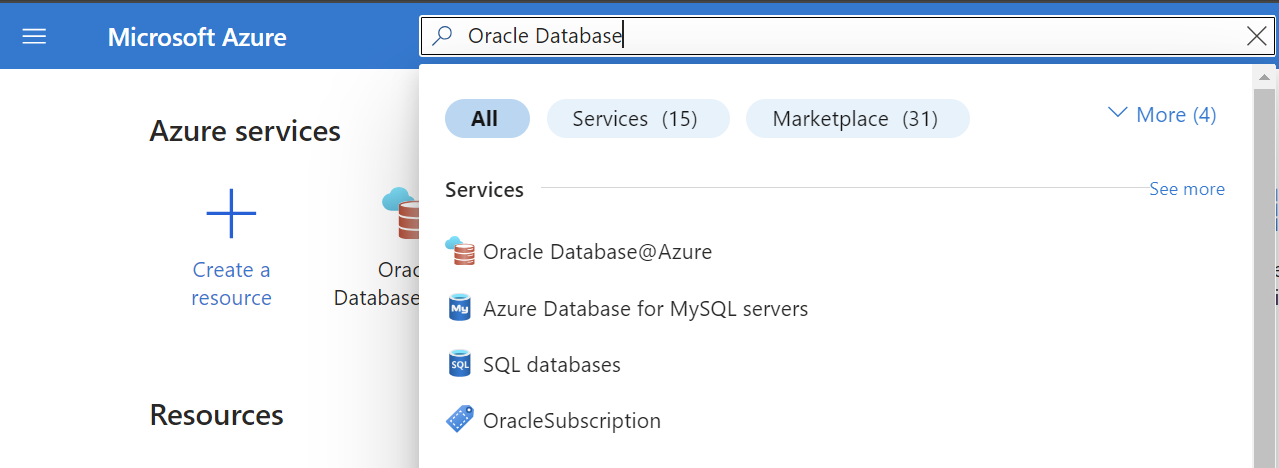
Enter Oracle Database and select Oracle Database@Azure.

-
Click Oracle Autonomous Database Service from the left sidebar under Oracle Database@Azure and click + Create.

-
In the Basics section, enter the Project and Instance details.
- Confirm the Subscription to manage the deployed resource and costs.
- Select a Resource group which is a collection of resources that share the same lifecycle, permissions, and policies.
- Enter the Name for your Oracle Autonomous Database.
- Select the Azure Region that is right for you and your customers. Not every resource is available in every region.

Task 2: Provide Configuration Information
Provide the Database configuration, Backup retention, Administrator credentials, and License information.
-
Select Workload type. Oracle Autonomous Database supports different workload types, including Data Warehouse and Transaction Processing. Both workload types provide performance improvements and additional features that support operations for the specified workload.
-
In the Database configuration section, select the Database version, ECPU count, and Storage. Automatic backups are managed by Oracle. Backup storage is billed separately and in addition to database storage. When a backup ages beyond the backup retention setting, it is deleted.

-
Enter the administrator password.
Note: Password must be 12 to 30 characters and contain at least one uppercase letter, one lowercase letter, and one number. The password cannot contain the double quote (“) character or the username admin.

-
Select your License type.
- License included: Subscribe to a new Oracle Database software license and the Oracle Database service.
- Bring your own license (BYOL): Bring your organization’s Oracle Database software license to Oracle Cloud Infrastructure.

-
Select Advanced options. The
AL32UTF8character set is recommended by default.
Task 3: Select Virtual Network and Subnet
Transport Layer Security (TLS) connections allow you to connect to your Oracle Autonomous Database without a wallet, if you use a Java Database Connectivity (JDBC) thin driver with JDK8 or above. TLS connections require you to use an access control list (ACL) or private endpoint.
-
Select your desired Virtual network.
Note: The drop-down menu will only list virtual networks that are located within the subscription and resource group that you have selected in the Basics section. If the drop-down menu is empty, you may need to specify a different subscription or resource group, or create a virtual network within the selected resource group.
-
Select your desired Subnet.
Note: The drop-down menu will only list delegated subnets that are contained within the virtual network that you have selected above. If the drop-down menu is empty, you may need to specify a different virtual network, or create a delegated subnet within the selected virtual network.

Task 4: Confirm Maintenance Information
-
Select Maintenance patch level. It is set to Regular by default.
-
Enter an Email address to receive operational notices and announcements as well as unplanned maintenance notifications.

-
In the Consent section, review the Oracle terms of use, Oracle privacy policy and agree to the terms of service.

-
Tags are name and value pairs that enable you to categorize resources and view consolidated billing by applying the same tag to multiple resources and resource groups.
Note: If you create tags and then change resource settings on other tags, your tags will be automatically updated.

-
In the Review + create section, review the information you supplied under the Basics, Configuration, Networking and Maintenance sections. Click Create to initiate the Oracle Autonomous Database creation process.

Related Links
Acknowledgments
- Author - Anwar Belayachi (Senior Principal Solution Architect - OCI Multicloud)
More Learning Resources
Explore other labs on docs.oracle.com/learn or access more free learning content on the Oracle Learning YouTube channel. Additionally, visit education.oracle.com/learning-explorer to become an Oracle Learning Explorer.
For product documentation, visit Oracle Help Center.
Provision an Oracle Autonomous Database in Oracle Database@Azure
G13387-01
August 2024