Note:
- This tutorial requires access to Oracle Cloud. To sign up for a free account, see Get started with Oracle Cloud Infrastructure Free Tier.
- It uses example values for Oracle Cloud Infrastructure credentials, tenancy, and compartments. When completing your lab, substitute these values with ones specific to your cloud environment.
Streamline Frontend CI/CD with OCI DevOps Service and OCI Object Storage
Introduction
This tutorial: Set Up Oracle Cloud Infrastructure (OCI) Object Storage and Oracle API Gateway for Static Website Hosting, describes how to host statically compiled JavaScript application, utilizing Ahead-of-Time (AOT) compilation on OCI Object Storage and Oracle API Gateway.
To establish a complete production workflow, in this tutorial we will guide you through setting up a robust CI/CD DevOps pipeline for your static frontend website using Oracle Cloud Infrastructure DevOps service.
The OCI DevOps service is an end-to-end, continuous integration and continuous delivery (CI/CD) platform for developers. Using this service, DevOps engineer can easily build, test, and deploy software and applications on Oracle Cloud. The DevOps build and deployment pipelines reduce change-driven errors and decrease the time customers spend on building and deploying releases. The service also provides private Git repositories to store your code and supports connections to external code repositories.
Objective
- Set up a robust CI/CD DevOps pipeline for your static frontend website using OCI DevOps service and OCI Object Storage.
Prerequisites
- Access to an Oracle Cloud tenancy.
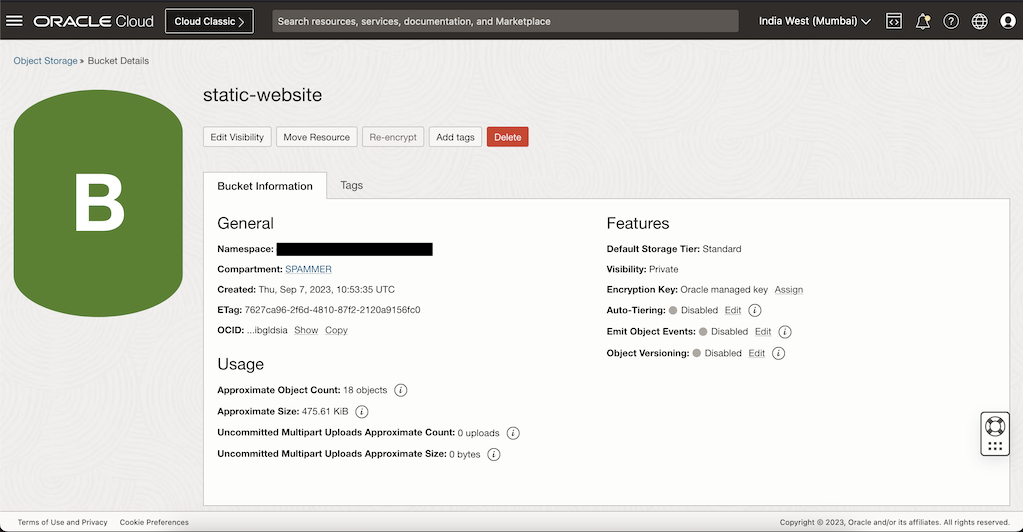
Task 1: Create an OCI Object Storage Bucket
Create a new bucket in OCI Object Storage. This bucket will be used to host your static website as described in Set Up OCI Object Storage and Oracle API Gateway for Static Website Hosting.
Task 2: Create a DevOps Project
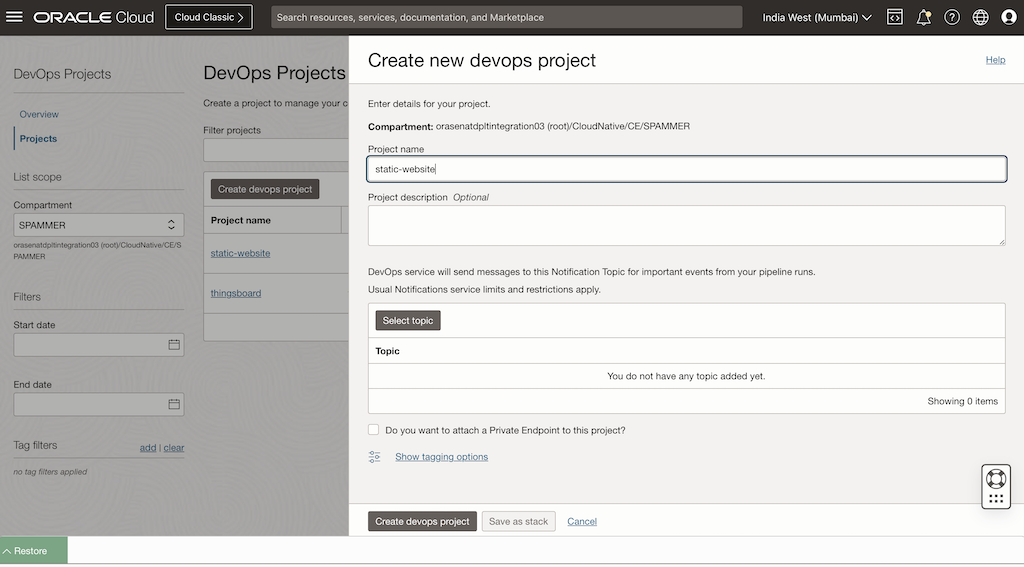
Navigate to Developer Services, DevOps, Projects, click Create Devops project, enter the project name, select a notification topic, and then click Create.
Note: You have to create a new notification topic if you have not already created it.
Task 3: Establish the Code Repository
You have a choice of either creating a new private Git repository or mirroring your existing repository within OCI Code Repositories.
Note: Follow this document: Setting up Repository for interacting with your code repositories.
Create build_spec.yaml file in the repo using the following code. This will serve as the Build Specification for our DevOps build.
version: 0.1
component: build
timeoutInSeconds: 1000
shell: bash
env:
  variables:
  # exportedVariables are made available to use as parameters in sucessor Build Pipeline stages
  # For this Build to run, the Build Pipeline needs to have a BUILDRUN_HASH parameter set
  exportedVariables:
    - BUILDRUN_HASH

steps:
  - type: Command
    name: "Define unique build tag"
    timeoutInSeconds: 140
    command: |
      echo "OCI_BUILD_RUN_ID: ${OCI_BUILD_RUN_ID}"
      export BUILDRUN_HASH=`echo ${OCI_BUILD_RUN_ID} | rev | cut -c 1-7`
      echo "BUILDRUN_HASH: " $BUILDRUN_HASH
  - type: Command
    name: "Install Nodejs"
    command: |
      sudo yum install -y oracle-nodejs-release-el7 oracle-release-el7
      echo "Installation Complete..."
  - type: Command
    name: "Frontend build"
    command: |
      npm install
      npm run build
      echo "Build Done..."
  - type: Command
    name: "Zip build files"
    command: |
      cd dist
      zip -r -j build.zip angular-conduit/*
      echo "Zip complete"
f
outputArtifacts:
  - name: static-website-build     # Change this to your artifact name.
    type: BINARY
    location: dist/build.zip
Task 4: Establish Artifact Registry
OCI Artifact Registry is a repository service for storing, sharing, and managing software development packages. With Artifact Registry, you can manage artifacts to make artifacts immutable, identify artifacts with secure hash, add versions, upload and download, fetch the latest and control visibility and permissions. For more information, see Artifact Registry
-
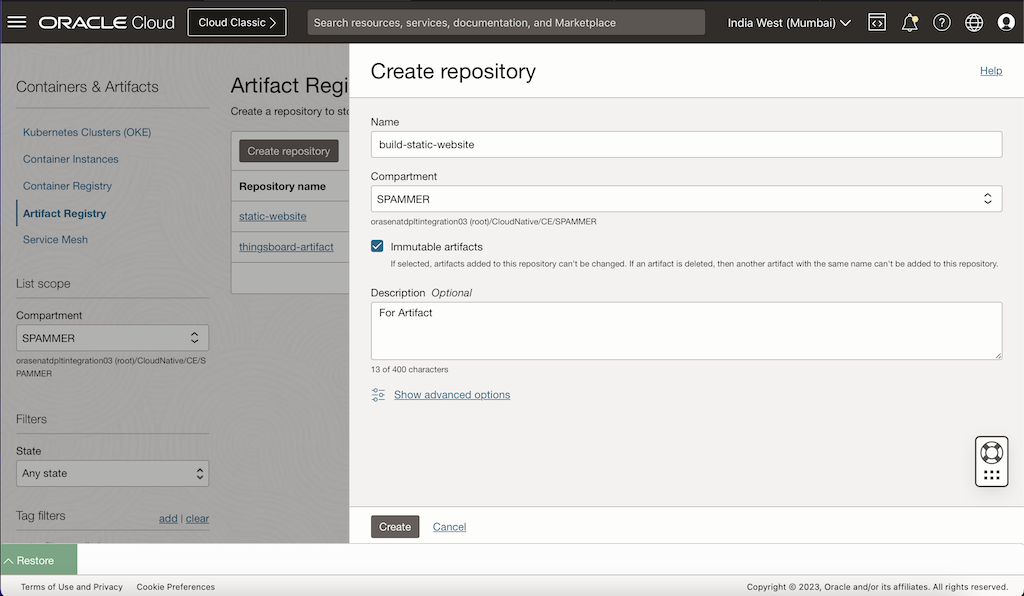
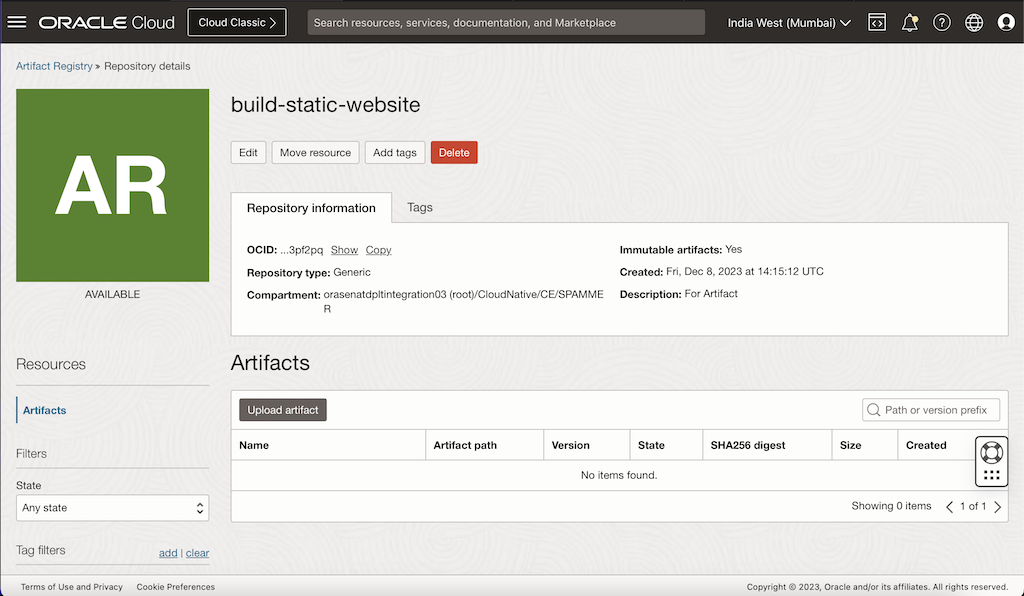
To create Artifact Registry, navigate to OCI Console, Developer Services, Containers And Artifacts, Artifacts Registry and click Create Repository, enter the following details and click Create. This will create an Empty Artifact Registry for storing your artifacts.
-
To create Deployment Artifact, we will use DevOps Shell container runtime to deploy the build artifact to OCI Object Storage. To do this, we will create a deployment specification. For more information, see Deployment Specification.
Command Specification -
deployemnt_spec.yamlversion: 0.1 component: command timeoutInSeconds: 6000 shell: bash inputArtifacts: - name: "static-artifact" type: GENERIC_ARTIFACT registryId: "<Artifact Registry OCID>" # replace this with your Artifact Registry OCID path: "build/static-website.zip" # replace this with your Build Artifact Path version: ${version} location: /workspace/input/build.zip steps: - type: Command timeoutInSeconds: 600 name: "unzip artifact" command: | echo "unzipping..." ls -latr /workspace/input mkdir -p /workspace/output unzip /workspace/input/build.zip -d /workspace/output ls -latr /workspace/output - type: Command name: "Bucket cleanup" timeoutInSeconds: 140 command: | oci os object bulk-delete --force --bucket-name <bucket_name> # replace this with your bucket name. echo "delete complete..." - type: Command name: "Static Website Deployment" timeoutInSeconds: 140 command: | oci os object bulk-upload --bucket-name <bucket_name> --content-type auto --src-dir /workspace/output/ # replace this with your bucket name. echo "deployment complete..."Note: : The –content-type auto parameter figures out and sets the content type of the file being uploaded, if not specified the content type of the uploaded file is set as octet-stream.
-
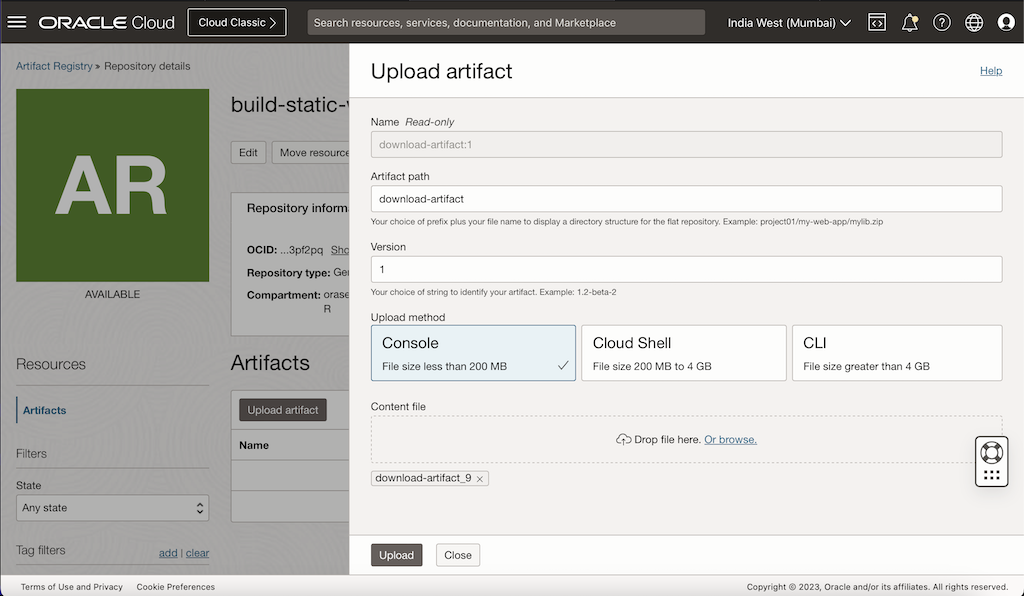
Navigate to OCI Console, Developer Services, Artifact Registry, select the Registry created in Step 1, click Upload Artifact, then enter Artifact Path Name as download-artifact, Version as 1 and click Upload to upload the deployment specification.
Task 5: Establish Build and Deployment Pipelines
Build Pipeline: This is where your application code is compiled, tested, and packaged. In OCI DevOps, you can define build pipelines that specify the steps needed to build your application. This often includes running automated tests to ensure code quality.
Deployment Pipeline: This is where the built artifacts are deployed to various environments, such as testing, staging, and production. In OCI DevOps, deployment pipelines allow you to define the process for deploying your applications, including the ability to specify different deployment strategies (like blue-green or canary deployments). We will proceed with setting up the build and deployment pipelines.
-
Access Artifact Registry and IAM Policies.
You can access the artifacts that you store in Artifact Registry from the DevOps service. You can create a reference to three types of artifacts in Artifact Registry: instance group deployment configurations, general artifacts, and Kubernetes manifests. Your administrator must grant the read all-artifacts permission to the pipeline resources.
We need to add several IAM policies so that the DevOps services build and deployment pipeline and container service can access the artifact registry for uploading and downloading the artifacts. For more information, see DevOps IAM Policies
-
Create Build Pipeline. For more information about OCI Build Pipeline, see Managing Build Pipelines.
-
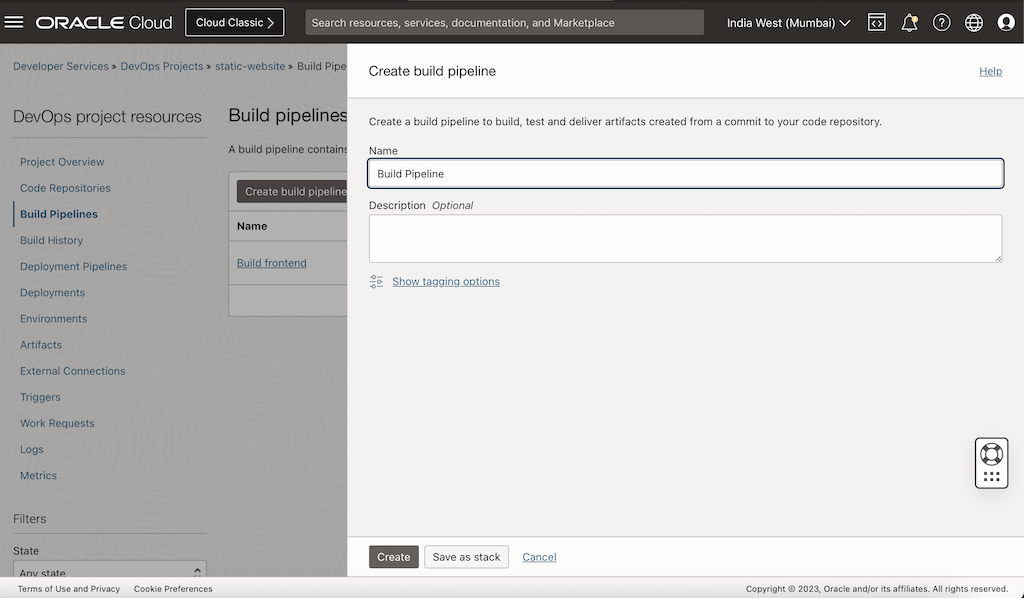
Navigate to OCI Console, Developer Services, DevOps, select your project, select Build Pipeline and click Create build pipeline, then open pipeline that you created.
-
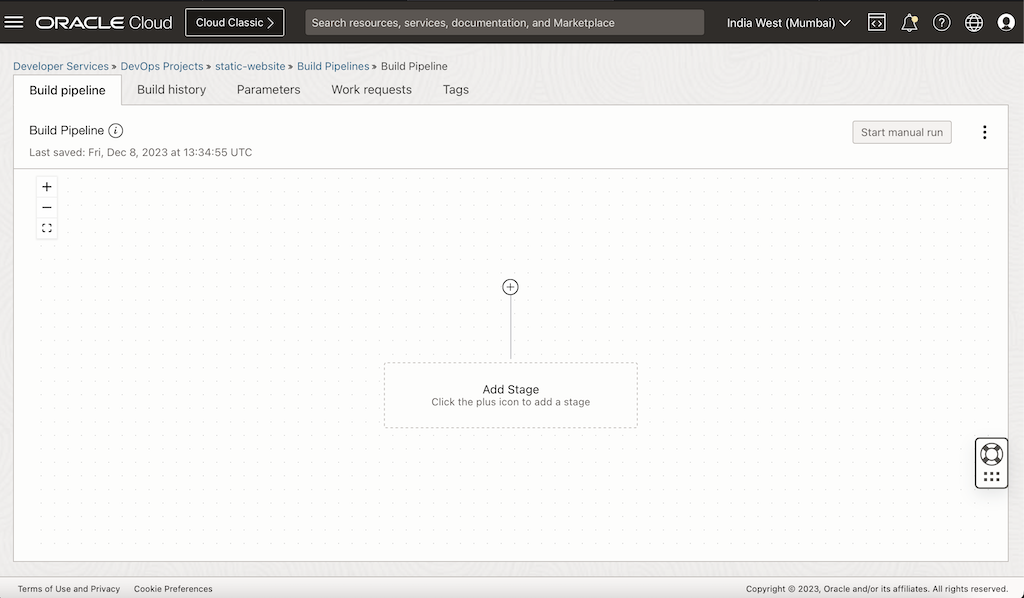
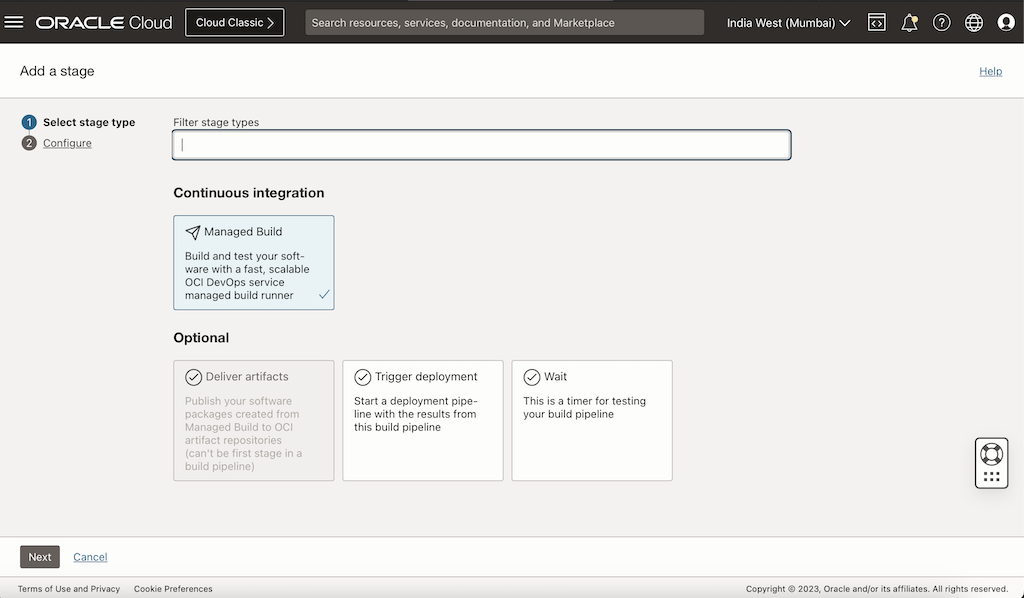
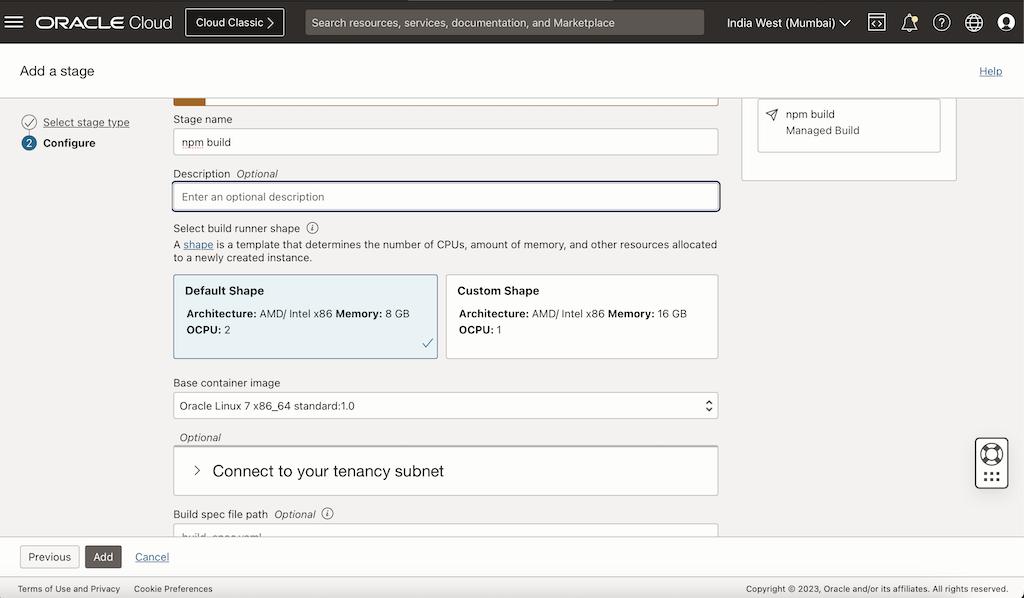
To manage build, click Add Stage, Managed Build, Next, enter the following details, and then click Add.
-
Stage Name:
npm build -
Build Runner Shape:
Default Shape -
Base Container Image:
Oracle Linux 7 x86_64 standard:1.0(You change it according to your need) -
Build Spec File Path:
build_spec.yamlPrimary Code Repository - Click on Select Source Connection type - OSI Code Repository, Select Your Repo in table, -
Branch:
main.Note: You change the build machine according to your need.
-
-
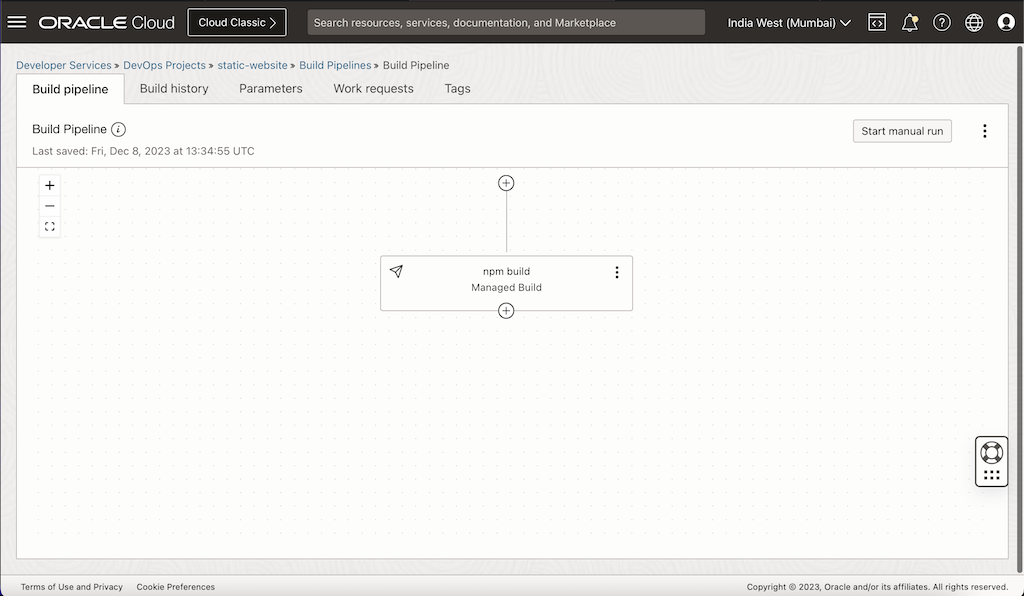
Add another stage Deliver Artifact. Click Plus sign below the “Managed Build” stage, select Deliver artifacts and click Next.
Enter Stage Name as save-artifact, click Create Artifact and enter the following details.
-
Name:
save-artifacts -
Type:
General Artifact -
Artifact Location:
Set a custom artifact location and Version -
Artifact Path:
build/static-website.zip -
version:
${version} -
Under Associate build artifacts with build result, enter Build config/result artifact name as
static-website-buildand click Add.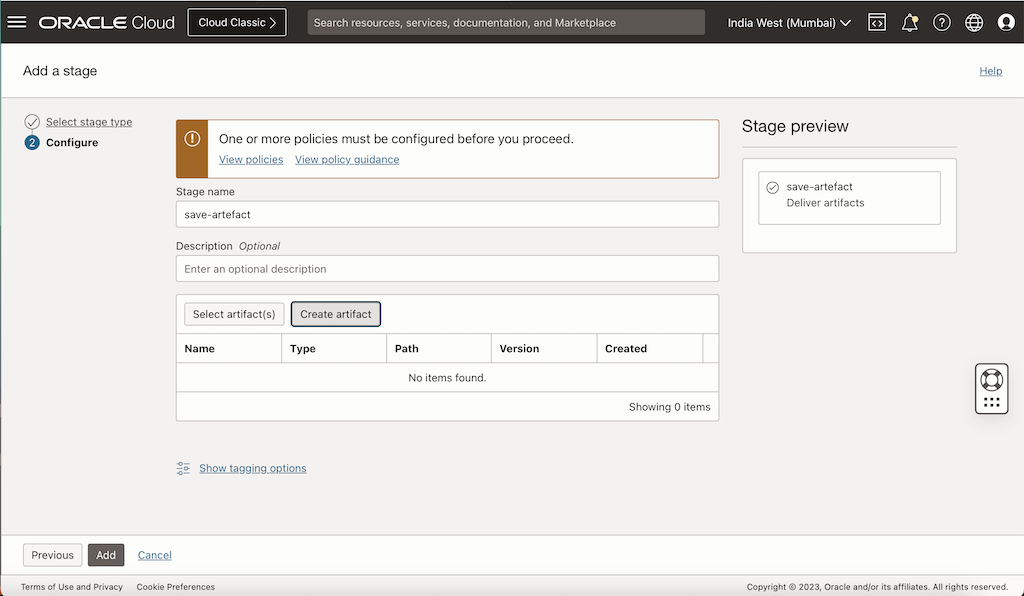
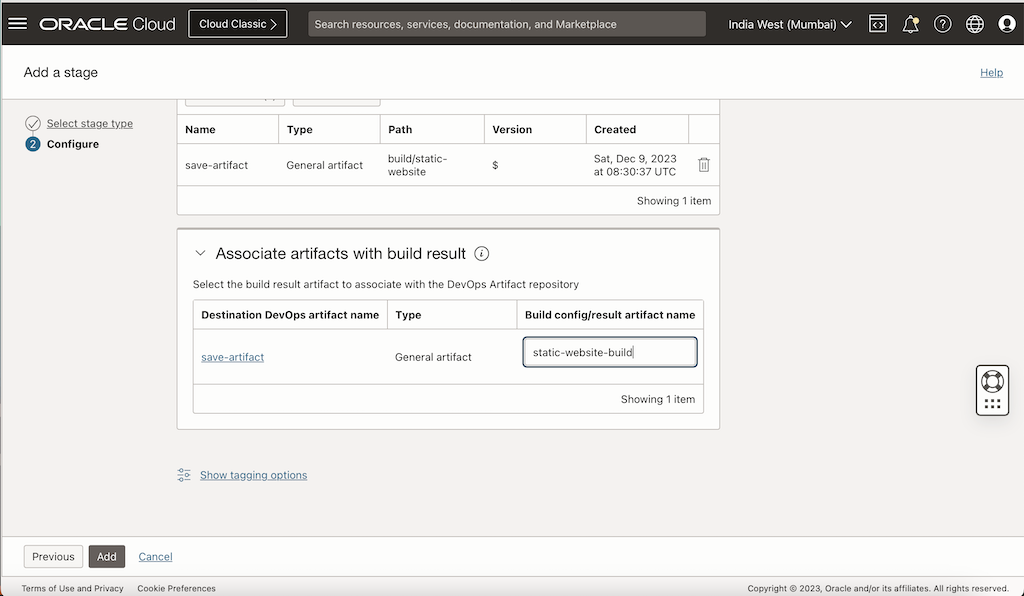
Note: : Make sure the build artifact name is the same as in the Build Specification output Artifacts stage.
-
-
-
Create Deployment Pipeline, For more information about deployment pipeline, see Managing Deployment Pipelines.
-
Navigate to DevOps, select your project, select Deployment Pipeline, click Create Deployment Pipeline, enter the required information and then click Create.
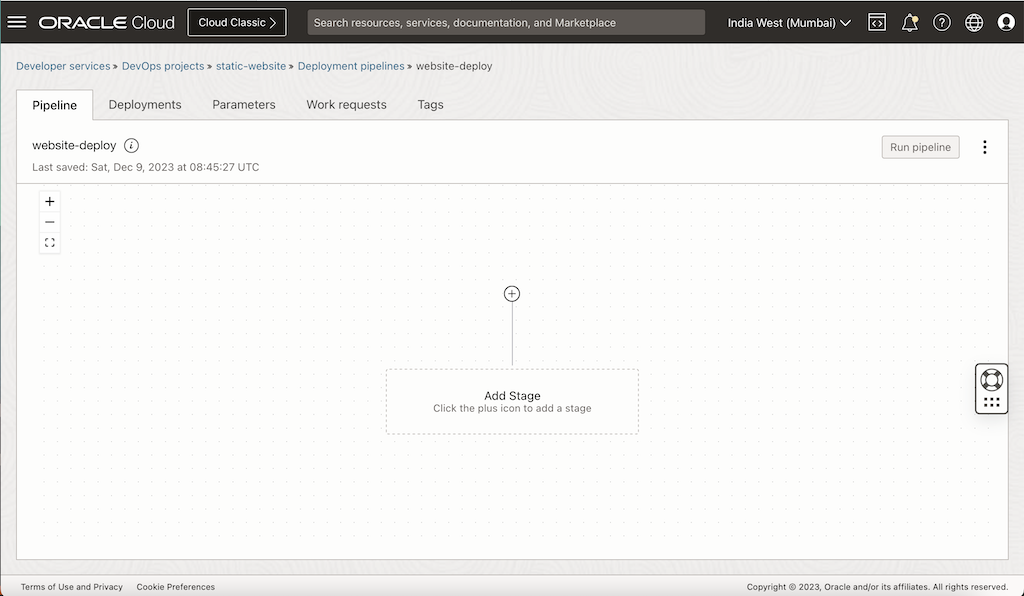
-
Click Add Stage and select Integrations as “Execute Shell Command” and click Next, enter the Stage Name and set the artifact we created in Task 4.2 as the command specification.
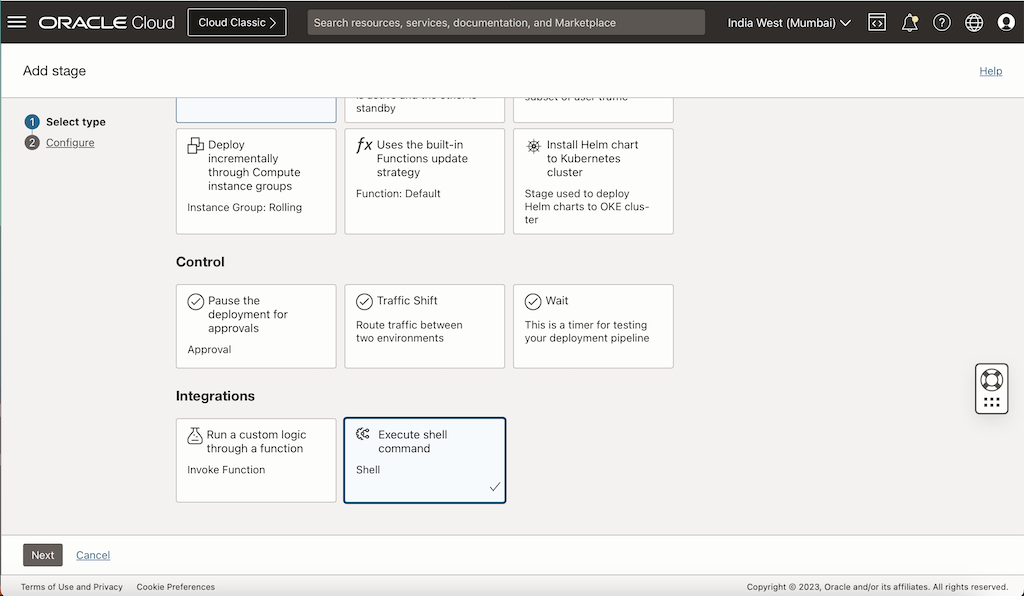
-
Select the deployment specification, we uploaded to Artifact Registry in Task 4.2.
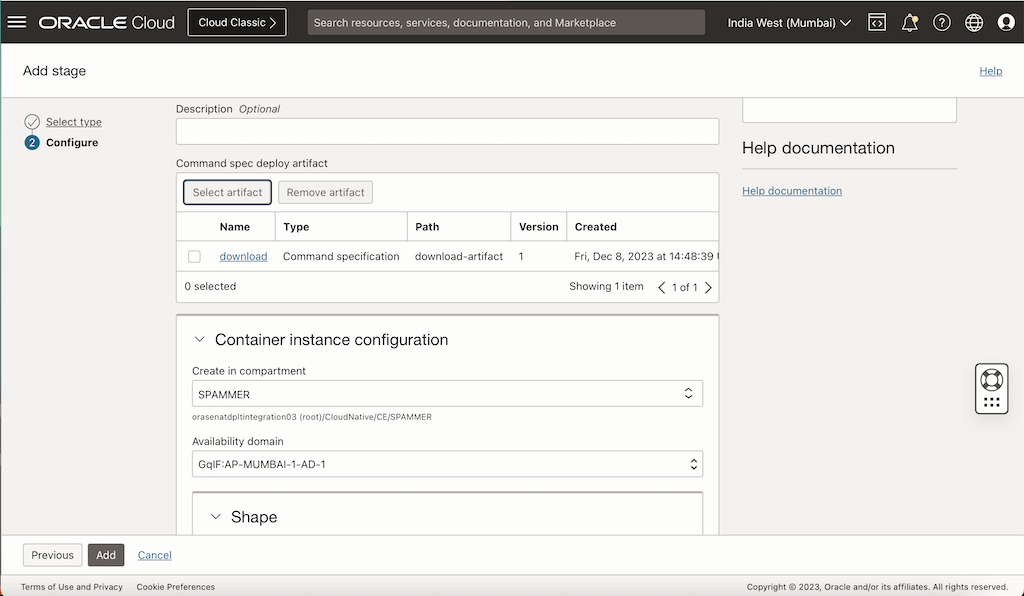
-
Select the container instance shape and size for the shell stage and click Add.
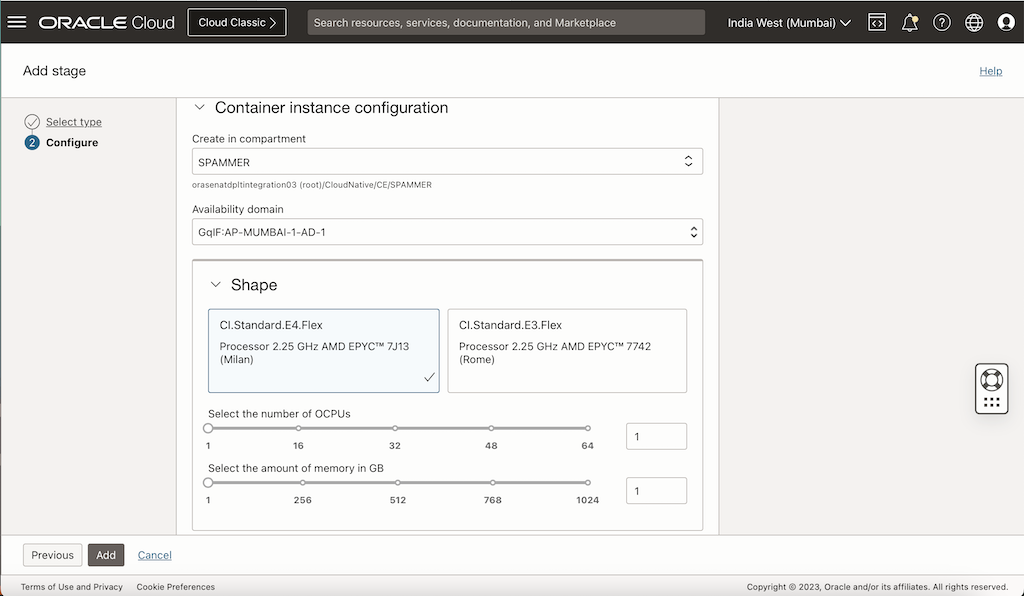
-
-
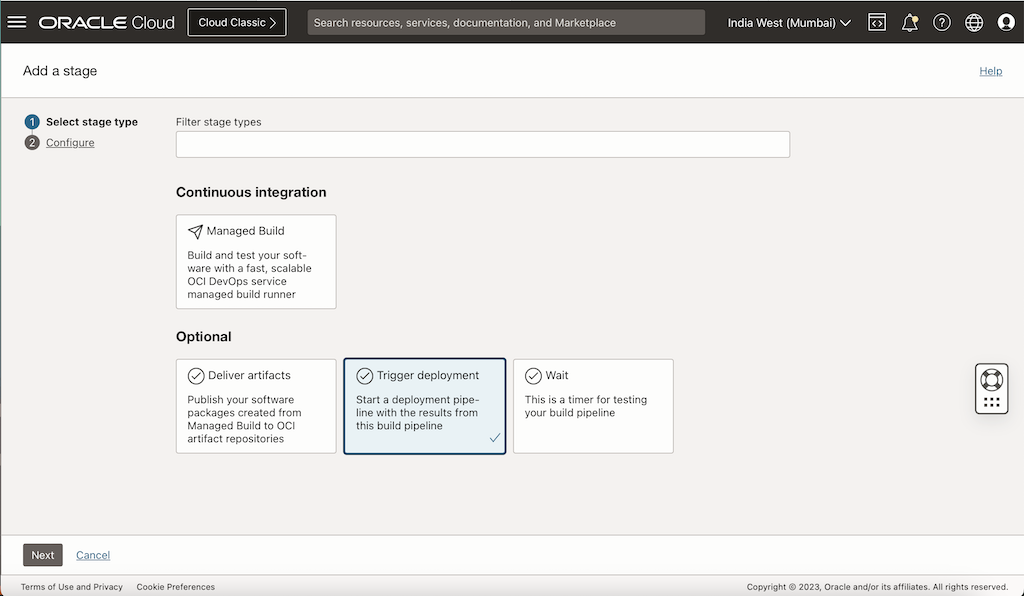
Trigger deployment pipeline stage. We have our build and deployment pipeline created, we need to trigger the deployment pipeline from our build pipeline. To do this, we will go back to our build stages and add additional stage of type Trigger deployment.
-
To add stage, click the Plus sign below Deliver Artifacts and select Trigger deployment.
-
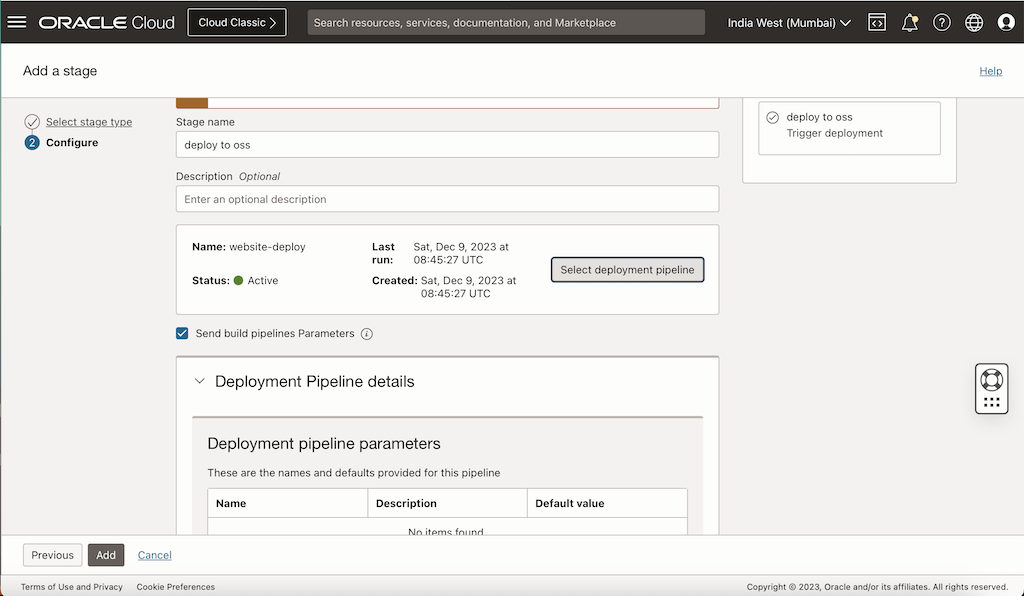
Enter Stage Name as deploy to oss, select Select deployment pipeline, and then click Add.
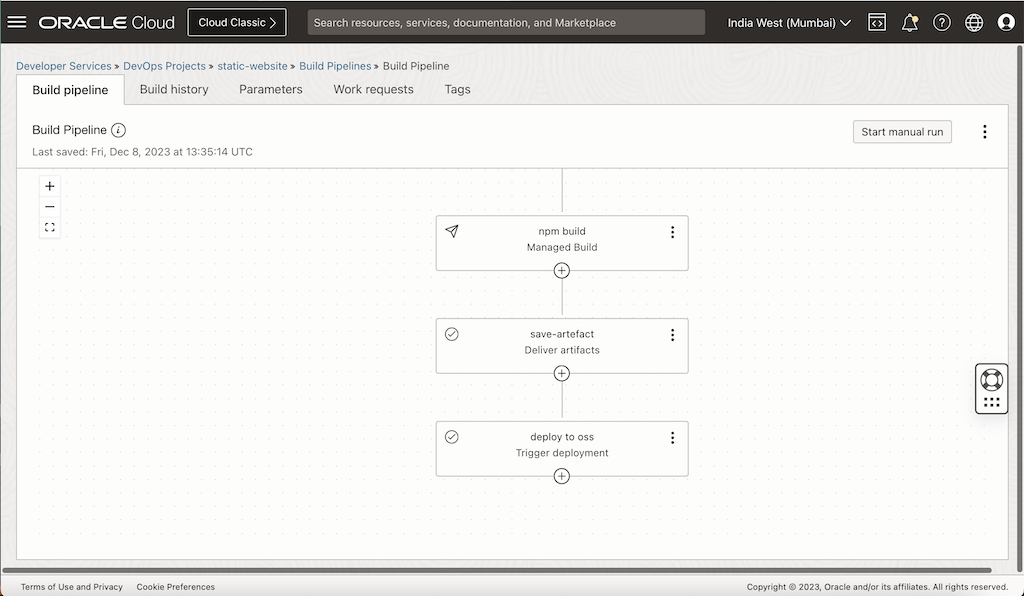
We have added a trigger for the deployment pipeline. Now our build and deploy pipeline are complete.
-
Task 6: Add Parameters
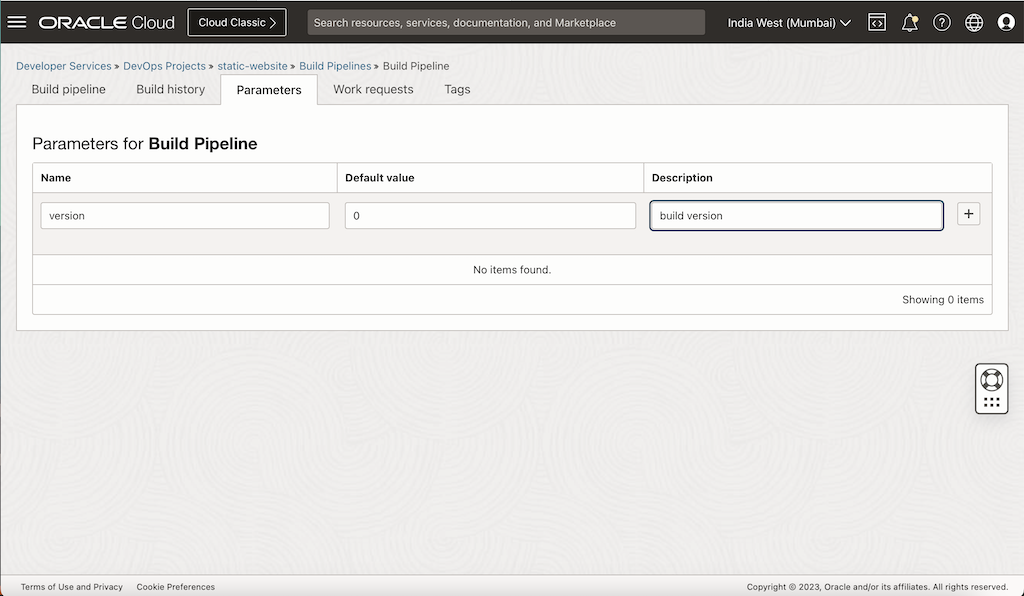
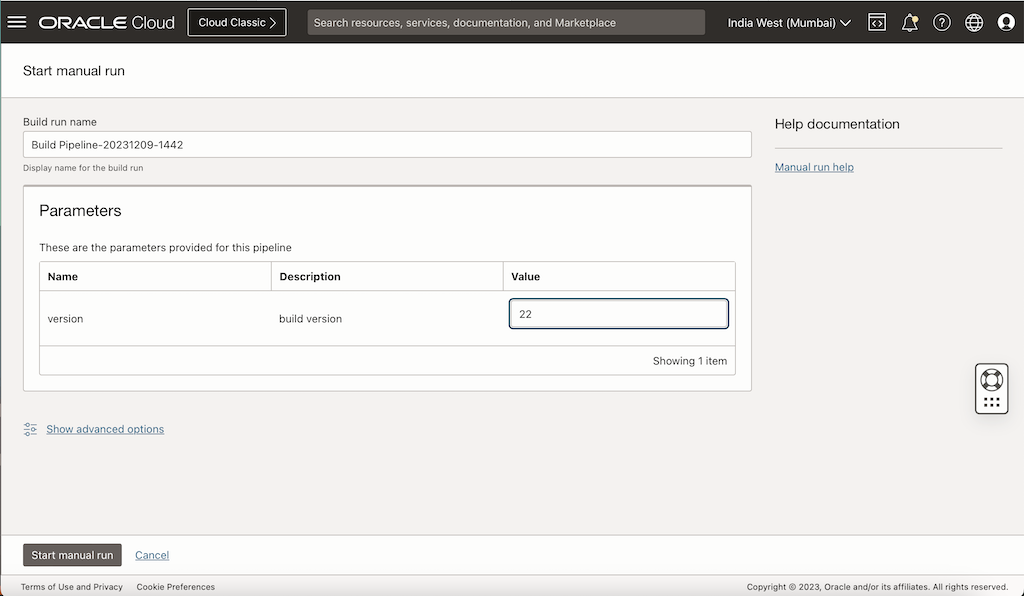
We will add build version to the parameters, so we can track each individual build using its build number. Navigate to the build pipeline we created in Task 5.1, go to the Parameters, add Name as “version”, Default value as “0”, Description as “version for artifact” and click the Plus sign to add the parameter to the build.
Task 7: Test
Go to the build pipeline we have created and click Start manual run.
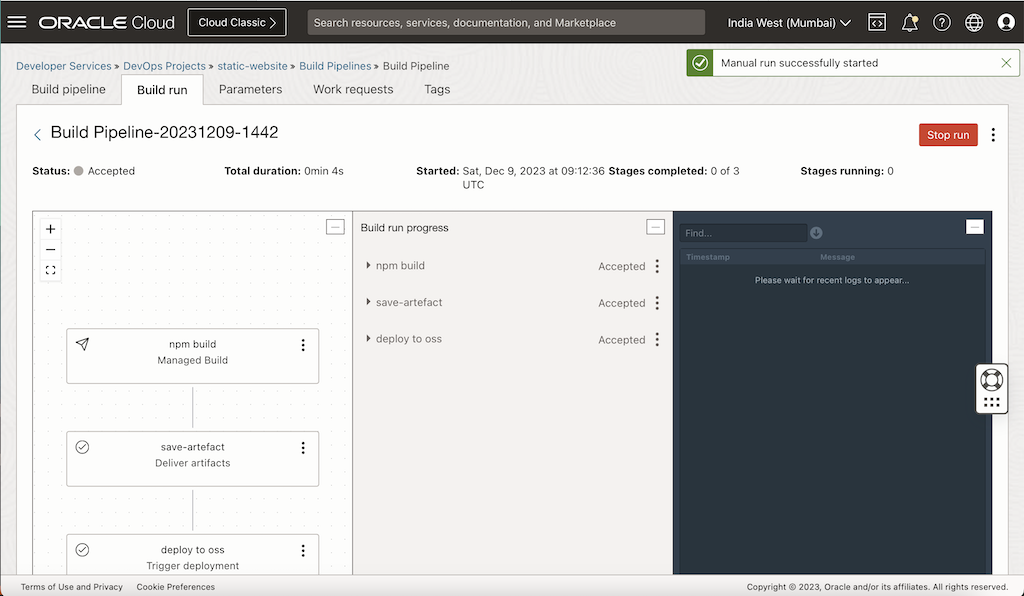
You can see run logs as below.
Note:
If you get an artifact not found error, make sure you have all the required IAM policies and the artifact path and versions are correct.
Make sure the artifact name in the build and download specifications are same as in the Artifact Registry.
Related Links
Acknowledgments
- Author - Mayank Kakani (OCI Cloud Architect)
More Learning Resources
Explore other labs on docs.oracle.com/learn or access more free learning content on the Oracle Learning YouTube channel. Additionally, visit education.oracle.com/learning-explorer to become an Oracle Learning Explorer.
For product documentation, visit Oracle Help Center.
Streamline Frontend CI/CD with OCI DevOps Service and OCI Object Storage
F90963-01
December 2023
Copyright © 2023, Oracle and/or its affiliates.