Note:
- This tutorial requires access to Oracle Cloud. To sign up for a free account, see Get started with Oracle Cloud Infrastructure Free Tier.
- It uses example values for Oracle Cloud Infrastructure credentials, tenancy, and compartments. When completing your lab, substitute these values with ones specific to your cloud environment.
Migrate Data from Amazon DynamoDB to Oracle NoSQL Database Table
Introduction
Amazon DynamoDB is a fully managed NoSQL database service offered by Amazon Web Services that provides fast and scalable key-value and document data storage.
Oracle NoSQL Database Cloud Service is a fully managed NoSQL database service offered by Oracle Corporation on Oracle Cloud Infrastructure. It provides scalable key-value and JSON document storage with low-latency performance and automatic scaling for cloud-native applications.
This tutorial describes how to migrate data from Amazon DynamoDB to Oracle NoSQL Database Cloud Service using tool Oracle NoSQL Database Migrator.
The migration workflow uses DynamoDB’s native export-to-S3 capability to extract table data in DynamoDB JSON format. The exported data is then imported into Oracle NoSQL Database Cloud Service running in Oracle Cloud Infrastructure (OCI).
Architecture
The migration workflow consists of the following components:
- Amazon DynamoDB (source database)
- Amazon S3 (export storage)
- OCI Compute instance (runs Oracle NoSQL Database Migrator)
- Oracle NoSQL Database Cloud Service (target database)

High-level Migration Process
- Provision DynamoDB tables & Amazon S3 Bucket.
- Enable PITR in Table and export DynamoDB tables to Amazon S3 Bucket.
- Provision OCI compute instance
- Install and configure Oracle NoSQL Database Migrator tool on Compute.
- Configure AWS and OCI authentication on OCI compute.
- Execute migration from Amazon S3 bucket to OCI NoSQL
- Validate migrated data in Oracle NoSQL Database.
Prerequisites
Before you begin, ensure that:
- You have an active AWS account with permissions to manage DynamoDB and S3.
- You have an OCI tenancy with permissions to,
- Create compartments
- Create compute instances
- Create Oracle NoSQL tables
- You have SSH access to an OCI compute instance.
Task 1: Provision Amazon DynamoDB Resources
Under this tutorial, we will provision only the basic required resources in AWS, that are mandatory for this exercise.
1. Create IAM User in AWS
Create a dedicated IAM user to manage DynamoDB operations.
a. Login to AWS Console
b. Navigate to IAM, Users
c. Click Create User
d. Assign programmatic access
- Attach
AdministratorAccesspolicy (for demo purposes)

e. Review and Click Create user.
⚠️ In production environments, use least-privilege IAM policies.
2. Create a DynamoDB Table in AWS
a. Sign in to the AWS Console.
b. Navigate to DynamoDB.
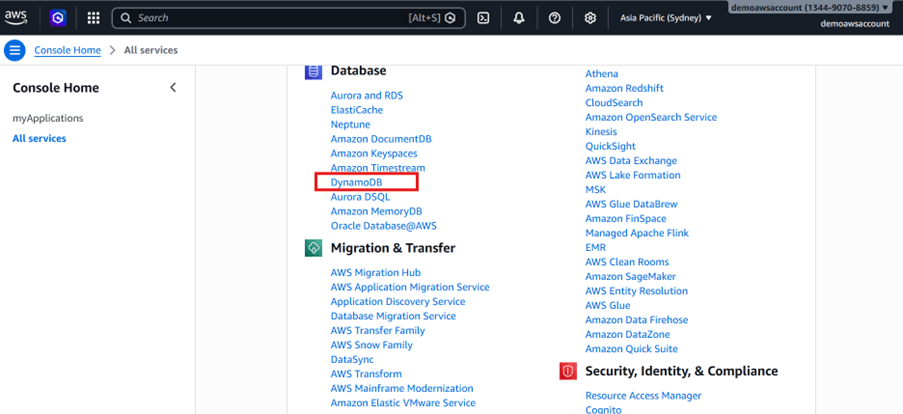
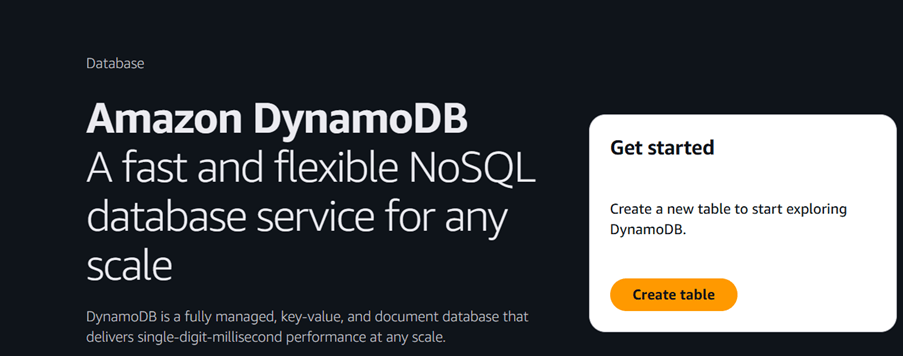
c. Click Create table.
d. Specify:
- Table name
- Partition key
- Optional sort key
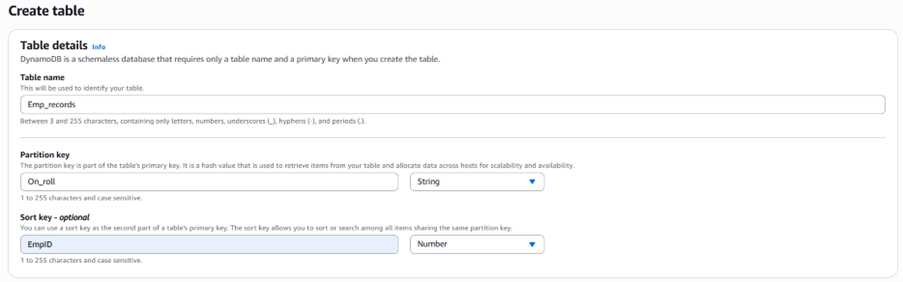
e. Accept default settings and create the table.
f. Review created tables.

3. Add new column or Insert Sample Records in the DynamoDB table.
a. Sign in to the AWS Console.
b. Select the table
c. Click Actions, Create Item

d. Insert sample records

e. Validate Records

Task 2: Export DynamoDB Table to Amazon S3 Bucket
Use DynamoDB’s native export-to-S3 capability to extract table data in DynamoDB JSON format to S3 bucket.
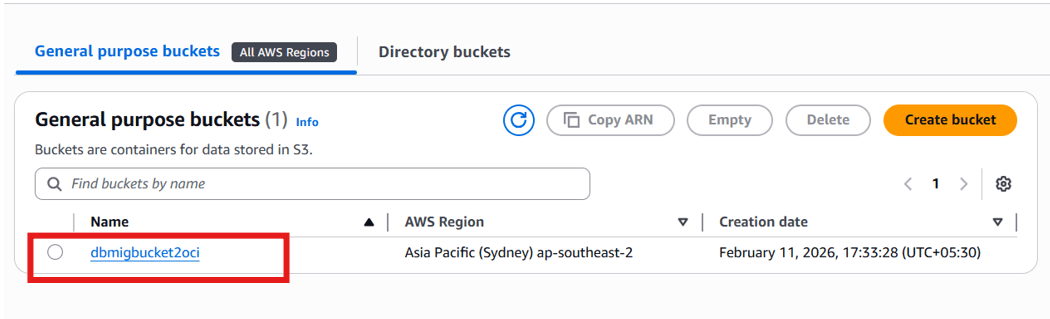
1. Create Amazon S3 Bucket
a. Sign in to the AWS Console
b. Navigate to S3
c. Create a new bucket
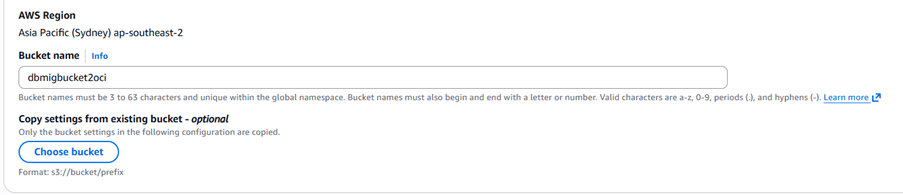
d. Keep default settings
e. Validate Bucket
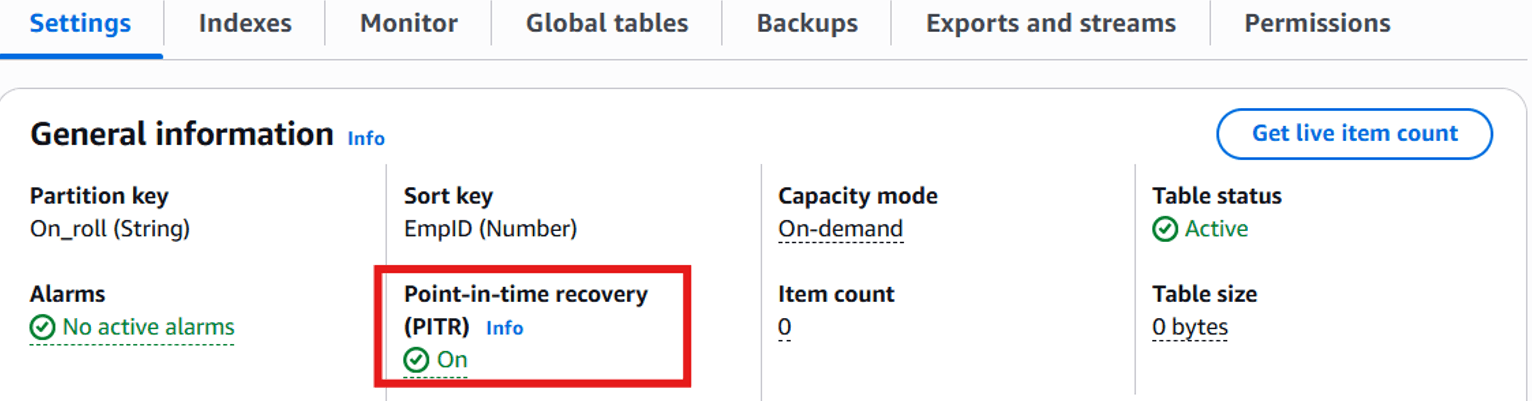
2. Enable Point-In-Time Recovery (PITR)
DynamoDB export requires Point-in-Time Recovery. PITR must be enabled at table level, before exporting it.
a. Select table
b. Enable Point-in-time recovery

c. After enabling PITR.
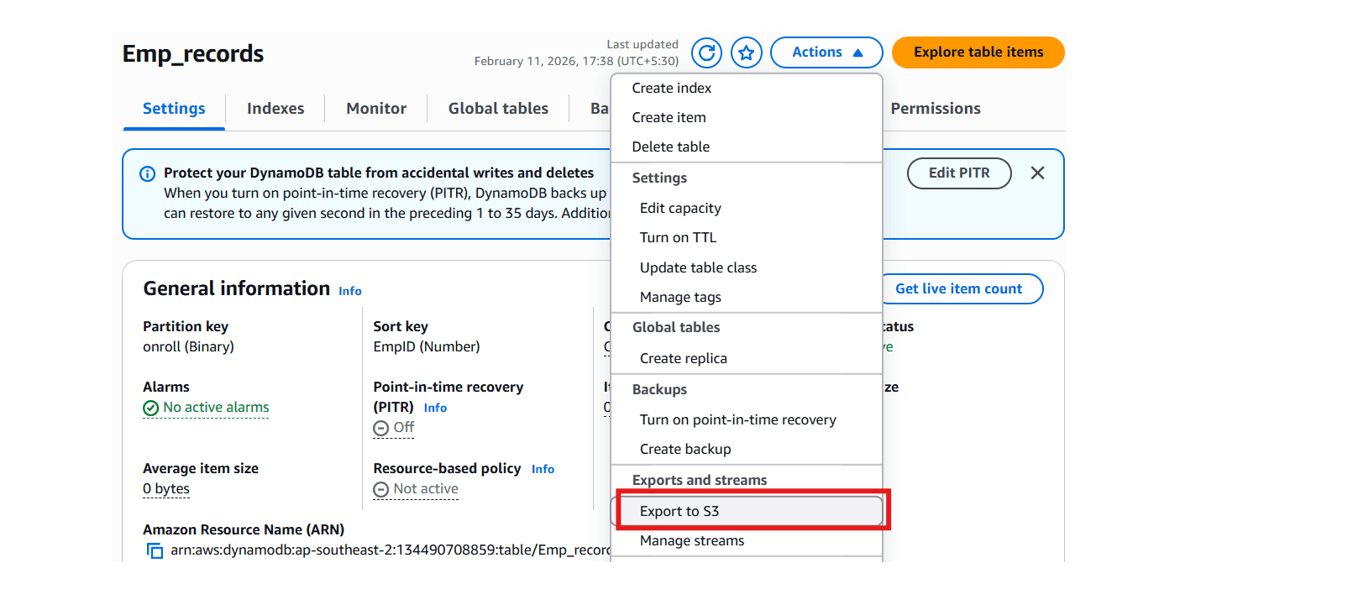
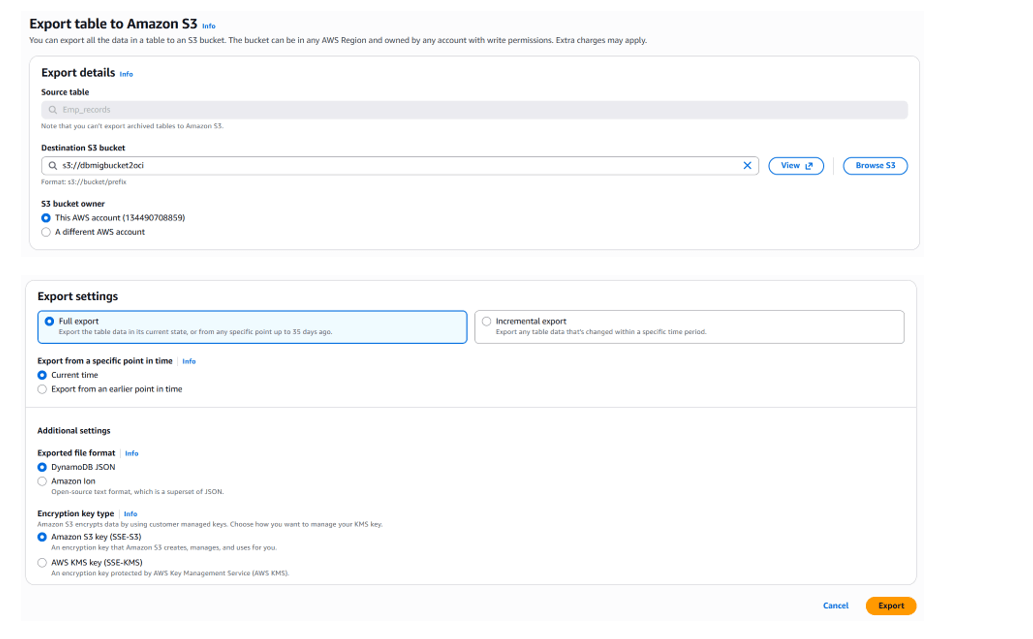
3. Export Table Data to S3 Bucket.
a. Sign in to the AWS Console.
b. Select table
c. Click Export to S3
d. Choose:
- Full export
- DynamoDB JSON format
- Encryption (default)
e. Click Export
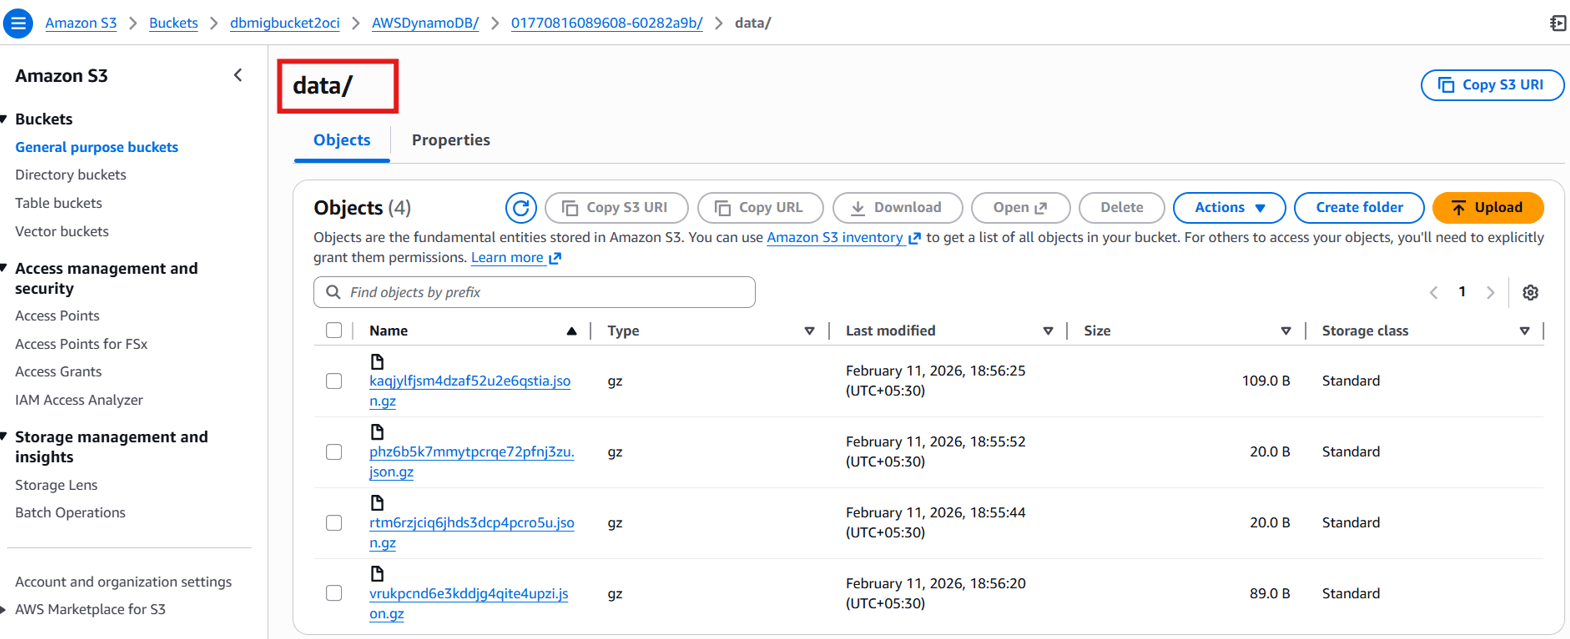
4. Verify Exported Data
After completion:

S3://bucket-name/AWSDynamoDB/ExportID/data/Contains:
- GZIP-compressed JSON files
- DynamoDB JSON format
Task 3: Prepare Oracle Cloud Infrastructure Environment
1. Create a Compartment
a. Sign in to the OCI Console.
b. Navigate to Identity & Security, Compartments.
c. Create a new compartment for the Oracle NoSQL table.
2. Create a Compute Instance
a. Navigate to Compute , Instances.
b. Click Create instance.
c. Select:
- Shape:
VM.Standard.E4.Flex(or equivalent) - Operating System: Oracle Linux 9 d. Create the instance.
This compute instance runs the Oracle NoSQL Database Migrator.
3. Install Oracle NoSQL Database Migrator
Oracle NoSQL Migrator reads DynamoDB export files from Amazon S3 and import data to OCI Oracle NoSQL database. We will install Oracle NoSQL Migrator tool on one of the OCI compute created above.
a. Install Java 11
Oracle NoSQL Database Migrator require Java to be running on the compute.
- Log in as the opc user to the newly created compute instance and install Java 11 as follows:
sudo yum install java-11b. Extract Migrator Package
- Download the Oracle NoSQL Database Migrator 1.8.0. Use SCP to upload the Oracle NoSQL Database Migrator ZIP file to the opc user’s home directory on the new compute instance.
- Unzip the Oracle NoSQL Database Migrator software downloaded. Migrator doesn’t require any installation, just untar it.
tar -zxvf V1053574-01.tar.gz
cd nosql-migrator-1.8.0/
Verify installation:
[opc@nosql-migrator-1.8.0]\$ ls -ltr
total 332
-rw-r--r--. 1 opc opc    822 Nov 13 07:26 sdk_logging.properties
-rw-r--r--. 1 opc opc   1720 Nov 13 07:26 README.md
-rw-r--r--. 1 opc opc    897 Nov 13 07:26 log4j2.xml
-rw-r--r--. 1 opc opc   1870 Nov 13 07:26 LICENSE.txt
-rw-r--r--. 1 opc opc    488 Dec  2 07:11 Dockerfile
-rw-r--r--. 1 opc opc 234275 Dec 23 08:38 THIRD_PARTY_LICENSES.txt
-rwxr-xr-x. 1 opc opc  73063 Dec 23 08:38 runMigrator
-rw-r--r--. 1 opc opc   4640 Dec 23 08:38 CHANGELOG.md
drwxr-xr-x. 2 opc opc    124 Feb  6 02:50 lib
Task 4: Configure Secure Access (OCI & AWS)
To use Oracle NoSQL Migrator, secure cross-cloud authentication must be configured to enable the Compute instance to access both Amazon S3 and Oracle Cloud Infrastructure (OCI) resources.
1. Create OCI API Key
In the OCI console, create an API key for the OCI user who will own the target Oracle NoSQL Database Cloud Service table. This user must have permissions to create and manage the Oracle NoSQL Database Cloud Service table.
a. In the OCI Console, open Profile, API Keys.
b. Add a new API key.
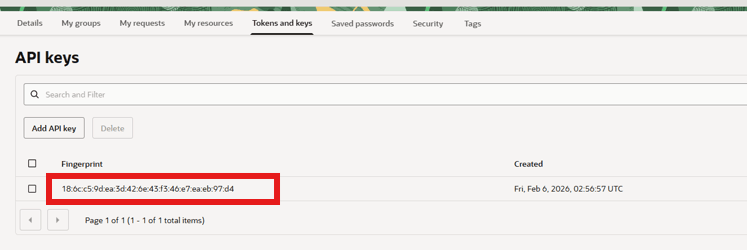
c. Download the private key.
d. Record:
- User OCID
- Tenancy OCID
- Fingerprint
- Region identifier
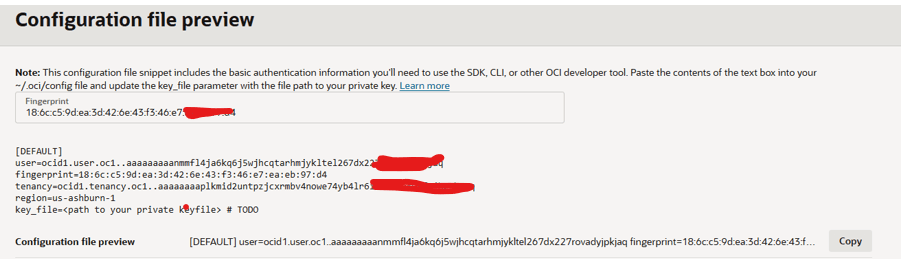
2. Create OCI configuration File
a. Use SSH to log in as the opc user to the compute instance created earlier.
b. Create all the OCI identity file under /home/opc/.oci directory.
Private Key:
c. Copy the private key on compute as /home/opc/.oci/ociuser.pem.
/home/opc/.oci/ociuser.pemConfig file:
\$vi /home/opc/.oci/configExample:
[DEFAULT]
user=ocid1.user.oc1...
fingerprint=xx:xx:xx
tenancy=ocid1.tenancy.oc1...
region=ap-hyderabad-1
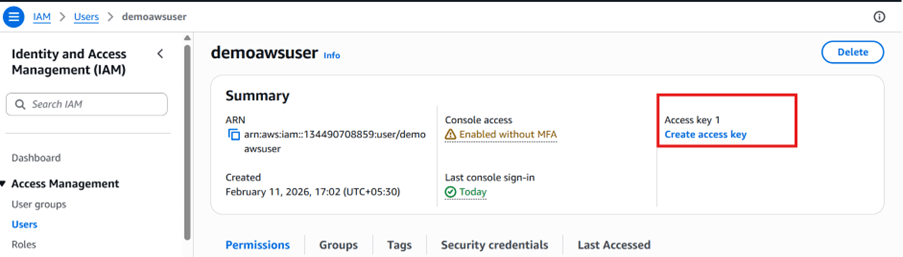
key_file=/home/opc/.oci/ociuser.pem3. Create AWS Access Keys
In the AWS console, create an access key (if one does not already exist) for the user who will access the Amazon S3 Object Storage where the Amazon DynamoDB data is being exported.
a. Sign in to the AWS Console.
b. Go to IAM, User, Security Credentials
c. Create Access Key
Use case: Application running outside AWS.
4. Configure AWS Credentials
Create the following files on the compute instance:
/home/opc/.aws/config
/home/opc/.aws/credentials
Example config:
[default]
region=<aws_region>
Example credentials:
[default]
aws_access_key_id=<access_key>
aws_secret_access_key=<secret_key>
Task 5: Configure & Execute Oracle NoSQL Migrator
Migrator requires a JSON configuration file describing:
- Source (S3)
- Sink (OCI NoSQL)
- Table schema
- Credentials
1. Create Migration Config File
Create a migration configuration JSON file that includes information about the source and target (sink). Under sink note DDBPartitionKey & DDBSortKey from DynamoDB Table.
Create:
/home/opc/.oci/migrator-config-dynamodb-bucket_to_OCI.jsonExample configuration:
{
  "source": {
    "type": "aws_s3",
    "format": "dynamodb_json",
    "s3URL": "https://bucket-name.s3.region.amazonaws.com/AWSDynamoDB/ExportID/data",
    "credentials": "/home/opc/.aws/credentials",
    "credentialsProfile": "default"
  },
  "sink": {
    "type": "nosqldb_cloud",
    "endpoint": "<oci_region>",
    "table": "Emp_records",
    "schemaInfo": {
      "defaultSchema": true,
      "DDBPartitionKey": "PartitionKey:string",
      "DDBSortKey": "SortKey:Number",
      "readUnits": 10,
      "writeUnits": 10,
      "storageSize": 1
    },
    "compartment": "<compartment_ocid>",
    "credentials": "/home/opc/.oci/config",
    "credentialsProfile": "DEFAULT",
    "overwrite": true
  },
  "abortOnError": false,
  "migratorVersion": "1.8.0"
}
Understanding Default Schema Mode
When defaultSchema: true:
Oracle NoSQL creates table with:
- Partition Key
- Optional Sort Key
documentJSON column
All non-key DynamoDB attributes are stored inside document.
2. Run Migration
In the compute instance, change the directory to the nosql-migrator-1.8.0 subdirectory
\$cd /home/opc/nosql-migrator-1.8.0
\$./runMigrator --config /home/opc/.oci/migrator-config-dynamodb-bucket_to_OCI.json
After successful execution, the output displays the number of records processed.
Successful migration log:
[opc@.nosql-migrator-1.8.0]\$ ./runMigrator --config /home/opc/.oci/migrator-config-dynamodb-bucket_custom-schema.json

2026-02-11 13:32:35.279 [INFO] Configuration for migration:
{
  "source" : {
    "type" : "aws_s3",
    "format" : "dynamodb_json",
    "s3URL" : "https://dbmigbucket2oci.s3.ap-southeast-2.amazonaws.com/AWSDynamoDB/01770816089608-60282a9b/data",
    "credentials" : "/home/opc/.aws/credentials",
    "credentialsProfile" : "default"
  },
  "sink" : {
    "type" : "nosqldb_cloud",
    "endpoint" : "ap-hyderabad-1",
    "table" : "Emp_records",
    "schemaInfo" : {
      "defaultSchema" : true,
      "DDBPartitionKey" : "On_roll:string",
      "DDBSortKey" : "EmpID:Number",
      "readUnits" : 5,
      "writeUnits" : 50,
      "storageSize" : 5
    },
    "compartment" : "ocid1.compartment.oc1..aaaaaaaazliaxu2oqqcp3x6574nxkegv6lxbvh5lildyztb4fizbk2tqv2ia",
    "includeTTL" : false,
    "credentials" : "/home/opc/.oci/hyd_config",
    "credentialsProfile" : "DEFAULT",
    "writeUnitsPercent" : 90,
    "overwrite" : true,
    "requestTimeoutMs" : 5000
  },
  "abortOnError" : false,
  "migratorVersion" : "1.8.0"
}
2026-02-11 13:32:35.283 [INFO] creating source from given configuration:
2026-02-11 13:32:37.061 [INFO] source creation completed
2026-02-11 13:32:37.061 [INFO] creating sink from given configuration:
2026-02-11 13:32:38.253 [INFO] sink creation completed
2026-02-11 13:32:38.255 [INFO] creating migrator pipeline
2026-02-11 13:32:38.255 [INFO] [cloud sink] : start loading DDLs
2026-02-11 13:32:38.256 [INFO] [cloud sink] : executing DDL: CREATE TABLE IF NOT EXISTS Emp_records (On_roll string,EmpID Number,document JSON, PRIMARY KEY(SHARD(On_roll),EmpID)),limits: [5, 50, 5]
2026-02-11 13:32:38.763 [INFO] [cloud sink] : completed loading DDLs
2026-02-11 13:32:39.426 [INFO] migration started
2026-02-11 13:32:39.635 [INFO] [DDB S3 source] : start parsing JSON records from object: AWSDynamoDB/01770816089608-60282a9b/data/kaqjylfjsm4dzaf52u2e6qstia.json.gz
2026-02-11 13:32:40.373 [INFO] Migration success for source kaqjylfjsm4dzaf52u2e6qstia. read=2,written=2,failed=0
2026-02-11 13:32:40.373 [INFO] [DDB S3 source] : start parsing JSON records from object: AWSDynamoDB/01770816089608-60282a9b/data/phz6b5k7mmytpcrqe72pfnj3zu.json.gz
2026-02-11 13:32:40.606 [INFO] Migration success for source phz6b5k7mmytpcrqe72pfnj3zu. read=0,written=0,failed=0
2026-02-11 13:32:40.606 [INFO] [DDB S3 source] : start parsing JSON records from object: AWSDynamoDB/01770816089608-60282a9b/data/rtm6rzjciq6jhds3dcp4pcro5u.json.gz
2026-02-11 13:32:40.839 [INFO] Migration success for source rtm6rzjciq6jhds3dcp4pcro5u. read=0,written=0,failed=0
2026-02-11 13:32:40.839 [INFO] [DDB S3 source] : start parsing JSON records from object: AWSDynamoDB/01770816089608-60282a9b/data/vrukpcnd6e3kddjg4qite4upzi.json.gz
2026-02-11 13:32:41.304 [INFO] Migration success for source vrukpcnd6e3kddjg4qite4upzi. read=1,written=1,failed=0
2026-02-11 13:32:41.304 [INFO] Migration is successful for all the sources.
2026-02-11 13:32:41.306 [INFO] migration completed.
Records provided by source=3, Records written to sink=3, Records failed=0,Records skipped=0.
Elapsed time: 0min 1sec 878ms
Migration completed.
Task 6: Validate Migration
After a successful execution of Data Migrator,all Table records which were inserted in DynamoDB, should be visible in Oracle NoSQL.
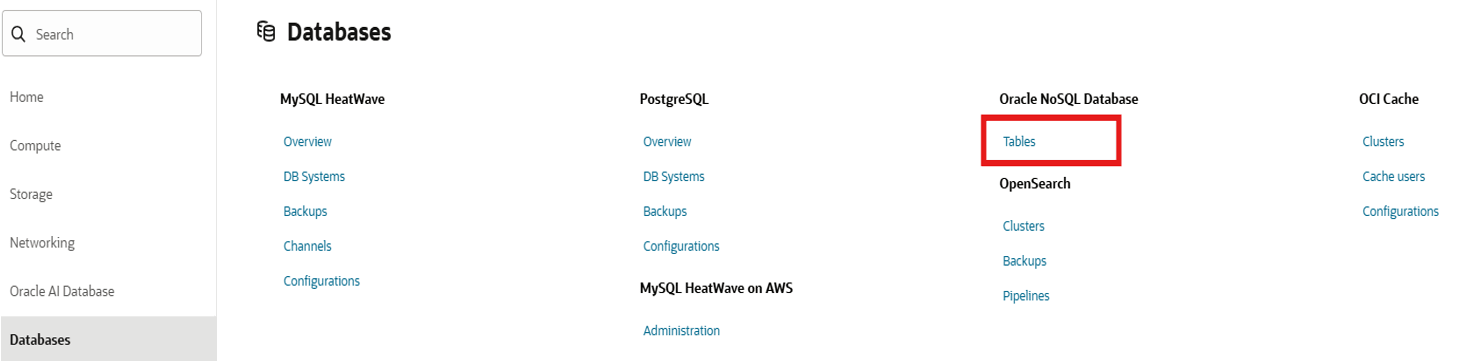
a. Open the OCI Console.
b. Navigate to Database,Oracle NoSQL Database, Tables.
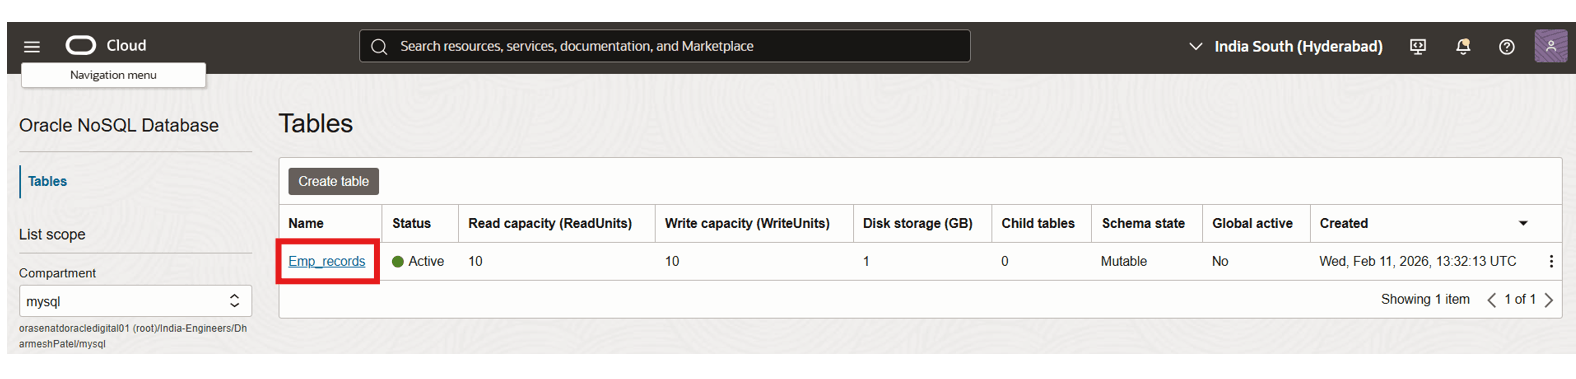
c. Select the appropriate compartment.
d. Open the migrated table.
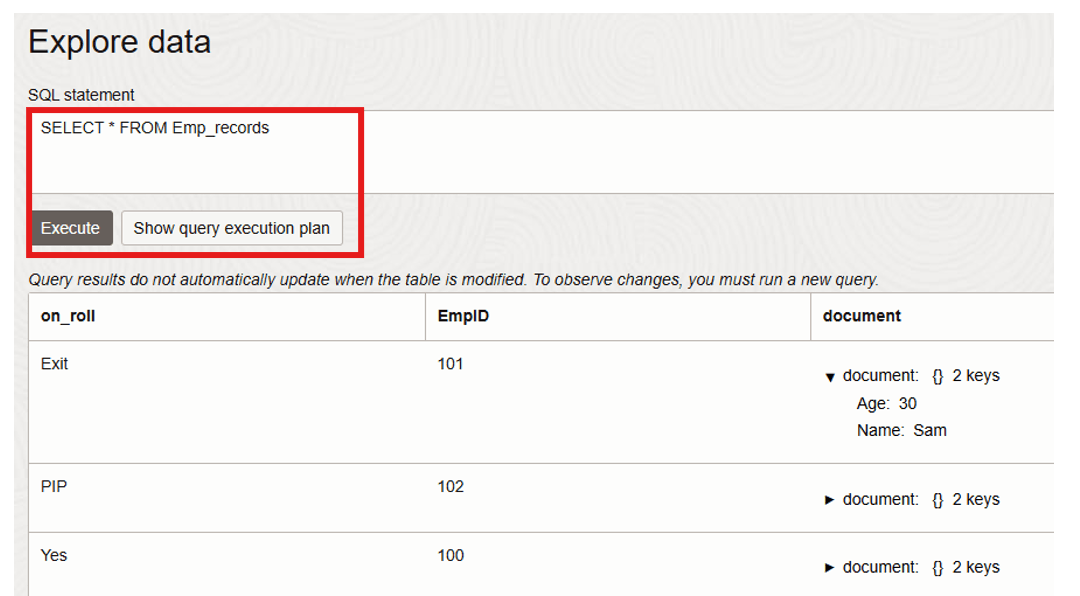
e. Verify the records.
- Select Table and click on Explore data.
- Click on Execute.
Migration Considerations & Best Practices
Capacity Planning
- Configure appropriate Read/Write Units
- Adjust
writeUnitsPercentcarefully
Security
- Use least privilege IAM
- Rotate API keys
- Avoid storing credentials in plain text
Large Tables
For multi-terabyte exports:
- Monitor S3 export size
- Increase write units in OCI
- Consider batching exports
TTL Handling
If DynamoDB TTL is required, enable:
"includeTTL": trueMulti-Table Migration
Automate exports using AWS CLI scripting if migrating multiple tables.
Conclusion
This tutorial demonstrated an end-to-end migration workflow from Amazon DynamoDB to Oracle NoSQL Database Cloud Service using native export capabilities and Oracle NoSQL Database Migrator.
This approach enables:
- Cloud portability
- Modernization initiatives
- Multi-cloud architecture
- Cost optimization
- Integration with OCI ecosystem
With proper planning, secure configuration, and capacity tuning, organizations can achieve seamless NoSQL data migration across cloud platforms.
Troubleshooting
- Ensure PITR is enabled before export.
- Verify AWS credentials if S3 access fails.
- Confirm correct OCI region and compartment OCID.
- Increase write units if migration throughput is slow.
- Review migrator logs for detailed error messages.
Clean Up Resources
After completing this tutorial, consider removing the following resources to avoid unnecessary charges:
- Delete the DynamoDB table.
- Delete the Amazon S3 bucket and exported files.
- Terminate the OCI compute instance.
- Delete the Oracle NoSQL table (if no longer required).
- Remove unused IAM users and API keys.
Related Links
Acknowledgments
Author - Dharmesh Patel (Principal Cloud Architect, Customer Success Services)
More Learning Resources
Explore other labs on docs.oracle.com/learn or access more free learning content on the Oracle Learning YouTube channel. Additionally, visit education.oracle.com/learning-explorer to become an Oracle Learning Explorer.
For product documentation, visit Oracle Help Center.
Migrate Data from Amazon DynamoDB to Oracle NoSQL Database Cloud Service
G52985-01