Configure OCI Announcement Subscriptions for Exadata Database Service
Introduction
OCI Announcements provides Oracle-published information about maintenance and service updates that may affect your Oracle Cloud Infrastructure (OCI) resources. For Exadata Database Service, announcement subscriptions allow you to define which announcements are relevant to your environment and route matching announcements to the appropriate teams or tools.
You can configure announcement subscriptions with filters that define which announcements are published to a configured OCI Notifications topic. For example, you can create a subscription for Oracle Exadata Database Service on Dedicated Infrastructure and select the announcement types your teams need to receive.
OCI Announcement Subscriptions integrate with OCI Notifications to deliver matching announcements. The announcement subscription publishes matching announcements to a Notifications topic, and OCI Notifications delivers the messages to active subscriptions configured for that topic.
Key Benefits
-
Target Relevant Announcements
Use announcement subscription filters to select maintenance and service updates relevant to Oracle Exadata Database Service on Dedicated Infrastructure. -
Reduce Unnecessary Communications
Select specific announcement types so teams receive information that is relevant to their operational responsibilities. -
Route Announcements to the Appropriate Teams
Use OCI Notifications topics and subscriptions to deliver matching announcements through supported delivery methods such as email, Slack, PagerDuty, HTTPS endpoints, or OCI Functions. -
Support Different Operational Needs
Configure announcement subscriptions based on the types of maintenance and service information needed by database, infrastructure, and operations teams.
Objectives
The following sections describe the user journey for configuring an OCI Announcement Subscription for Oracle Exadata Database Service on Dedicated Infrastructure using the OCI Console:
- Navigate to OCI Announcements
- Create an announcement subscription
- Configure the service and announcement type filters
- Configure an OCI Notifications topic and subscription
- Create and confirm the announcement subscription
Task 1: Navigate to OCI Announcements
-
Sign in to the OCI Console.
-
Open Announcements by clicking the Announcements (bell) icon in the upper-right corner of the OCI Console.
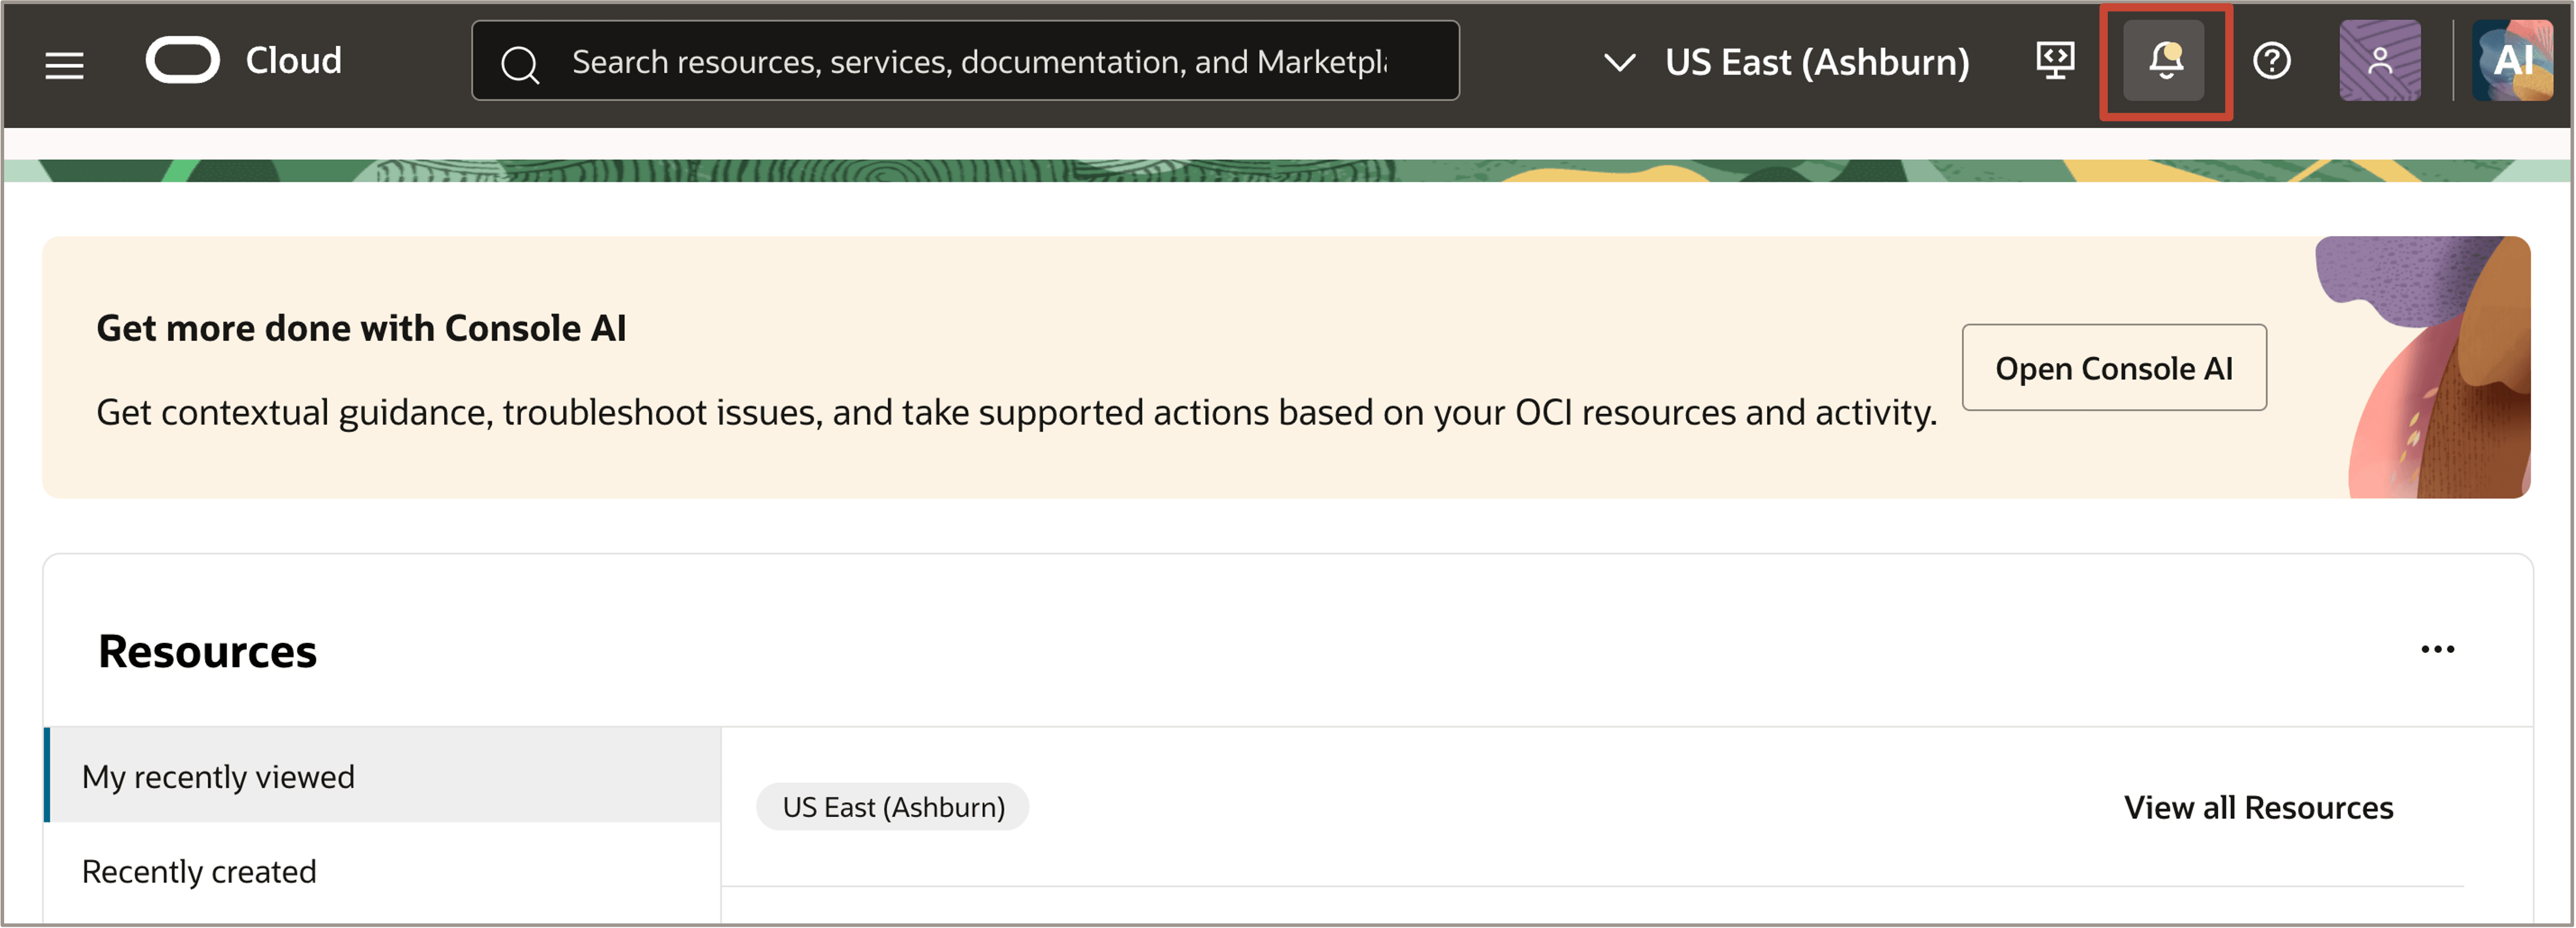
Description of the illustration navigate-announcement-oci.png
Alternatively, you can navigate to Governance & Administration, Account Management, then open Announcements in the OCI Console.
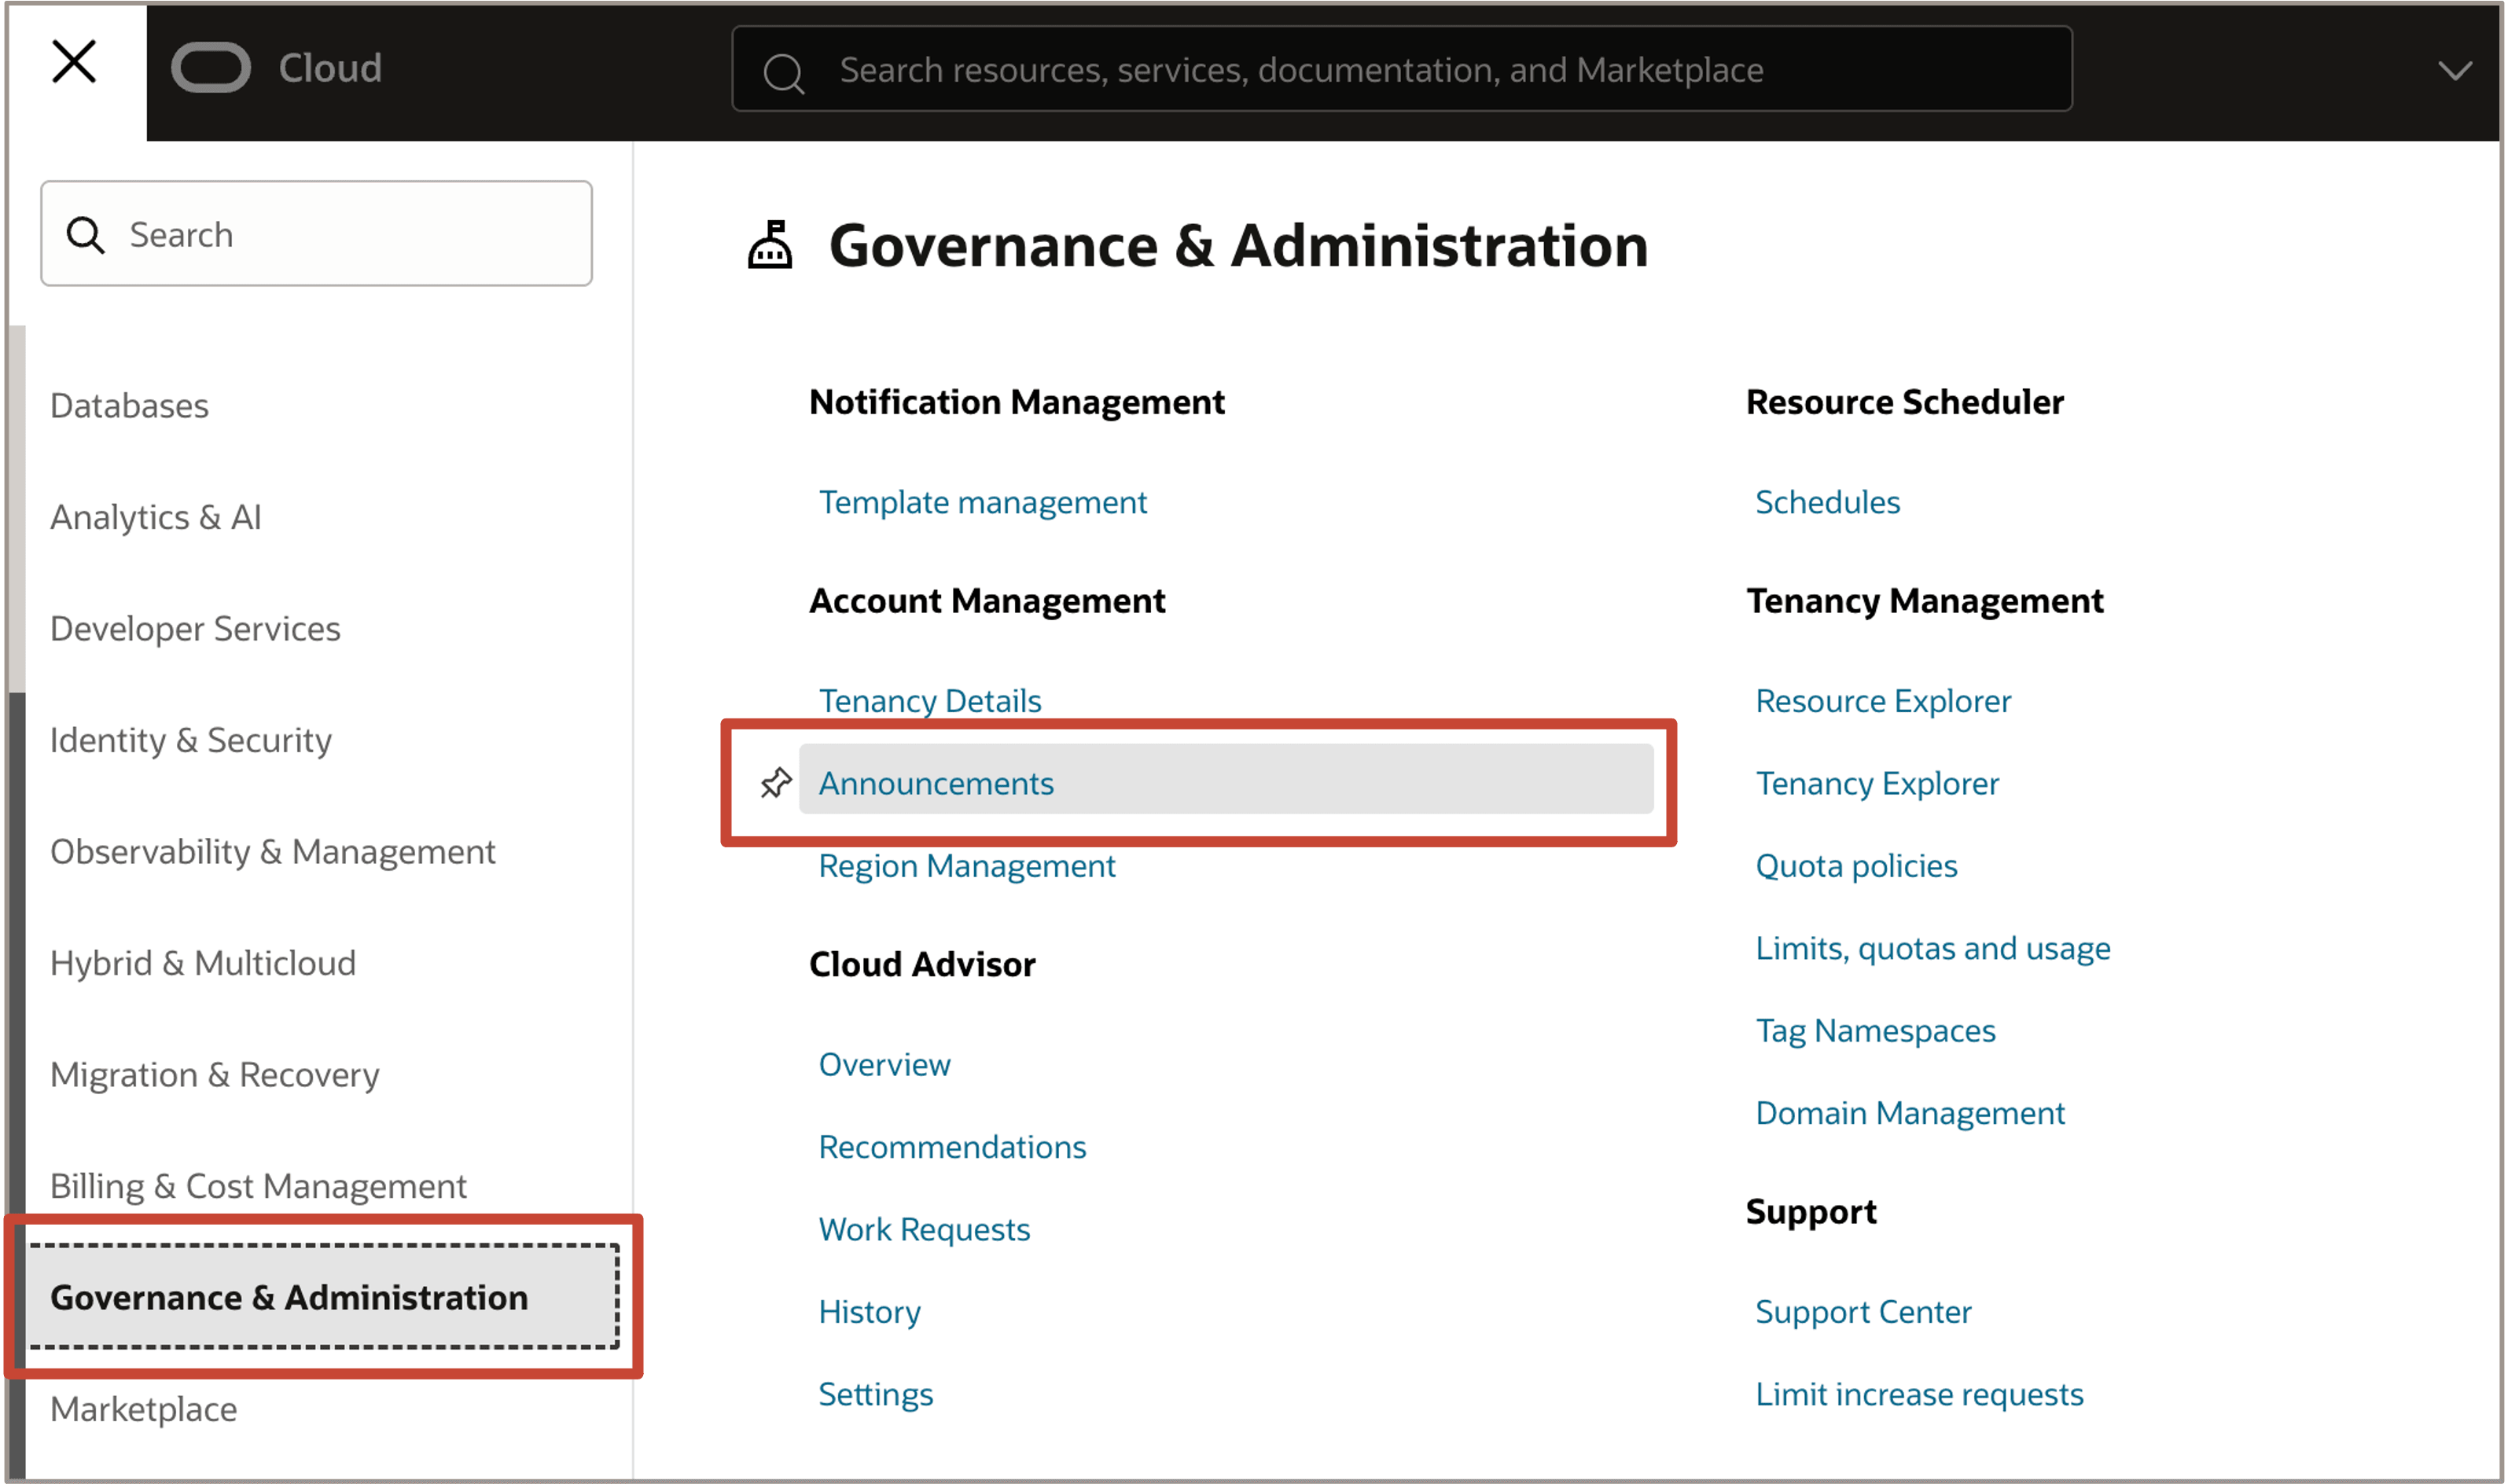
Description of the illustration navigate-announcements-console.png
-
On the Announcements page, click Subscriptions.
-
Click Create announcement subscription.
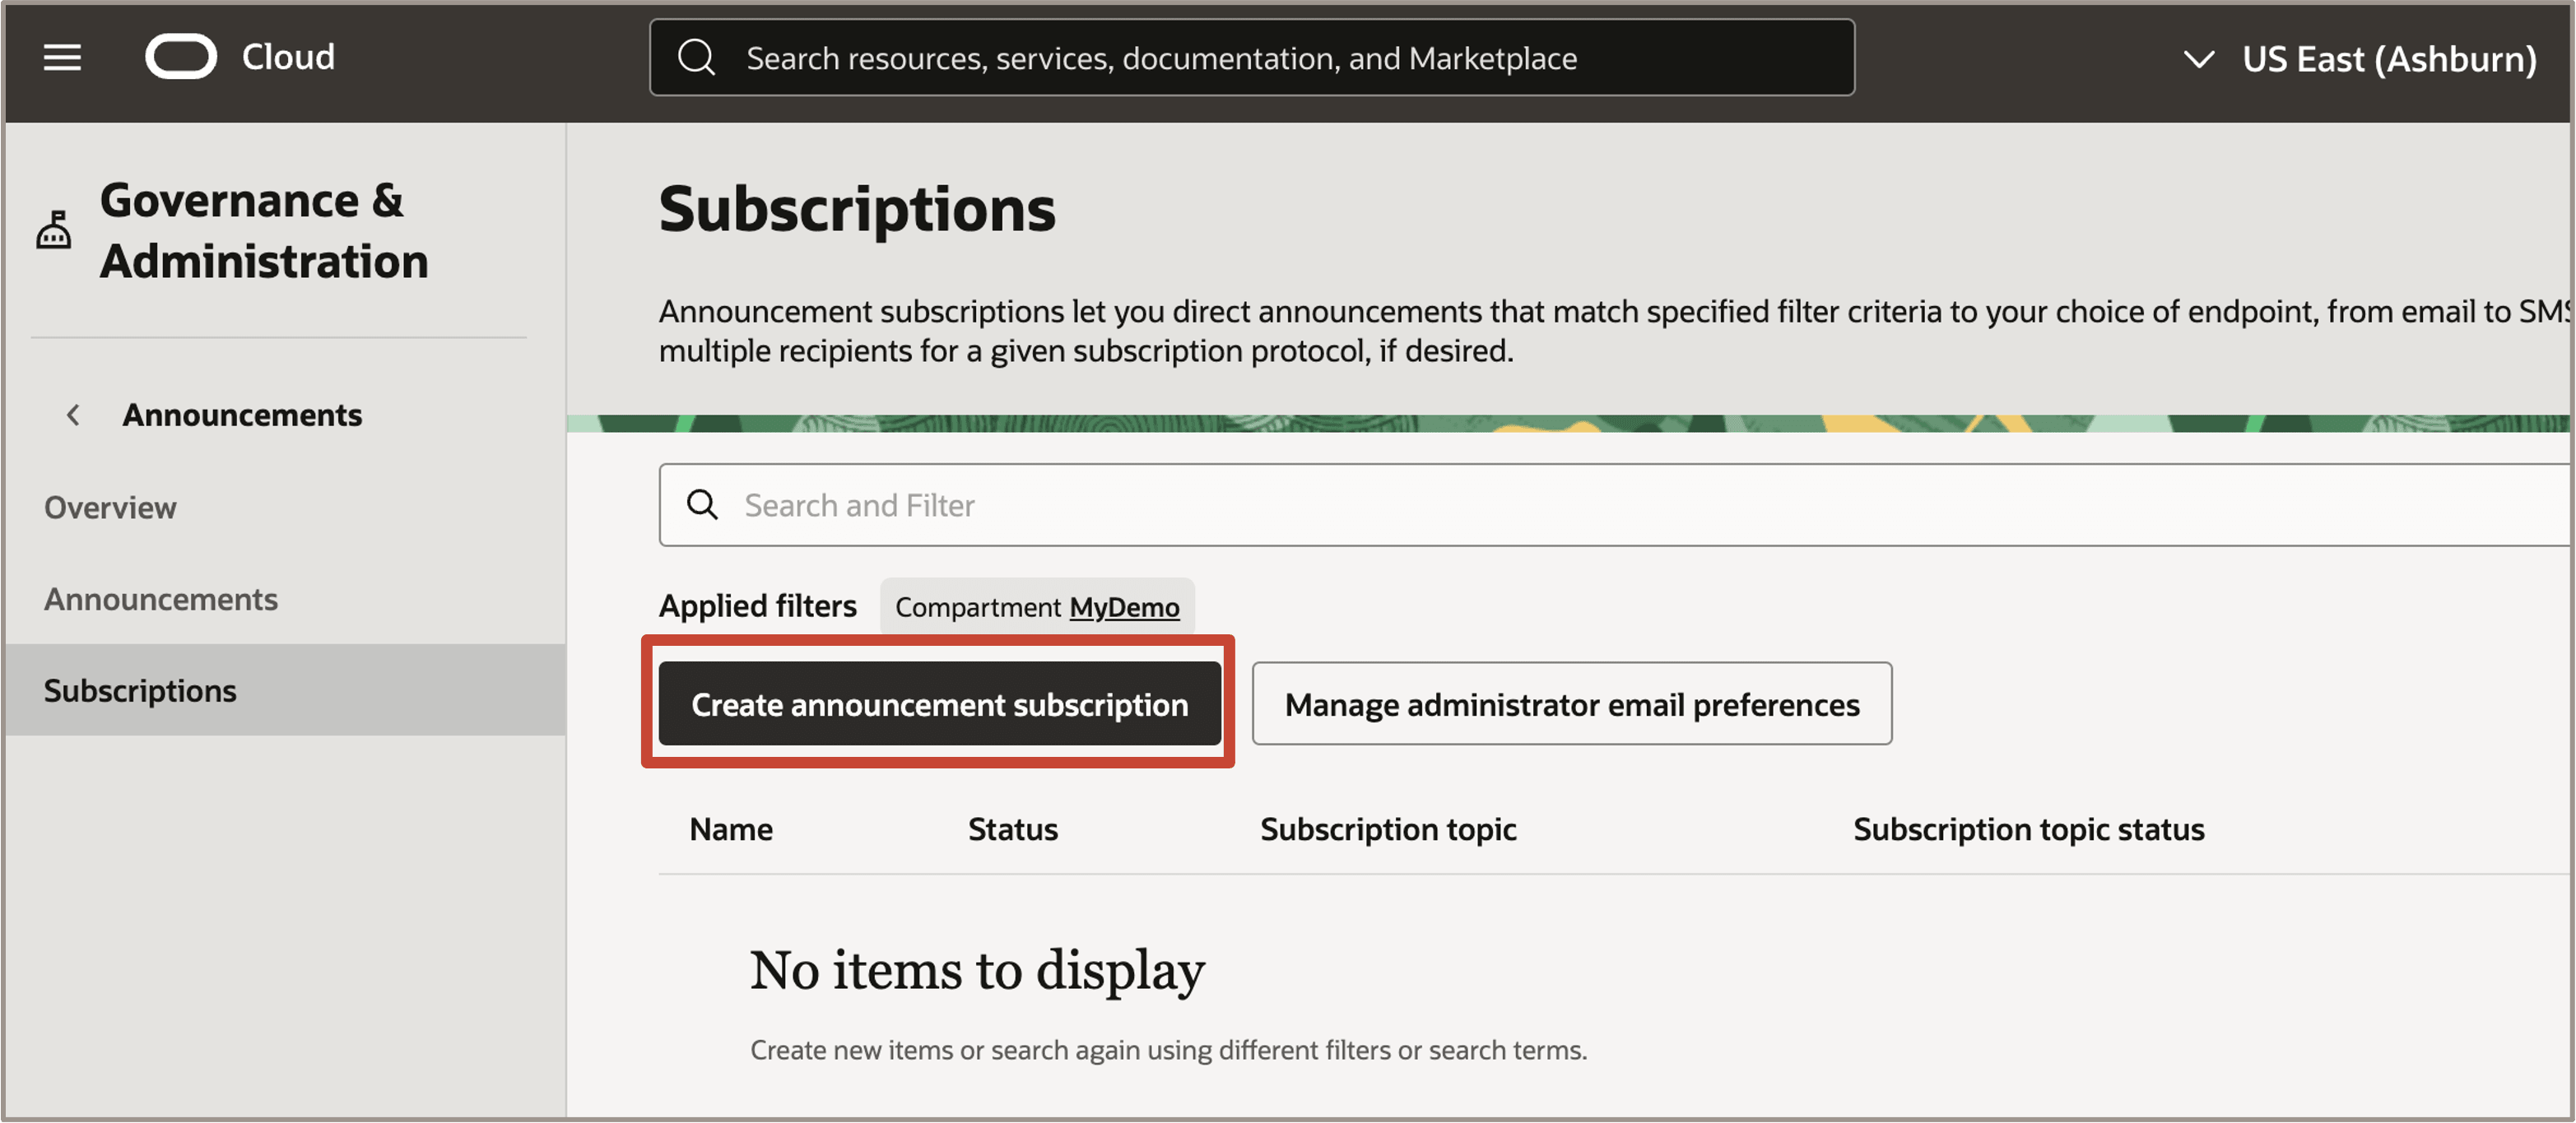
Description of the illustration create-announcement-subscription.png
Task 2: Create and Configure the Announcement Subscription
-
On the Create announcement subscription page, enter a Name and optional Description that identify the purpose of the subscription.
For example:
- Name:
Exadata Database Service Maintenance Announcements - Description:
Announcement subscription for maintenance and service updates for Oracle Exadata Database Service on Dedicated Infrastructure
- Name:
-
Select the Compartment where you want to create the announcement subscription.
-
Under Subscription type, select Selected announcements only.
This option allows you to configure filters that determine which announcements are published to the Notifications topic.
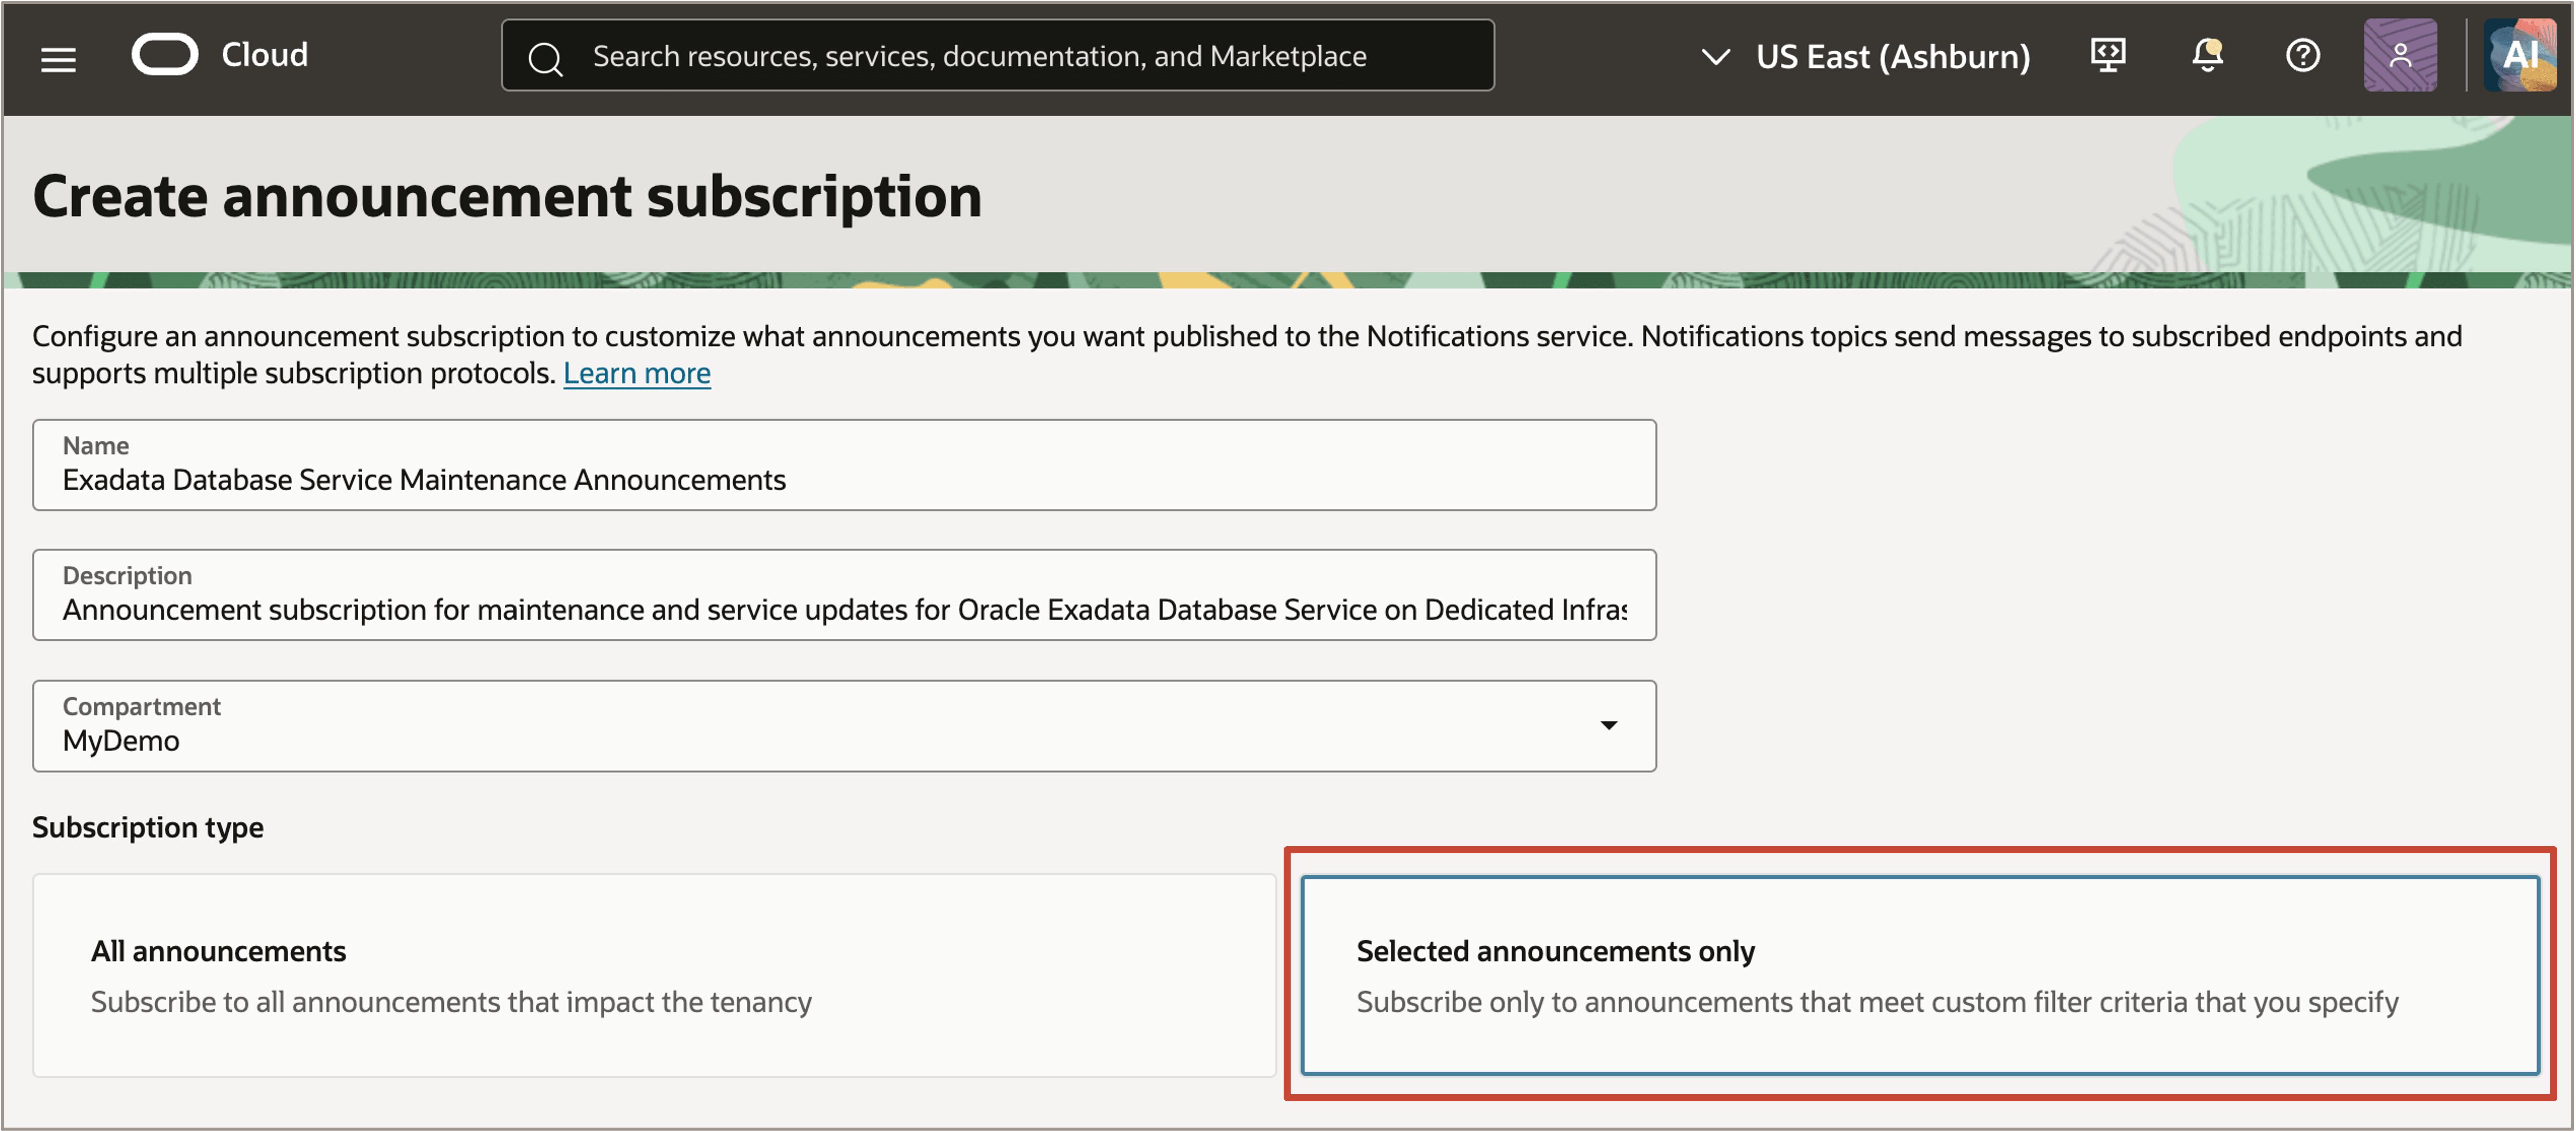
Description of the illustration select-announcements-only.png
-
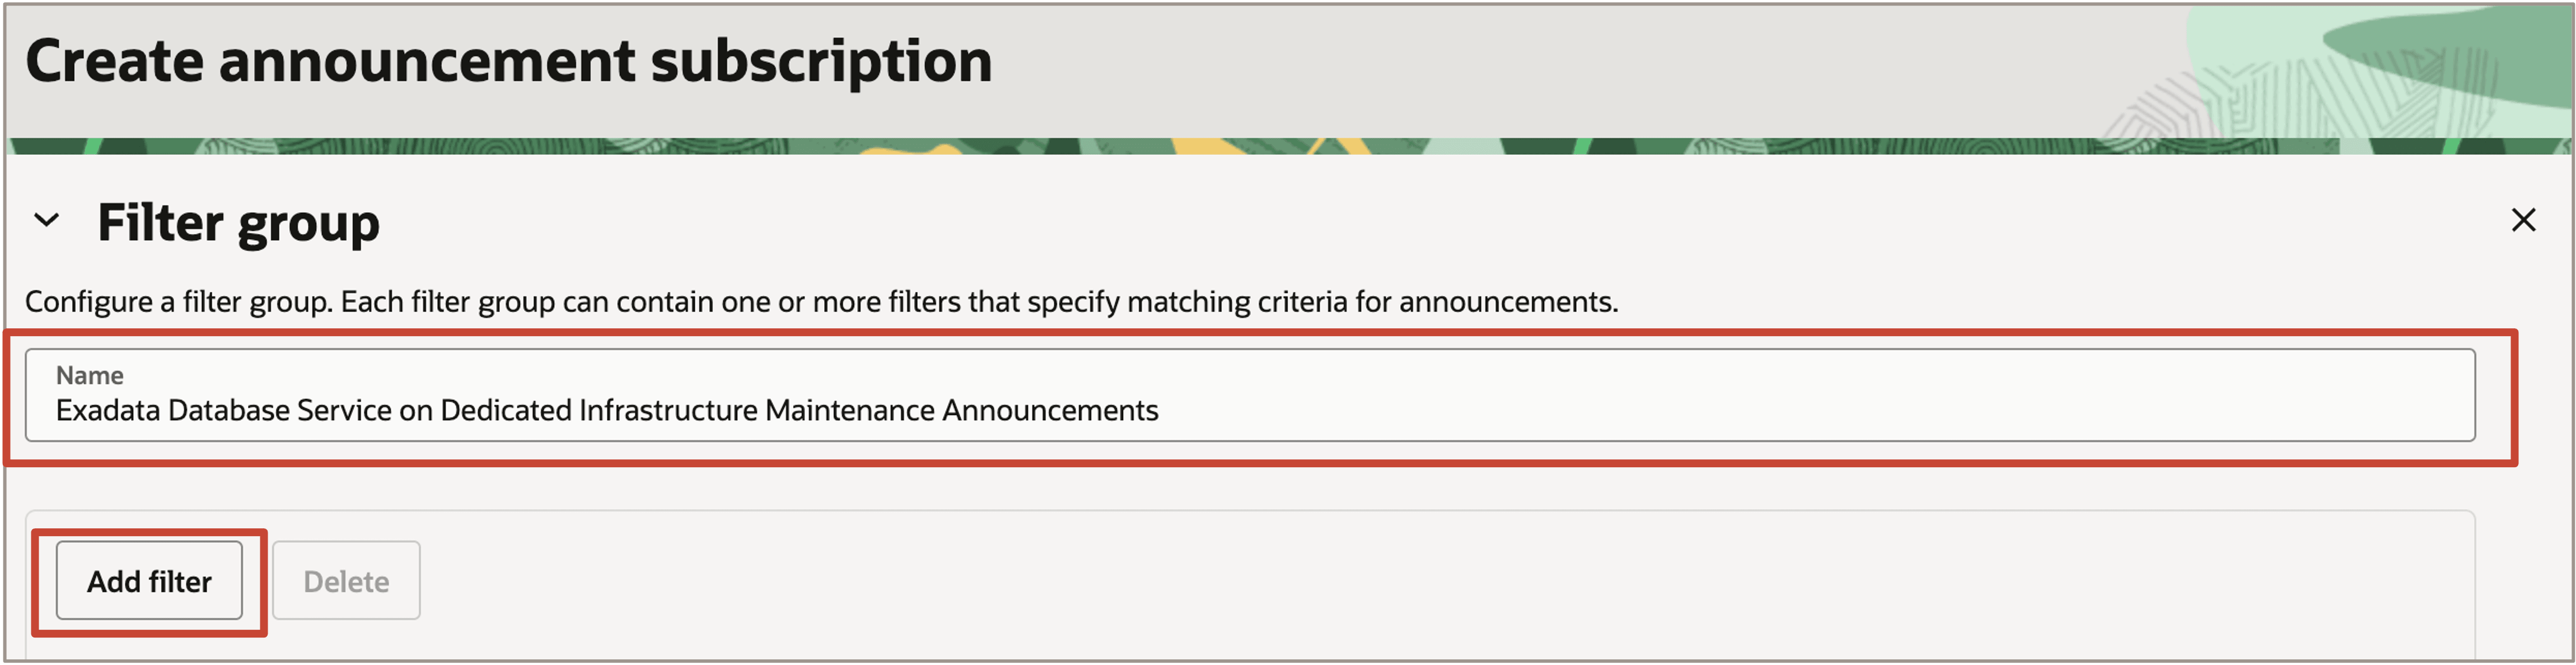
In the Filter group section, enter a descriptive name for the filter group.
For example:
Exadata Database Service on Dedicated Infrastructure Maintenance Announcements -
Click Add filter.
-
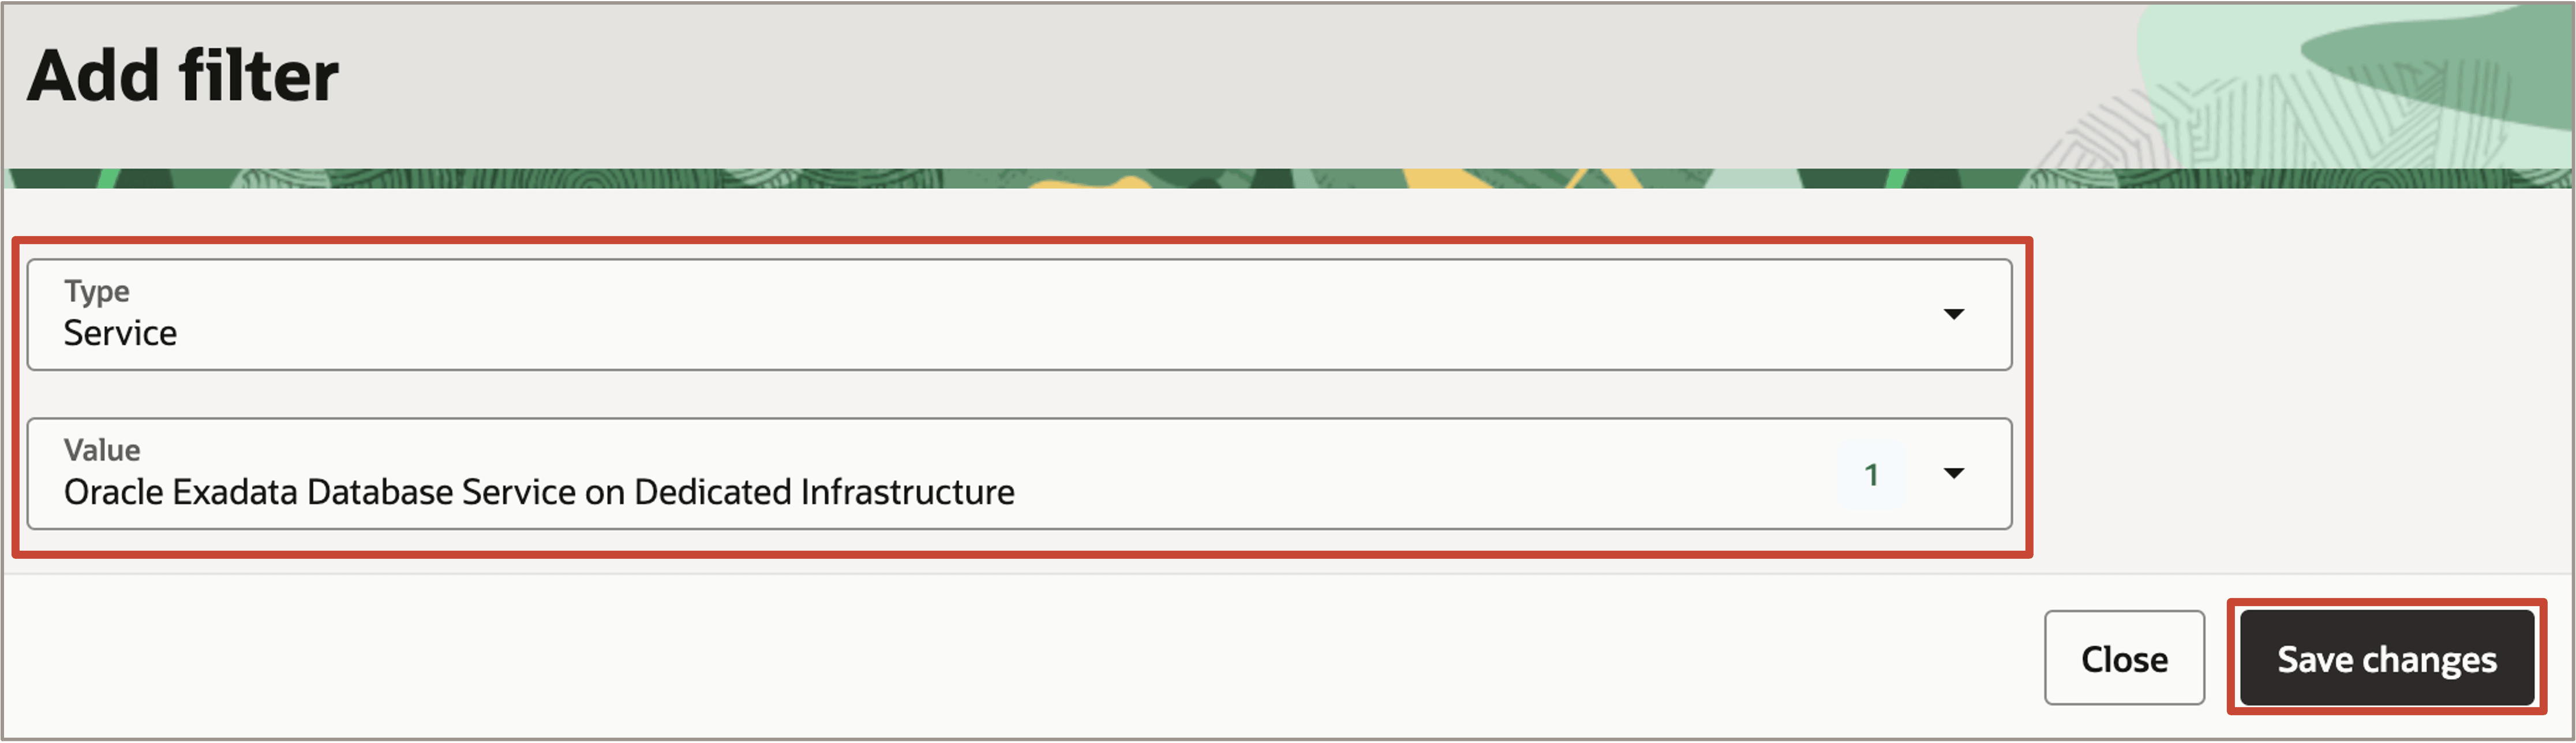
For Type, select Service. For Value, select Oracle Exadata Database Service on Dedicated Infrastructure. Click Save changes
-
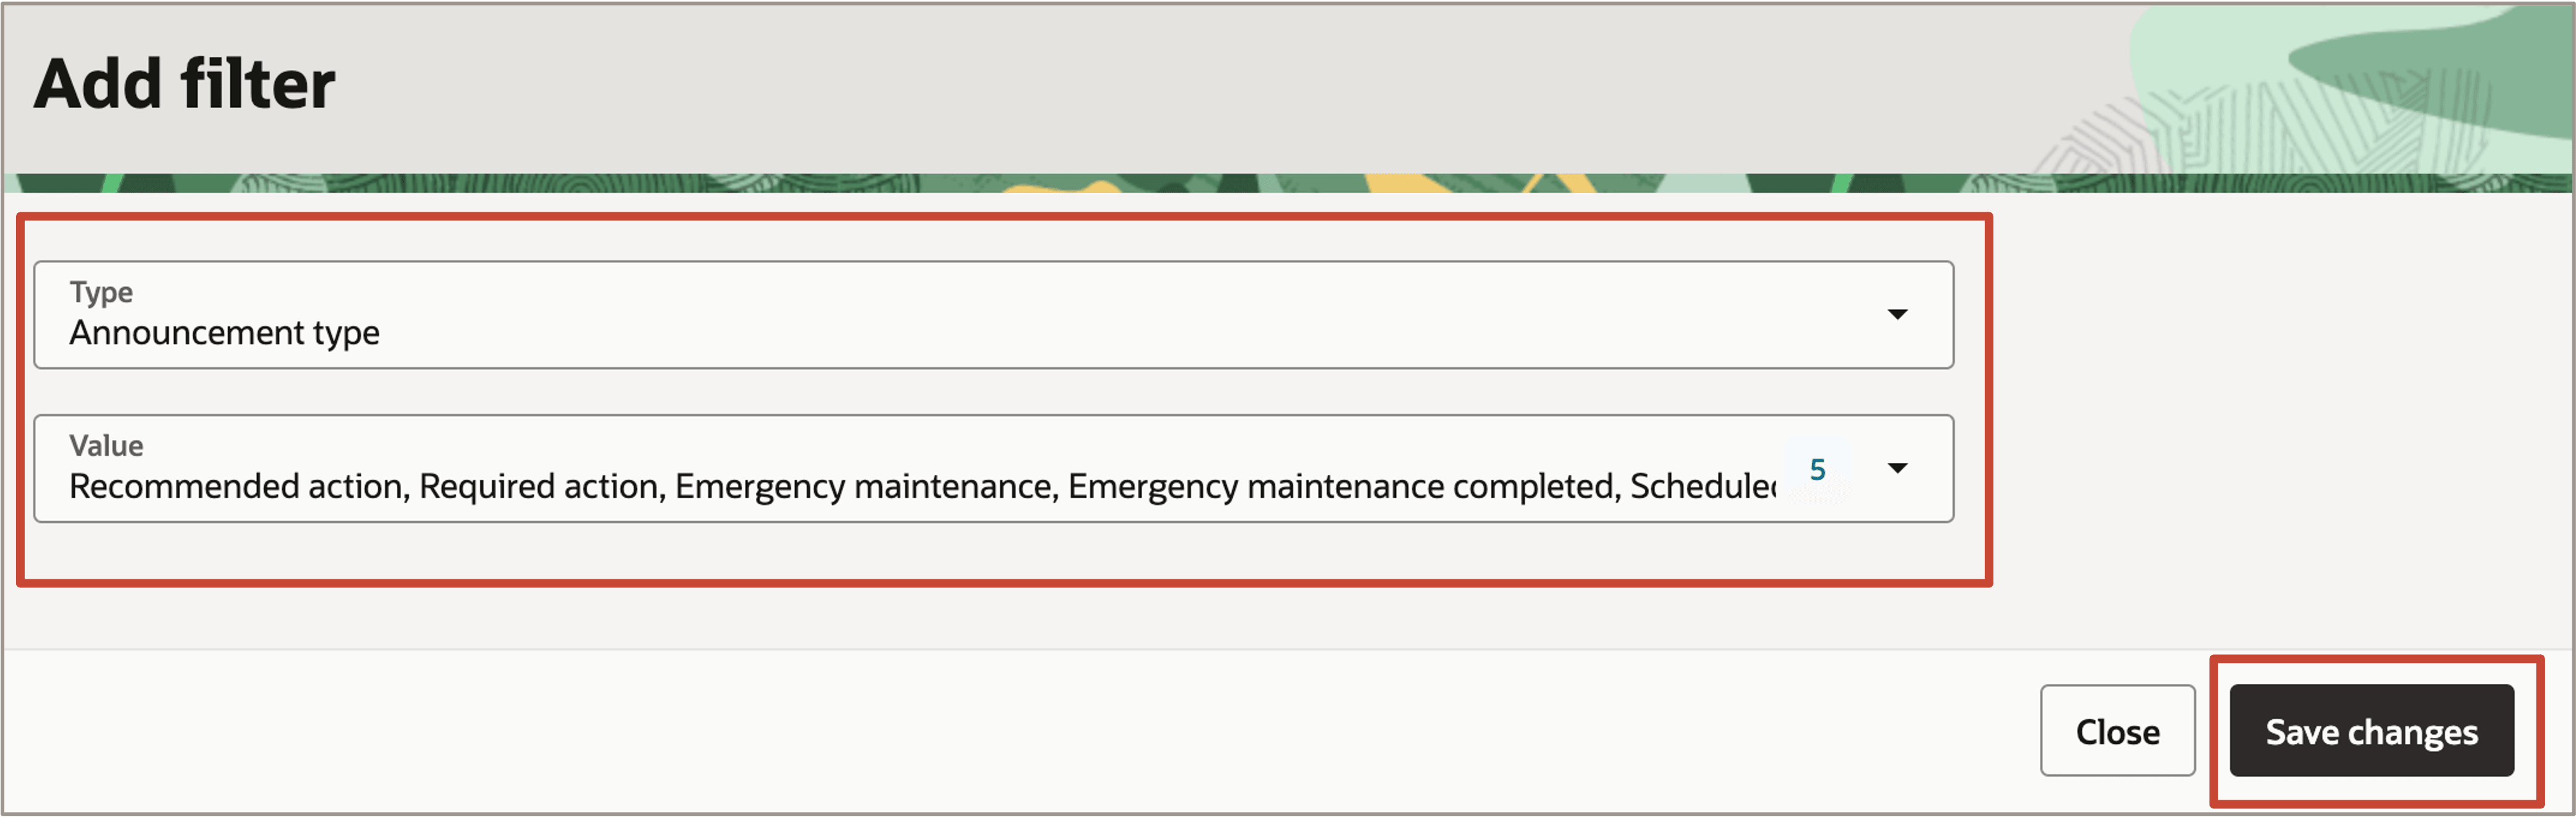
Click Add filter again and select Announcement type.
Select the announcement types you want to receive. For this example, select:
- Recommended action
- Required action
- Emergency maintenance
- Emergency maintenance completed
- Scheduled maintenance
Click Save changes.
Note:
Filters within a filter group work together to determine which announcements match the subscription. In this example, announcements must apply to Oracle Exadata Database Service on Dedicated Infrastructure and match one of the selected announcement types. You can also create multiple filter groups within an announcement subscription, each with different filters to define additional criteria for matching announcements.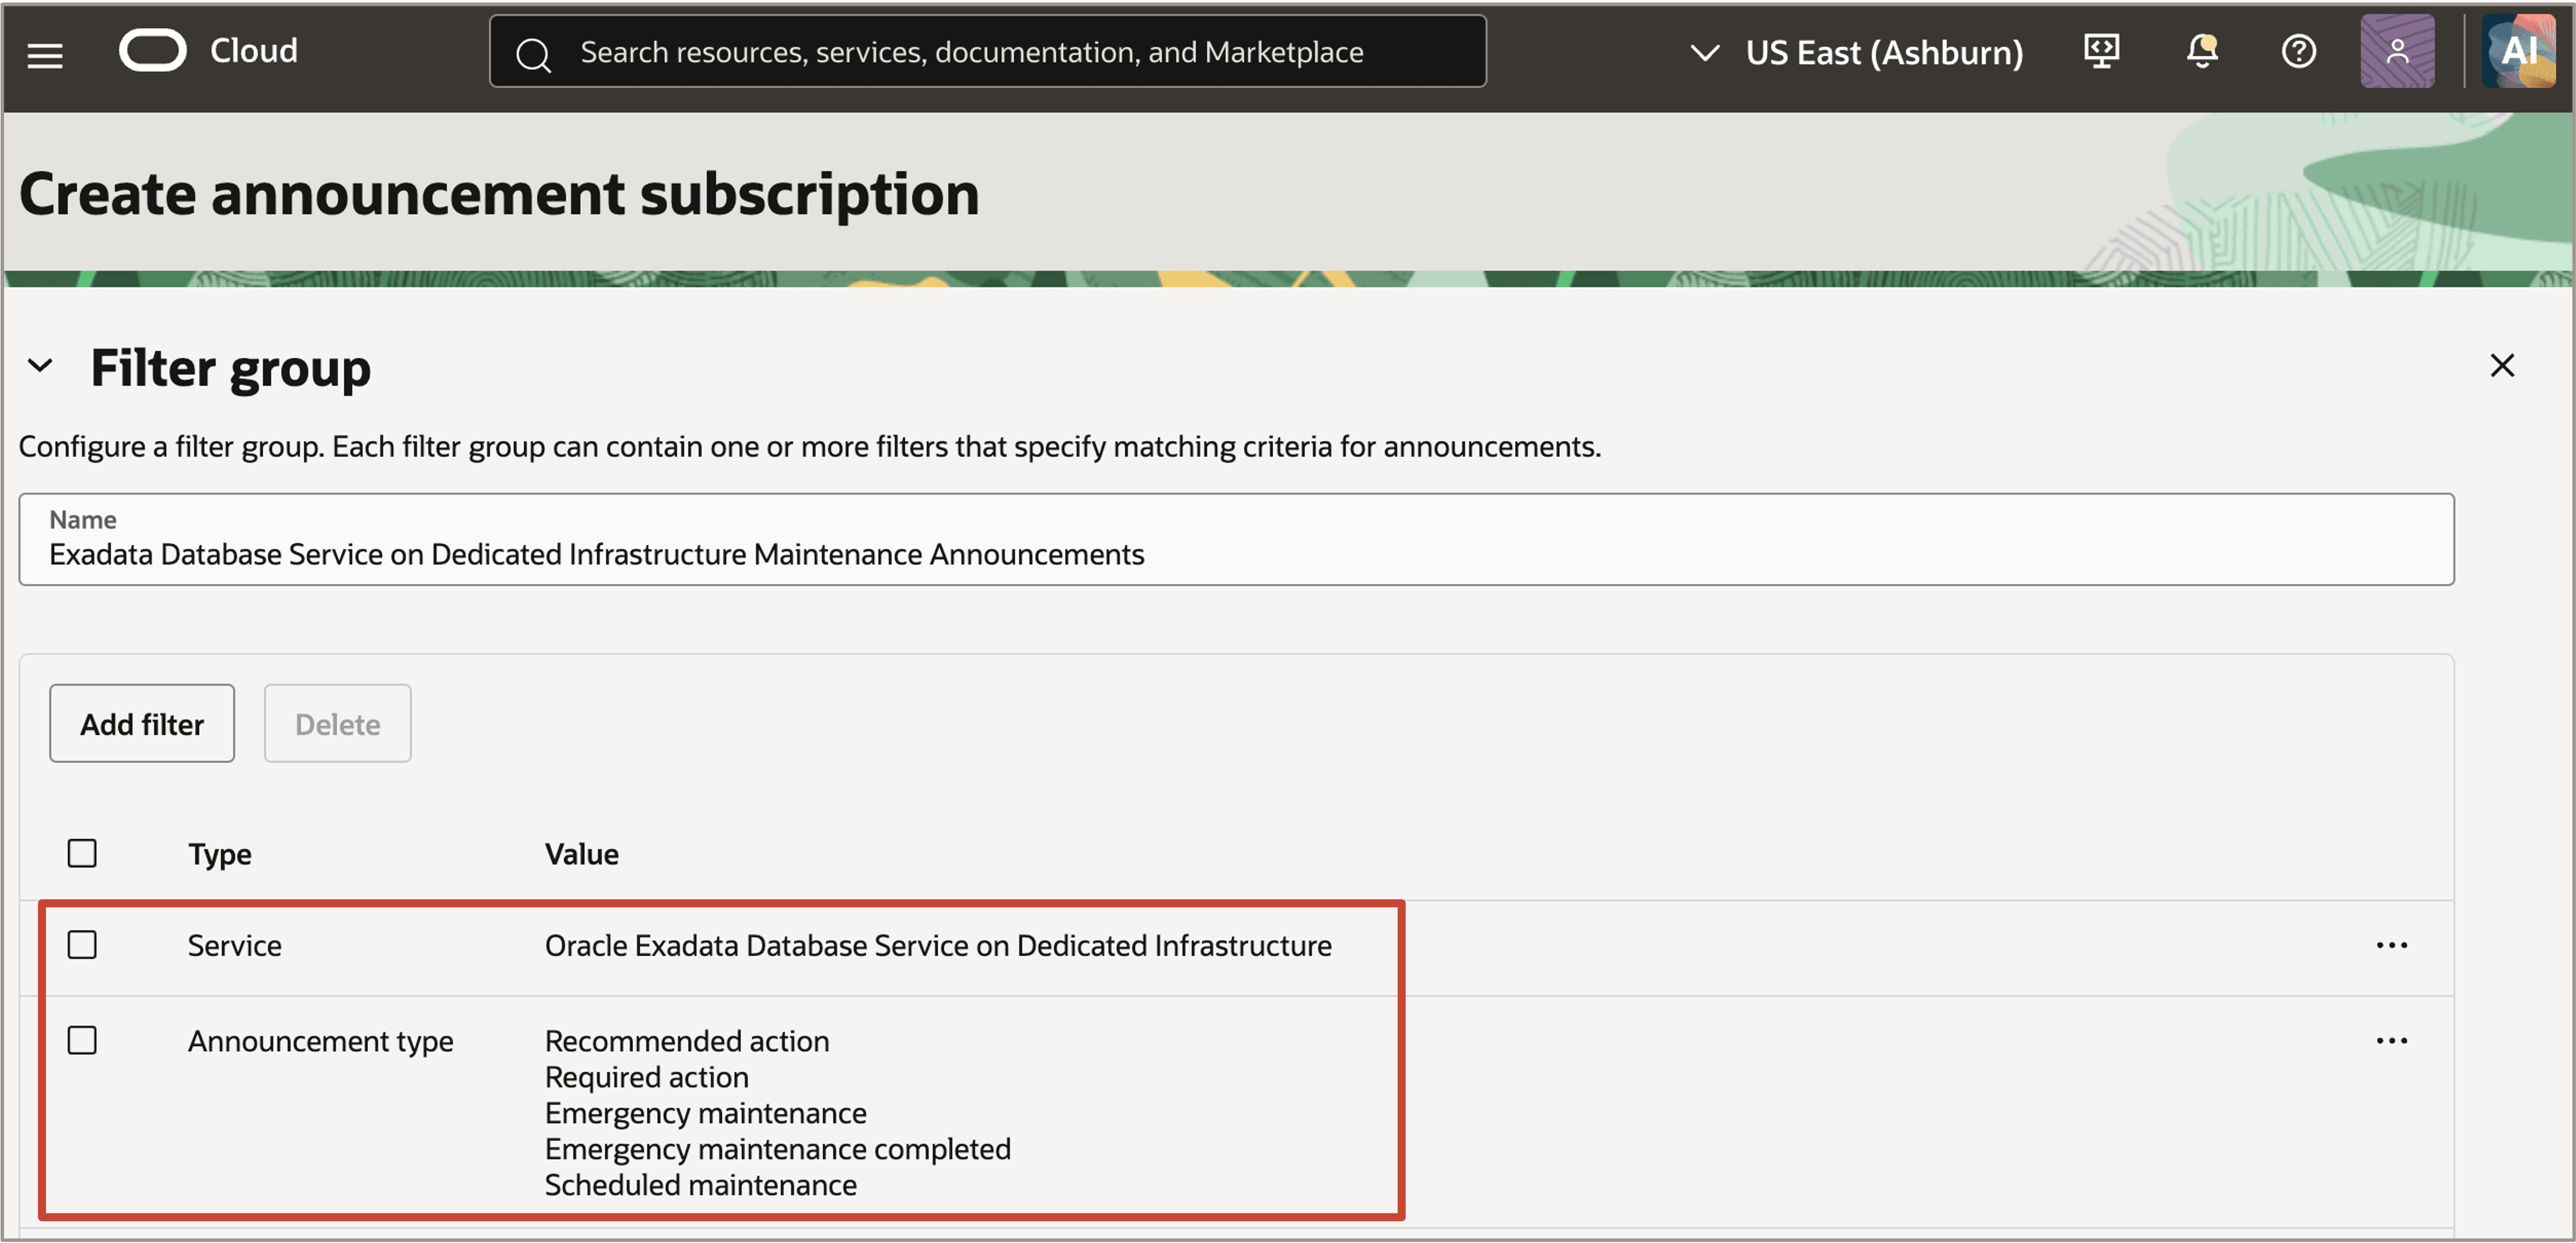
-
Under Display preferences, select the preferred Time zone for announcement timestamps.
Select the preferred Language, if applicable.
Task 3: Configure the Notifications Topic and Create the Announcement Subscription
After configuring the announcement filters, configure the OCI Notifications topic that will receive matching announcements.
You can use an existing Notifications topic or create a new topic.
-
In the Notifications topic section, select Create new topic.
Note: You can select Use existing topic if you already have an OCI Notifications topic that you want to use for this announcement subscription.
-
Select the Compartment where you want to create the Notifications topic.
-
Enter a Name and optional Description for the topic.
For example:
- Name:
Exadata-Database-Service-Maintenance-Announcements - Description:
Notifications topic for Oracle Exadata Database Service on Dedicated Infrastructure announcements
- Name:
-
Under Subscription, select the Subscription protocol that you want to use to deliver the announcements.
Supported options include:
- Function
- HTTPS custom URL
- PagerDuty
- Slack
- SMS
-
Enter the endpoint information required for the selected protocol.
For example, if you select Email, enter the email address that should receive the announcements.
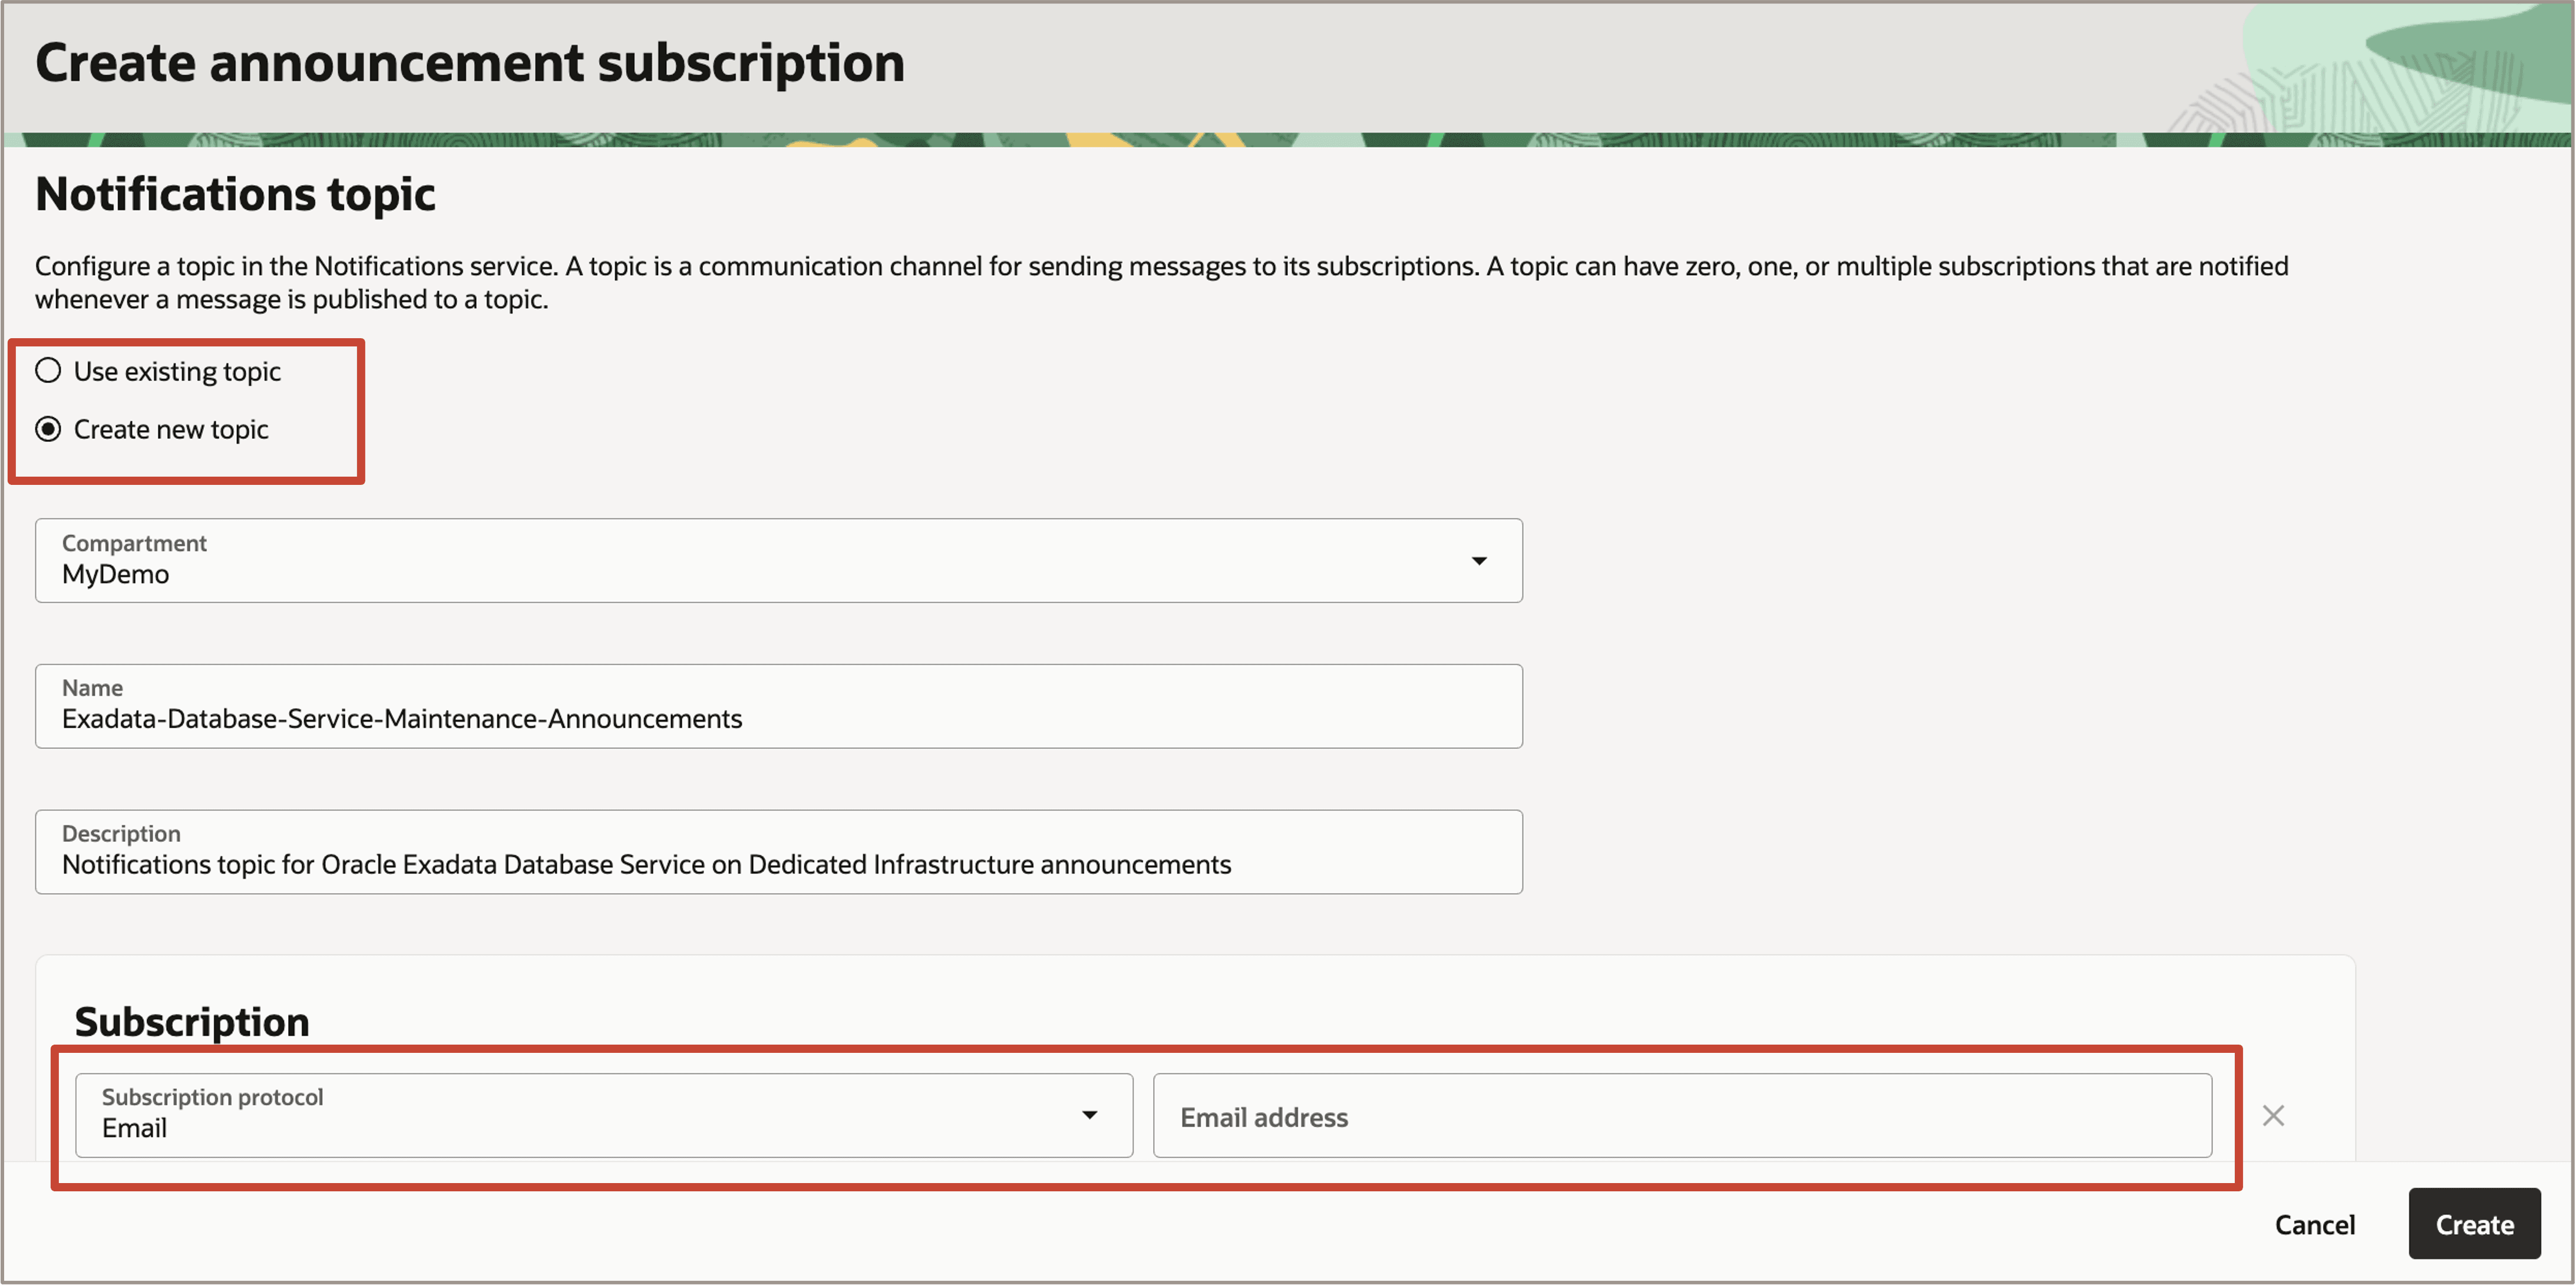
Description of the illustration configure-notifications-topic.png
-
Click Create.
The announcement subscription is created and matching announcements are published to the configured Notifications topic.
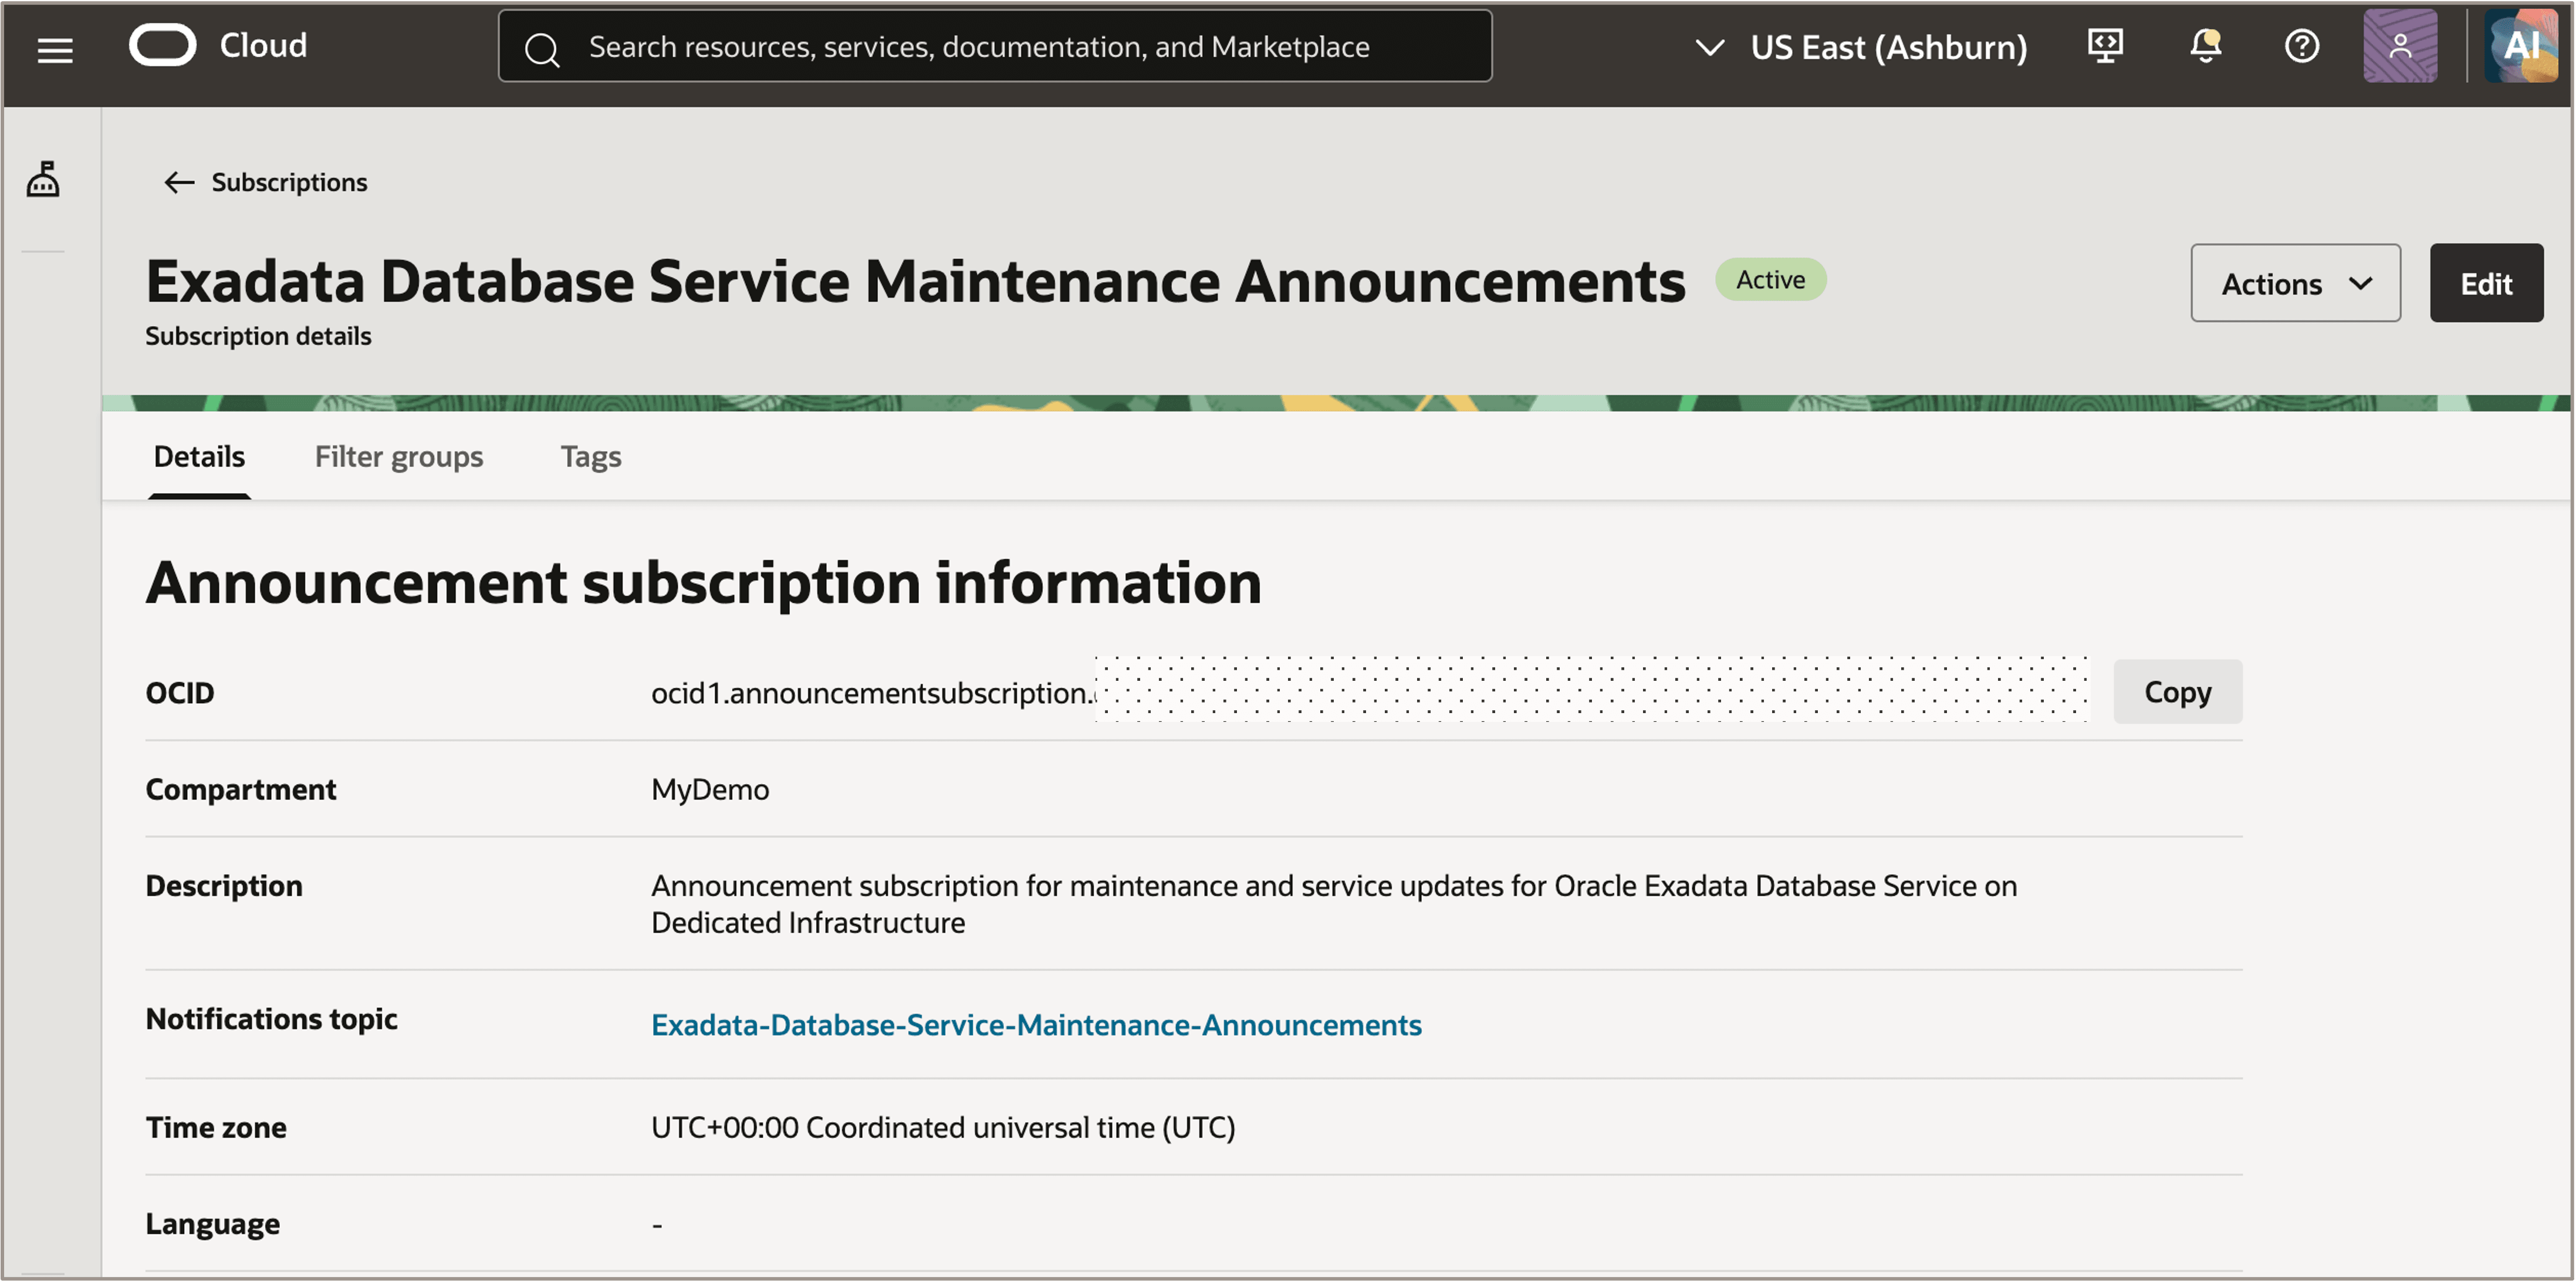
Description of the illustration announcements-active.png
Note:
If you configure an email subscription, the recipient must confirm the subscription before receiving announcements. The subscription remains in a pending state until it is confirmed.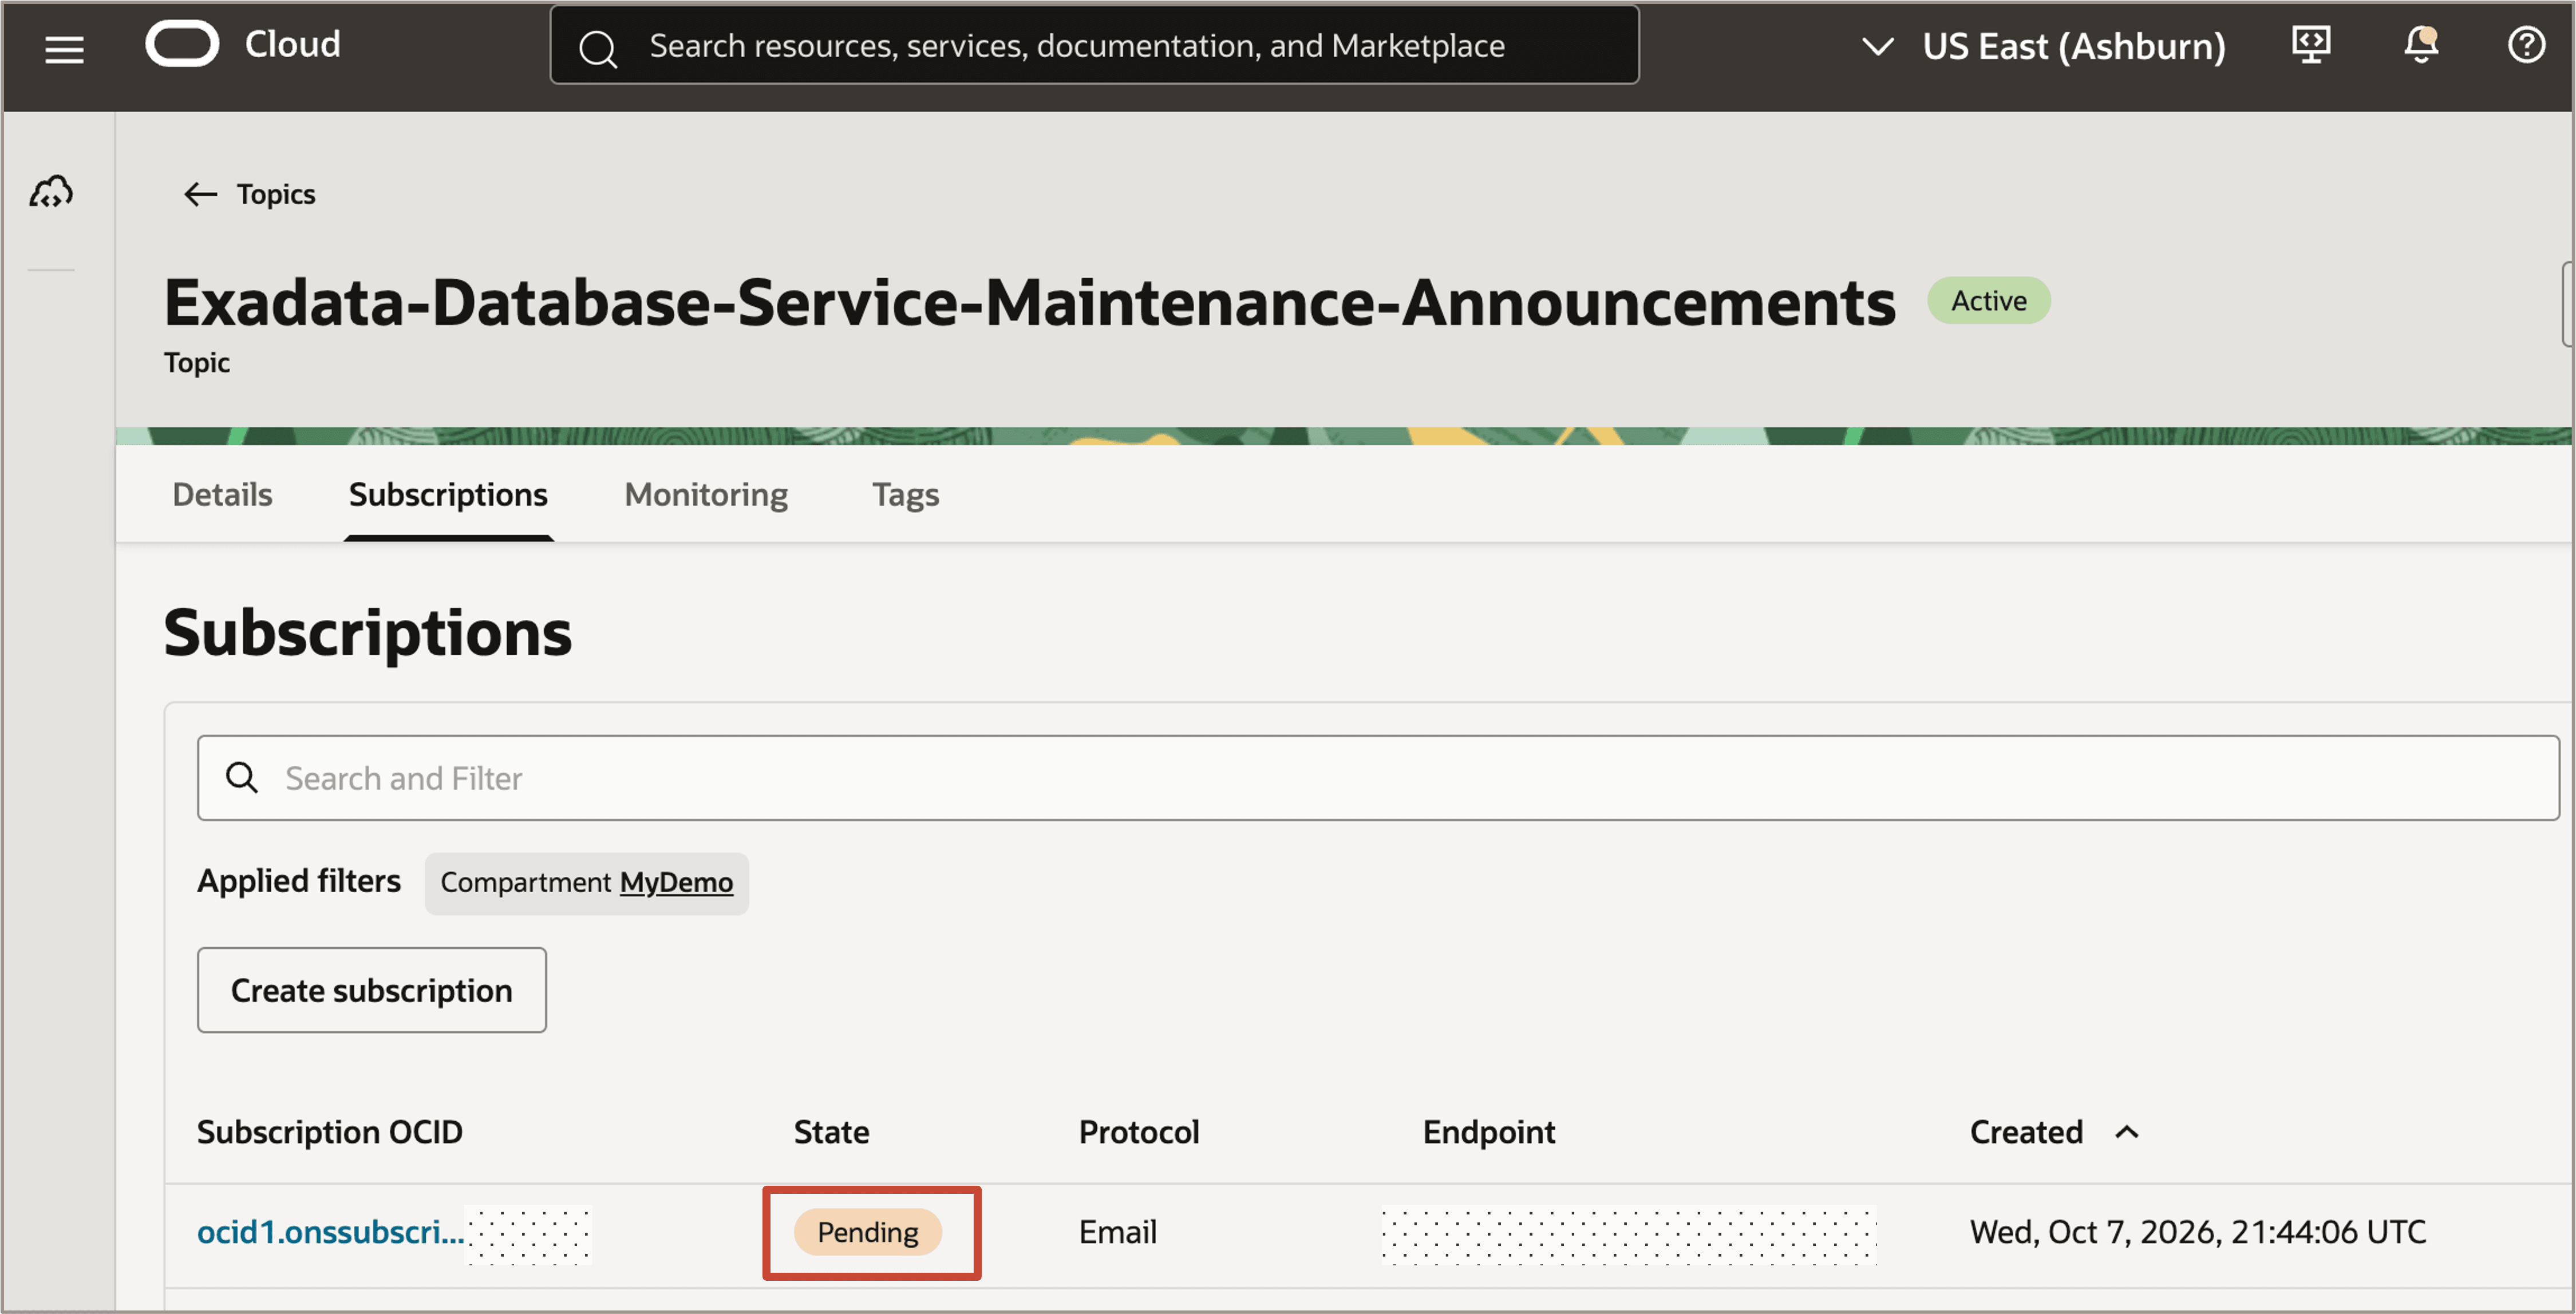
Task 4: Confirm an Email Subscription
If you selected Email as the subscription protocol, OCI Notifications sends a confirmation email to the configured email address.
-
Open the confirmation email sent to the configured email address.
-
Click Confirm subscription.
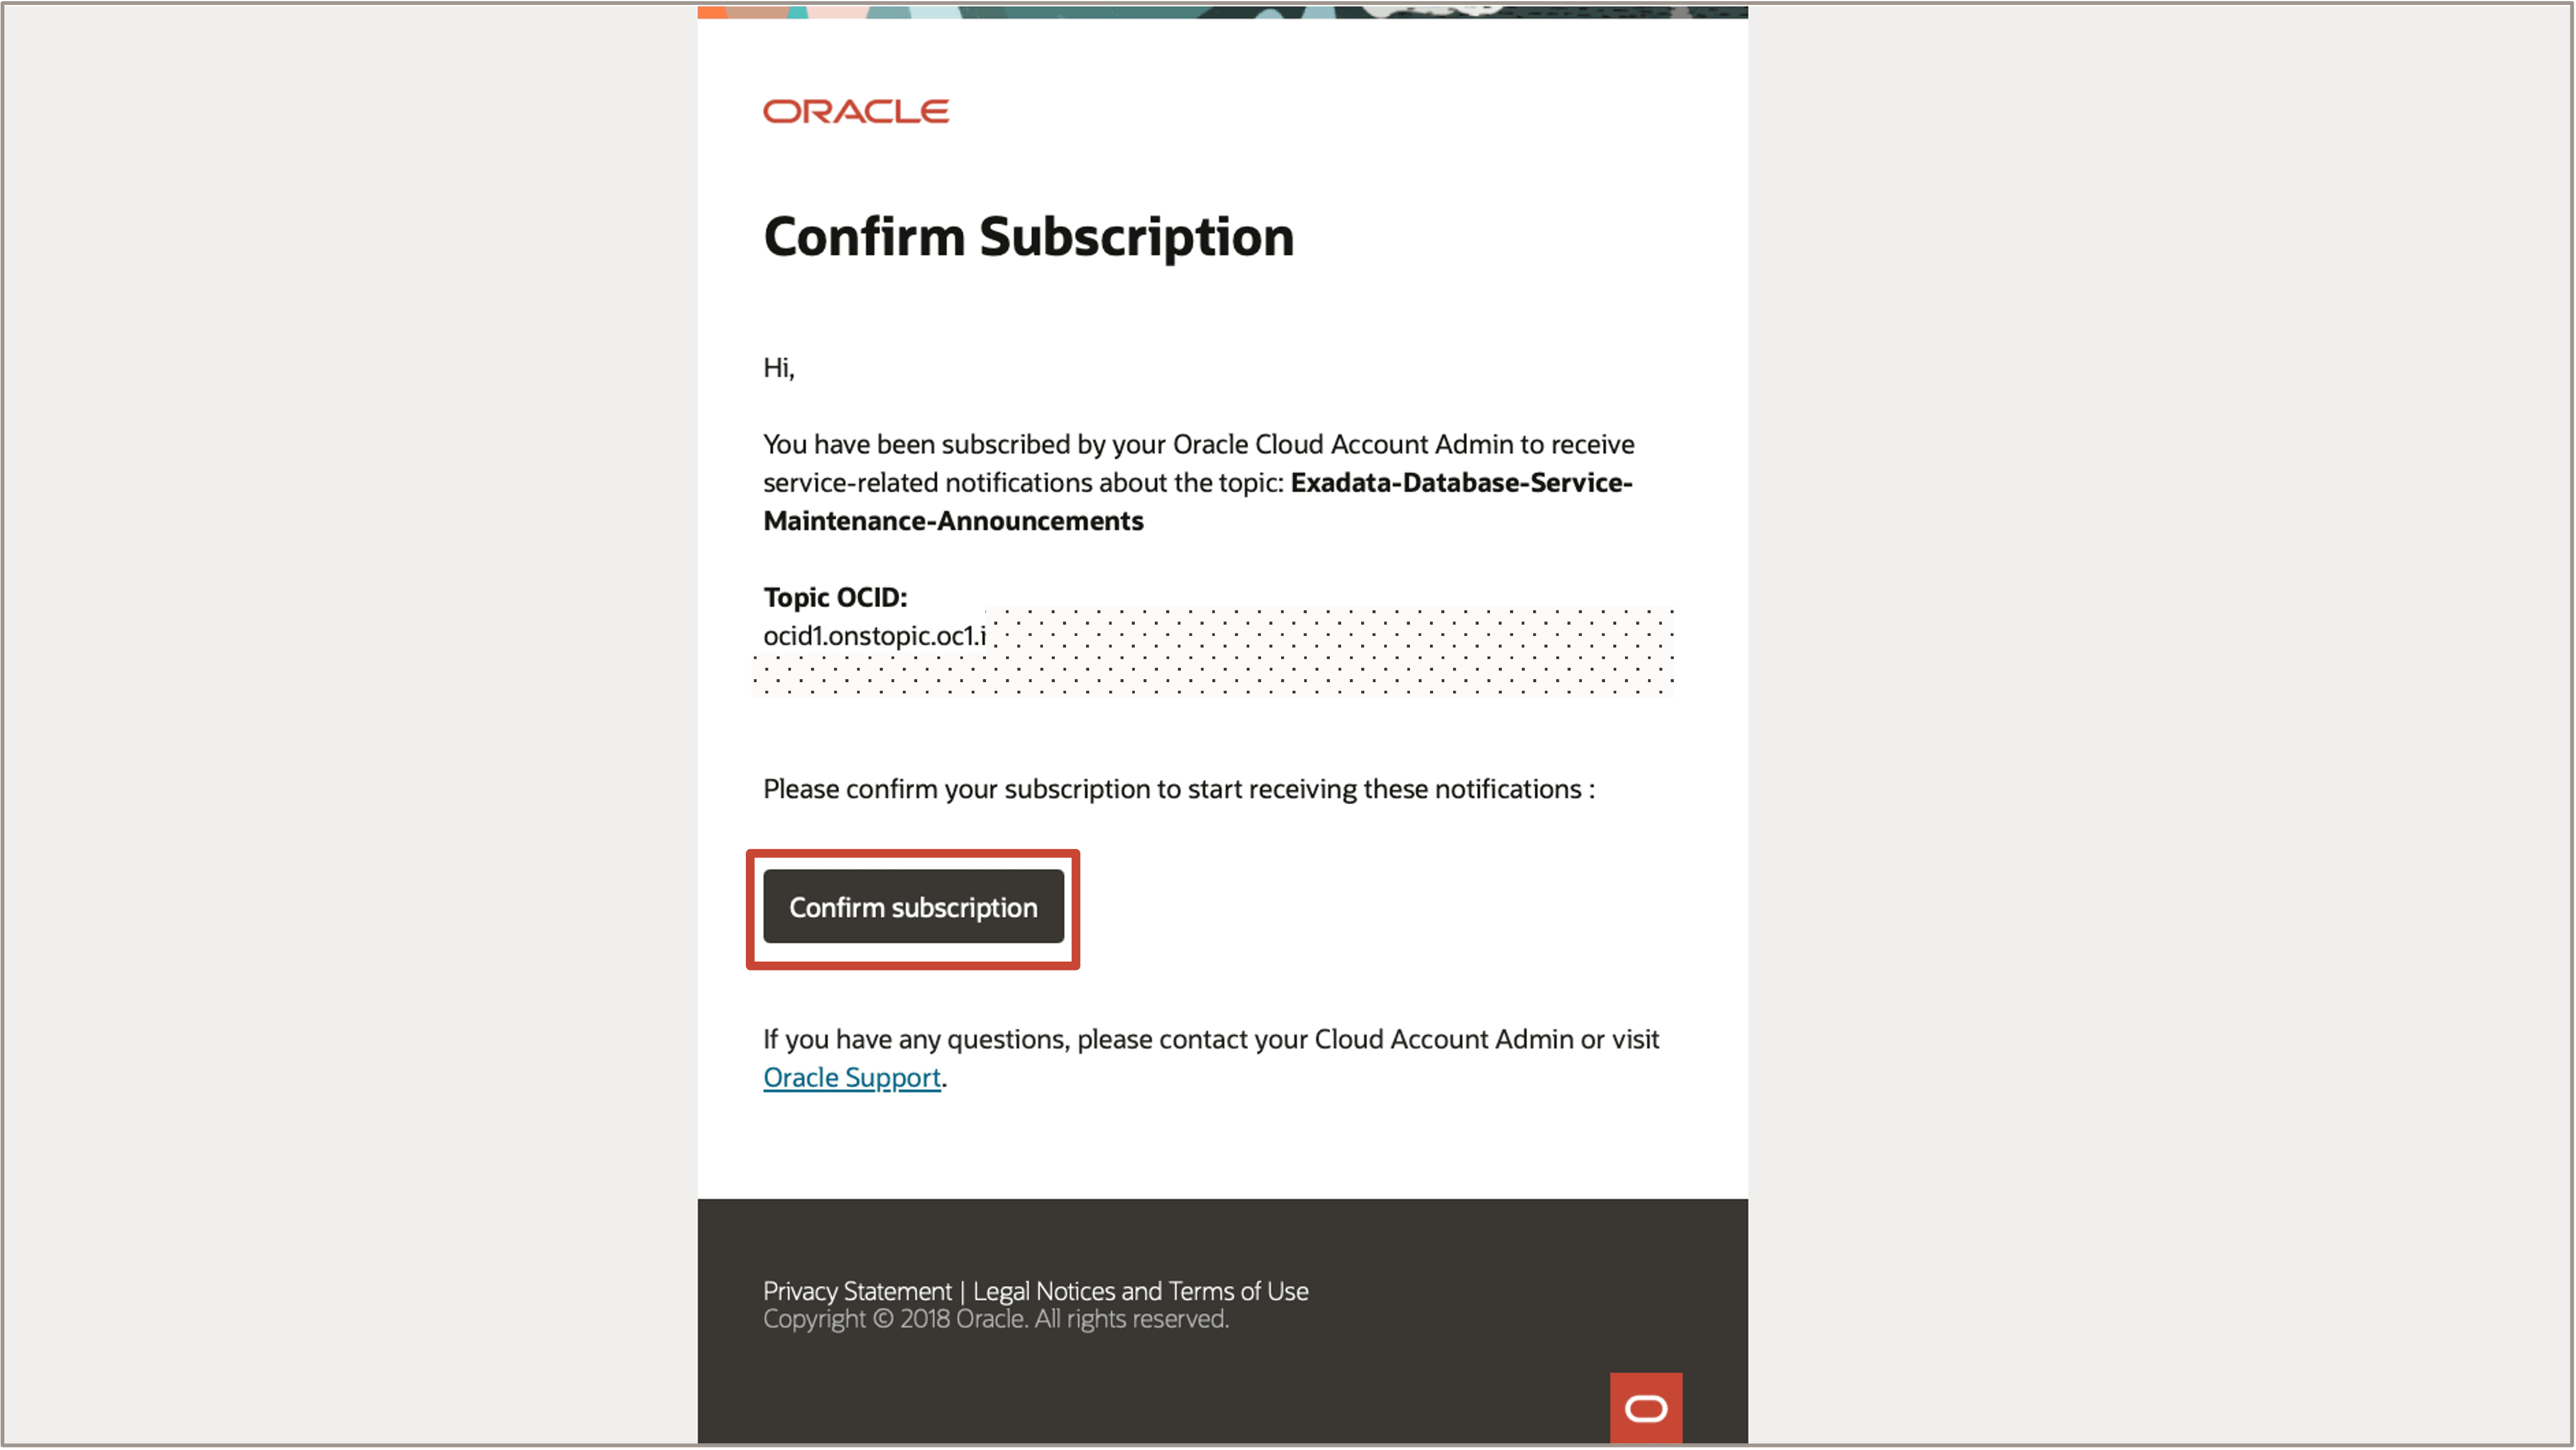
-
In the OCI Console, navigate to the Notifications topic and open the Subscriptions tab.
-
Verify that the email subscription is in Active state.
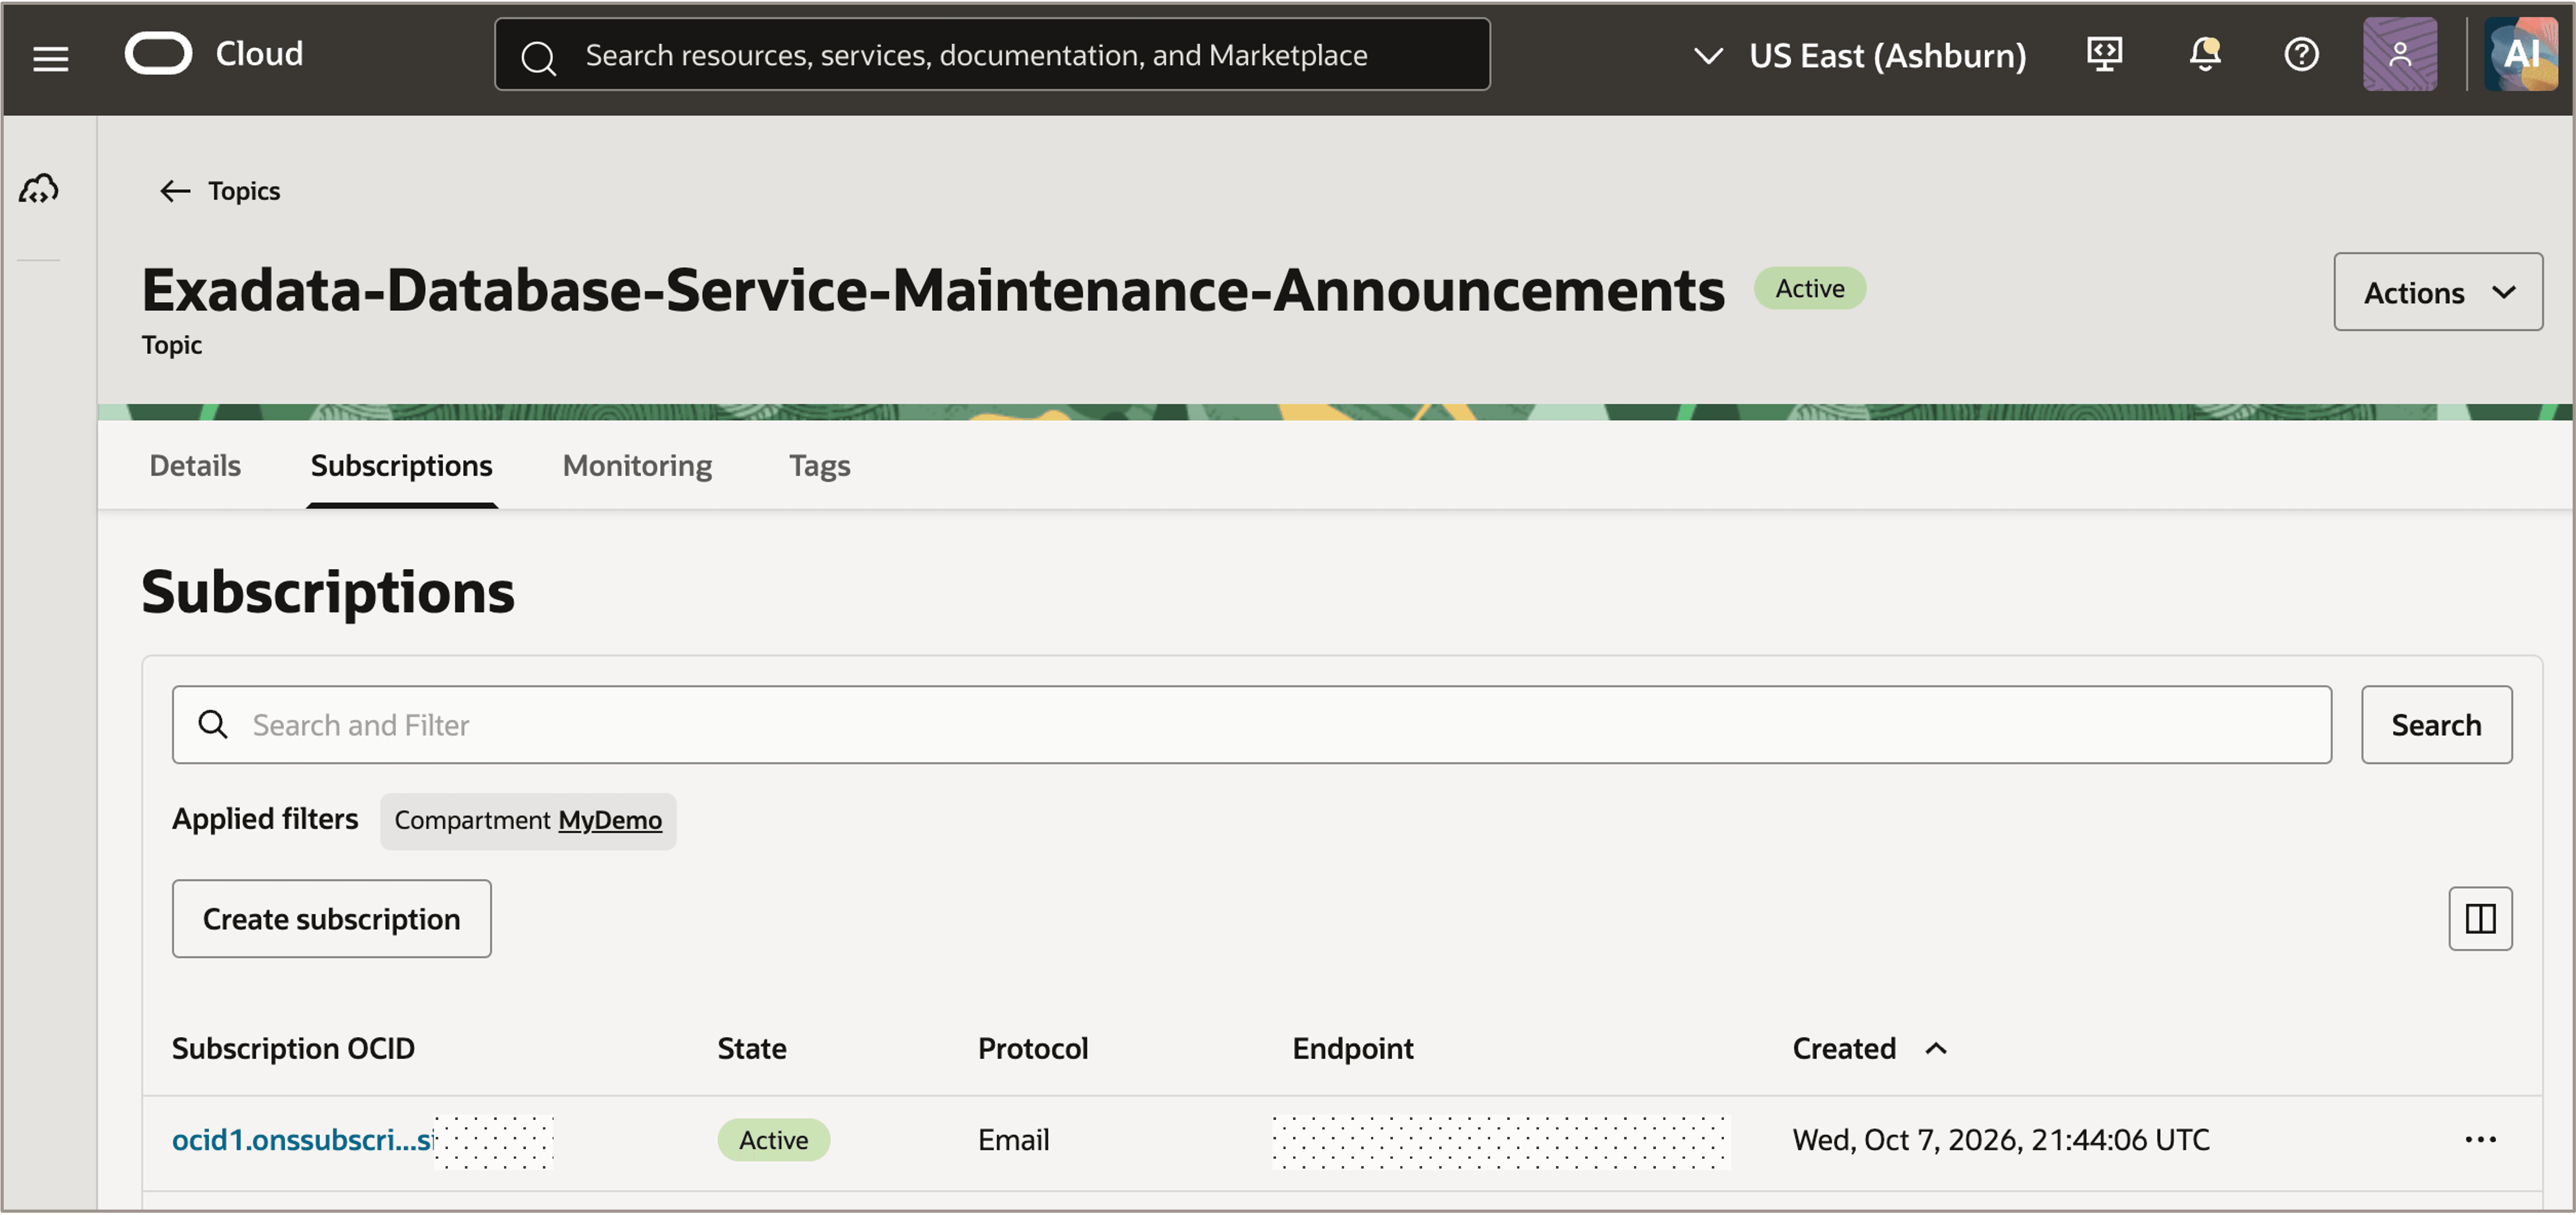
Description of the illustration subscription-confirmed.png
If the confirmation link expires, navigate to the Notifications topic, open the Subscriptions tab, click the actions menu (three dots) for the applicable subscription, and select Resend confirmation.
Note:
The confirmation link for an email subscription is valid for three days.
Related Links
- Overview of Announcements
- Creating an Announcement Subscription
- Overview of Notifications
- Creating a Subscription
Acknowledgments
- Authors - Leo Alvarado, Lavanya Jain, Tammy Bednar (Product Management)
More Learning Resources
Explore other labs on docs.oracle.com/learn or access more free learning content on the Oracle Learning YouTube channel. Additionally, visit education.oracle.com/learning-explorer to become an Oracle Learning Explorer.
For product documentation, visit Oracle Help Center.
Configure OCI Announcement Subscriptions for Exadata Database Service
G62536-02