Note:
- This tutorial requires access to Oracle Cloud. To sign up for a free account, see Get started with Oracle Cloud Infrastructure Free Tier.
- It uses example values for Oracle Cloud Infrastructure credentials, tenancy, and compartments. When completing your lab, substitute these values with ones specific to your cloud environment.
Secure Oracle Digital Assistant Chatbot with Oracle Identity Cloud Service
Introduction
Chatbots or digital assistants provide a very easy and convenient way to access all types of data – be it our own enterprise data, or service provider’s data, or vendor’s data, or even customer’s data.
But not all data is publicly accessible. The chatbots should allow users to access only the data that they are authorized to, and thereby enable secured access to data based on roles. Also for some chatbot functionalities, you may need the user ID of the authenticated user. That would require the user to first login, while using the chatbot.
Oracle Digital Assistant (ODA) enables you to develop secure chatbots, where you can secure the capabilities using different Identity Providers. Oracle Digital Assistant enables security with these identity providers:
- Oracle Identity Cloud Service (IDCS)
- Oracle Access Manager (OAM)
- Microsoft identity platform
- Google identity platform
Architecture

Objectives
- Configure an Oracle Digital Assistant chatbot to be secured with Oracle Identity Cloud Service.
Prerequisites
-
An active Oracle Cloud Infrastructure (OCI) tenancy with required permissions and resources quota to support the solution architecture.
-
Instantiation and familiarity with Oracle Digital Assistant and Oracle Identity Cloud Service. For more information about configuration of Oracle Digital Assistant, see Conversational AI in Minutes (No Developer Experience Required).
Task 1: Configure Oracle Identity Cloud Service
-
Register an application with Oracle Identity Cloud Service. For more information, see Register an Application with IDCS or OAM.
-
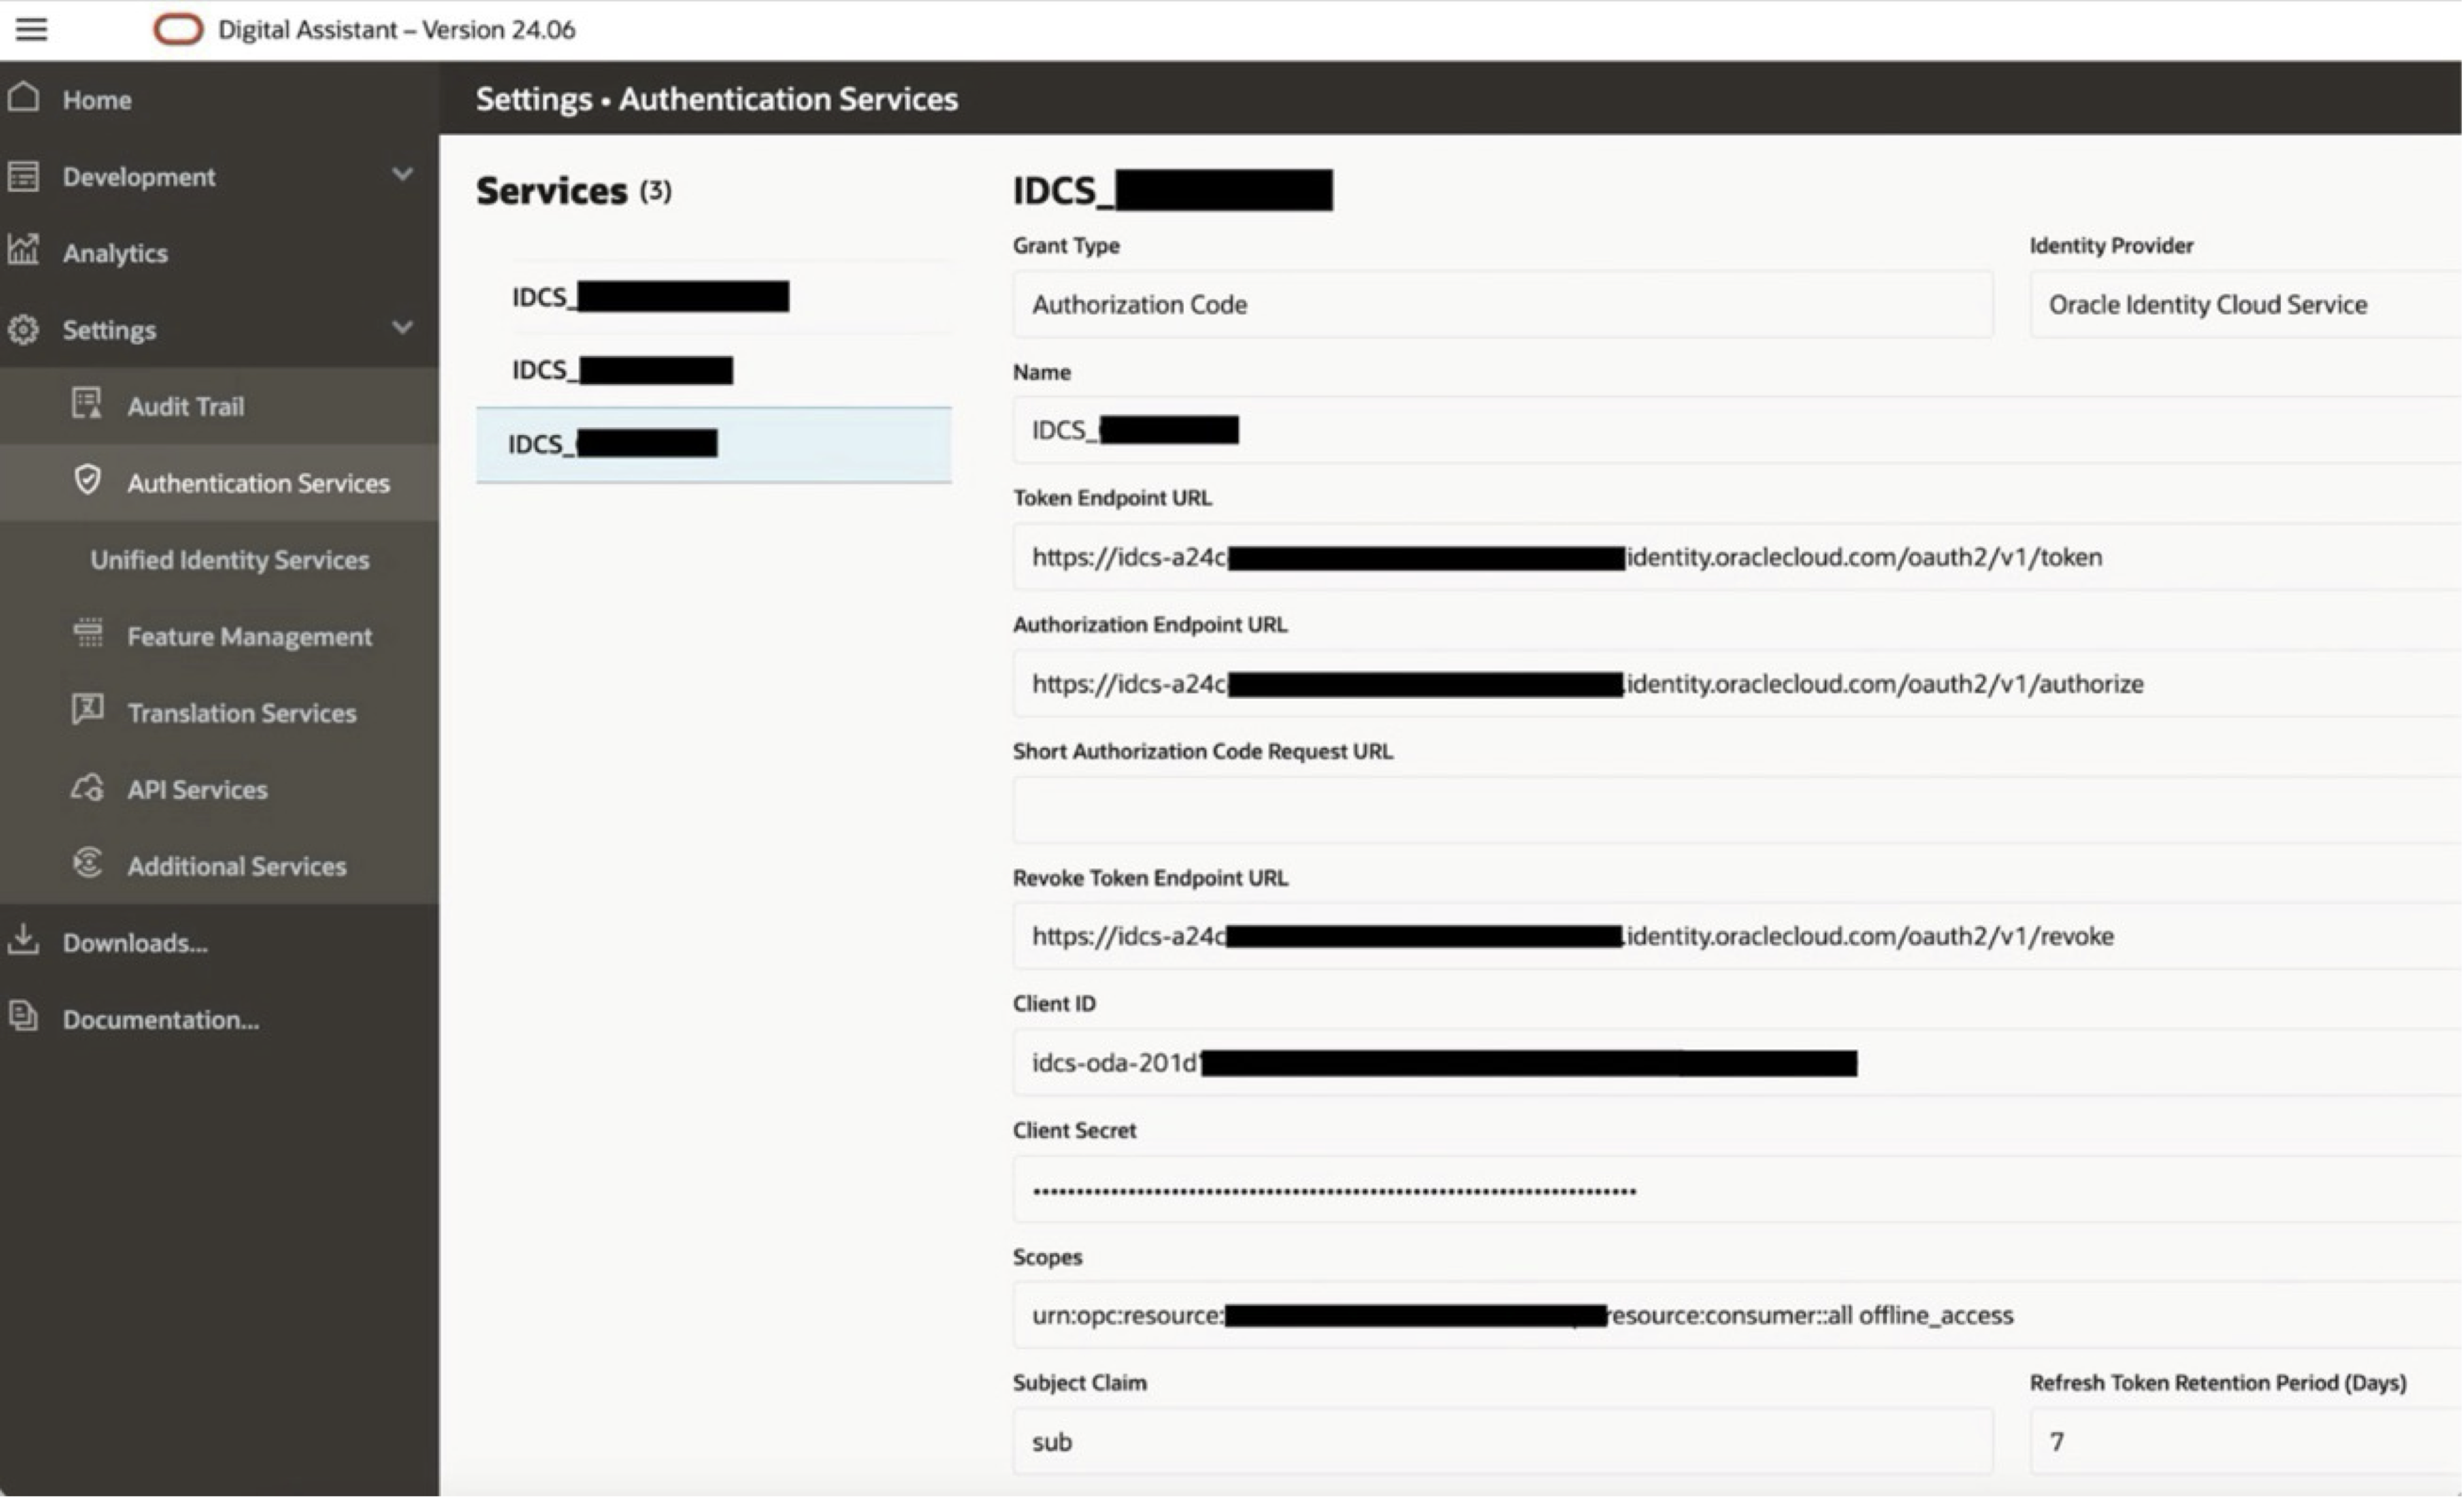
To create an Authorization Code Service using the ODA Console, go to Settings and Authentication Services. For more information, see Add an Authorization Code Service.
Task 2: Configure the Oracle Digital Assistant (ODA) Skill
-
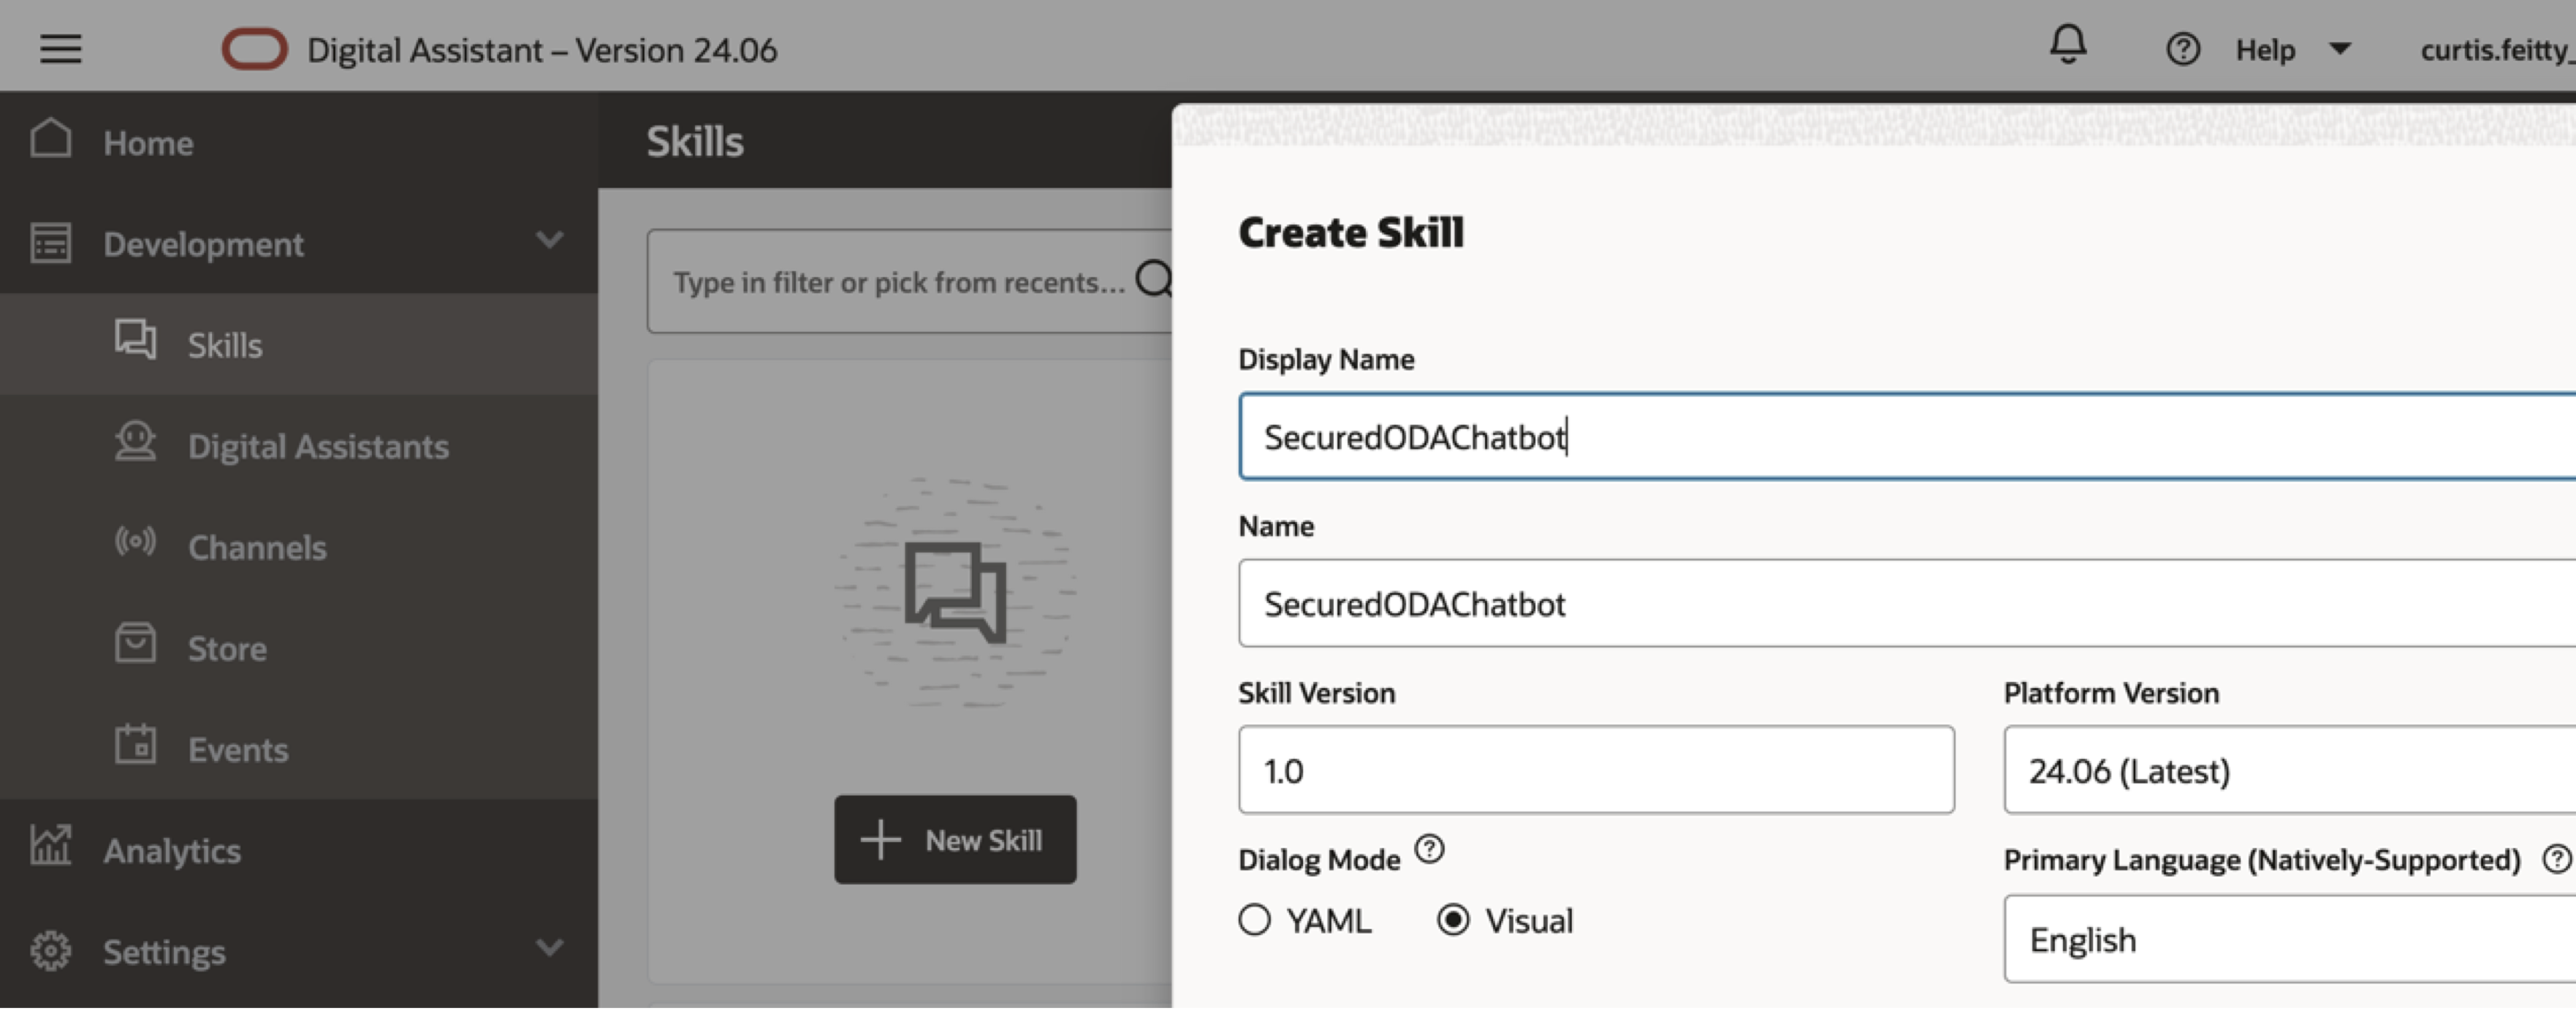
Create a new ODA skill using the ODA Console. For more information, refer to the ODA LiveLabs Conversational AI in Minutes (No Developer Experience Required).
It covers creation of ODA skills, including defining the intents, utterances, entities and designing the visual dialog flow and validation, debugging and testing the skill.
-
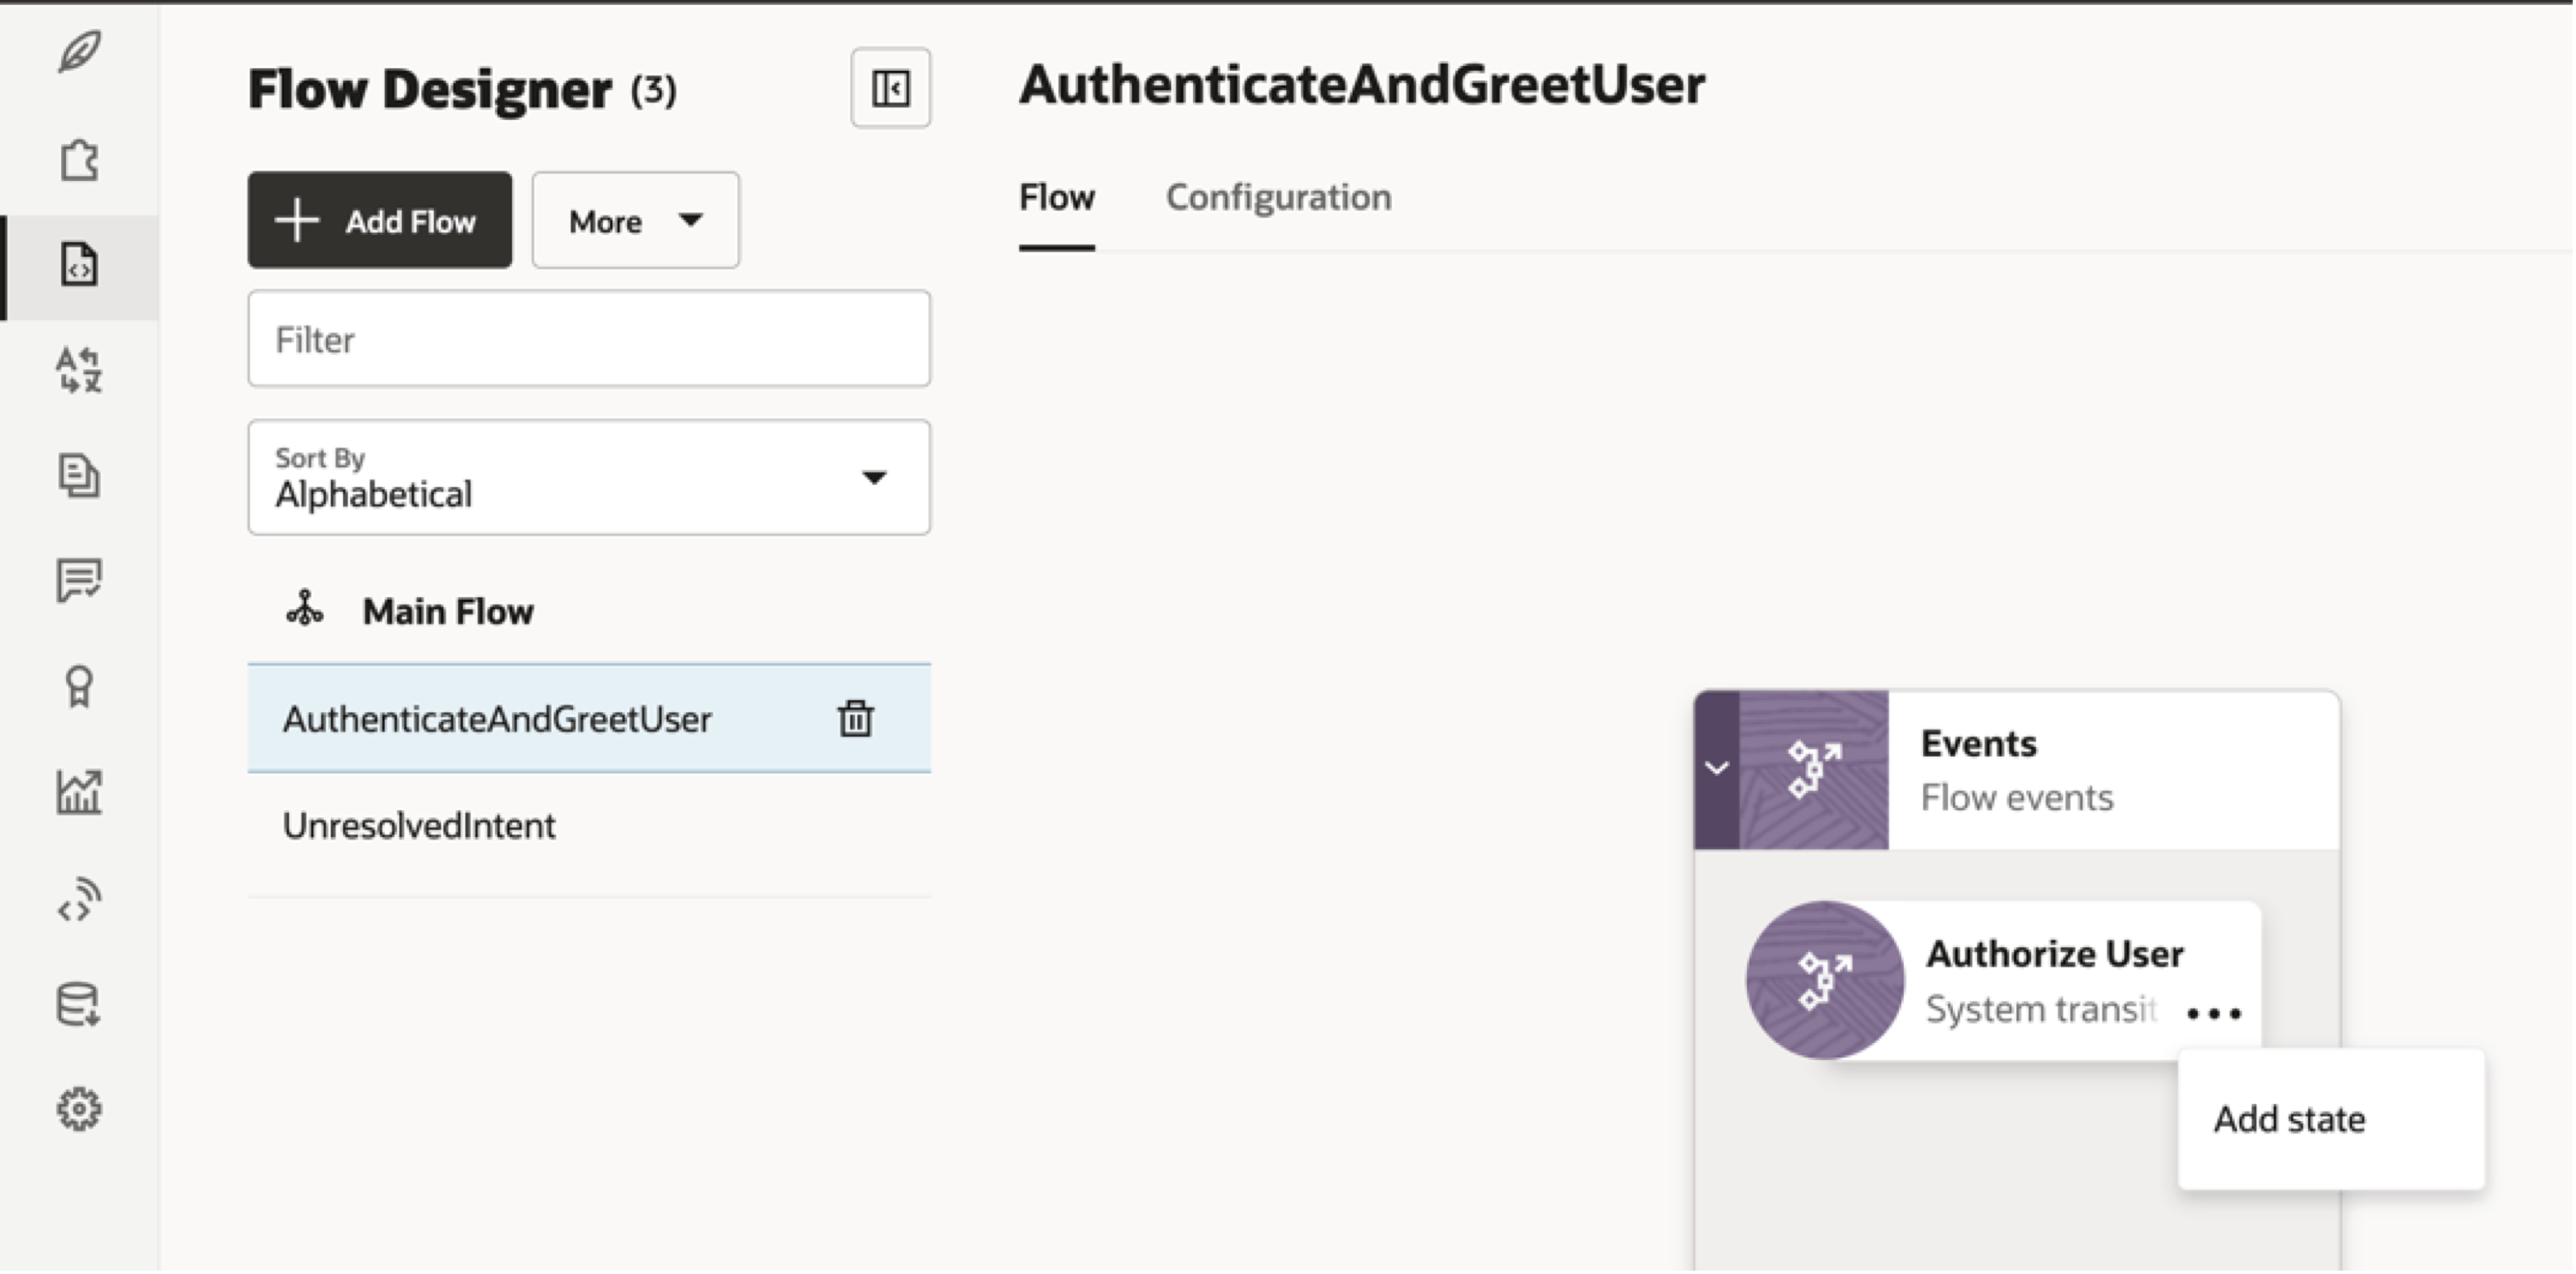
In the ODA Visual Dialog Flow (where you want to enable authentication), double-click Events and click Authorize User and Add State.
-
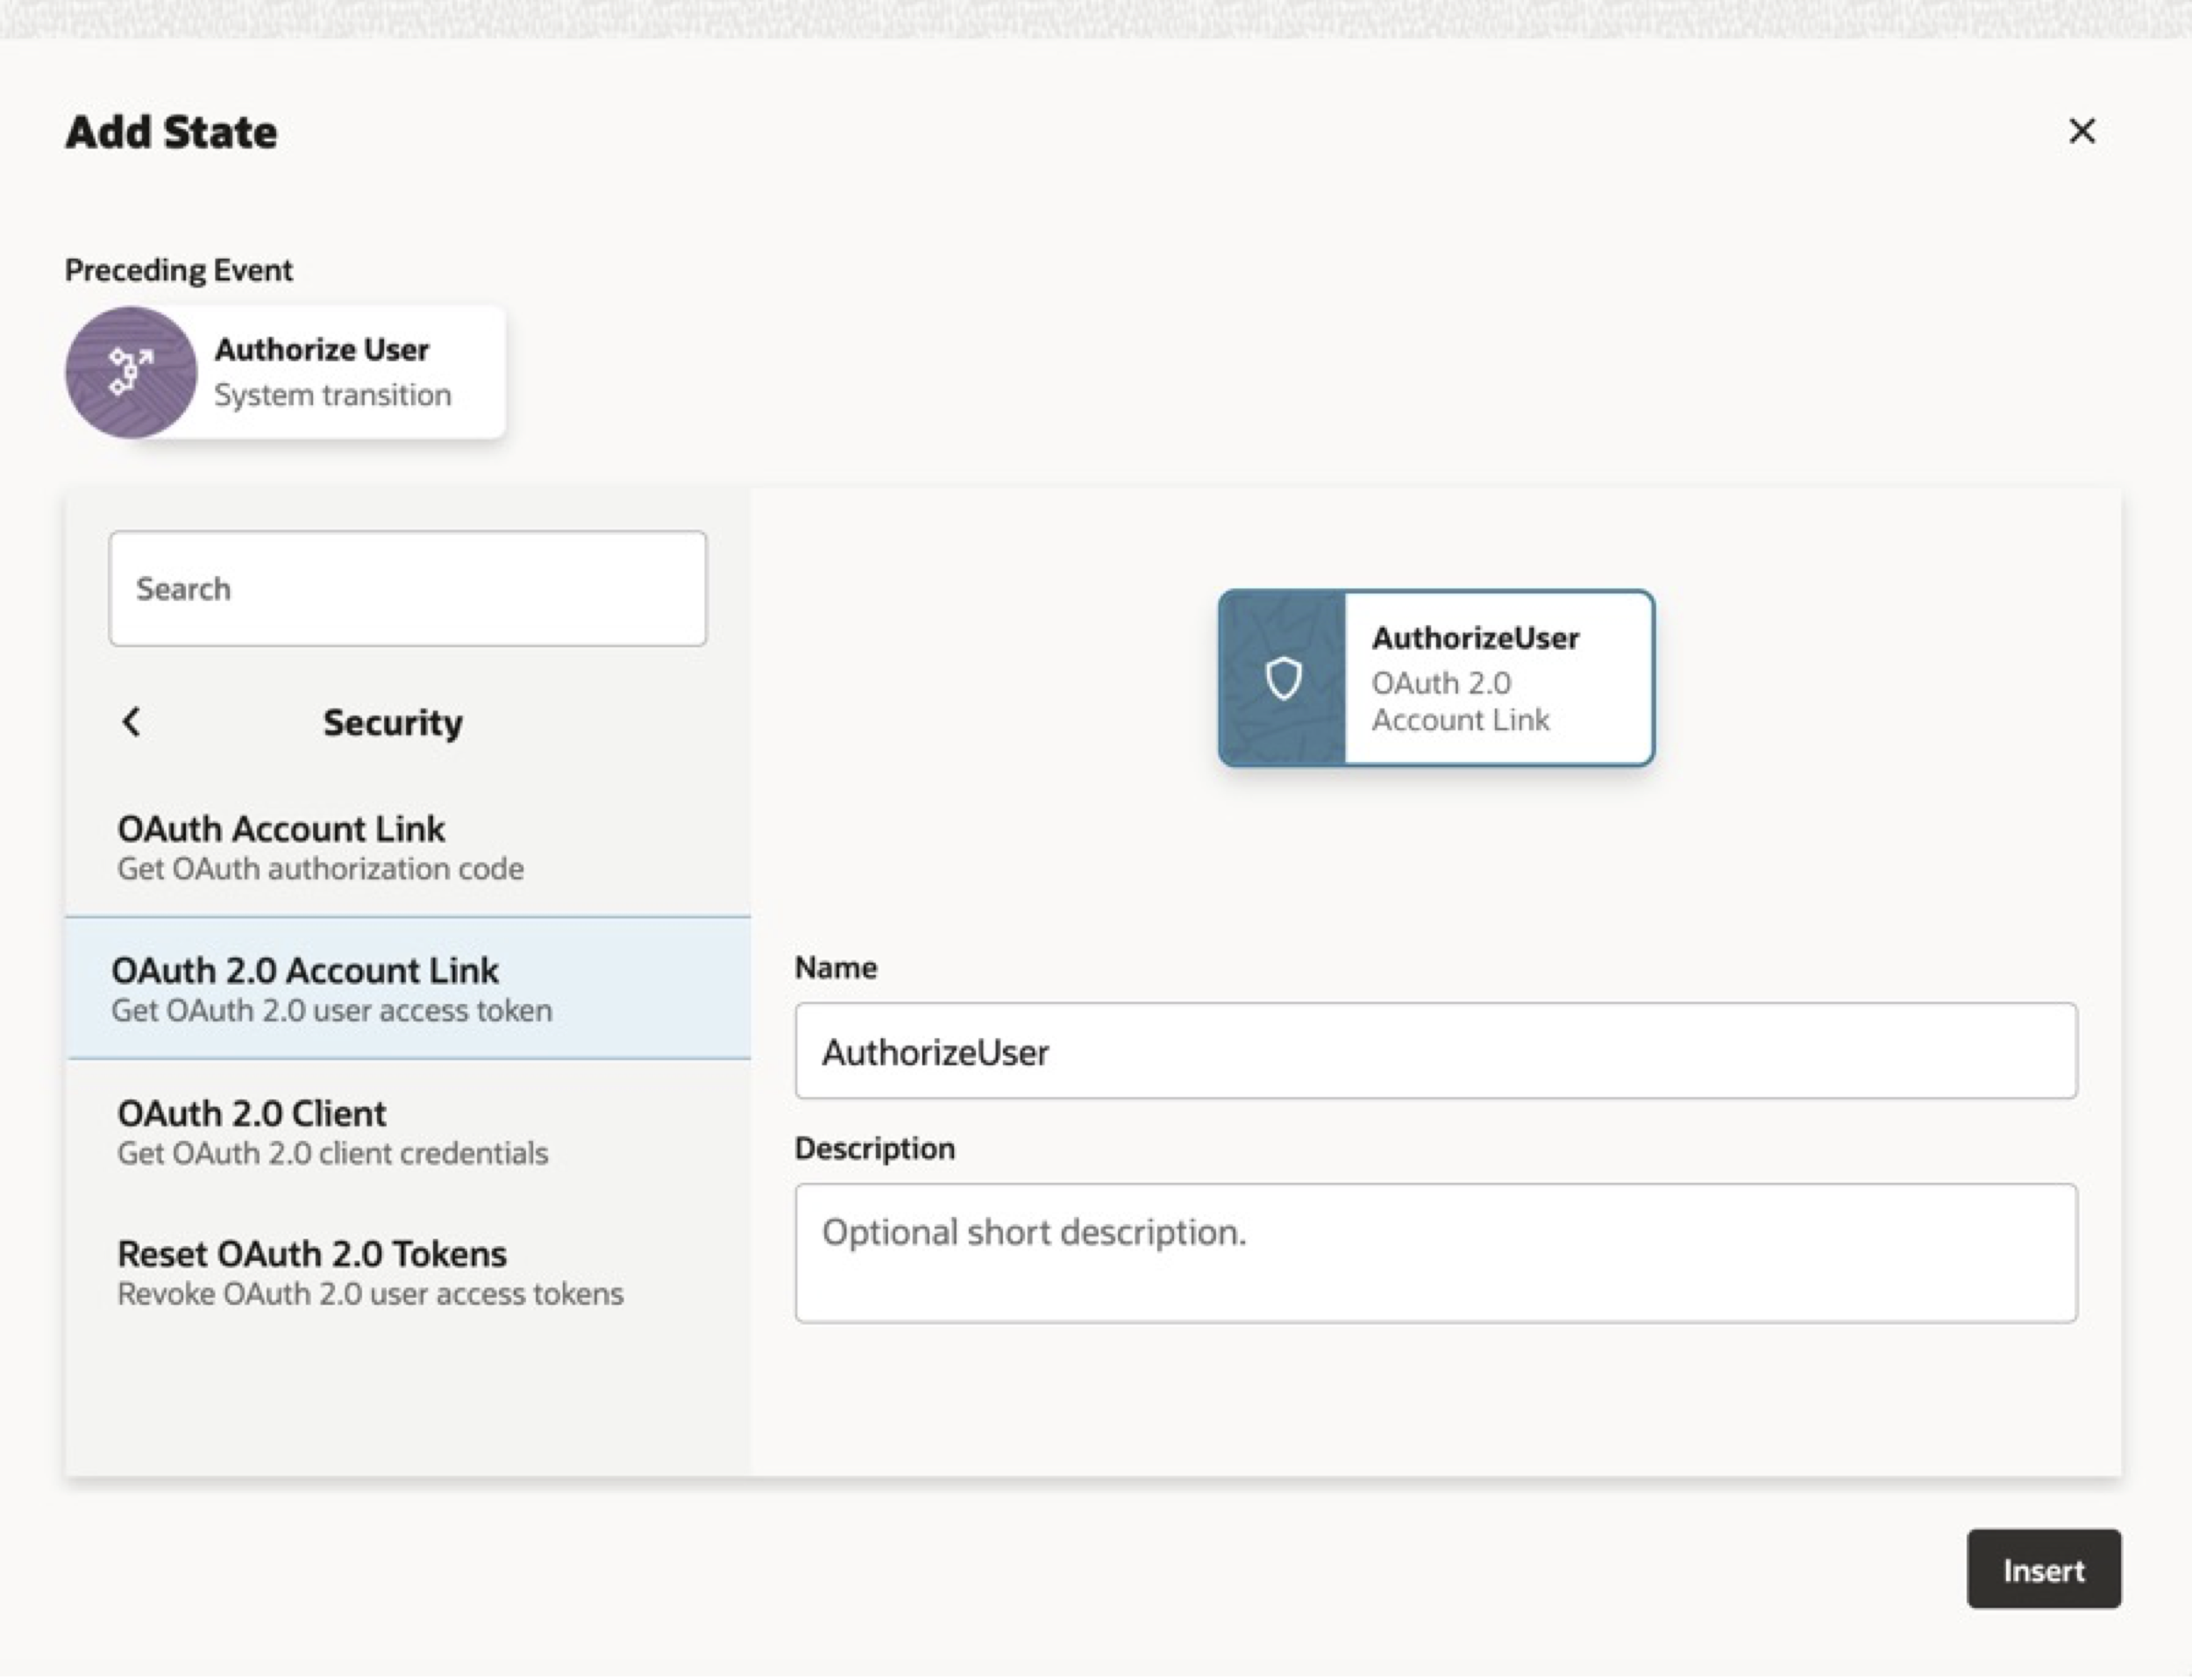
Select Security and OAuth 2.0 Account Link component, while adding new state.
-
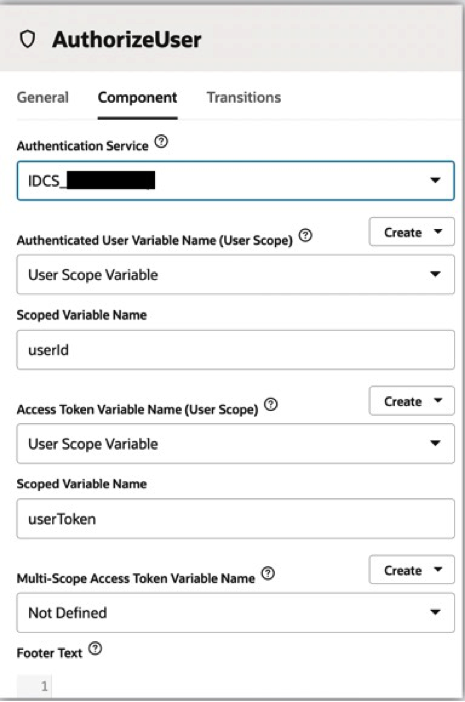
Configure the OAuth 2.0 Account Link component. Select the Authorization Code Service created in Task 1 from the drop-down menu, and save the authenticate user and access token in appropriate variables.
-
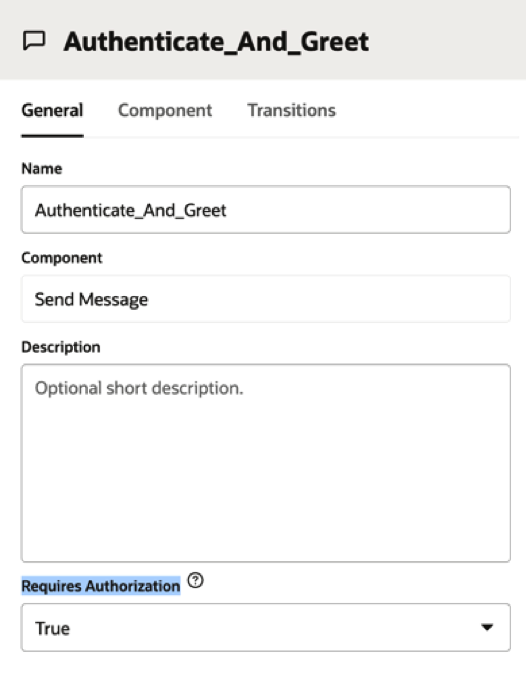
In the ODA Visual Dialog Flow, for the state where you what to enable authorization, set Requires Authorization to True in the General tab.
-
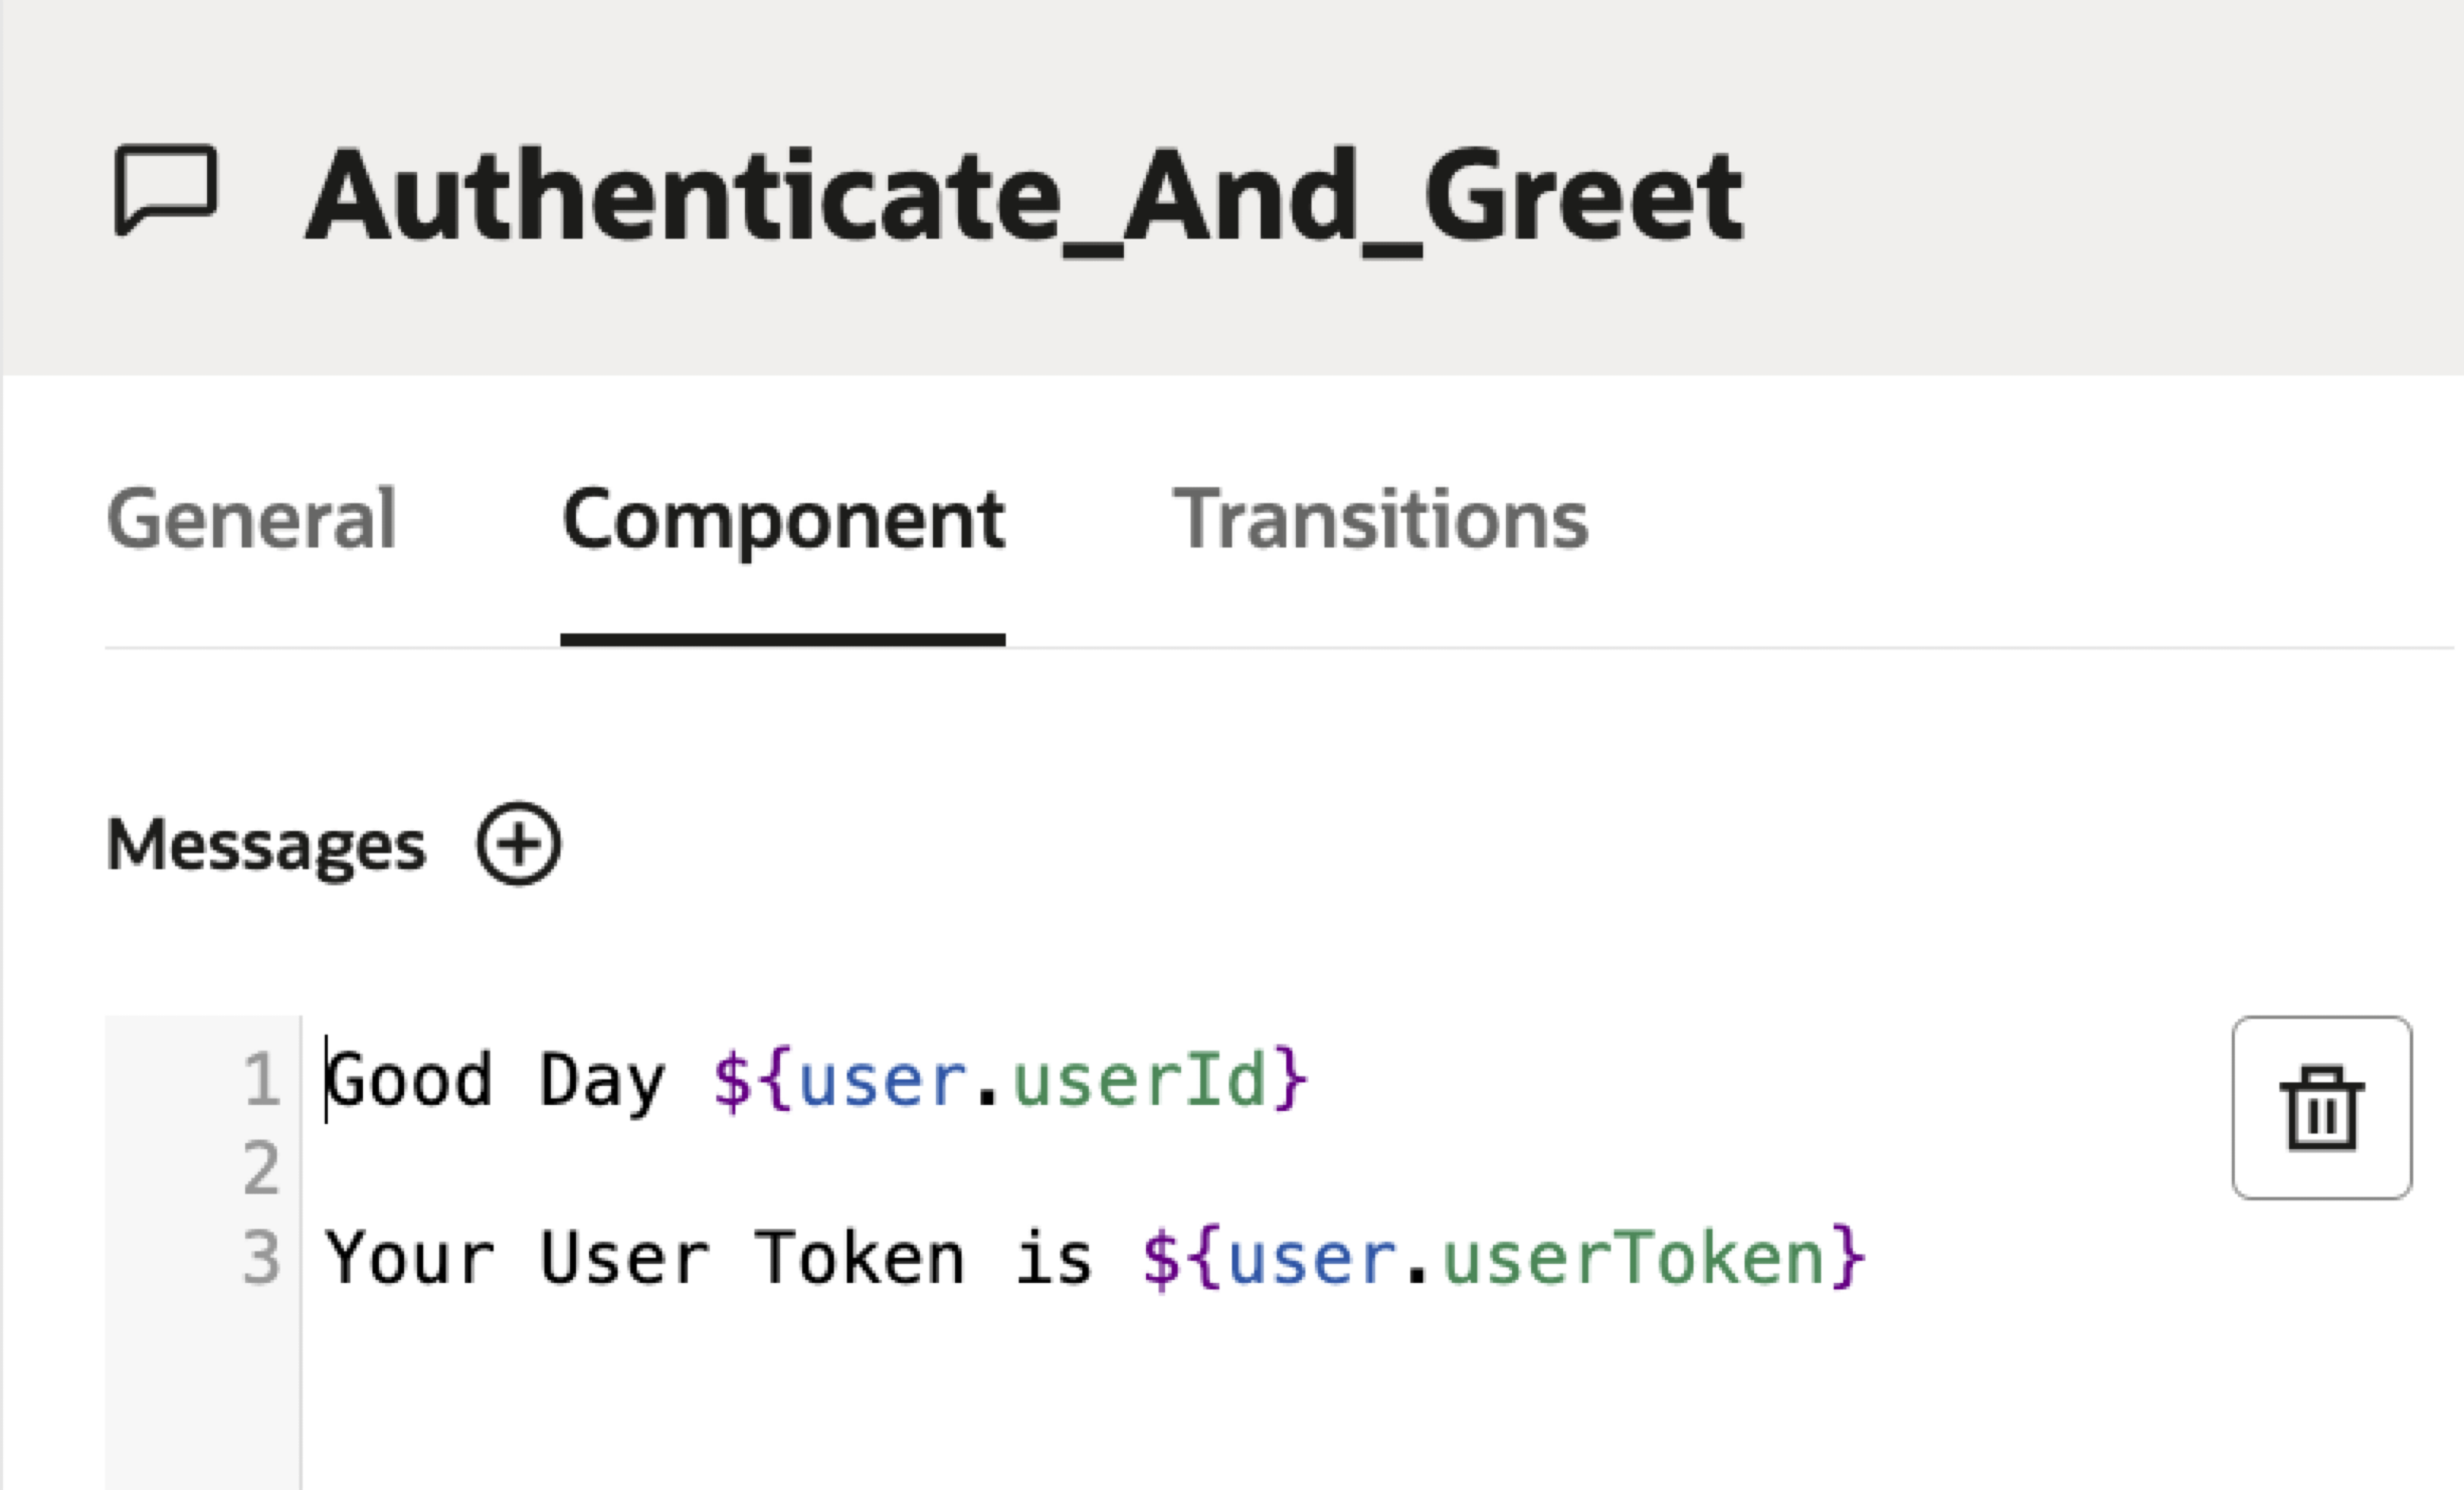
Print the User ID and the User Token of the authenticated user, in the Component tab.
This User ID and the User Token can be passed to other ODA components, and used to invoke authenticated APIs.
Task 3: Test the Secured Oracle Digital Assistant Chatbot
-
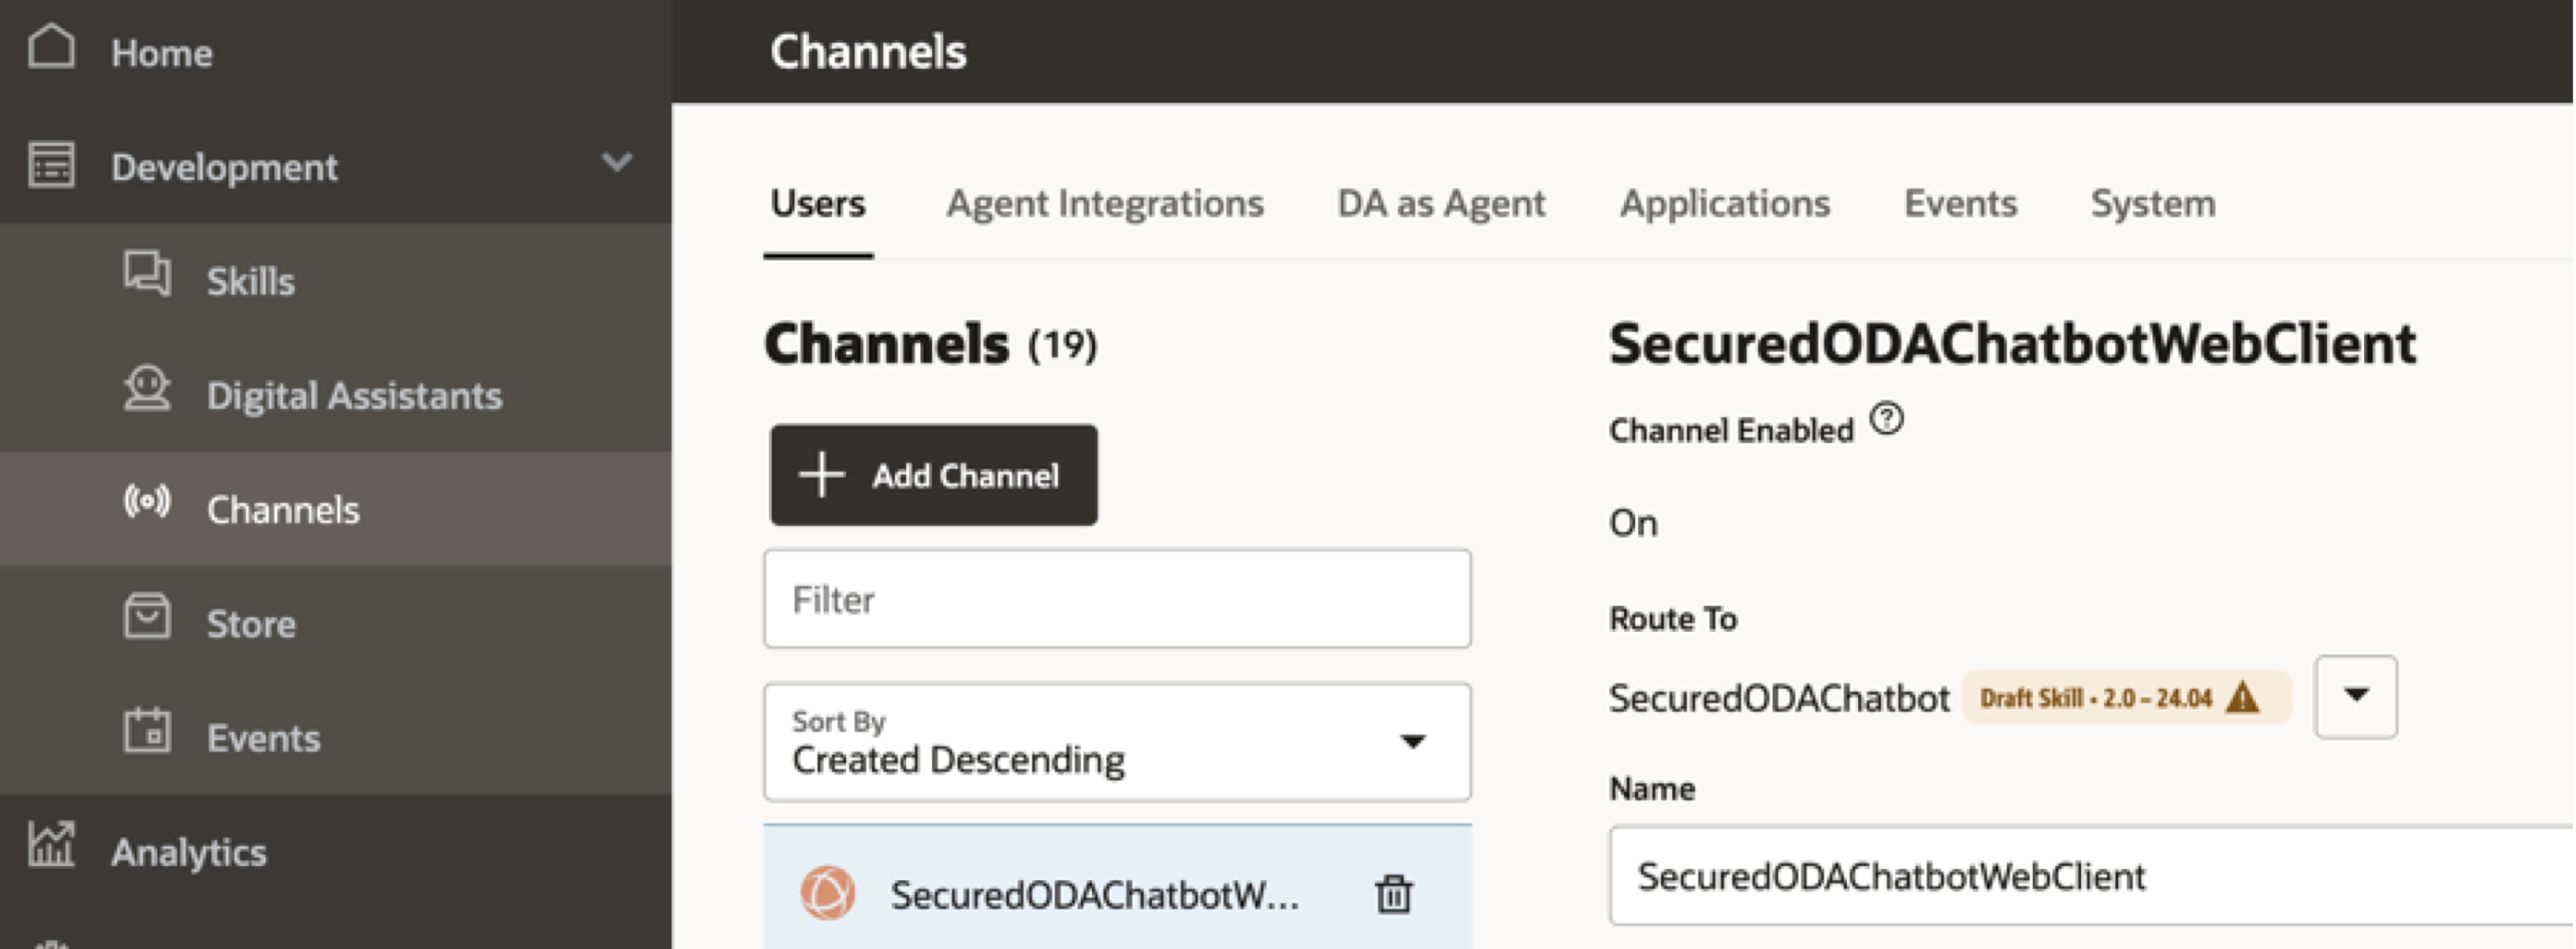
Create the appropriate channel for the ODA skill, to expose it to your users. This channel details can be used to embed the ODA chatbot in the respective channel.
-
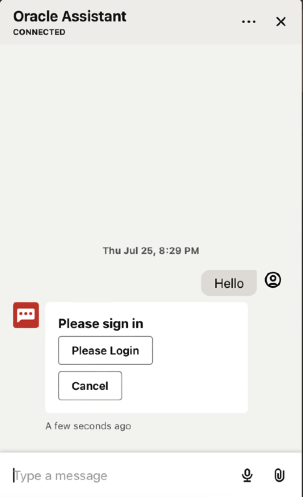
Open the ODA chatbot in the channel, it will ask you to log in.
-
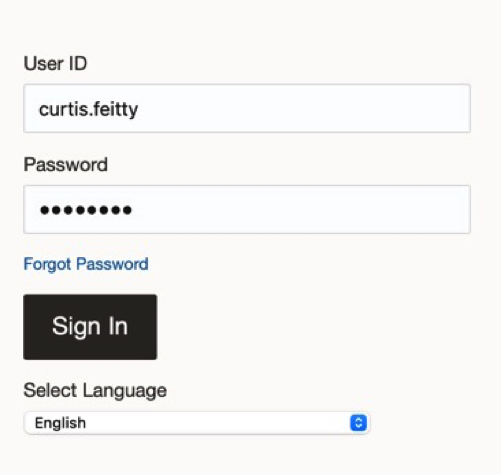
Click Please Login, it will open up the log in screen in a new window. You can use your credentials to log in.
-
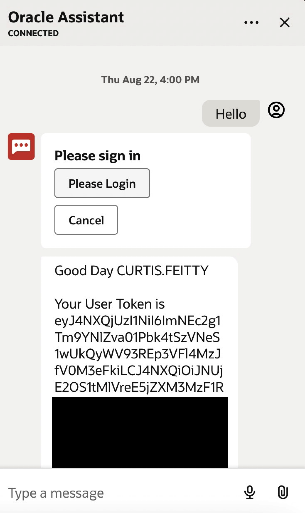
Once you are successfully logged in, the User ID and User Token can be displayed. This User ID and the User Token can be passed to other ODA components, and used to invoke authenticated APIs.
Related Links
Acknowledgments
- Author - Kaushik Kundu, Master Principal Cloud Architect
More Learning Resources
Explore other labs on docs.oracle.com/learn or access more free learning content on the Oracle Learning YouTube channel. Additionally, visit education.oracle.com/learning-explorer to become an Oracle Learning Explorer.
For product documentation, visit Oracle Help Center.
Secure Oracle Digital Assistant Chatbot with Oracle Identity Cloud Service
G13631-01
August 2024