Note:
- This tutorial requires access to Oracle Cloud. To sign up for a free account, see Get started with Oracle Cloud Infrastructure Free Tier.
- It uses example values for Oracle Cloud Infrastructure credentials, tenancy, and compartments. When completing your lab, substitute these values with ones specific to your cloud environment.
Use OCI Data Flow with Apache Spark Streaming to process a Kafka topic in a scalable and near real-time application
Introduction
Oracle Cloud Infrastructure (OCI) Data Flow is a managed service for the open-source project named Apache Spark. Basically, with Spark you can use it for massive processing files, streaming and database operations. You can build applications with very high scalable processing. Spark can scale and use clustered machines to paralellize jobs with minimum configuration.
Using Spark as a managed service (Data Flow), you can add many scalable services to multiply the power of cloud processing. Data Flow has the ability to process Spark Streaming.
Streaming applications require continuous execution for a long period of time that often extends beyond 24 hours, and might be as long as weeks or even months. In case of unexpected failures, streaming applications must restart from the point of failure without producing incorrect computational results. Data Flow relies on Spark structured streaming check-pointing to record the processed offset which can be stored in your Object Storage bucket.
Note: If you need to process data as a batch strategy, you can read this article: Process large files in Autonomous Database and Kafka with Oracle Cloud Infrastructure Data Flow
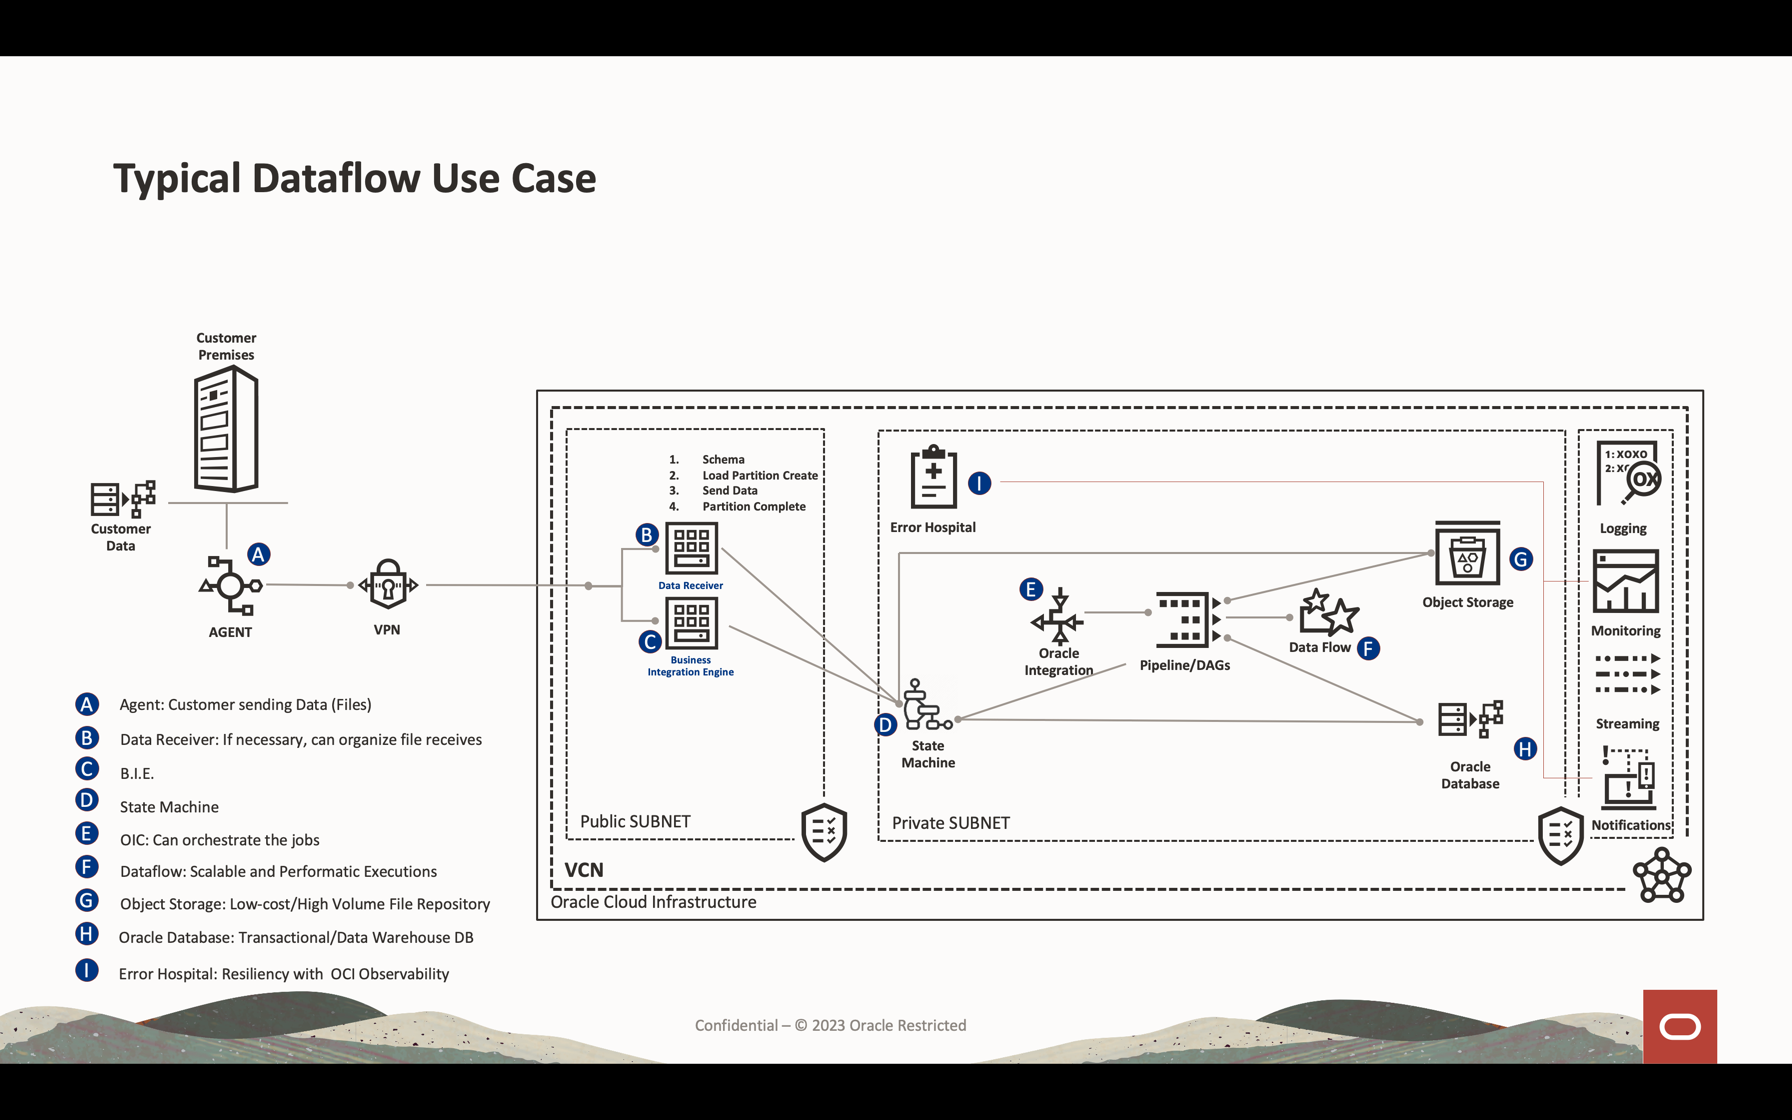
In this tutorial, you can see the most common activities used to process data volume streaming, querying database and merge/join the data to form another table in memory or send data to any destination near real-time. You can write this massive data into your database and in a Kafka queue with very low-cost and highly effective performance.
Objectives
- Learn how Data Flow can be used to process a large amount of data in a scalable and near real-time application.
Prerequisites
-
An operational Oracle Cloud tenant: You can create a free Oracle Cloud account with US$ 300.00 for a month to try this tutorial. See Create a Free Oracle Cloud Account
-
OCI CLI (Oracle Cloud Command Line Interface) installed on your local machine: This is the link to install the OCI CLI.
-
An Apache Spark application installed in your local machine. Review Develop Oracle Cloud Infrastructure Data Flow Applications Locally, Deploy to The Cloud to understand how to develop locally and in Data Flow.
Note: This is the official page to install: Apache Spark. There are alternative procedures to install Apache Spark for each type of Operational System (Linux/Mac OS/Windows).
-
Spark Submit CLI installed. This is the link to install Spark Submit CLI.
-
Maven installed in your local machine.
-
Knowledge of OCI Concepts:
- Compartments
- IAM Policies
- Tenancy
- OCID of your resources
Task 1: Create the Object Storage structure
The Object Storage will be used as a default file repository. You can use other type of file repositories, but Object Storage is a simple and low-cost way to manipulate files with performance. In this tutorial, both applications will load a large CSV file from the object storage, showing how Apache Spark is fast and smart to process a high volume of data.
-
Create a compartment: Compartments are important to organize and isolate your cloud resources. You can isolate your resources by IAM Policies.
-
You can use this link to understand and setup the policies for compartments: Managing Compartments
-
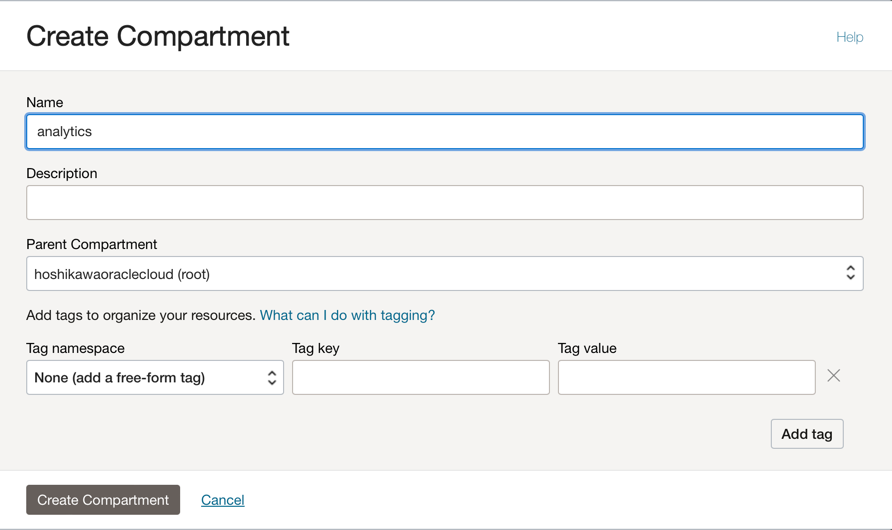
Create one compartment to host all resources of the 2 applications in this tutorial. Create a compartment named analytics.
-
Go to the Oracle Cloud main menu and search for: Identity & Security, Compartments. In the Compartments section, click Create Compartment and enter the name.
Note: You need to give the access to a group of users and include your user.
-
Click Create Compartment to include your compartment.
-
-
Create your bucket in the Object Storage: Buckets are logical containers for storing objects, so all files used for this demo will be stored in this bucket.
-
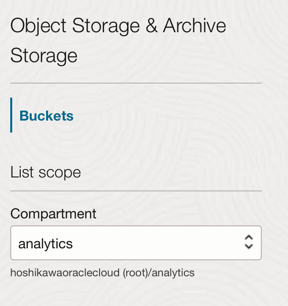
Go to the Oracle Cloud main menu and search for Storage and Buckets. In the Buckets section, select your compartment (analytics), created previously.
-
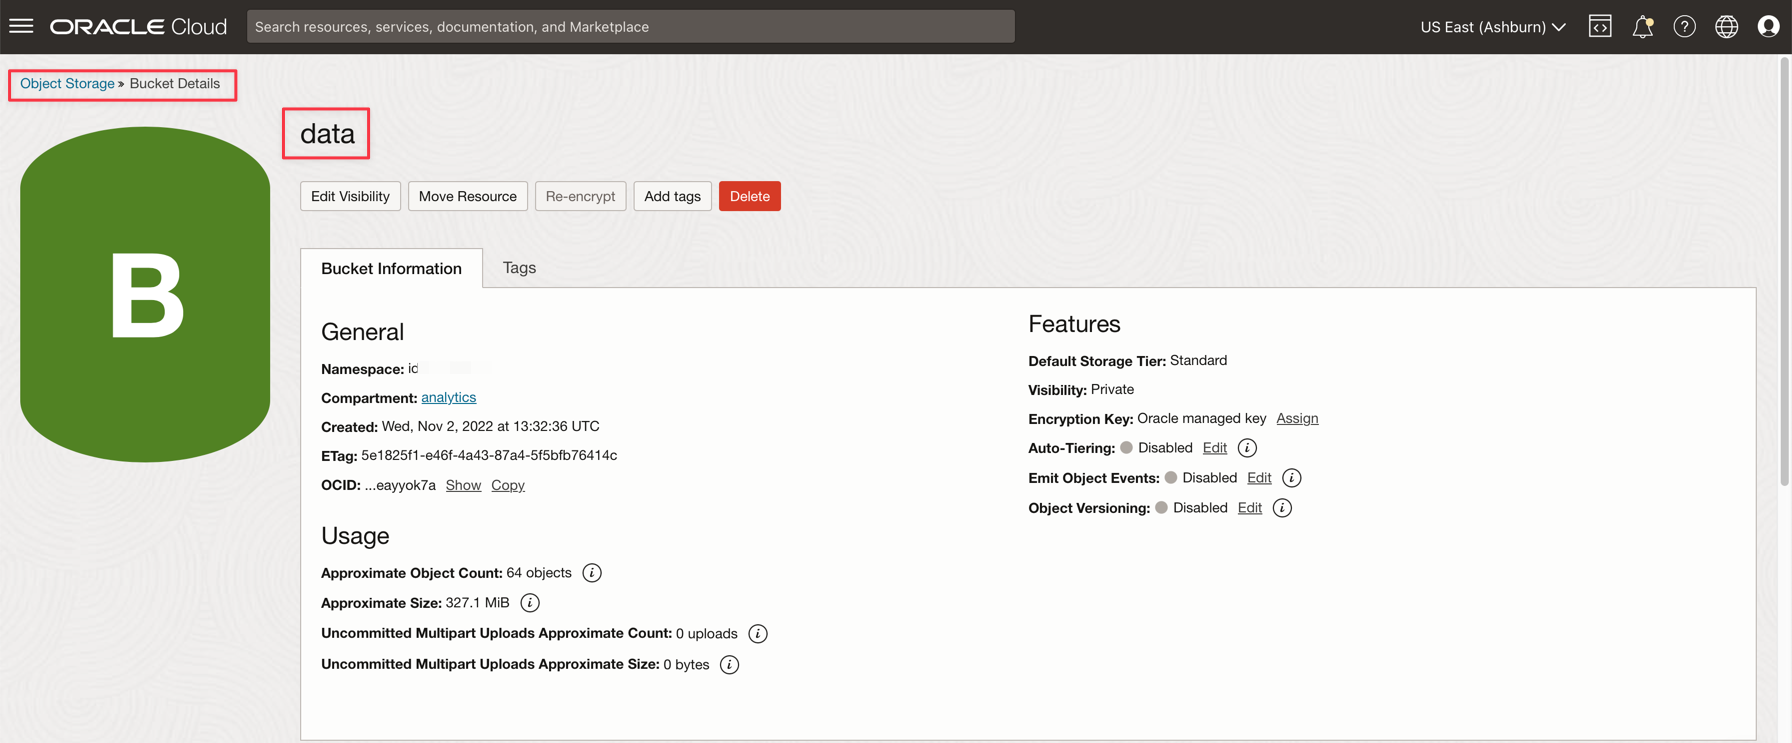
Click Create Bucket. Create 4 buckets: apps, data, dataflow-logs, Wallet

-
Enter the Bucket Name information with these 4 buckets and maintain the other parameters with the default selection.
-
For each bucket, click Create. You can see your buckets created.

-
Note: Review the IAM Policies for the bucket. You must set up the policies if you want to use these buckets in your demo applications. You can review the concepts and setup here Overview of Object Storage and IAM Policies.
Task 2: Create the Autonomous Database
Oracle Cloud Autonomous Database is a managed service for the Oracle Database. For this tutorial, the applications will connect to the database through a Wallet for security reasons.
-
Instantiate the Autonomous Database as described here: Provision Autonomous Database.
-
From the Oracle Cloud main menu, select the Data Warehouse option, select Oracle Database and Autonomous Data Warehouse; select your compartment analytics and follow the tutorial to create the database instance.
-
Name your instance Processed Logs, choose logs as the database name and you don’t need to change any code in the applications.
-
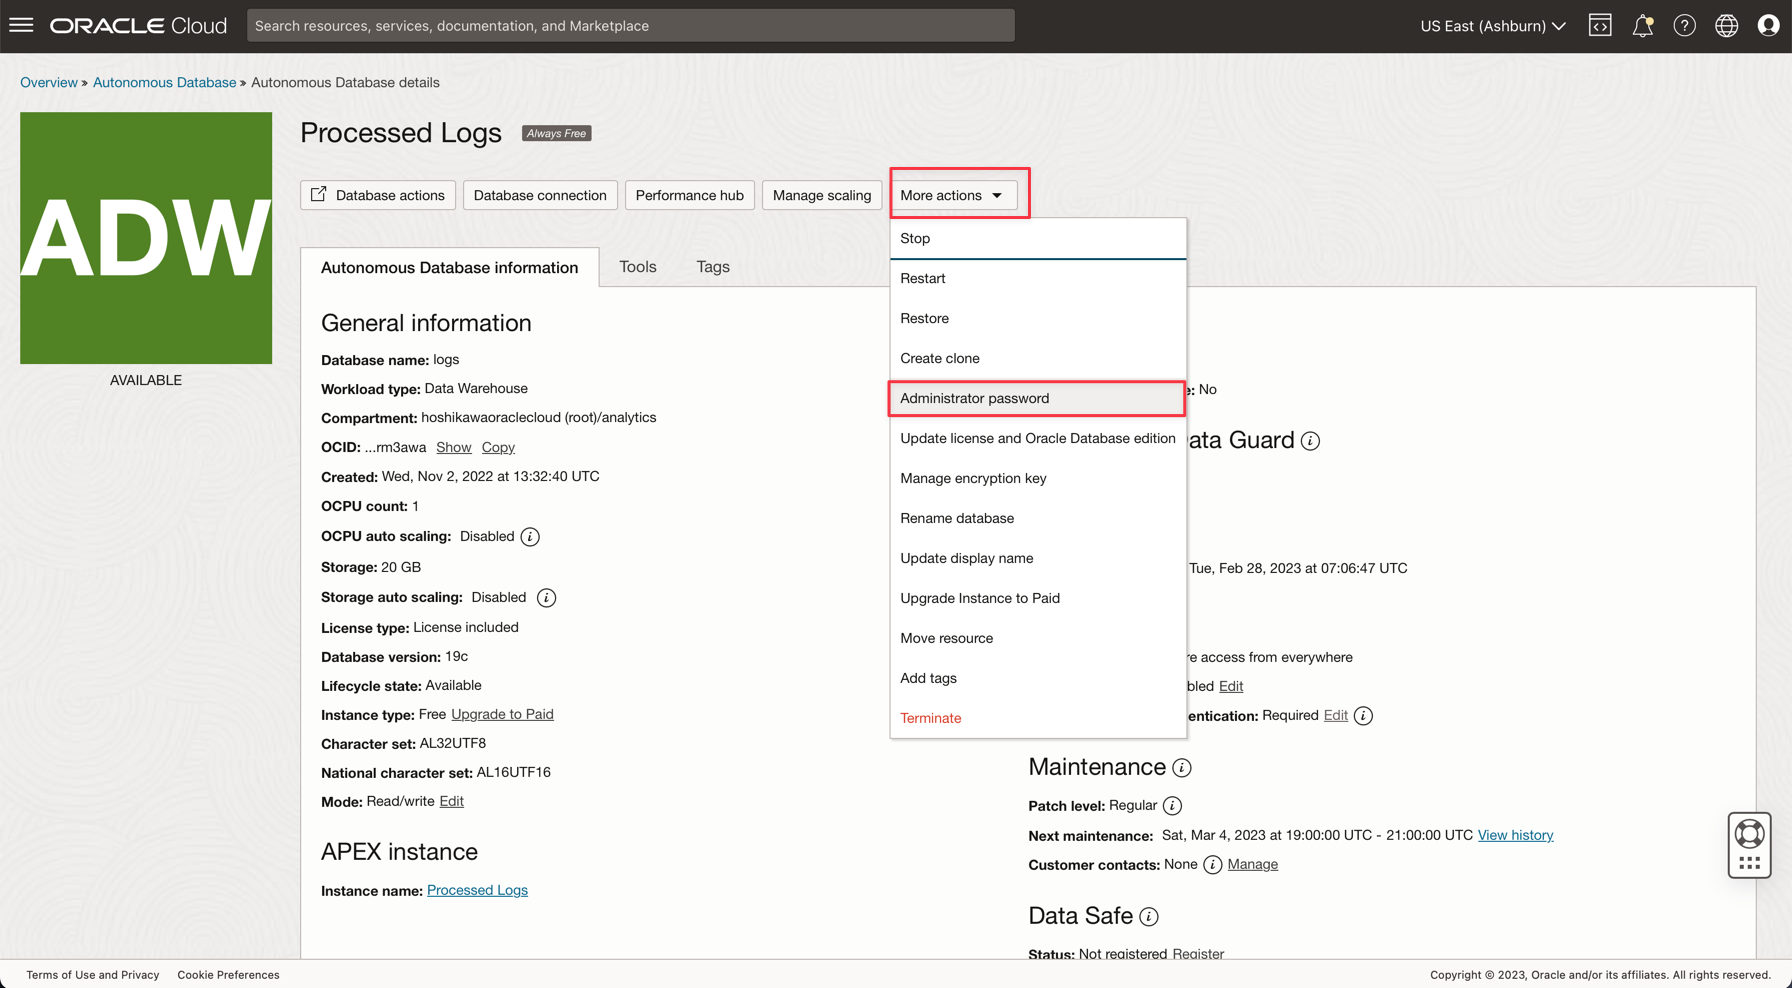
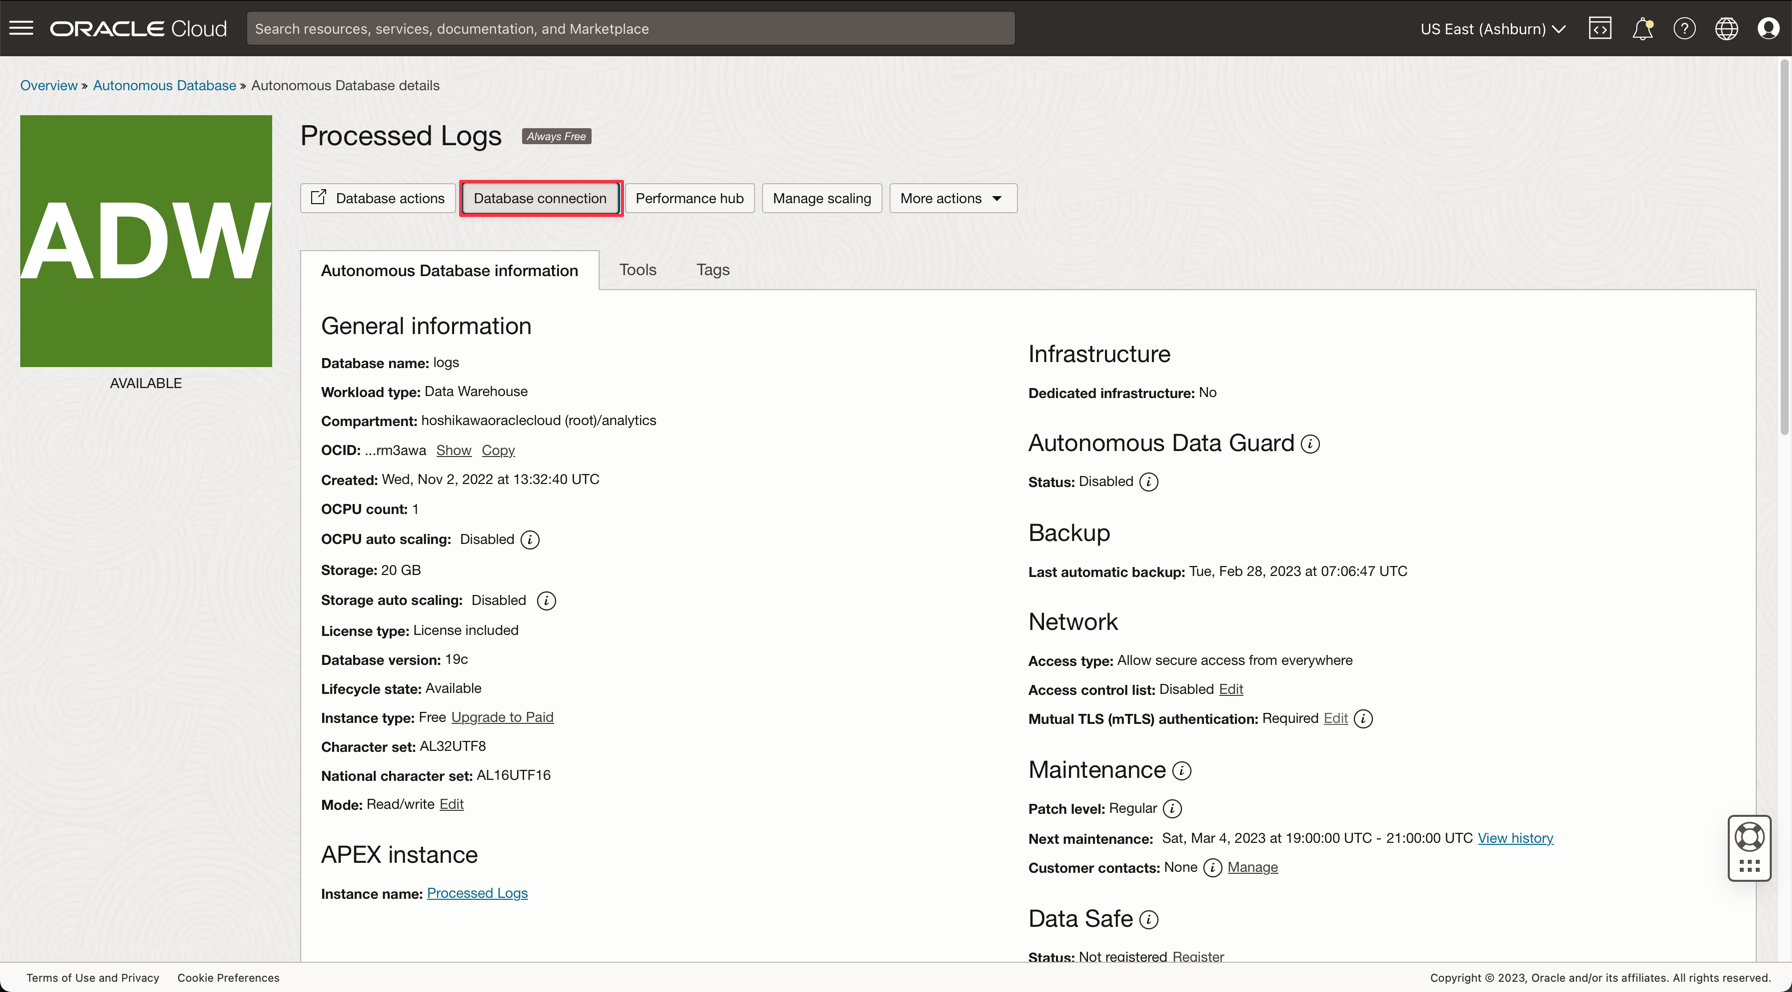
Enter the ADMIN password and download the Wallet zip file.
-
After creating the database, you can setup the ADMIN user password and download the Wallet zip file.
-
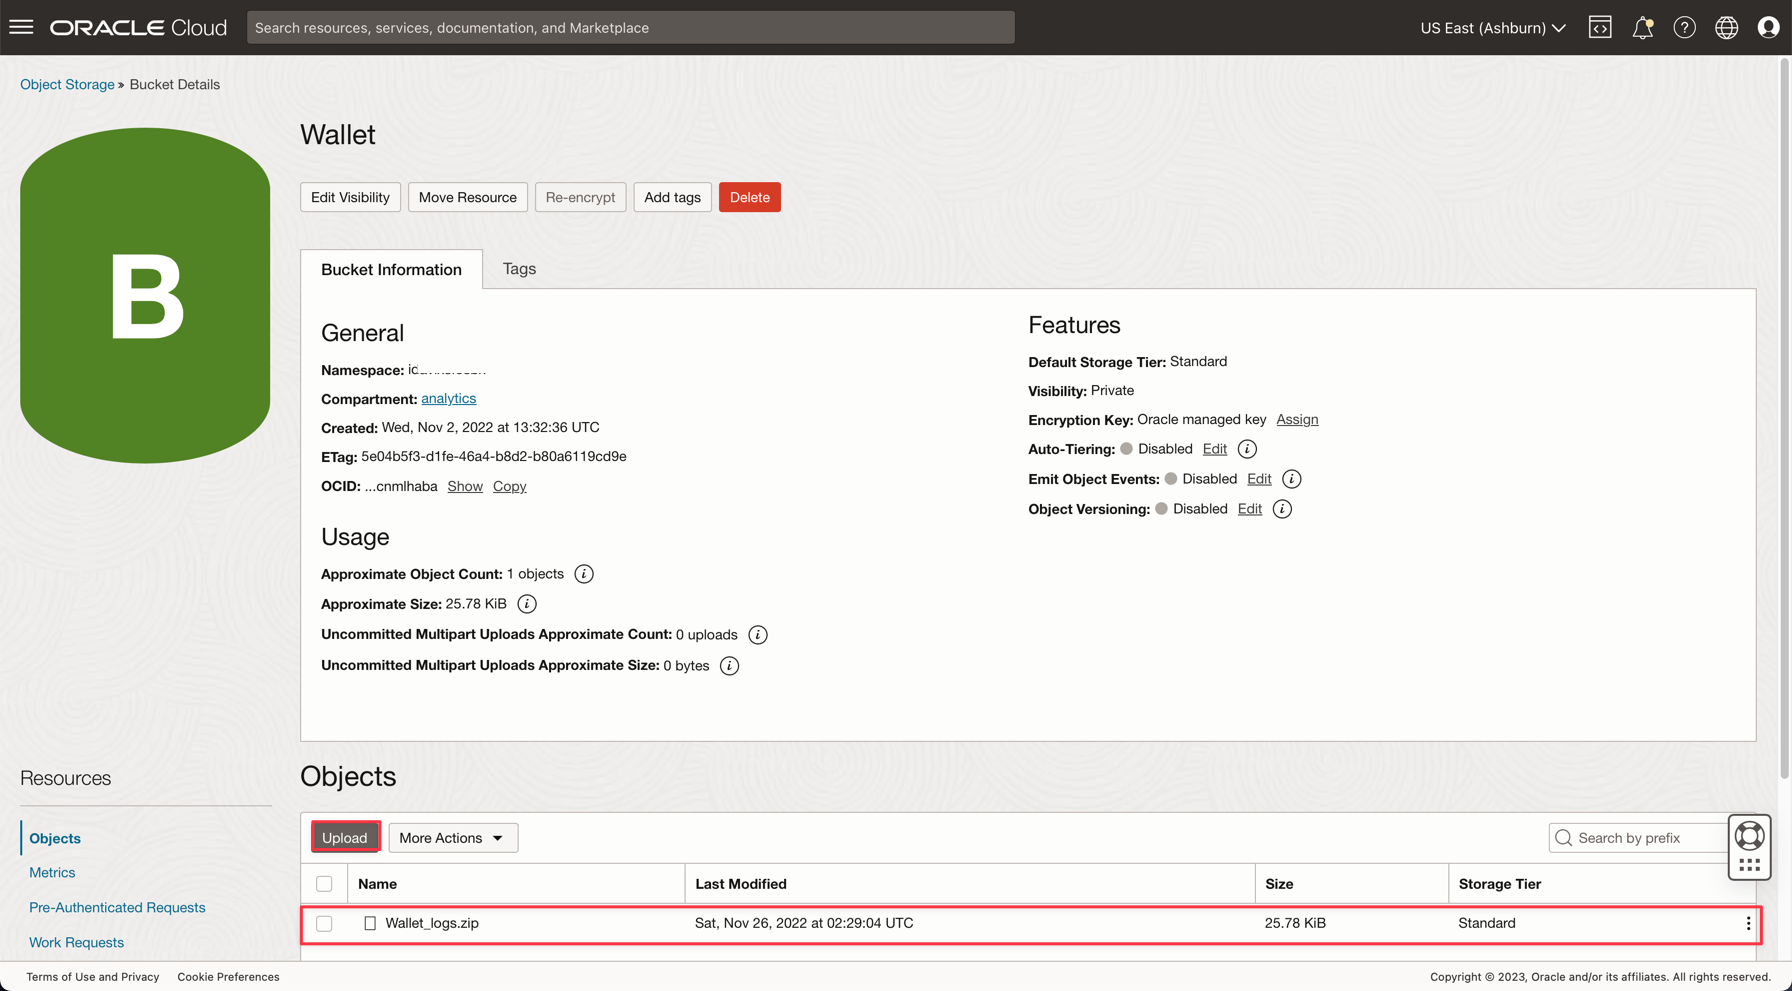
Save your Wallet zip file (
Wallet_logs.zip) and annotate your ADMIN password, you will need to setup the application code. -
Go to Storage, Buckets. Change to analytics compartment and you will see the Wallet bucket. Click on it.
-
To upload your Wallet zip file, just click Upload and attach the Wallet_logs.zip file.
Note: Review IAM Policies for accessing the Autonomous Database here: IAM Policy for Autonomous Database
Task 3: Upload the CSV Sample Files
To demonstrate the power of Apache Spark, the applications will read a CSV file with 1,000,000 lines. This data will be inserted in the Autonomous Data Warehouse database with just one command line and published on a Kafka streaming (Oracle Cloud Streaming). All these resources are scalable and perfect for high data volume.
-
Download these 2 links and Upload to the data bucket:
-
Note:
- organizations.csv has only 100 lines, just to test the applications on your local machine.
- organizations1M.csv contains 1,000,000 lines and will be used to run on the Data Flow instance.
-
From the Oracle Cloud main menu, go to Storage and Buckets. Click on the data bucket and upload the 2 files from the previous step.

-
Upload an auxiliary table to ADW Database
-
Download this file to upload to the ADW Database: GDP PER CAPTA COUNTRY.csv
-
From the Oracle Cloud main menu, select Oracle Database and Autonomous Data Warehouse.
-
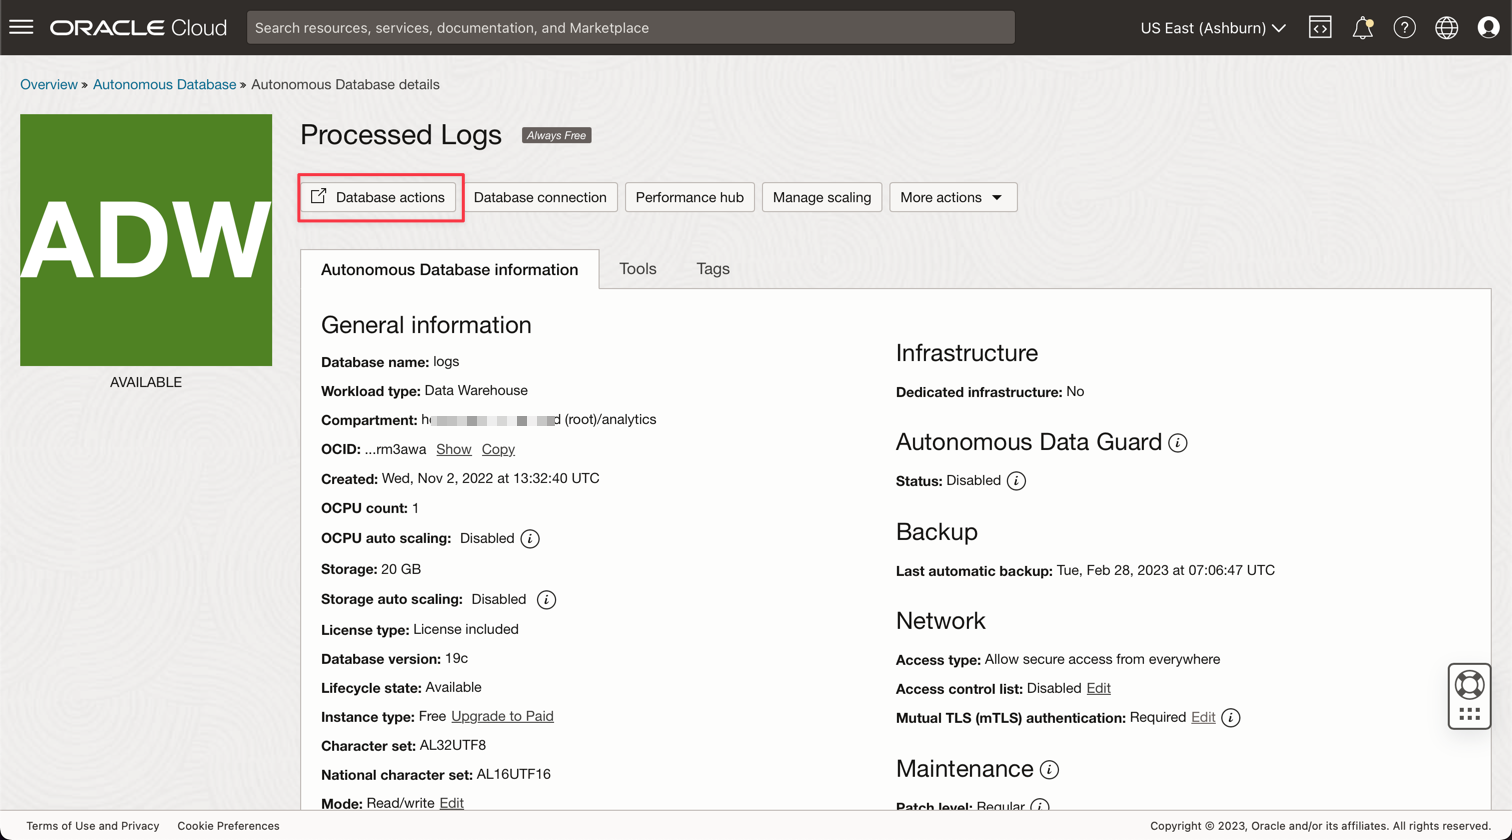
Click on the Processed Logs Instance to view the details.
-
Click Database actions to go to the database utilities.
-
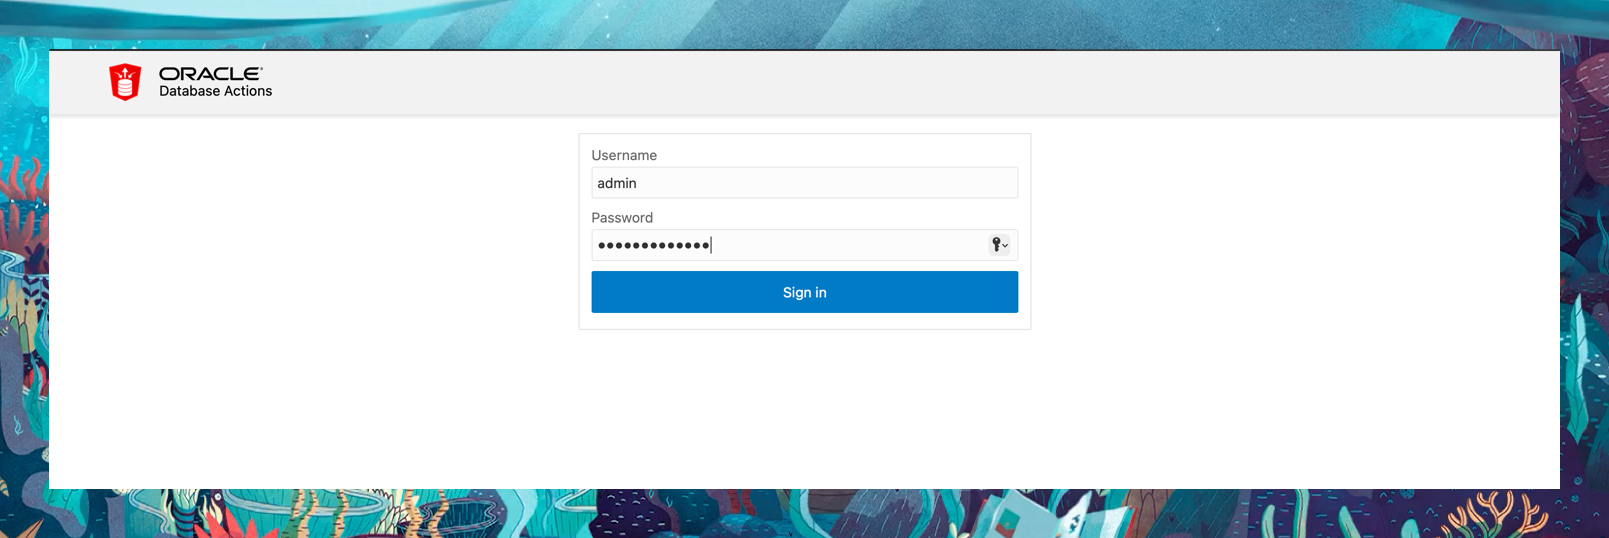
Enter your credentials for the ADMIN user.
-
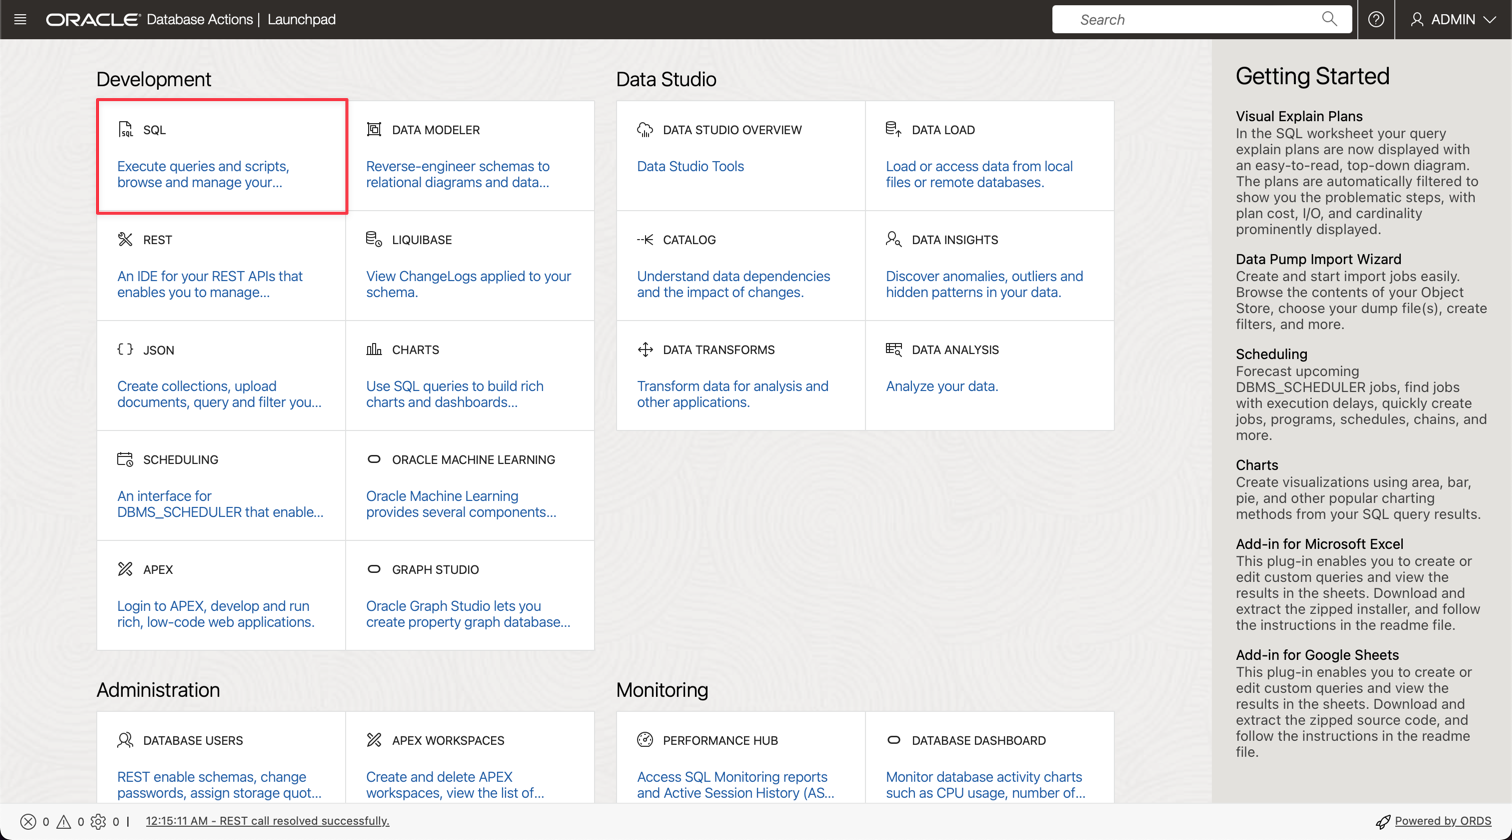
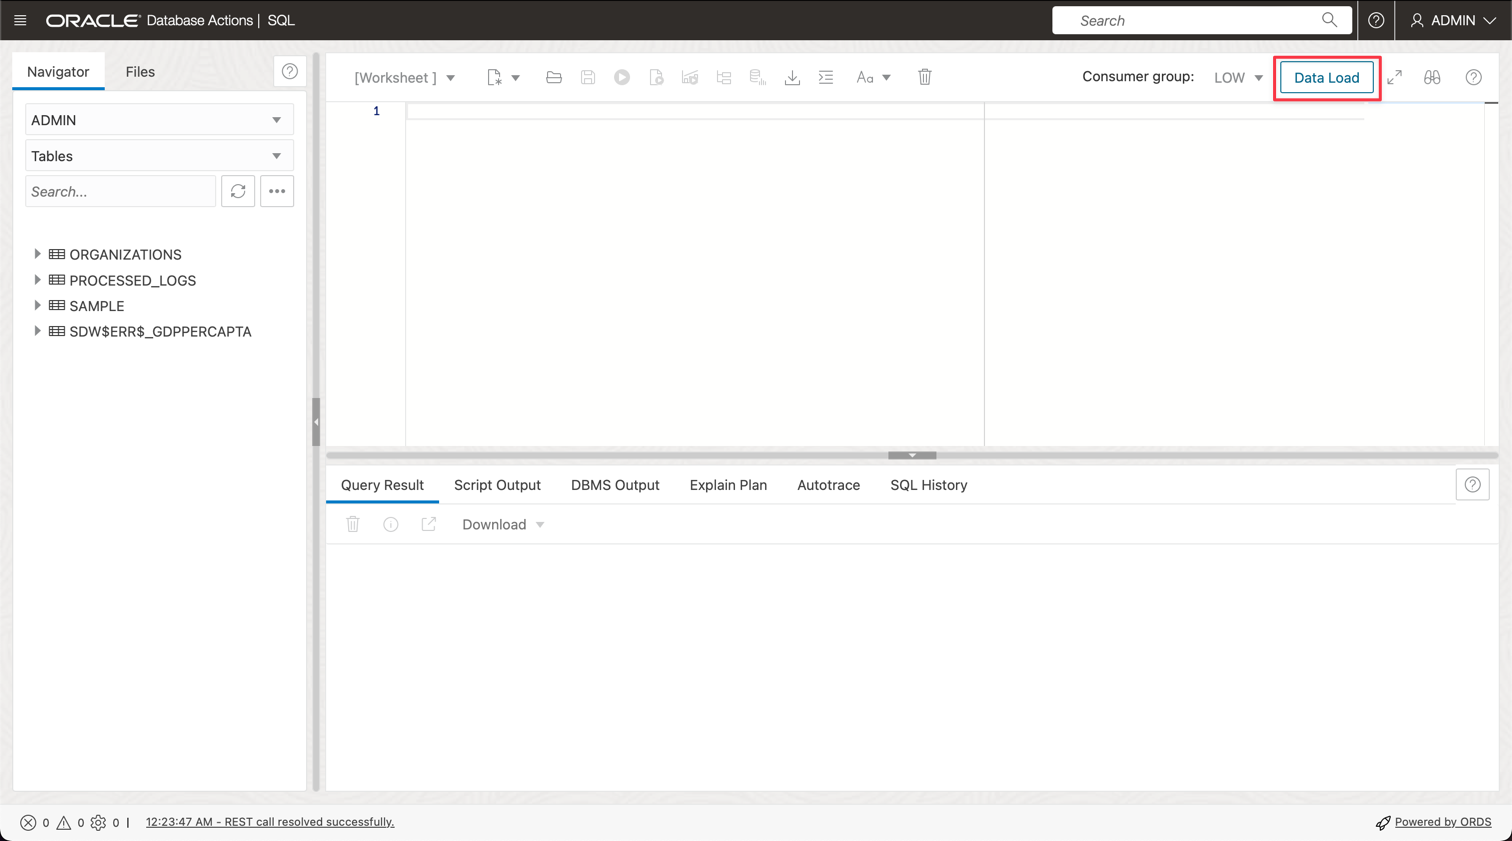
Click on the SQL option to go to the Query Utilities.
-
Click Data Load.
-
Drop the GDP PER CAPTA COUNTRY.csv file into the console panel and proceed to import the data into a table.
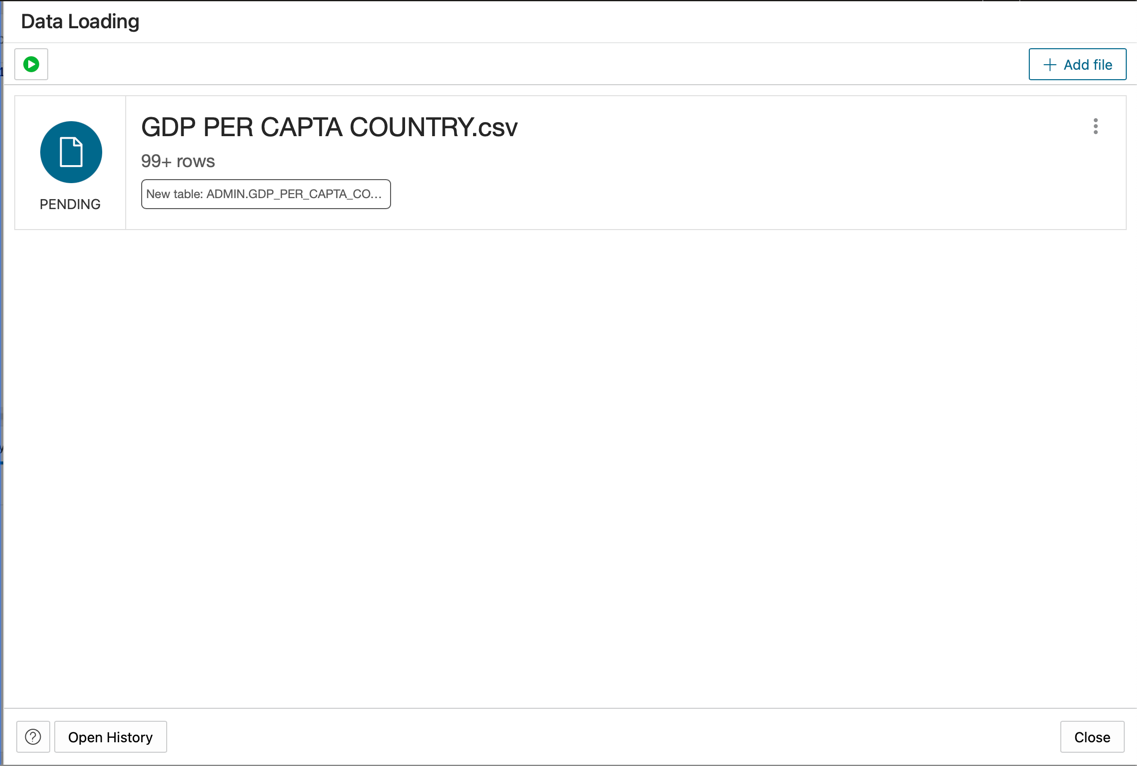
-
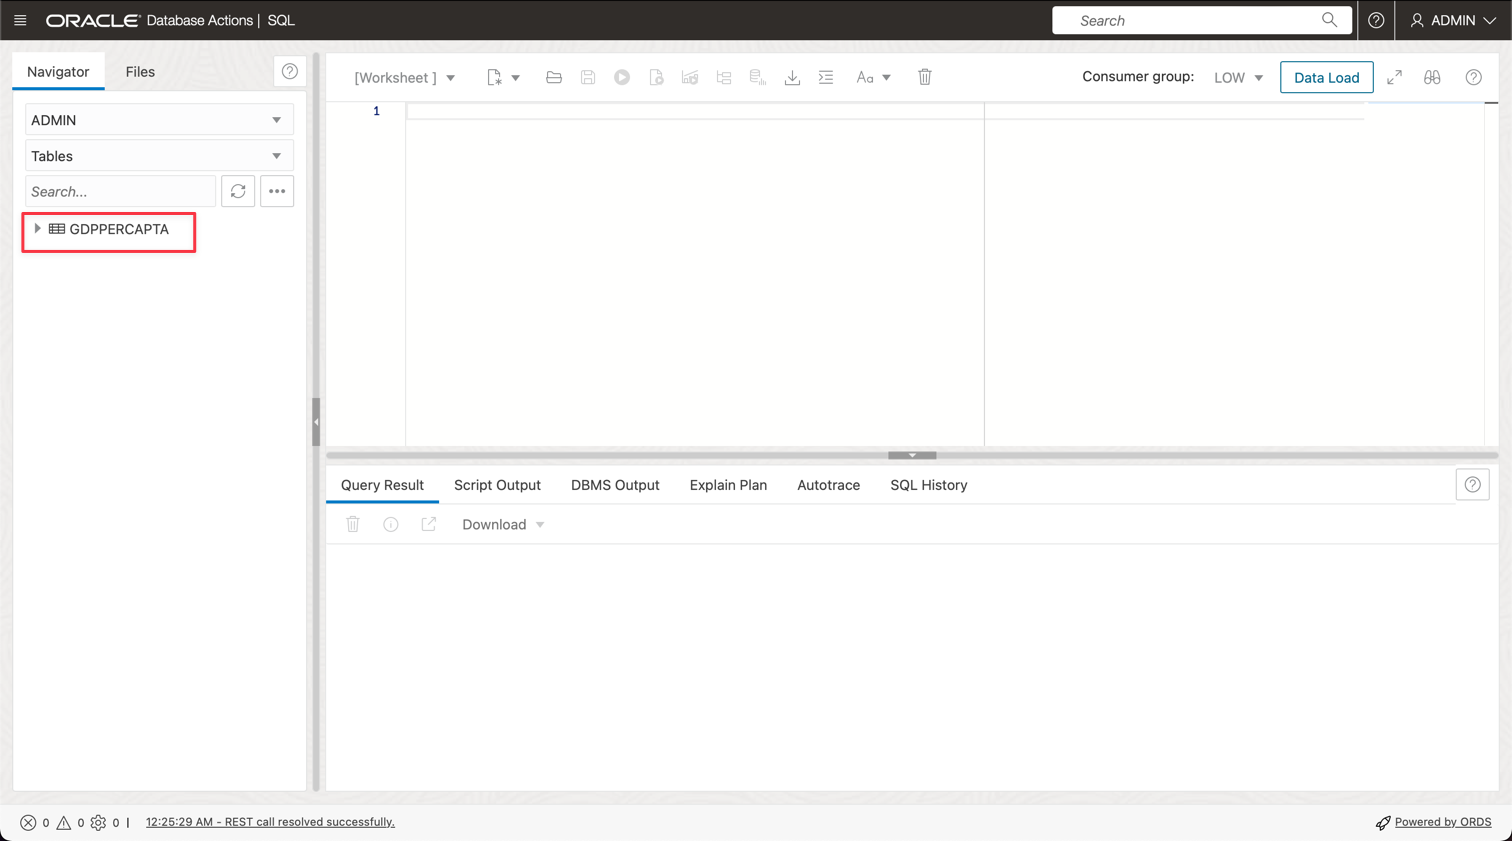
You can see your new table named GDPPERCAPTA imported successfully.
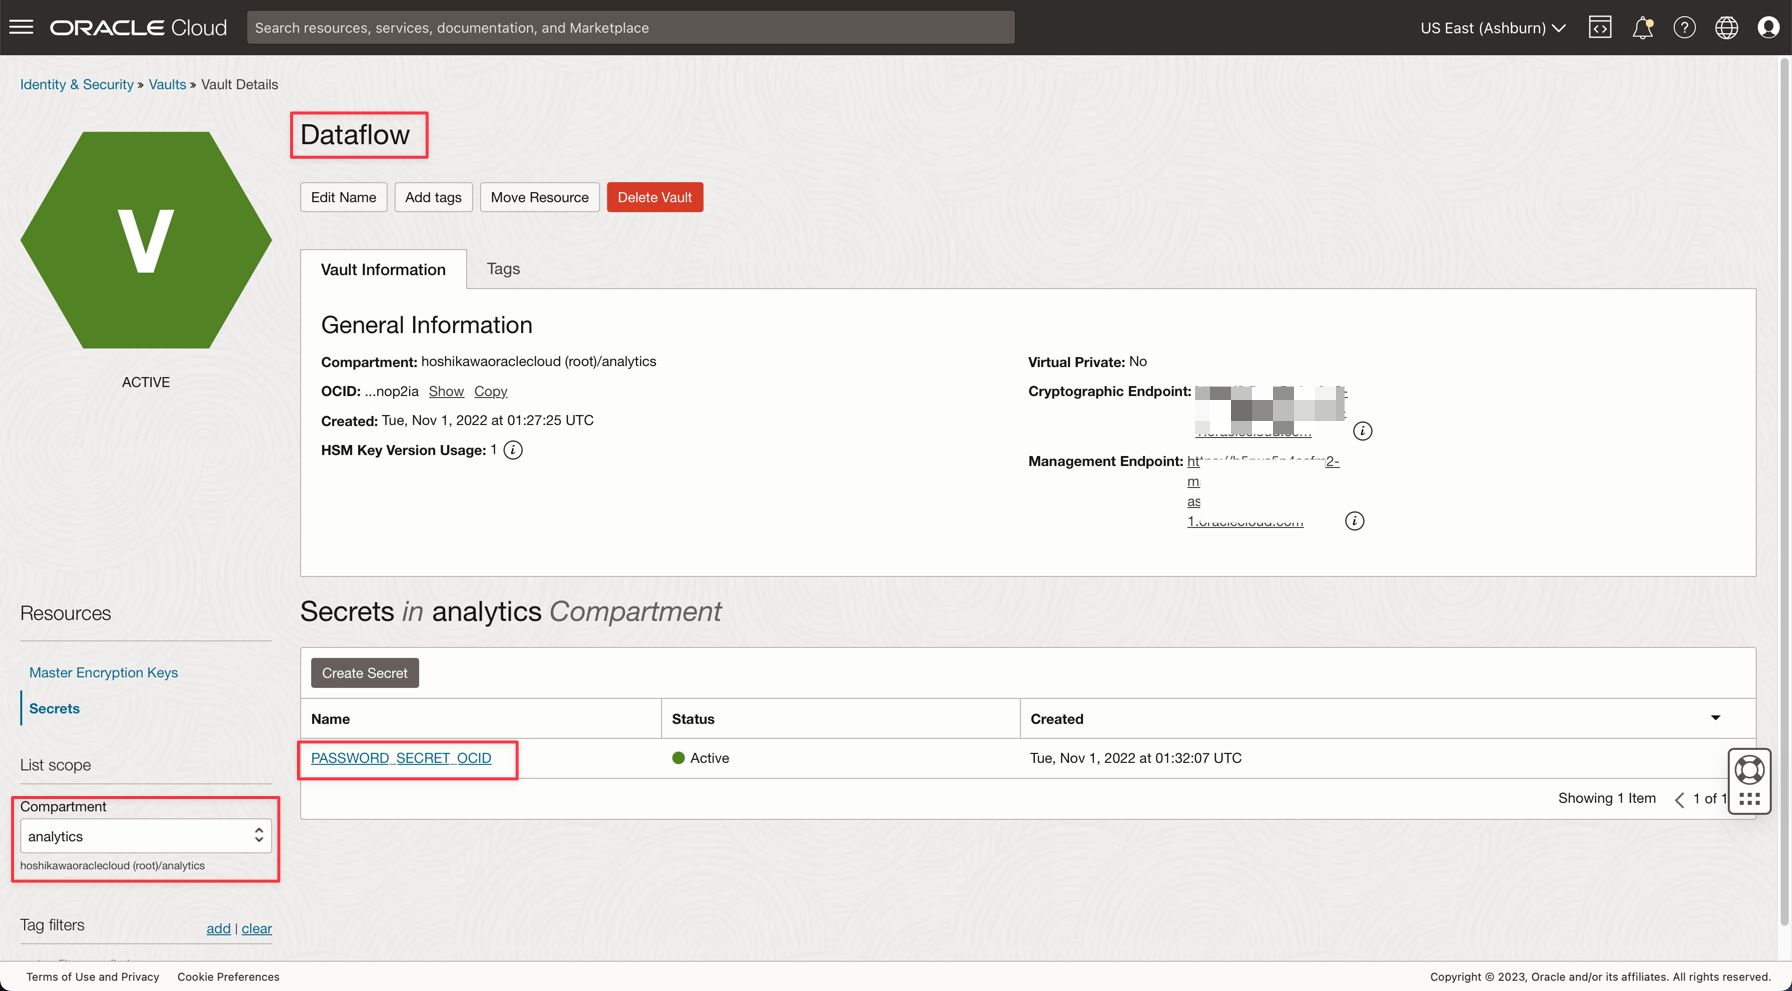
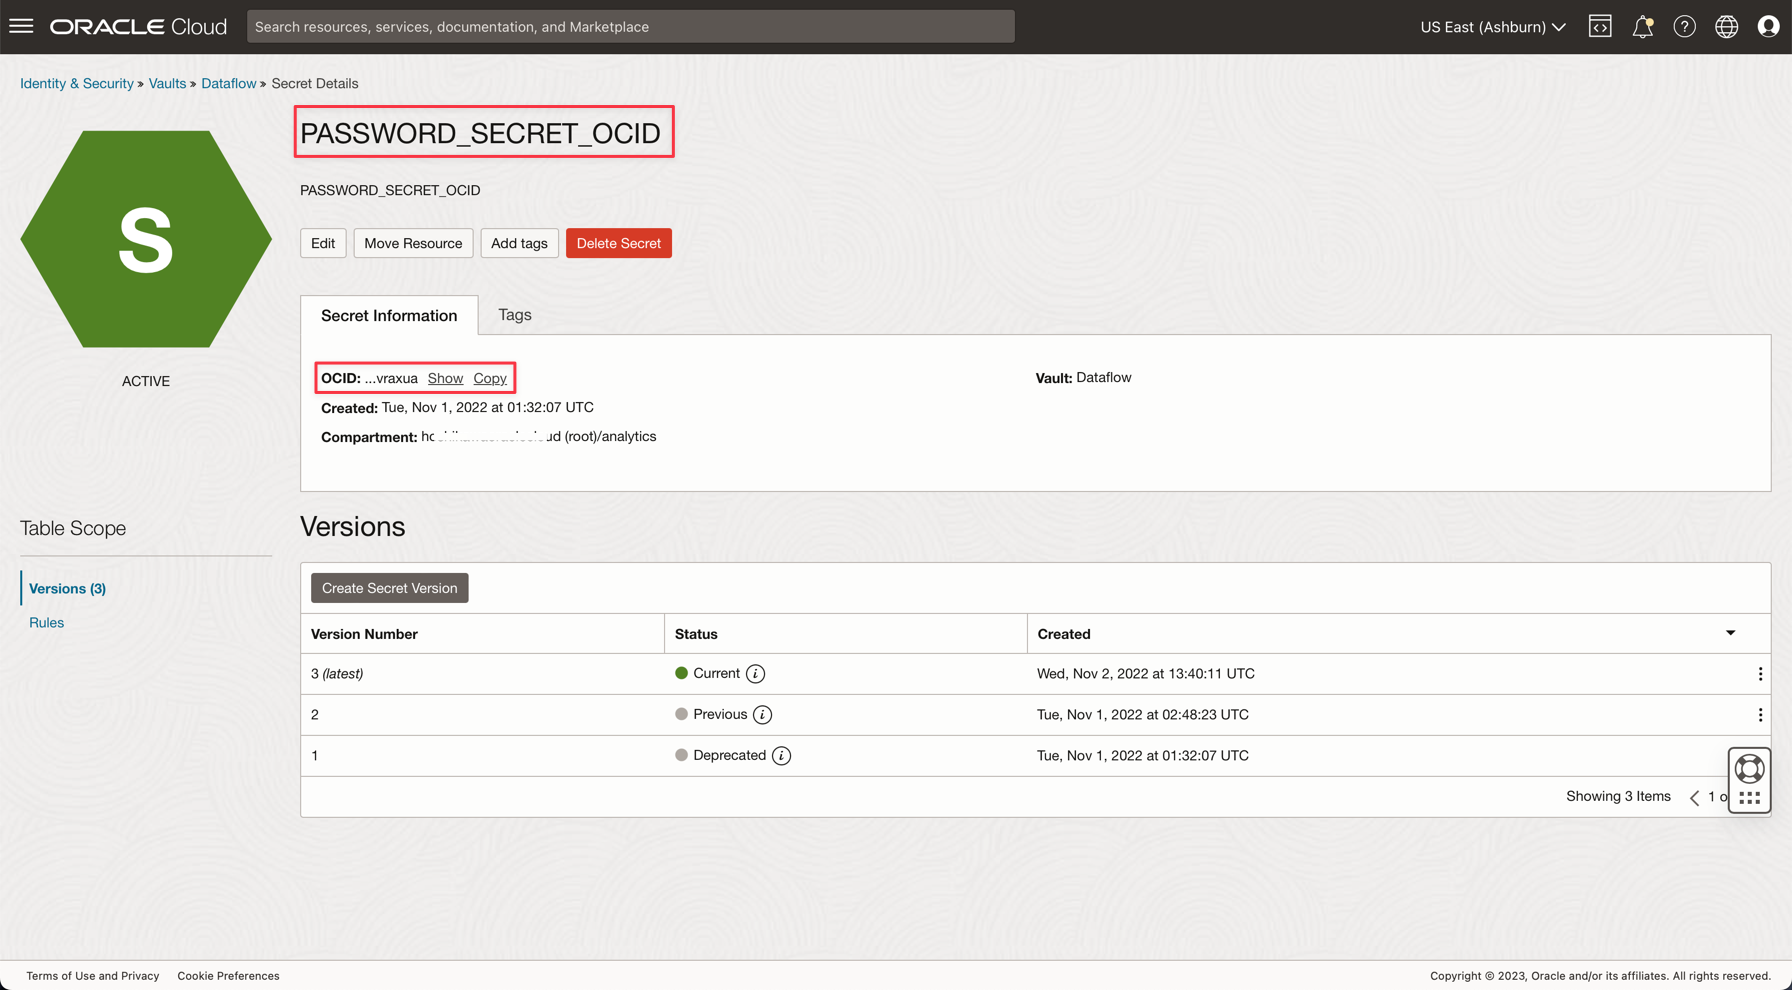
Task 4: Create a Secret Vault for your ADW ADMIN password
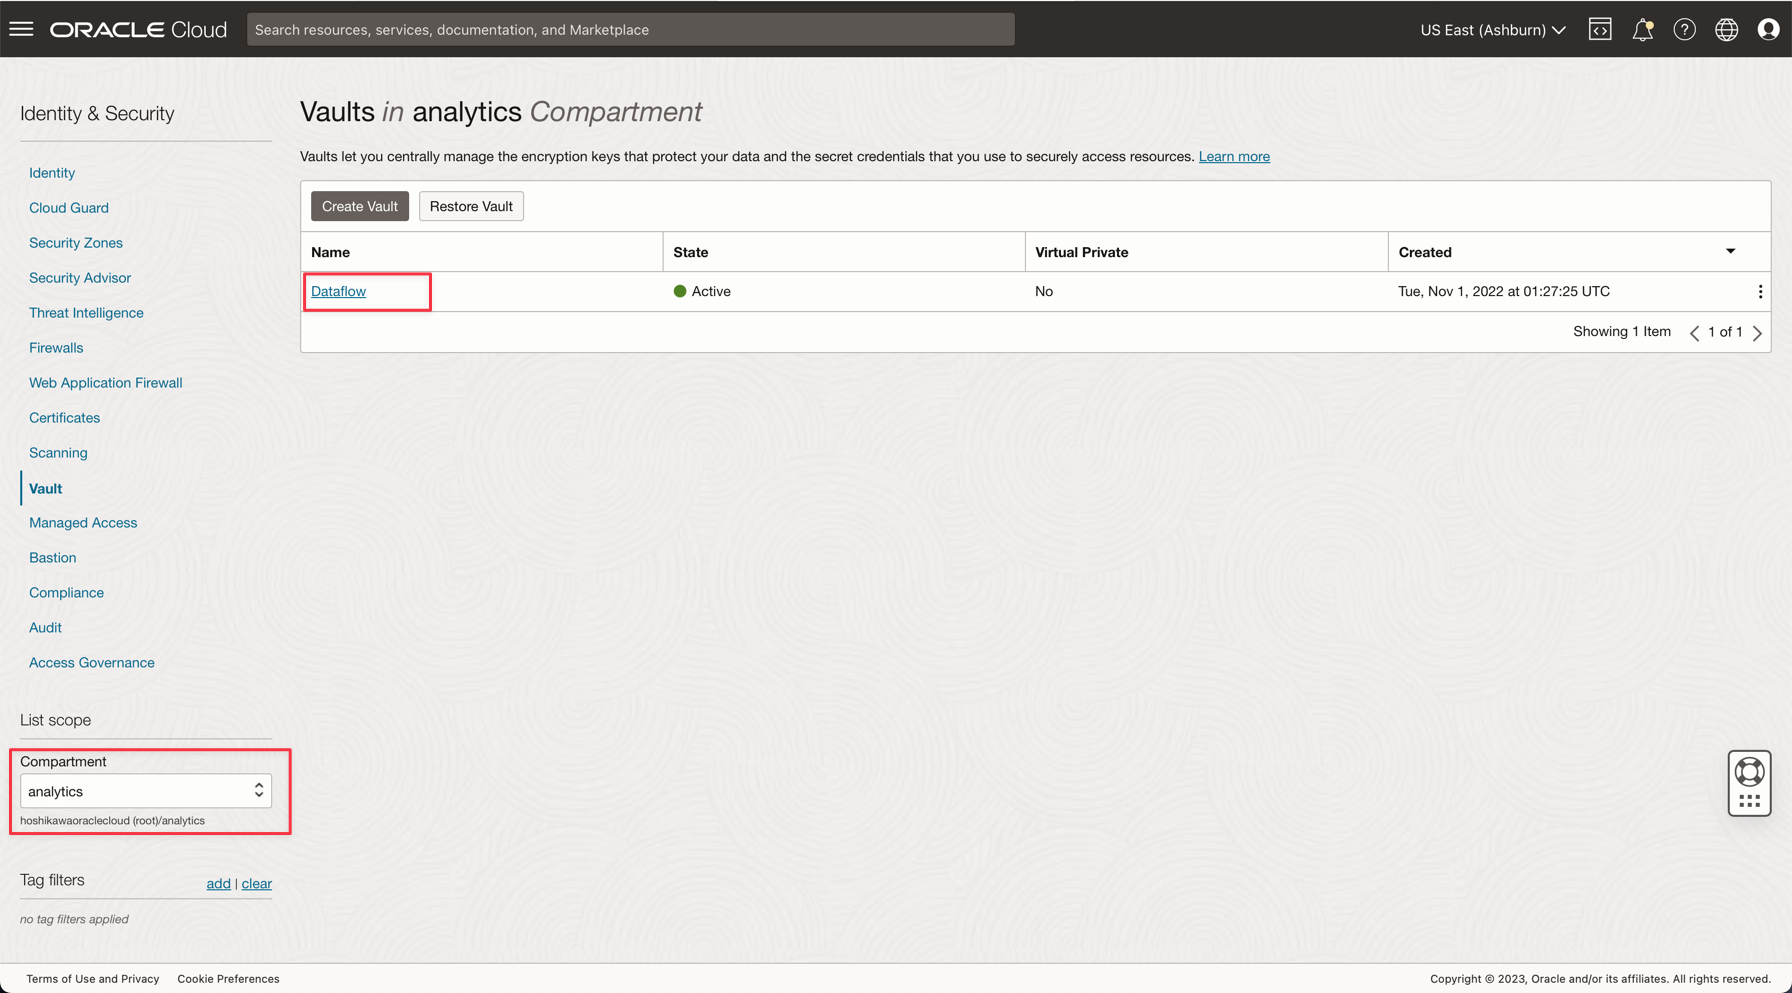
For security reasons, the ADW ADMIN password will be saved on a Vault. Oracle Cloud Vault can host this password with security and can be accessed on your application with OCI Authentication.
-
Create your secret in a vault as described in the following documentation: Add the database admin password to Vault
-
Create a variable named PASSWORD_SECRET_OCID in your applications and enter the OCID.
Note: Review the IAM Policy for OCI Vault here: OCI Vault IAM Policy.
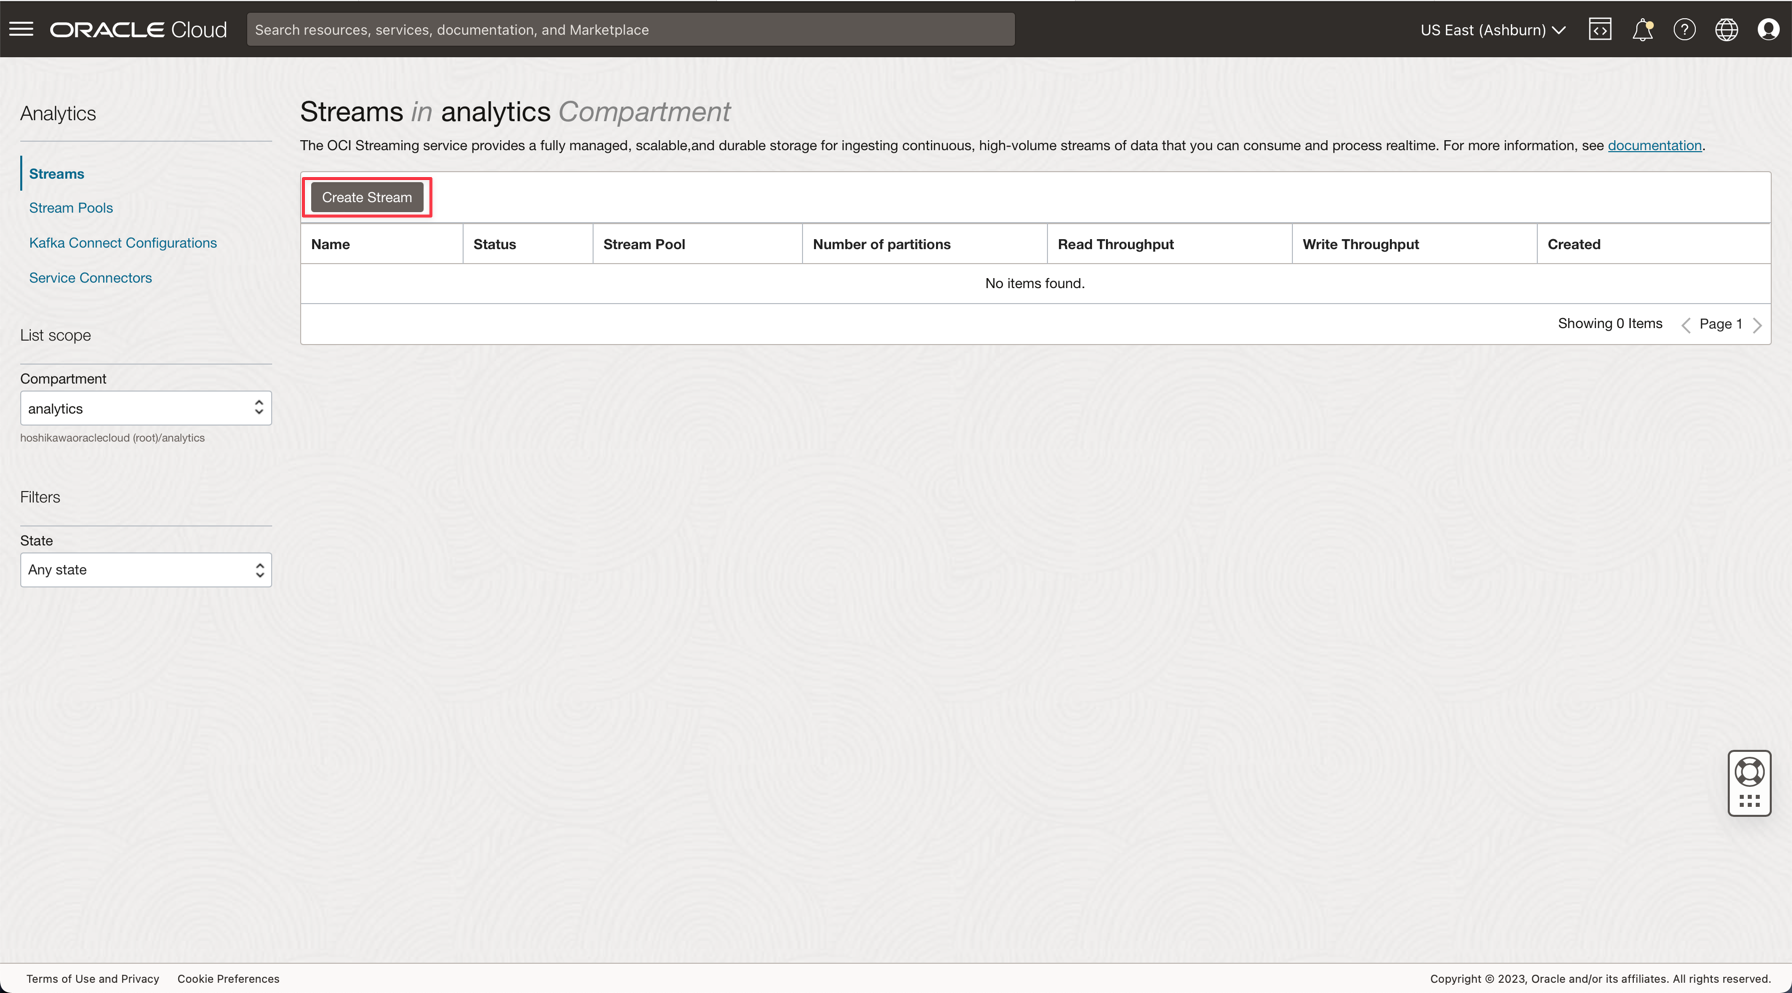
Task 5: Create a Kafka Streaming (Oracle Cloud Streaming)
Oracle Cloud Streaming is a Kafka like managed streaming service. You can develop applications using the Kafka APIs and common SDKs. In this tutorial, you will create an instance of Streaming and configure it to execute in both applications to publish and consume a high volume of data.
-
From the Oracle Cloud main menu, go to Analytics & AI, Streams.
-
Change the compartment to analytics. Every resource in this demo will be created on this compartment. This is more secure and easy to control IAM.
-
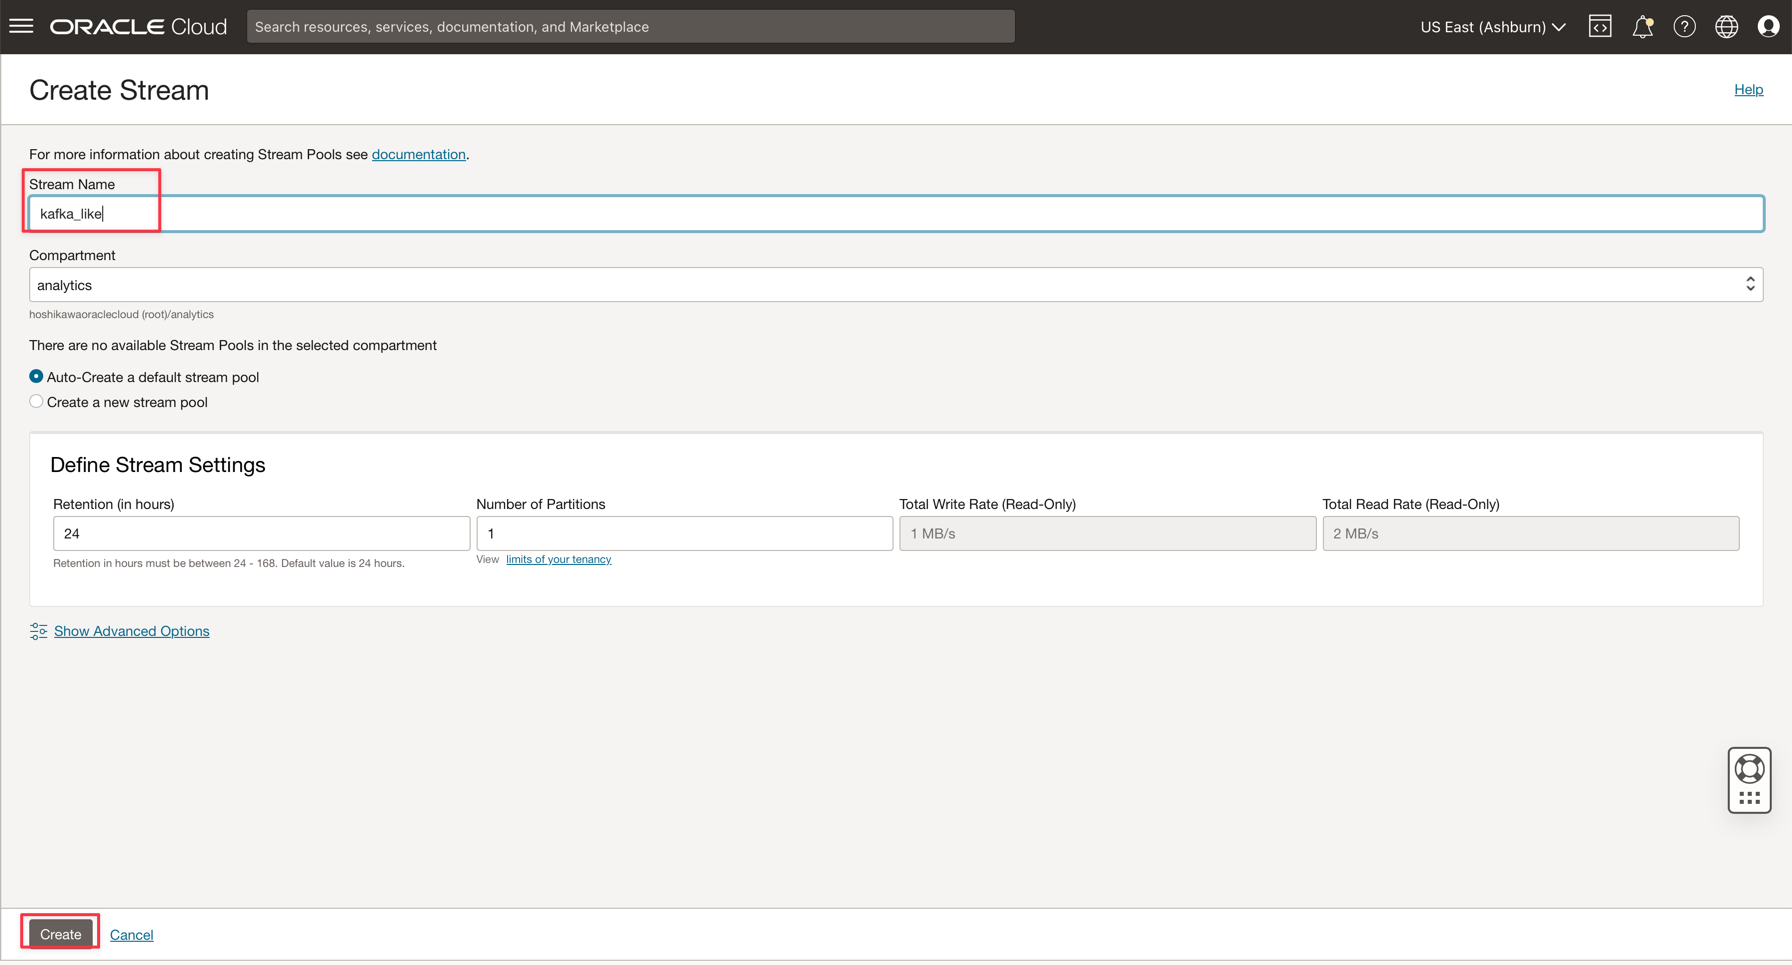
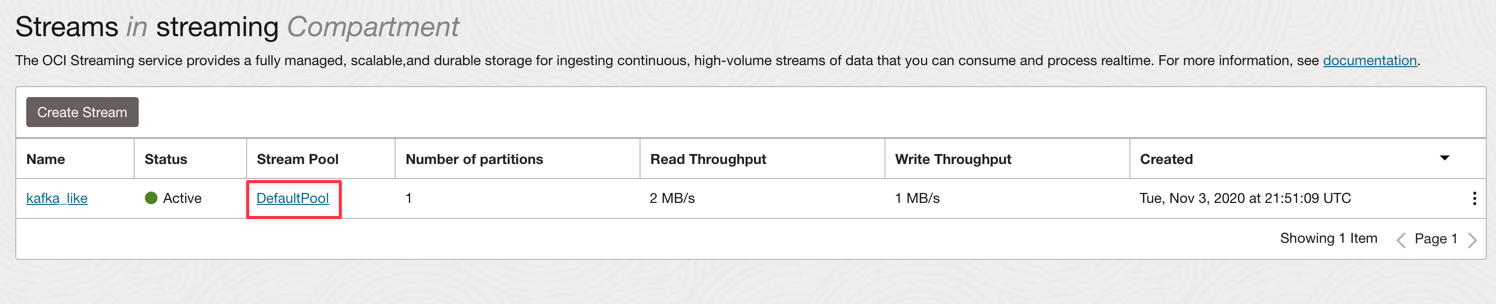
Click Create Stream.
-
Enter the name as kafka_like (for example) and you can maintain all other parameters with the default values.
-
Click Create to initialize the instance.
-
Wait for the Active status. Now you can use the instance.
Note: In the streaming creation process, you can select the Auto-Create a default stream pool option to automatically create your default pool.
-
Click on the DefaultPool link.
-
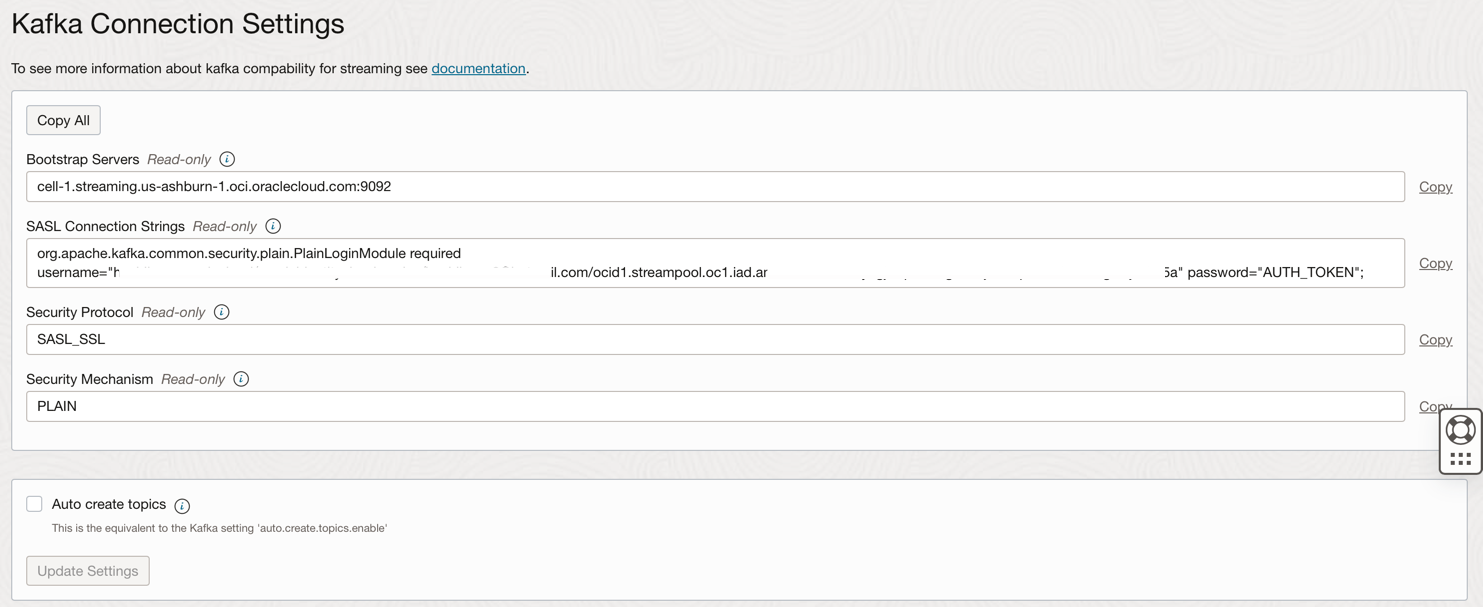
View the connection setting.

-
Annotate this information as you will need it in the next step.
Note: Review the IAM Policies for the OCI Streaming here: IAM Policy for OCI Streaming.
Task 6: Generate a AUTH TOKEN to access Kafka
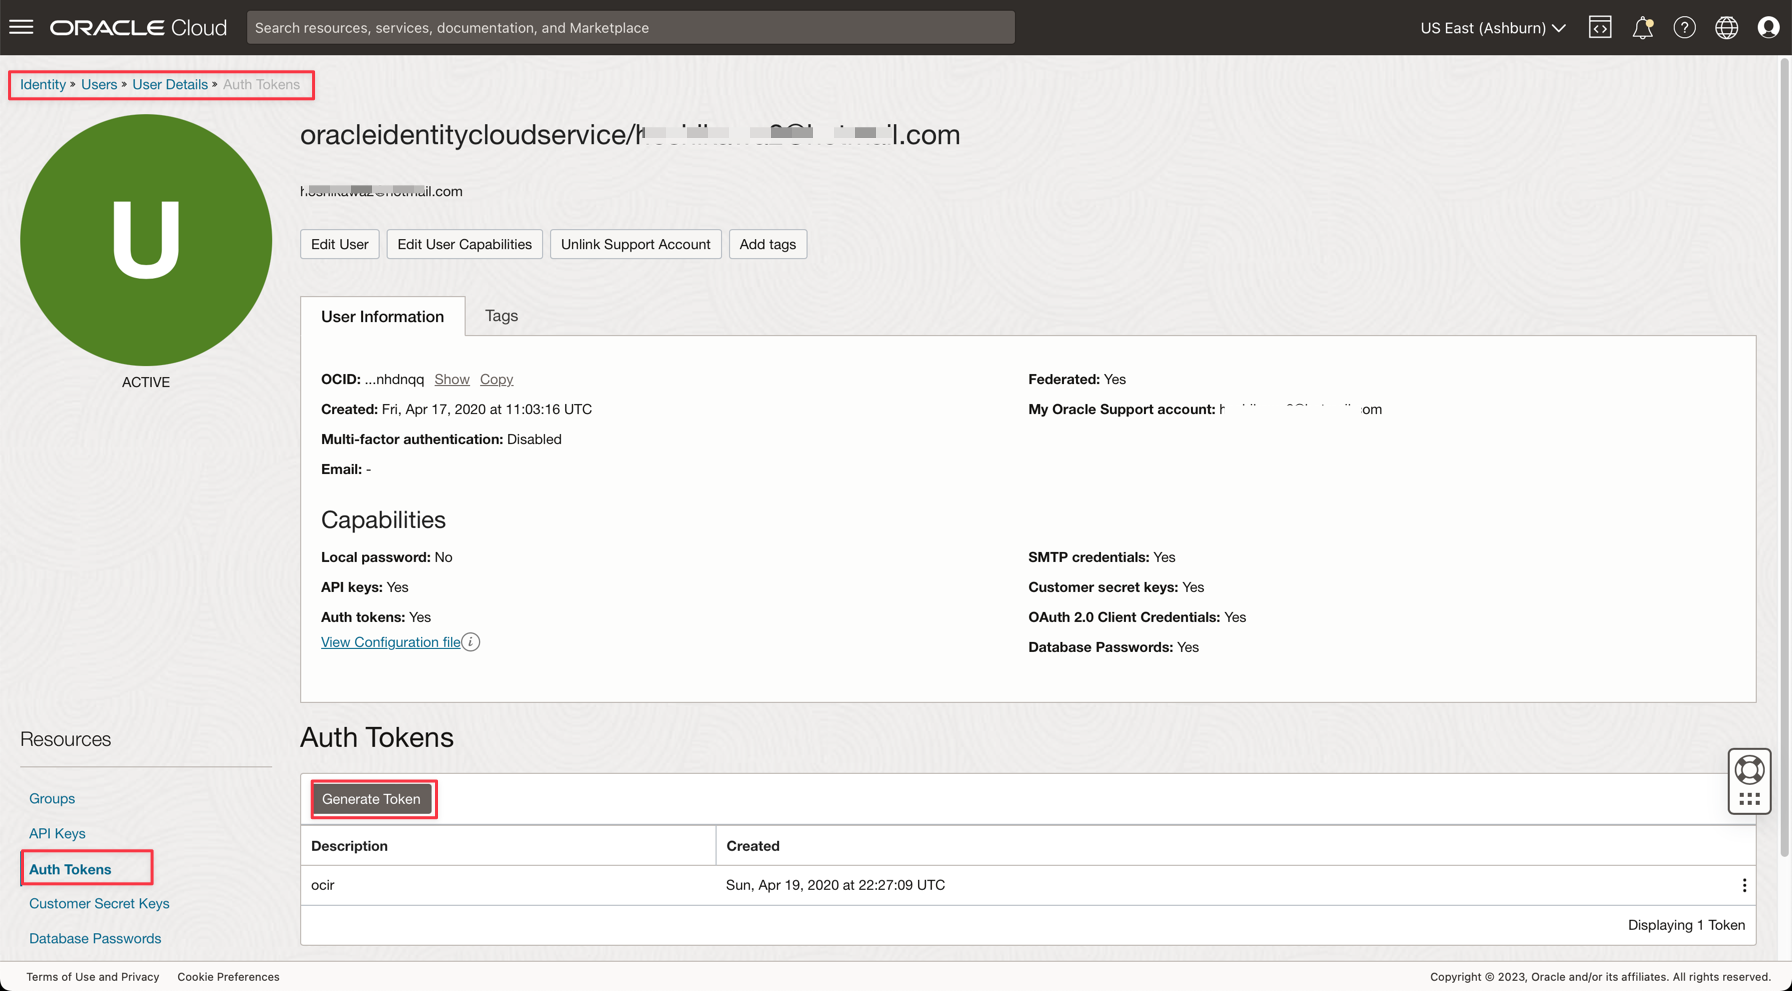
You can access OCI Streaming (Kafka API) and other resources in Oracle Cloud with an Auth Token associated to your user on OCI IAM. In Kafka Connection Settings, the SASL Connection Strings has a parameter named password and an AUTH_TOKEN value as described in the previous task. To enable access to OCI Streaming, you need to go to your user on OCI Console and create an AUTH TOKEN.
-
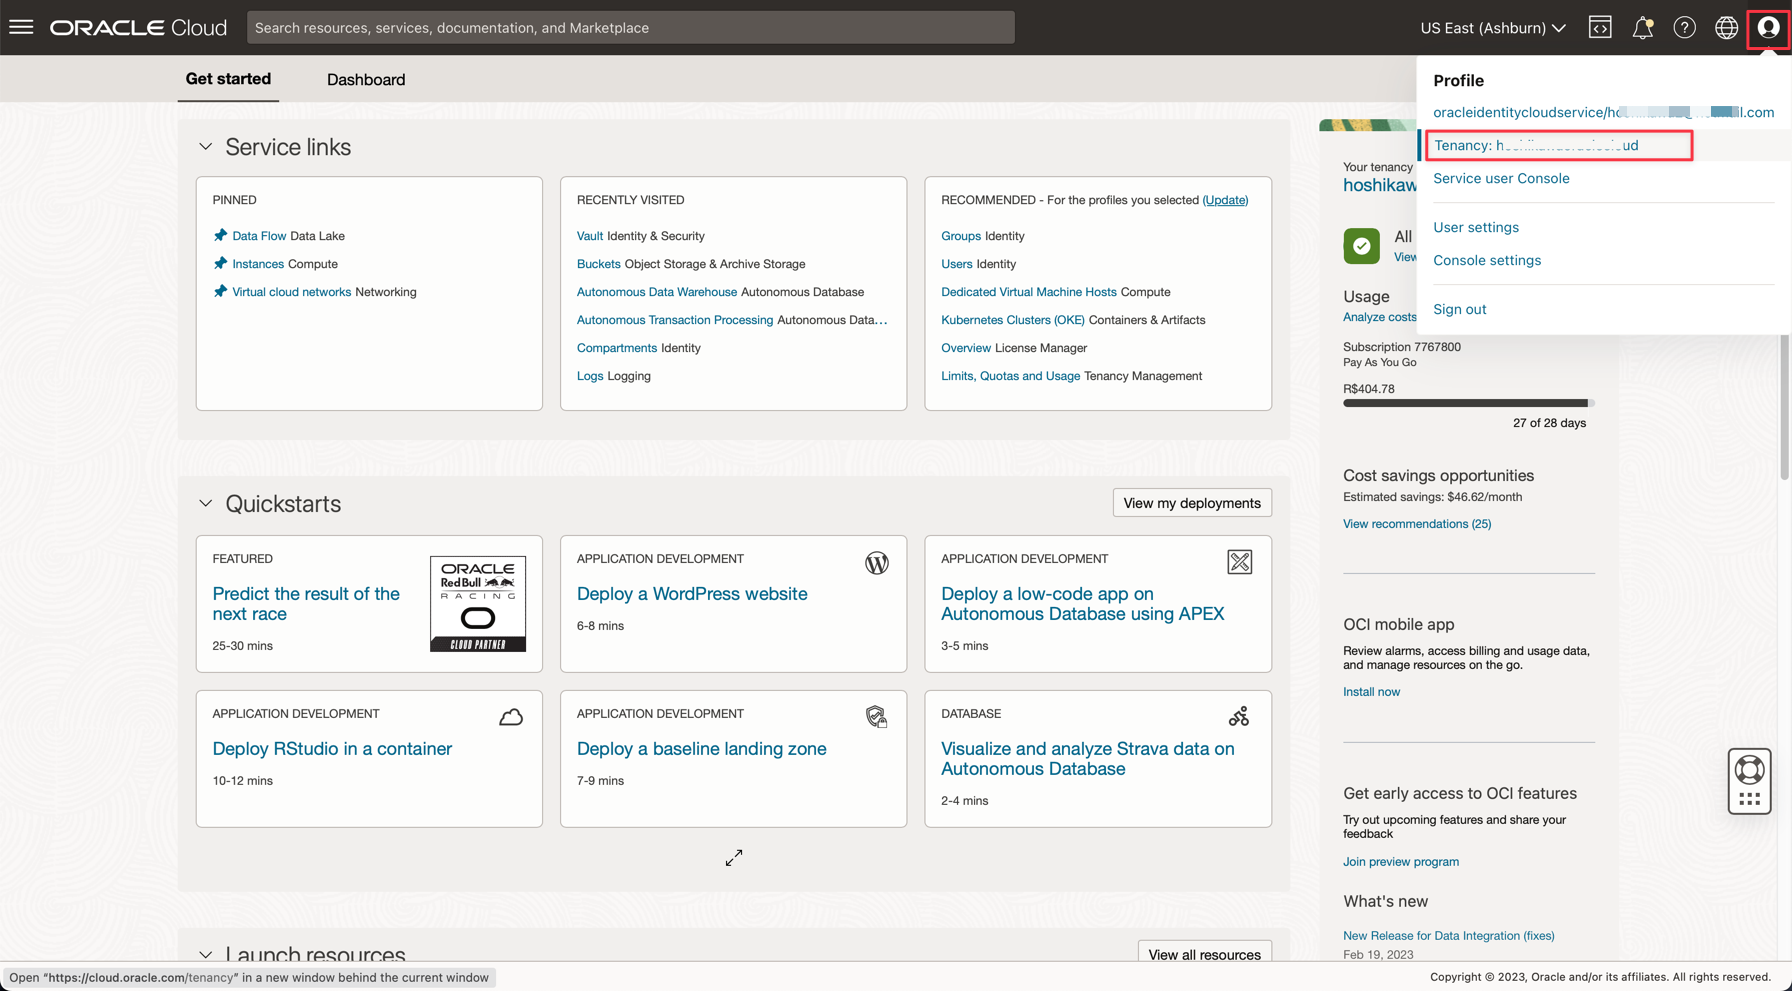
From the Oracle Cloud main menu, go to Identity & Security, Users.
Note: Remember that the user you need to create the AUTH TOKEN is the user configured with your OCI CLI and all the IAM Policies configuration for the resources created until now. The resources are:
- Oracle Cloud Autonomous Data Warehouse
- Oracle Cloud Streaming
- Oracle Object Storage
- Oracle Data Flow
-
Click on your username to view the details.
-
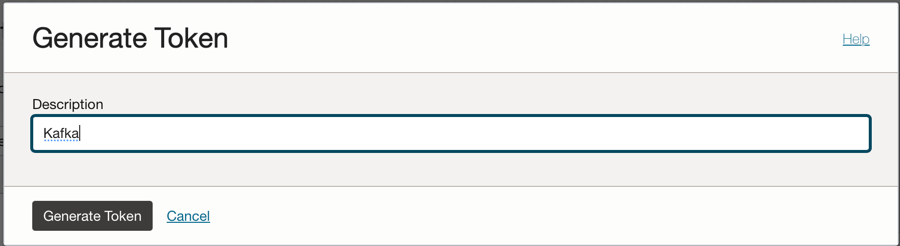
Click on the Auth Tokens option on the left side of the console and click Generate Token.
Note: The token will be generated only in this step and will not be visible after you complete the step. So, copy the value and save it. If you lose the token value, you must generate the auth token again.

Task 7: Setup the Demo application
This tutorial has a demo application for which we will set up the required information.
- DataflowSparkStreamDemo: This application will connect to the Kafka Streaming and consume every data and merge with an ADW table named GDPPERCAPTA. The stream data will be merged with GDPPERCAPTA and will be saved as a CSV file, but it can be exposed to another Kafka topic.
-
Download the application using the following link:
-
Find the following details in your Oracle Cloud Console:
-
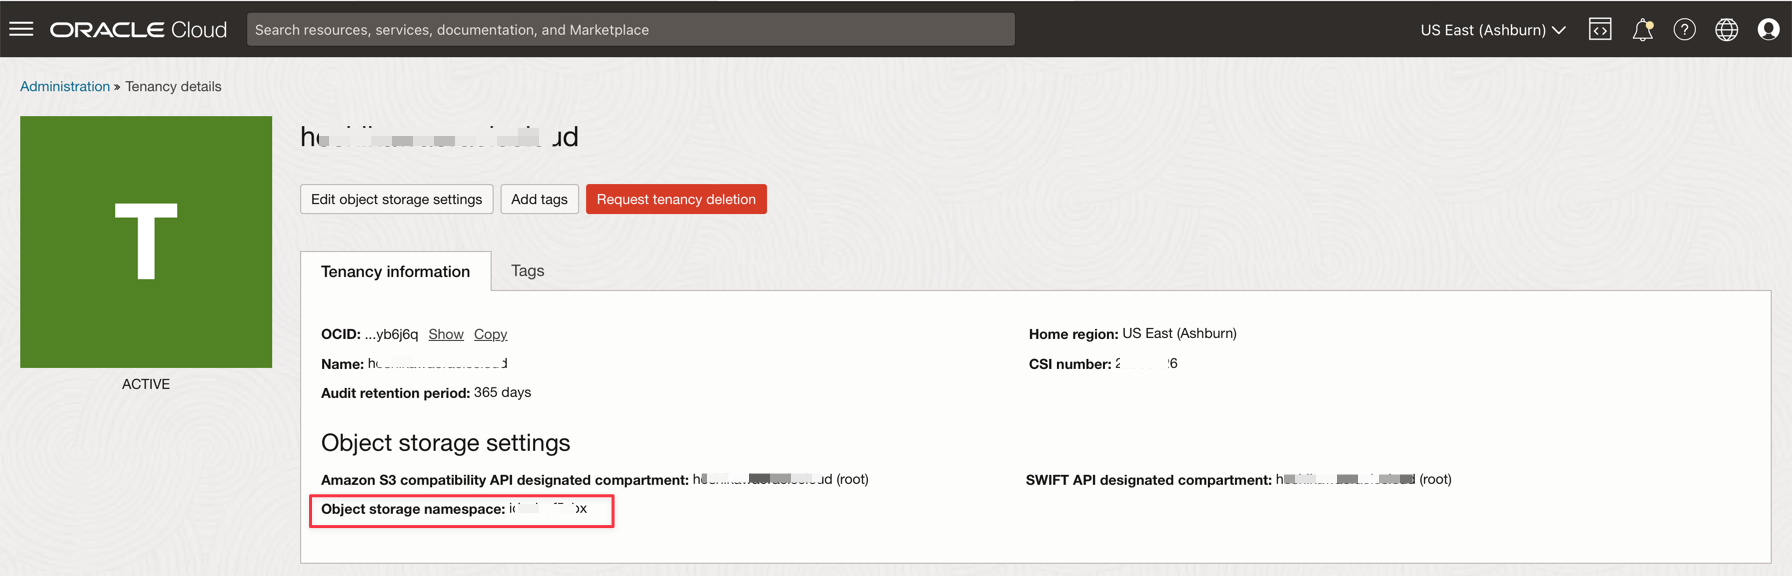
Tenancy Namespace
-
Password Secret
-
Streaming Connection Settings
-
Auth Token
-
-
Open the downloaded zip file (
Java-CSV-DB.zipandJavaConsumeKafka.zip). Go to the /src/main/java/example folder and find the Example.java code.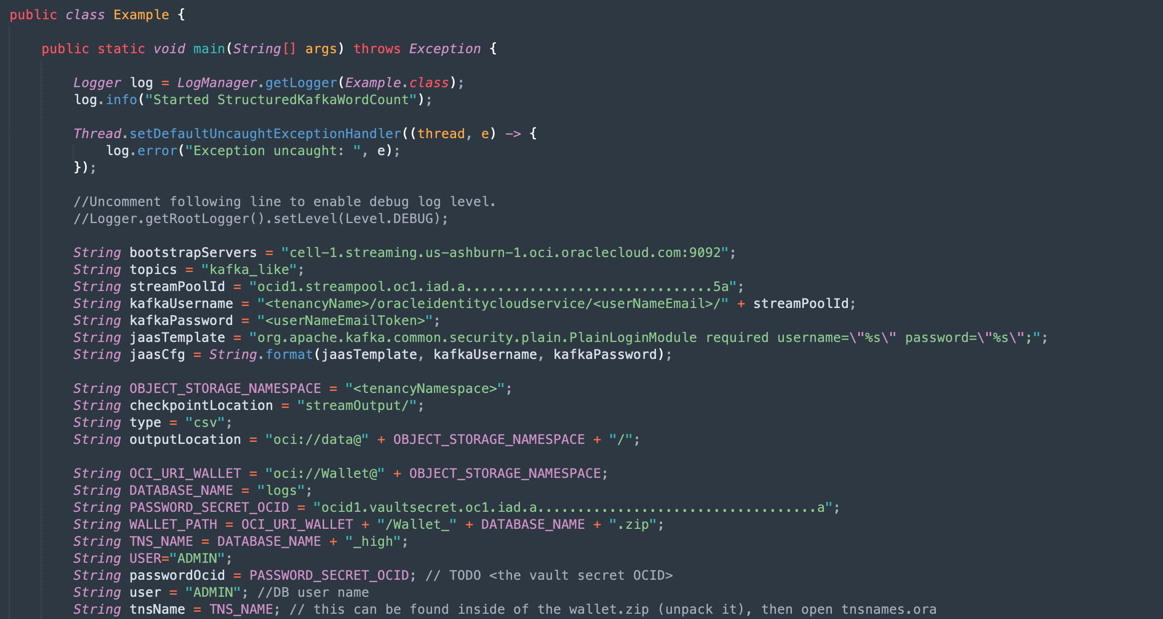
These are the variables that need to be changed with your tenancy resources values.
VARIABLE NAME RESOURCE NAME INFORMATION TITLE bootstrapServers Streaming Connection Settings Bootstrap Servers streamPoolId Streaming Connection Settings ocid1.streampool.oc1.iad….. value in SASL Connection String kafkaUsername Streaming Connection Settings value of usename inside “ “ in SASL Connection String kafkaPassword Auth Token The value is displayed only in the creation step OBJECT_STORAGE_NAMESPACE TENANCY NAMESPACE TENANCY NAMESPACE TENANCY NAMESPACE TENANCY PASSWORD_SECRET_OCID PASSWORD_SECRET_OCID OCID
Note: All the resources created for this demo are in the US-ASHBURN-1 region. Check in what region you want to work. If you change the region, you need to change 2 points in 2 code files:
Example.java: Change the bootstrapServers variable, replacing the “us-ashburn-1” with your new region
OboTokenClientConfigurator.java: Change the CANONICAL_REGION_NAME variable with your new region
Task 8: Understand the Java code
This tutorial was created in Java and this code can be ported to Python also. To prove the efficiency and scalability, the application was developed to show some possibilities in a common use case of an integration process. So the code for the application shows the following examples:
- Connect to the Kafka Stream and read the data
- Process JOINS with an ADW table to build a useful information
- Output a CSV file with every useful information came from Kafka
This demo can be executed in your local machine and deployed into the Data Flow instance to run as a job execution.
Note: For Data Flow job and your local machine, use the OCI CLI configuration to access the OCI resources. On the Data Flow side, everything is pre-configured, so no need to change the parameters. In your local machine side, you should have installed the OCI CLI and configured the tenant, user and private key to access your OCI resources.
Let’s show the Example.java code in sections:
-
Apache Spark initialization: This part of code represents the Spark initialization. Many parameters to perform execution processes are configured automatically, so it’s very easy to work with the Spark engine. The initialization differs if you are running inside the Data Flow or in your local machine. If you are in Data Flow, you don’t need to load the ADW Wallet zip file, the task of load, uncompress and read the Wallet files are automatic inside the Data Flow environment, but in the local machine, it needs to be done with some commands.
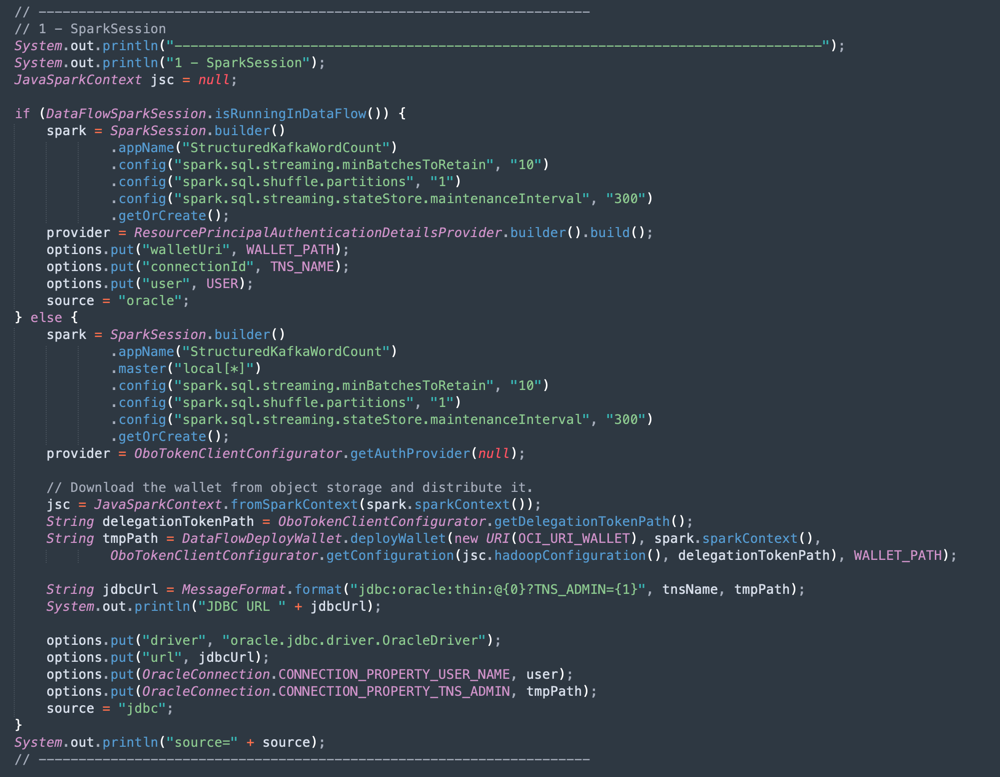
-
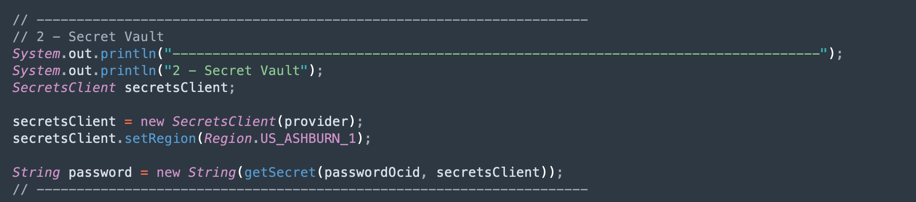
Read the ADW Vault Secret: This part of the code accesses your vault to obtain the secret for your Autonomous Data Warehouse instance.
-
Query an ADW Table: This section shows how to execute a query to a table.

-
Kafka Operations: This is the preparation for connecting to OCI Streaming using the Kafka API.
Note: Oracle Cloud Streaming is compatible with most Kafka APIs.
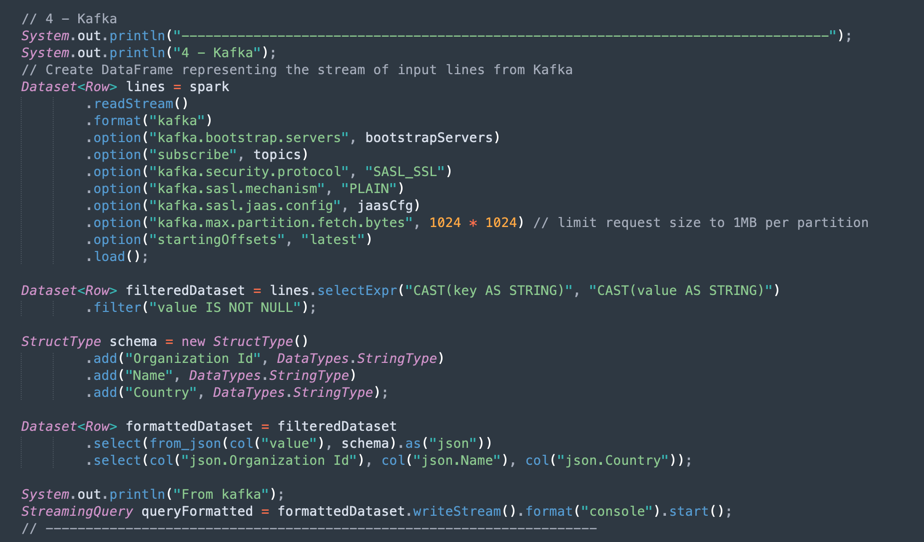
There is a process to parse the JSON data coming from Kafka topic into a dataset with the correct structure (Organization Id, Name, Country).
-
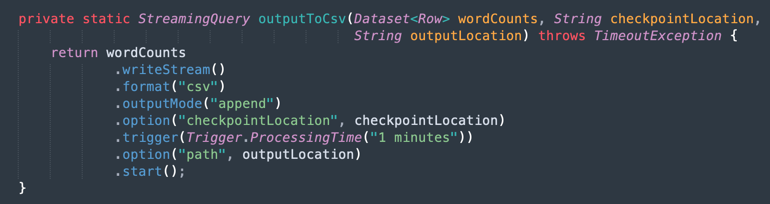
Merge the data from a Kafka Dataset and Autonomous Data Warehouse Dataset: This section shows how to execute a query with 2 datasets.

-
Output into a CSV File: Here is how the merged data generates the output into a CSV file.

Task 9: Package your application with Maven
Before you execute the job in Spark, it is necessary to package your application with Maven.
-
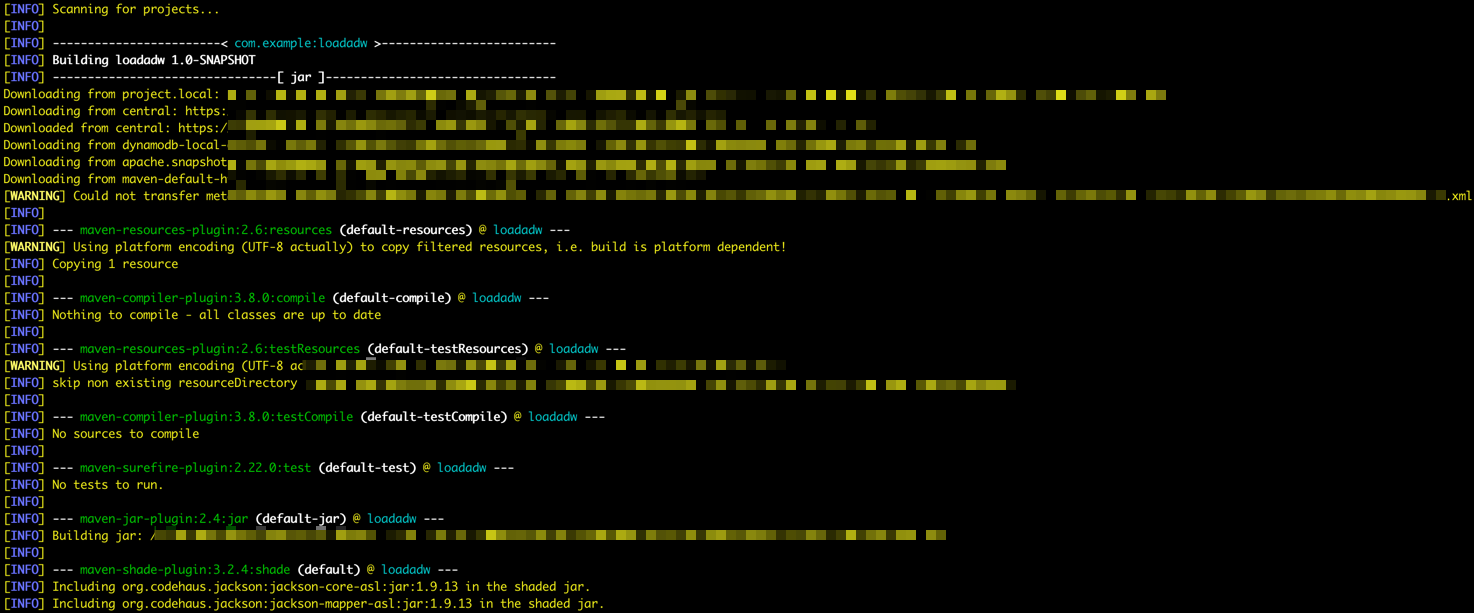
Go to the /DataflowSparkStreamDemo folder and execute this command:
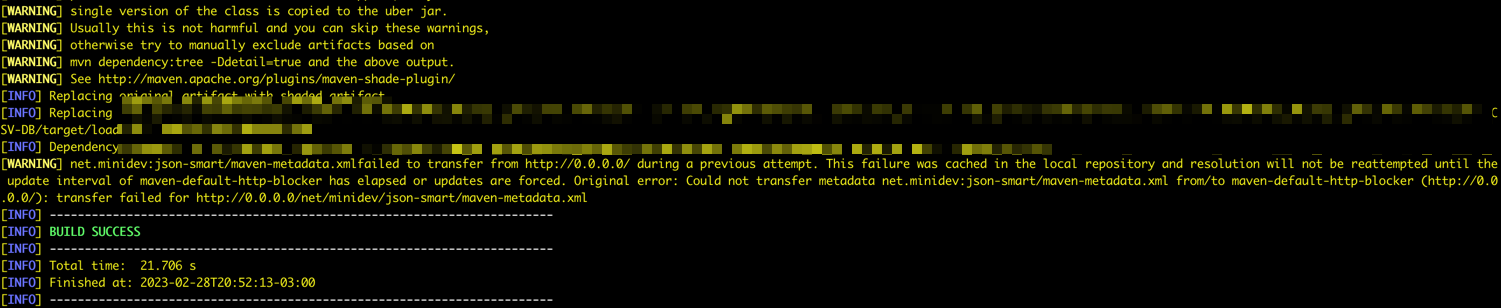
mvn package -
You can see Maven starting the packaging.
-
If everything is correct, you can see Success message.
Task 10: Verify the execution
-
Test your application in your local Spark machine by running this command:
spark-submit --class example.Example target/consumekafka-1.0-SNAPSHOT.jar -
Go to your Oracle Cloud Streaming Kafka instance and click Produce Test Message to generate some data to test your real-time application.

-
You can put this JSON message into the Kafka topic.
{"Organization Id": "1235", "Name": "Teste", "Country": "Luxembourg"}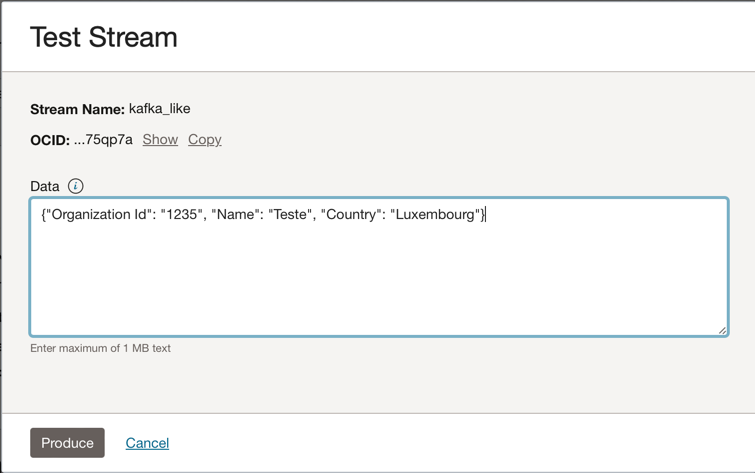
-
Every time you click Produce, you send one message to the application. You can see the application’s output log something like this:
-
This is the data read from the kafka topic.

-
This is the merged data from ADW table.

-
Task 11: Create and execute a Data Flow job
Now, with both applications running with success in your local Spark machine, you can deploy them into the Oracle Cloud Data Flow in your tenancy.
Note: See the Spark Streaming documentation to configure access to resources like Oracle Object Storage and Oracle Streaming (Kafka): Enable Access to Data Flow
-
Upload the packages into Object Storage.
- Before you create a Data Flow application, you need to upload your Java artifact application (your ***-SNAPSHOT.jar file) into the Object Storage bucket named apps.
-
Create a Data Flow Application.
-
Select the Oracle Cloud main menu and go to Analytics & AI and Data Flow. Be sure to select your analytics compartment before creating a Data Flow Application.
-
Click Create application.
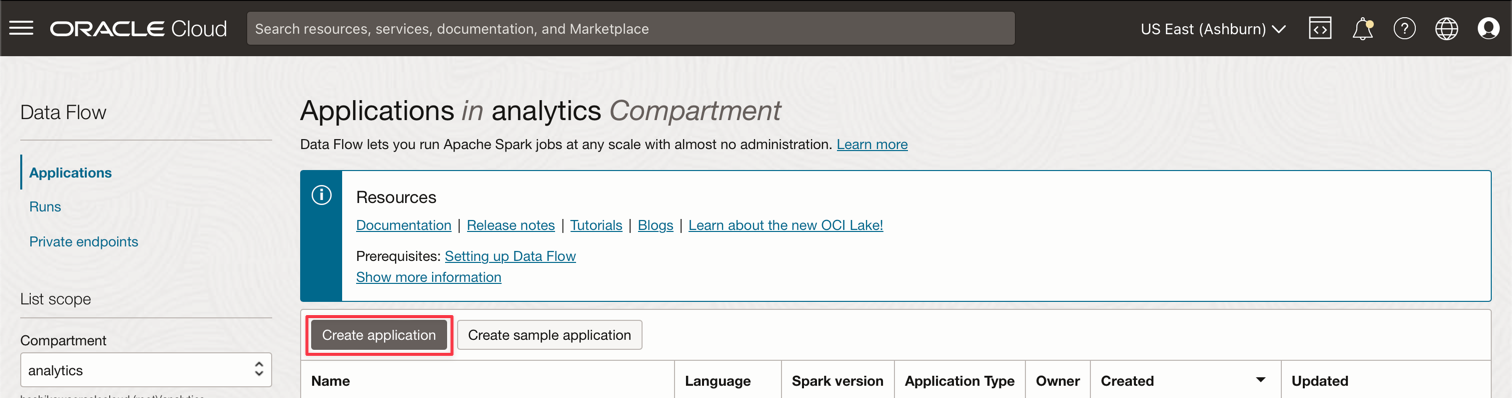
-
Fill the parameters like this.
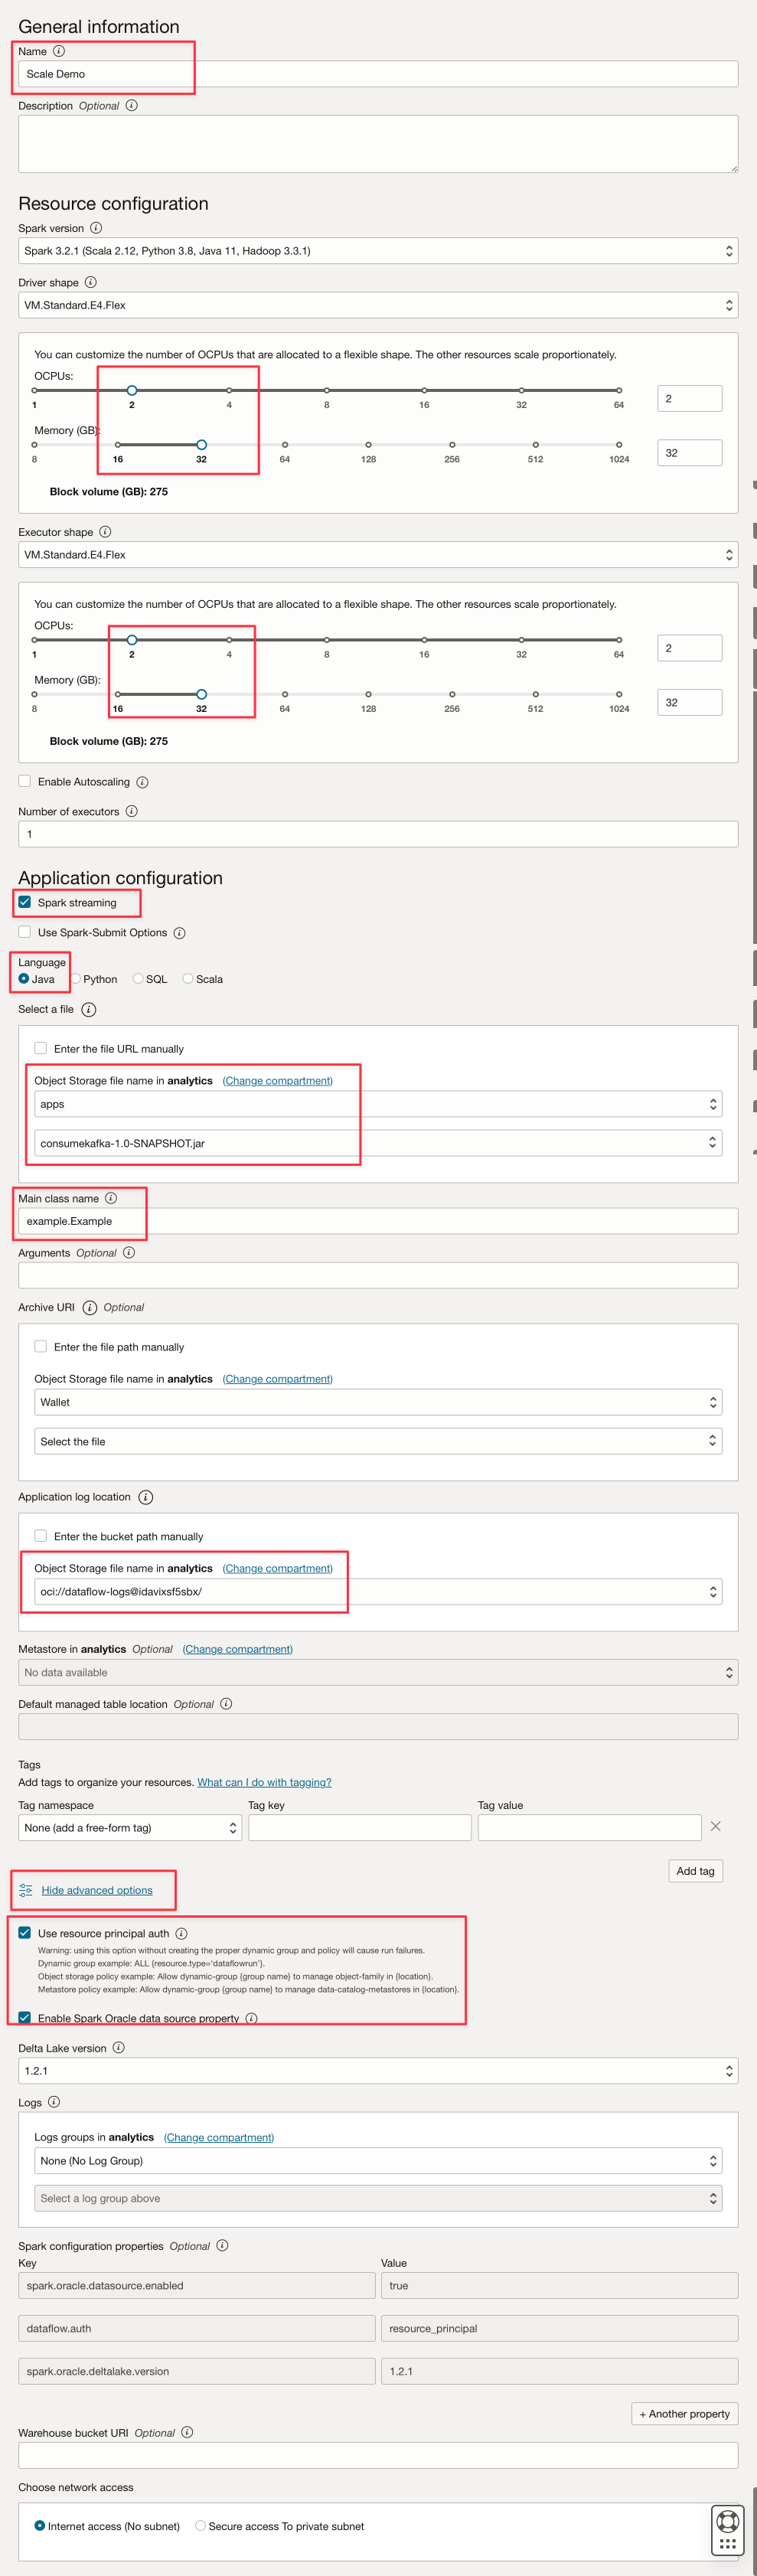
-
Click Create.
-
After creation, click on the Scale Demo link to view details. To run a job, click RUN.
Note: Click Show advanced options to enable OCI security for the Spark Stream execution type.

-
-
Activate the following options.

-
Click Run to execute the job.
-
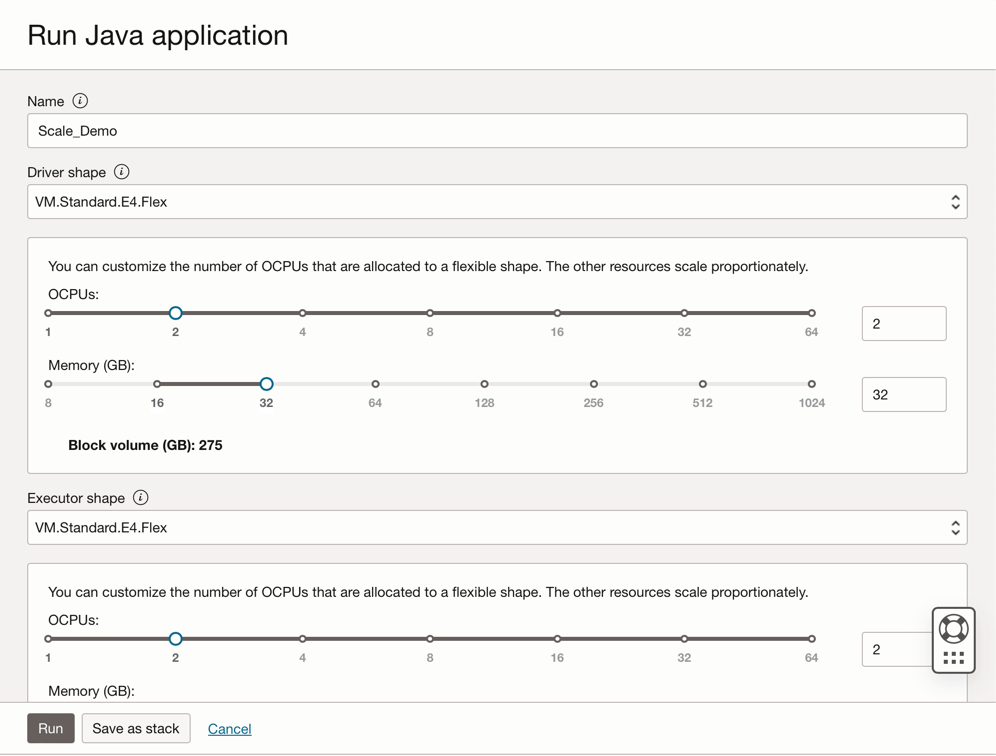
Confirm the parameters and click Run again.
-
It’s possible to view the Status of the job.

-
Wait until the Status go to Succeeded and you can see the results.

-
Related Links
Acknowledgments
- Author - Cristiano Hoshikawa (Oracle LAD A-Team Solution Engineer)
More Learning Resources
Explore other labs on docs.oracle.com/learn or access more free learning content on the Oracle Learning YouTube channel. Additionally, visit education.oracle.com/learning-explorer to become an Oracle Learning Explorer.
For product documentation, visit Oracle Help Center.
Use OCI Data Flow with Apache Spark Streaming to process a Kafka topic in a scalable and near real-time application
F79979-02
May 2023
Copyright © 2023, Oracle and/or its affiliates.