Note:
- This tutorial requires access to Oracle Cloud. To sign up for a free account, see Get started with Oracle Cloud Infrastructure Free Tier.
- It uses example values for Oracle Cloud Infrastructure credentials, tenancy, and compartments. When completing your lab, substitute these values with ones specific to your cloud environment.
Use Oracle Cloud Infrastructure Identity and Access Management Authentication with Oracle Autonomous Database
Introduction
An Oracle Cloud Infrastructure Identity and Access Management (OCI IAM) database password allows an IAM user to log in to an Oracle Autonomous Database instance as Oracle Database users typically log in with a user name and password. The user enters their IAM user name and IAM database password. An IAM database password is a different password than the Oracle Cloud Infrastructure (OCI) Console password. Using an IAM user with the password verifier you can log in to Autonomous Database with any supported database client.
OCI IAM is for making sure that only the right people can access an organization’s data and resources. You can configure the Oracle Database to use OCI IAM authentication and authorization to allow IAM users to access the database with IAM credentials. Centralizing user and credential management in IAM improves security, manageability, and user experience for the database users.
Audience
OCI IAM professionals and Administrators.
Objective
Configure Oracle Autonomous Database to use OCI IAM authentication and authorization to allow IAM users to access an Oracle Autonomous Database with IAM credentials.
Prerequisites
-
Autonomous Database provisioned in OCI.
-
OCI IAM Identity Domains tenancy with Administrator privilege.
-
Oracle Database tool for testing the Autonomous Database connection, see Connect to Autonomous Database Using Oracle Database Tools. In this tutorial, we are using the SQL*Plus command-line interface on Windows System New Oracle Client Installation.
Task 1: Create Database Groups, Users and Policies
-
Navigate to Identity & Security, Groups and then click Create Group. Provide the following details to create groups:
DB_AdminsandDB_Users.
-
Create first group with Name
DB_Adminsand DescriptionDB_Admins, then click Create.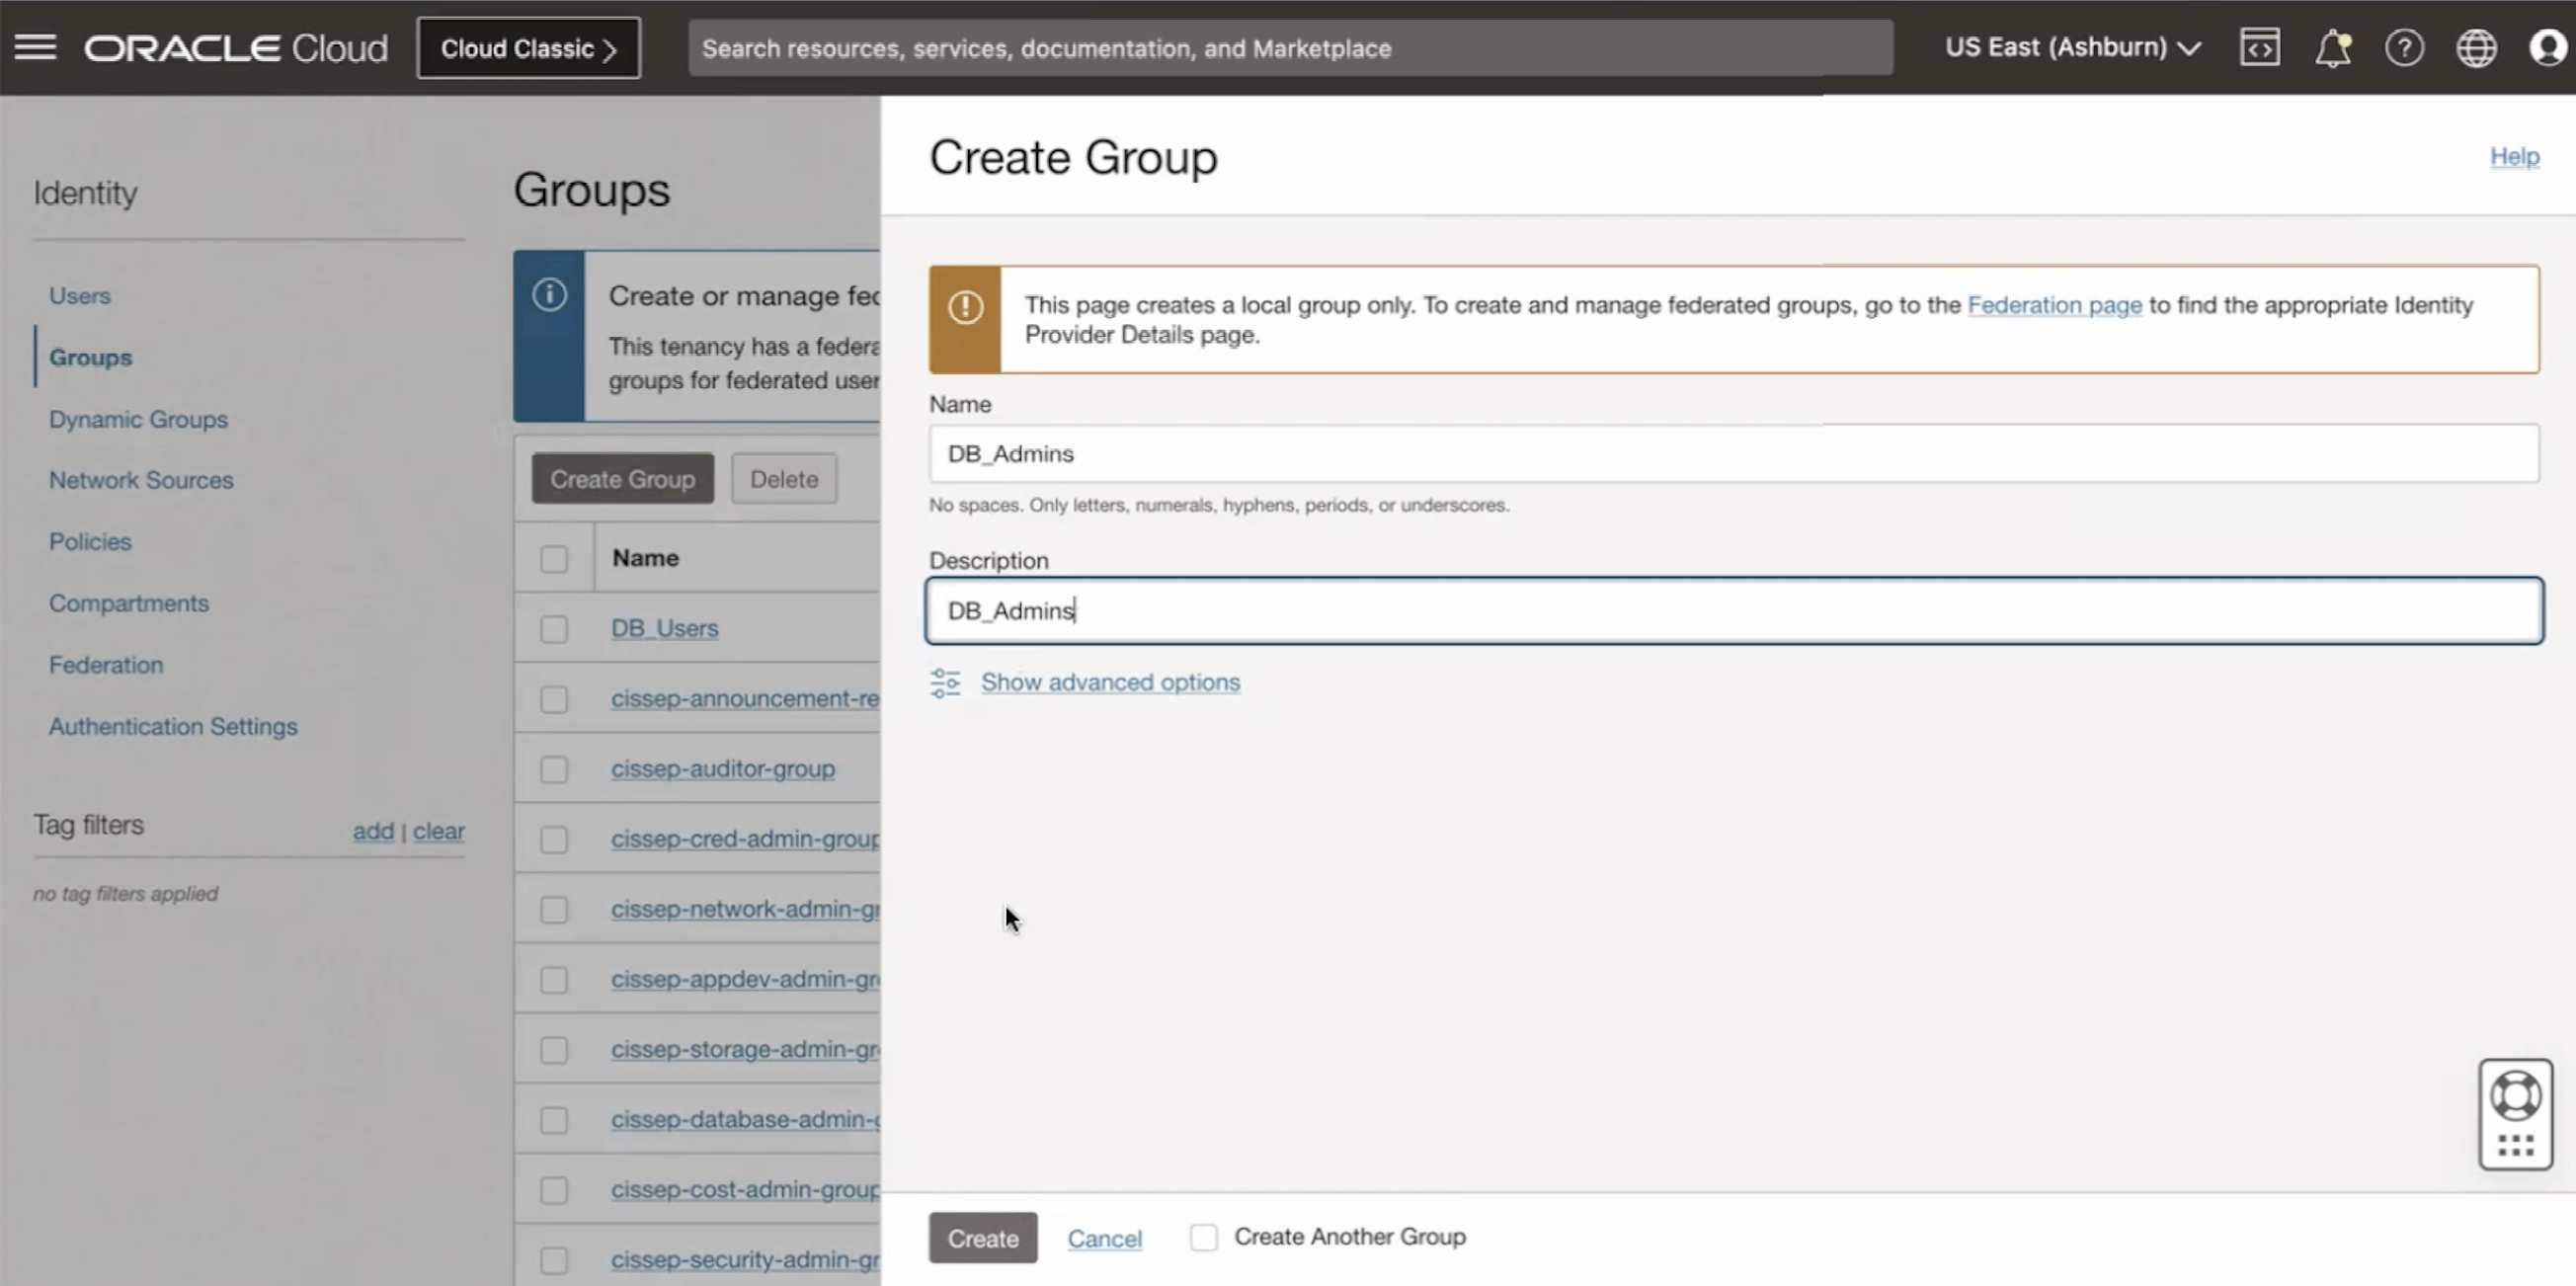
-
Create second group with Name
DB_Usersand DescriptionDB_Users, then click Create.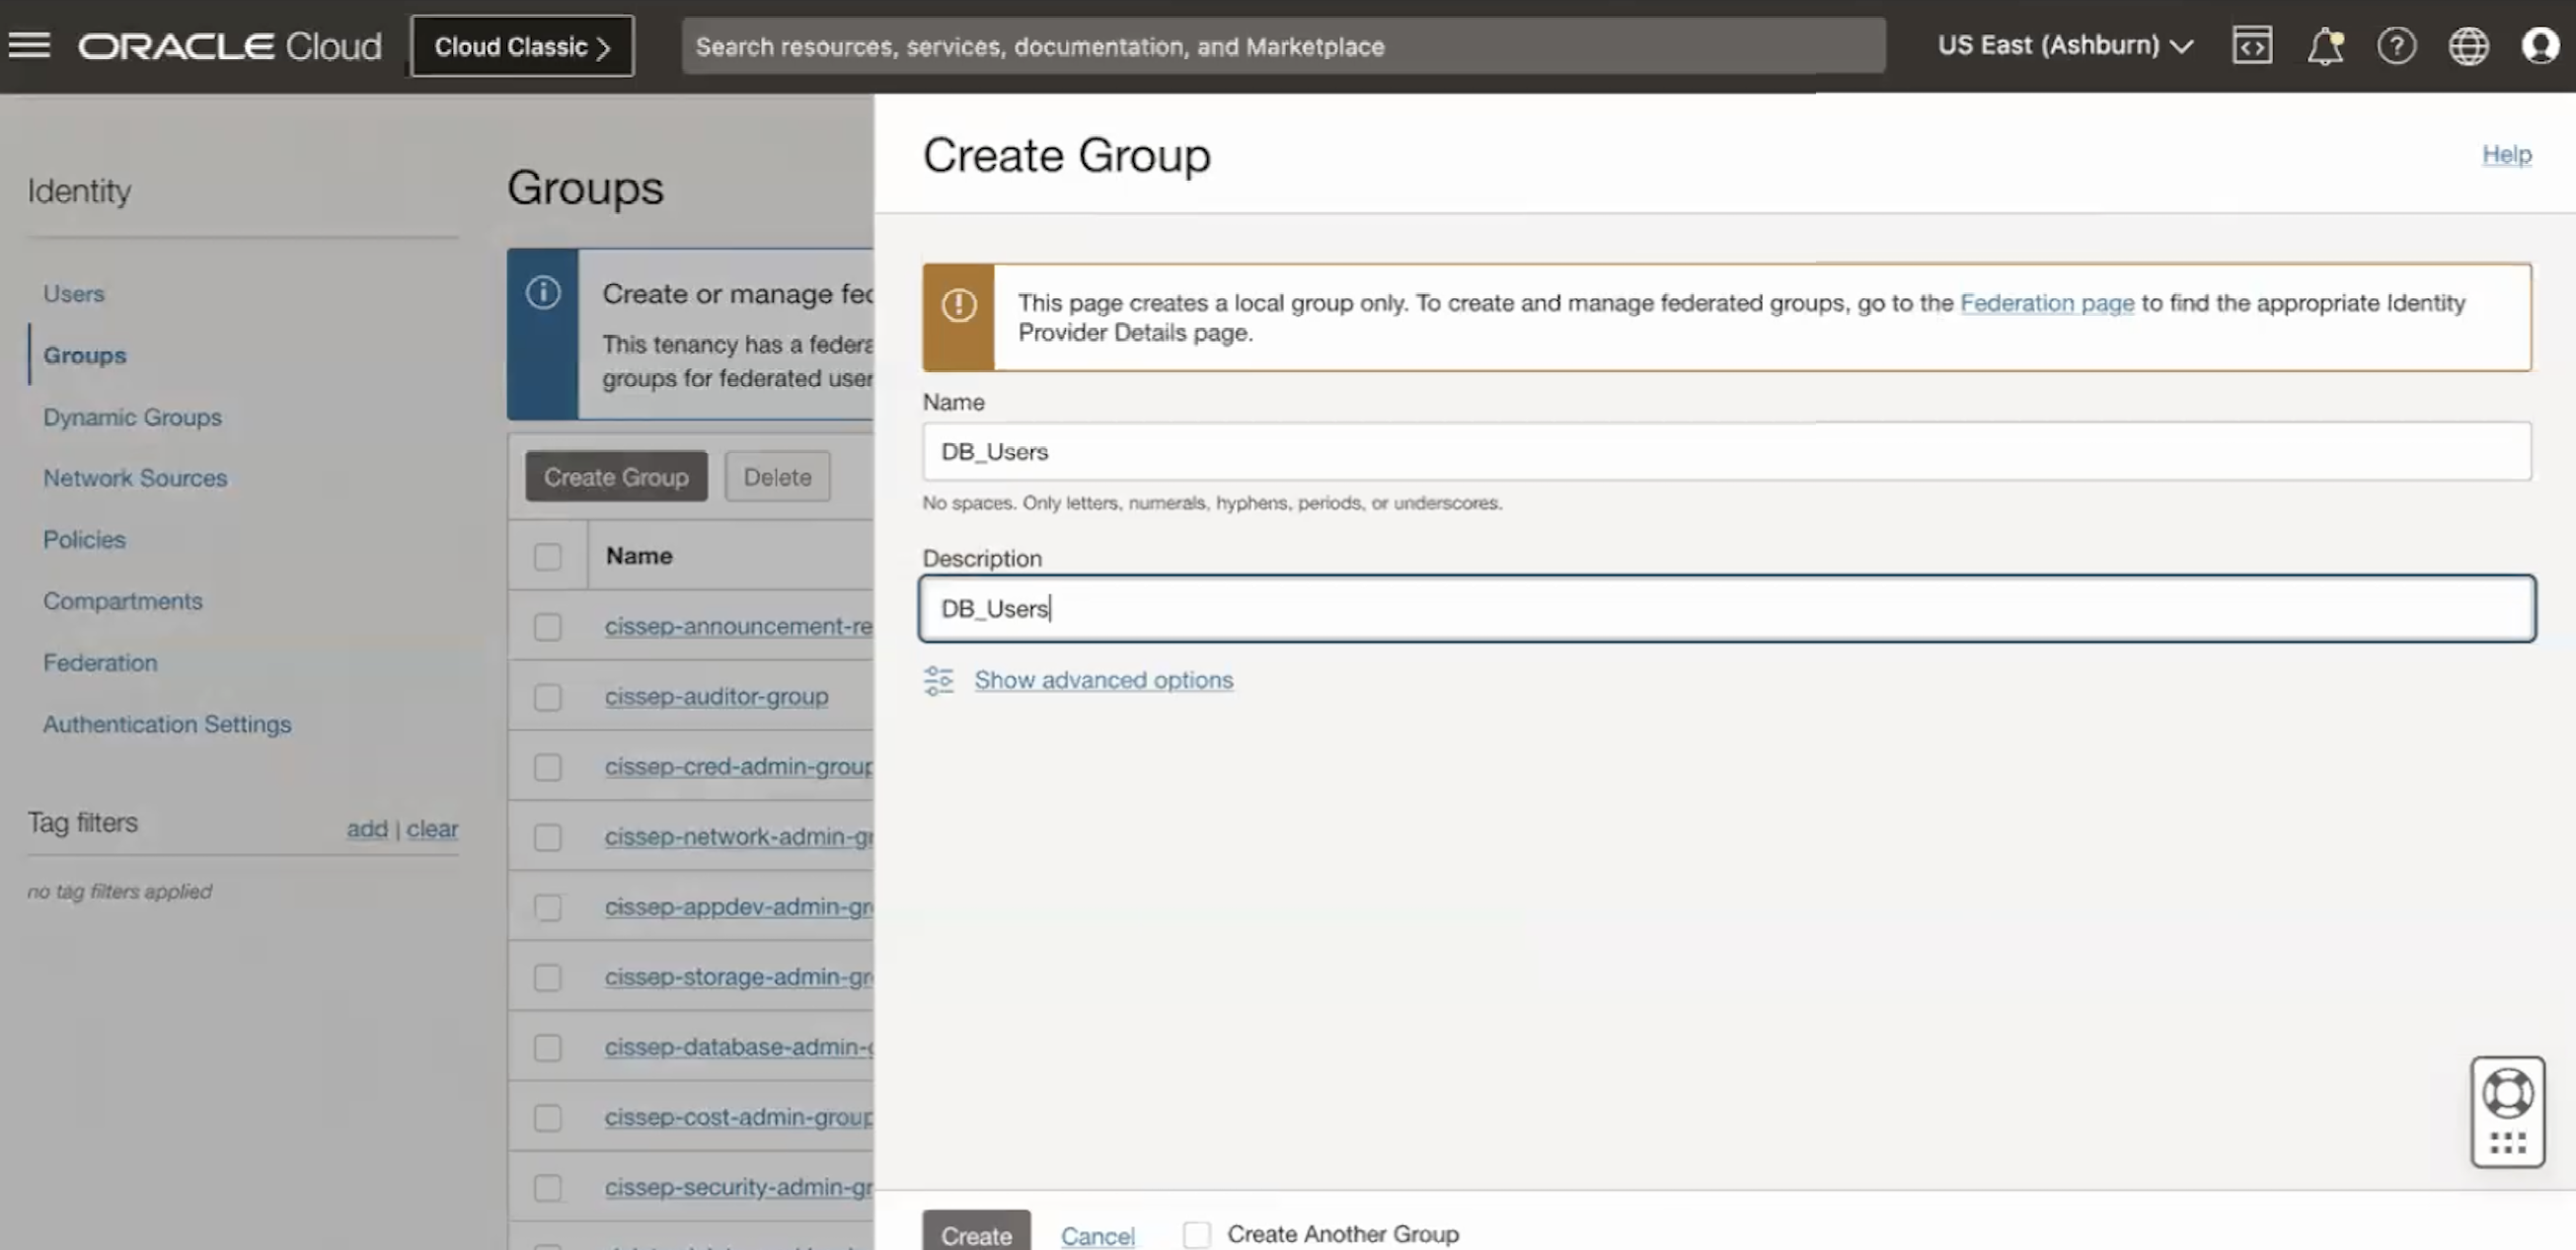
-
-
Navigate to Identity, Policy and enter following details, then click Create Policy.
-
Name:
ADB-Access-Policy -
Description:
ADB-Access-Policy -
Compartment: Ensure the correct compartment is selected
-
Policy Builder: Select the Show manual editor option
allow group DB_Users, DB_Admins to use database-connections in compartment <compartment-name>

allow group DB_Users, DB_Admins to use autonomous-database-family in compartment <compartment-name>
-
-
Navigate to Identity, Users and enter the following details to create two test users -
testuser1andtestuser2and then click Create.-
Select the User Type: IAM User
-
Username:
testuser1 -
Description:
testuser1 -
Email:
testuser1@demo.com -
Confirm Email:
testuser1@demo.com
-
-
Add testuser1 to DB_Users group.

-
Repeat Step 3 to set up
testuser2.-
Select the User Type: IAM User
-
Username:
testuser2 -
Description:
testuser2 -
Email:
testuser2@demo.com -
Confirm Email:
testuser2@demo.com
-
-
Add testuser2 to DB_Admins and DB_Users groups.


Task 2: Set the IAM Database Password for Users
-
Navigate to Identity and Users.
-
Select
testuser1. The Database username is testuser1. Select Database Password and enter the following details, then click Create Database Password.-
Description:
password -
Password: password
-
Confirm Password: password

-
-
Select
testuser2. The Database username is testuser2. Select Database Password and enter the following details given below then click Create Database Password.-
Description:
password -
Password: password
-
Confirm Password: password
Now you have successfully created the database passwords for
testuser1andtestuser2. -
Task 3: Configure database for Create Global User Schema Mappings and Role Mappings for DB_Users and DB_Admins groups
-
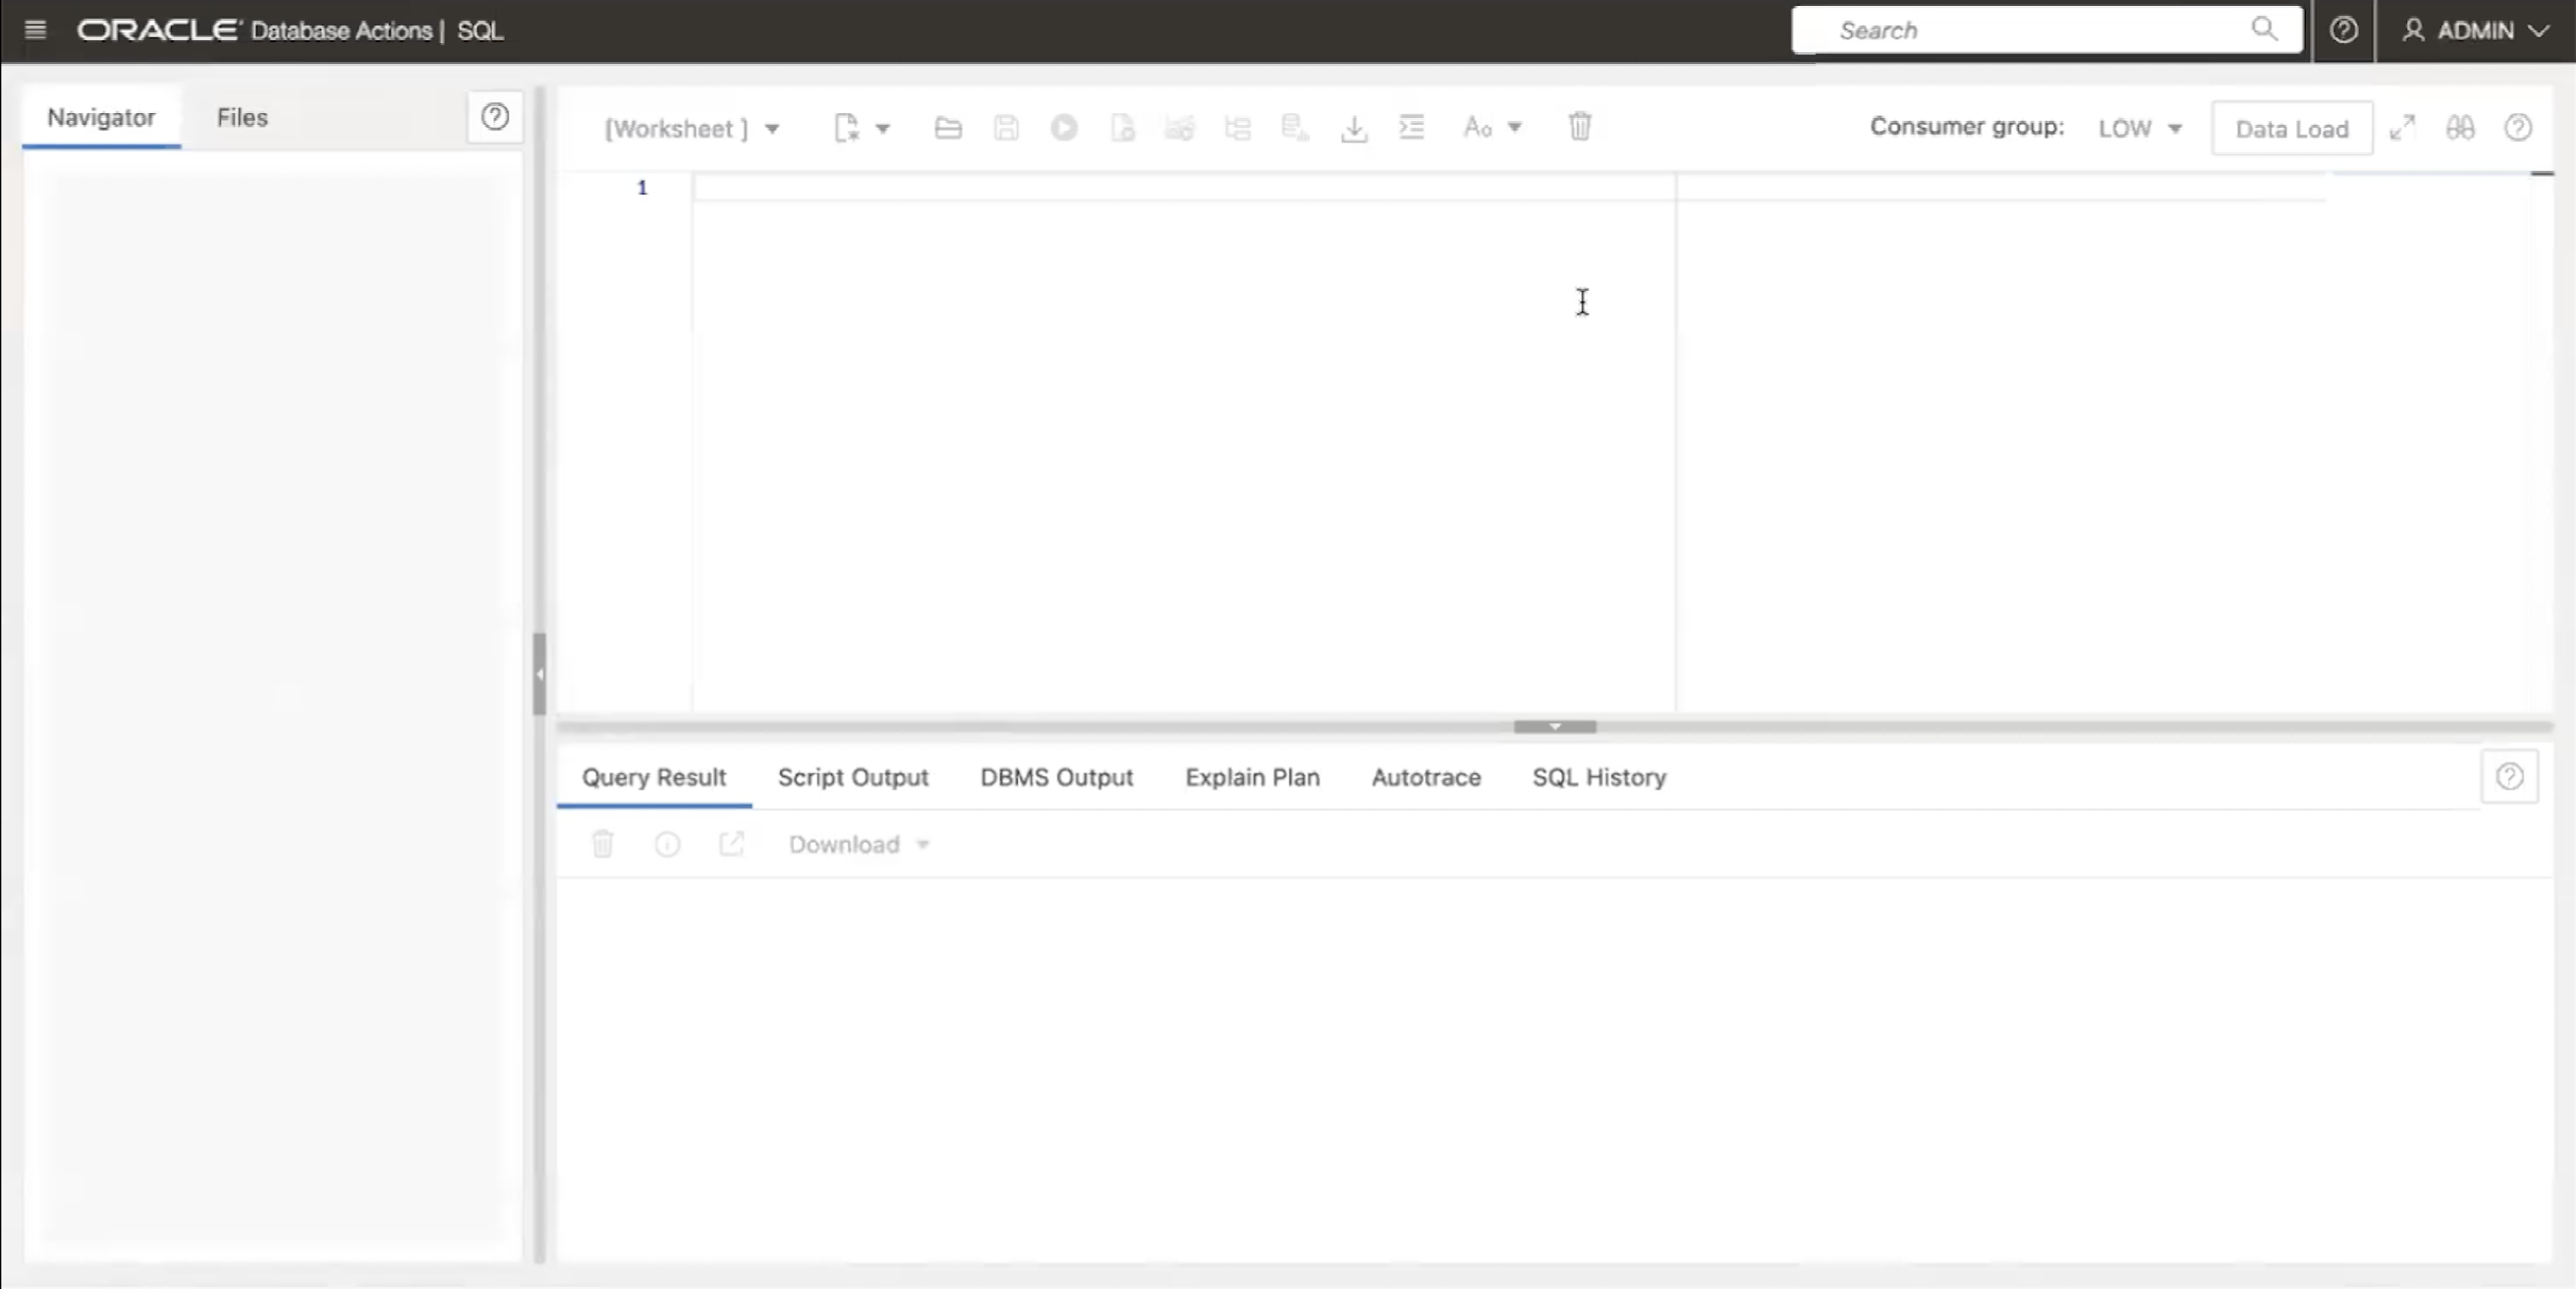
In OCI, navigate to Autonomous Database, Database Actions and SQL. The SQL session is created.

-
Verify the Current External Identity Provider for Autonomous Database using the below query.
SELECT NAME, VALUE FROM V$PARAMETER WHERE NAME='identity_provider_type';
Note: It is currently set to None.
-
Configure OCI IAM as an External Identity Provider for Autonomous Database using the below query.
EXEC DBMS_CLOUD_ADMIN.ENABLE_EXTERNAL_AUTHENTICATION('OCI_IAM');
SELECT NAME, VALUE FROM V$PARAMETER WHERE NAME='identity_provider_type';
Note: It is currently set to OCI_IAM.
-
Configure database for create global user schema mappings and role mappings for DB_Users and DB_Admins groups in SQL.
CREATE USER global_user IDENTIFIED GLOBALLY AS 'IAM_GROUP_NAME=DB_Users';

CREATE ROLE global_role IDENTIFIED GLOBALLY AS 'IAM_GROUP_NAME=DB_Admins';

grant CREATE SESSION to global_user;

grant DWROLE to global_role;

grant CREATE SESSION to global_role;
Task 4: Download the SQL*Plus Database Client
-
Ensure you install the latest release updates for your Oracle Database client releases 19c - 19.20.0 based on the Operating System. In this tutorial, we are using Windows OS.
-
Download the SQL*Plus DB client, see Install SQL*Plus DB client.
Task 5: Download Wallet
-
Navigate to Oracle Cloud, Databases, Autonomous Database and select the Autonomous Database provisioned then click the Database Connection.

-
Enter a password and download the wallet.

Task 6: Update the Wallet location in sqlnet.ora and set the TNS Admin variable
-
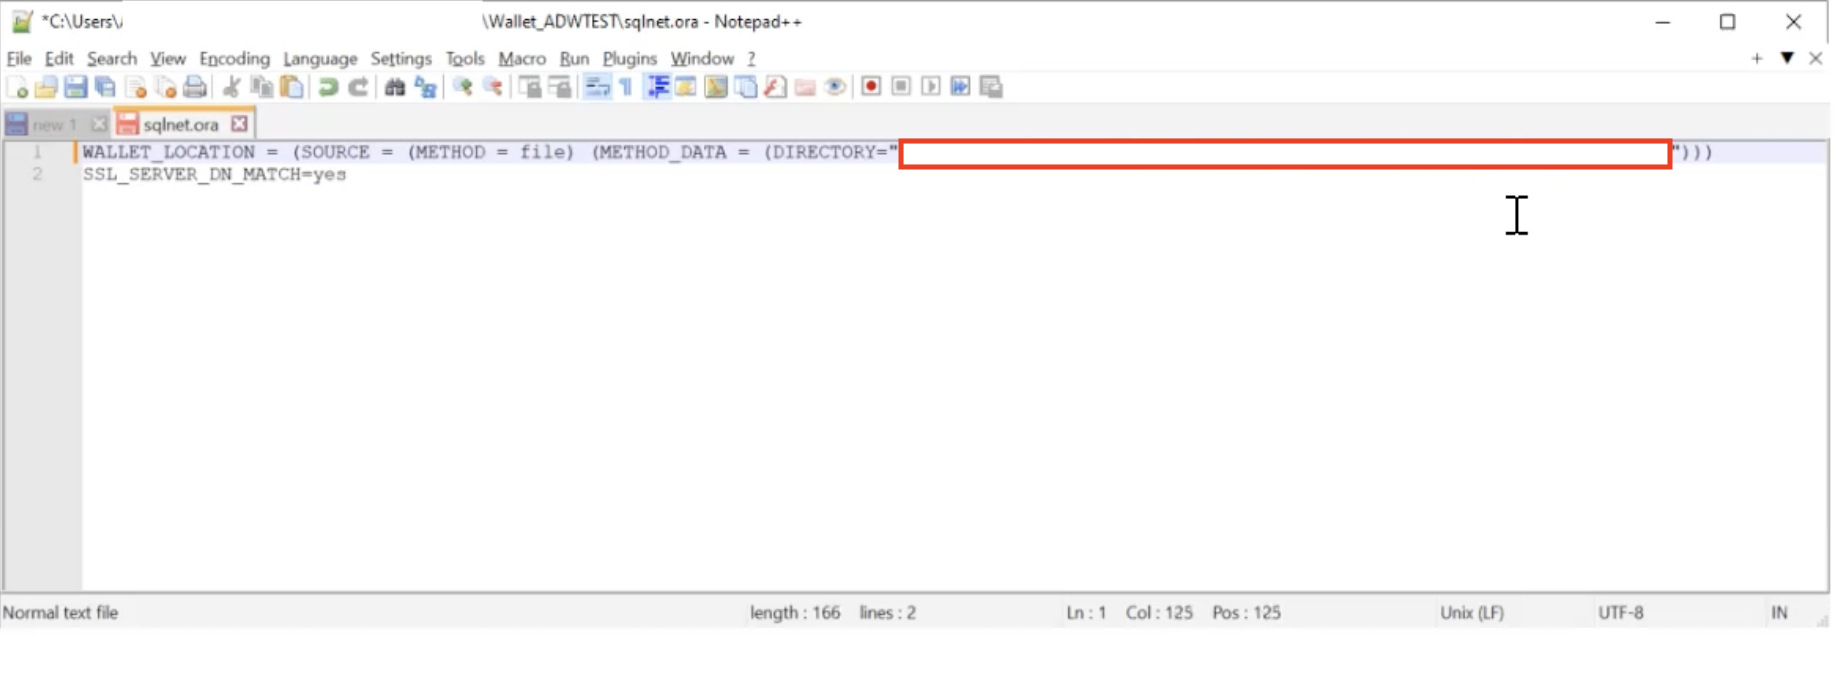
Update the downloaded wallet location path in the
sqlnet.orafile.
-
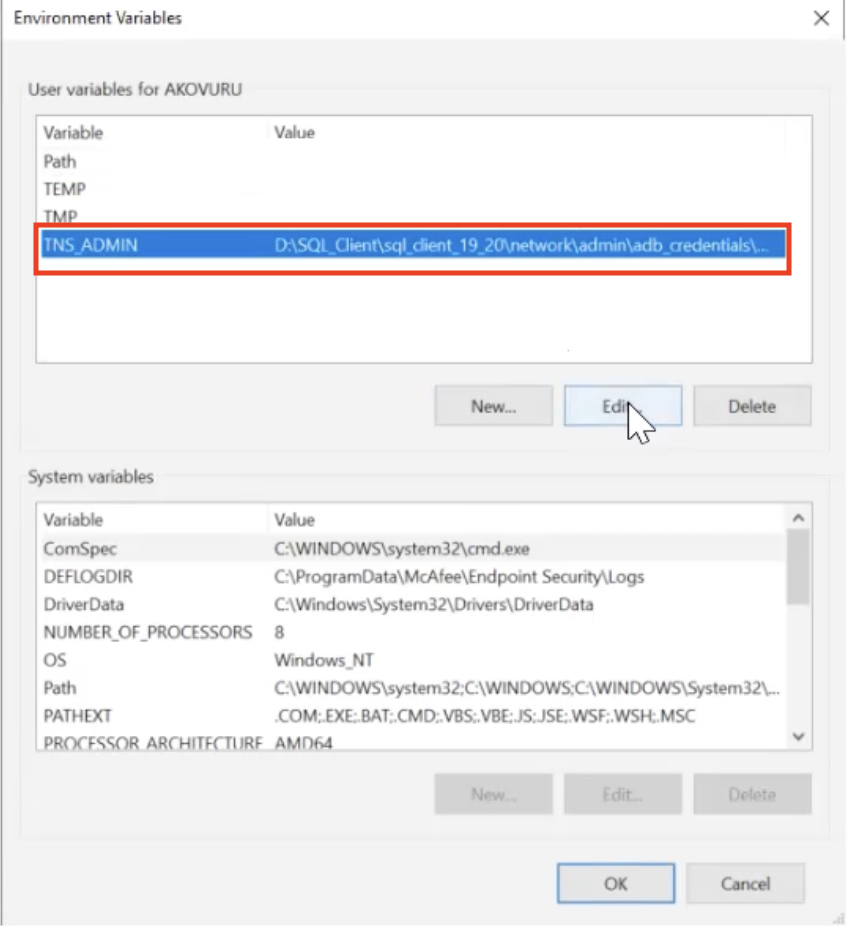
Set up the environment variable: TNS_Admin with the wallet location path.
Task 7: Connect to DB using PowerShell
-
Open Windows PowerShell and enter the following query.
sqlplus /nolog -
Demonstrate the Local Authentication for Administrator User.
conn admin/password@adwtest_highexit
Now you are successfully connected to Autonomous Database as the Administrator.
-
Demonstrate Password-Based Authentication for
testuser1andtestuser2and validate Users and Roles in the Database. Execute the below SQL query to connect to the Autonomous Database as testuser2.conn testuser1/password@adwtest_highYou are connected as
testuser1. Execute the below SQL queries one by one and observe the output to validate the User and Roles.SELECT SYS_CONTEXT ('USERENV','CURRENT_USER') FROM DUAL;SELECT SYS_CONTEXT ('USERENV','AUTHENTICATED_IDENTITY') FROM DUAL;SELECT SYS_CONTEXT ('USERENV','ENTERPRISE_IDENTITY') FROM DUAL;SELECT * FROM SESSION_ROLES;exit
Now you have successfully tested the connection to the Autonomous Database as testuser1.
-
Proceed with the below SQL query to connect to the Autonomous Database as testuser2.
conn testuser2/password@adwtest_highYou are connected as
testuser2. Now, execute the below SQL queries one by one and observe the output to validate the User and Roles.SELECT SYS_CONTEXT ('USERENV','CURRENT_USER') FROM DUAL;SELECT SYS_CONTEXT ('USERENV','AUTHENTICATED_IDENTITY') FROM DUAL;SELECT SYS_CONTEXT ('USERENV','ENTERPRISE_IDENTITY') FROM DUAL;SELECT * FROM SESSION_ROLES;exit
Now you have successfully tested the connection to the Autonomous Database as testuser2.
Related Links
Acknowledgments
-
Authors - Indiradarshni Balasundaram, Alex Kovuru, Anuj Tripathi
-
Contributor - Deepak Rao
More Learning Resources
Explore other labs on docs.oracle.com/learn or access more free learning content on the Oracle Learning YouTube channel. Additionally, visit education.oracle.com/learning-explorer to become an Oracle Learning Explorer.
For product documentation, visit Oracle Help Center.
Use Oracle Cloud Infrastructure Identity and Access Management Authentication with Oracle Autonomous Database
F89542-01
November 2023
Copyright © 2023, Oracle and/or its affiliates.