Note:
- This tutorial requires access to Oracle Cloud. To sign up for a free account, see Get started with Oracle Cloud Infrastructure Free Tier.
- It uses example values for Oracle Cloud Infrastructure credentials, tenancy, and compartments. When completing your lab, substitute these values with ones specific to your cloud environment.
Deploy to OCI Container Engine for Kubernetes from GitLab CI/CD
Introduction
In the rapidly evolving landscape of DevOps and cloud-native development, the need for streamlined integration between version control systems and container orchestration platforms can be critical. Oracle Cloud Infrastructure Container Engine for Kubernetes (OKE) offers a robust and scalable solution for managing containerized applications. However, some teams may have specific preferences and requirements that lead them to seek alternatives to Oracle Cloud Infrastructure (OCI) native DevOps services.
GitLab is a versatile and comprehensive version control and continuous integration and continuous delivery/deployment (CI/CD) platform that not only meets these preferences but also provides a compelling alternative to OCI DevOps services. In this tutorial, we will guide you through the process of seamlessly connecting GitLab to Oracle Cloud Infrastructure Container Engine for Kubernetes (OKE). The integration presented in this tutorial not only aligns to use an already existing GitLab solution which you might have in place, but also empowers the team with a unified solution for version control, continuous integration, and Kubernetes orchestration.
In the subsequent sections, this tutorial introduces two distinct approaches aimed at doing this integration.
-
Approach 1: Using short-lived token generated from Oracle Cloud Infrastructure Command Line Interface (OCI CLI). When you set up the
kubeconfigfile for a cluster using the OKE cluster access instructions, by default it contains an OCI CLI command to generate a short-lived, cluster-scoped, user-specific authentication token. The authentication token generated by the CLI command is appropriate to authenticate individual users accessing the cluster using Kubernetes command line tool (kubectl) and the Kubernetes dashboard. However it is recommended to limit this approach for testing purposes, not production environments. -
Approach 2: Using a Kubernetes service account. The short-lived generated authentication token from approach 1 is not appropriate to authenticate processes and tools accessing the cluster, such as CI/CD tools. To ensure access to the cluster, such tools require long-lived, non-user-specific authentication tokens. This can be achieved using a Kubernetes service account.
Objectives
-
Configure GitLab Runner.
-
Set up the CI/CD pipeline.
Prerequisites
-
An active OCI account.
-
A running OKE cluster with public endpoint. For more information, see Overview of Container Engine for Kubernetes.
-
GitLab account with sufficient privileges.
Approach 1: Deploy to OKE from GitLab CI/CD using short-lived generated token
Task 1: Prepare OCI Compute Instance
You will need an OCI Compute instance for the GitLab Runner, for example a virtual machine (VM).

-
Install kubectl on the VM. For more information, see Install and Set Up kubectl on Linux.
-
Install OCI CLI and create the configuration file for the authentication to the OCI tenancy (or you will be prompted to create it when running the cluster access steps). For more information, see Install OCI CLI and SDK and CLI Configuration File.
-
Set up the access to the OKE cluster. Go to Access Your Cluster and click Local Access instructions from the OCI Console.

-
Install GitLab Runner on the VM. Run the following commands as root.
sudo curl -L https://packages.gitlab.com/install/repositories/runner/gitlab-runner/script.rpm.sh | sudo bash
sudo yum install -y gitlab-runner
Check the GitLab Runner works.
gitlab-runner list
Task 2: Configure GitLab Runner and Project
-
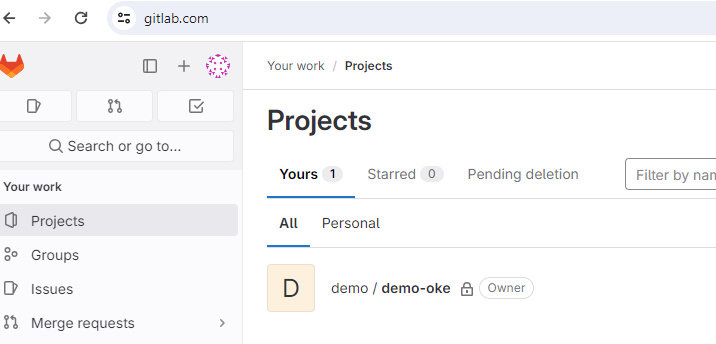
Log in to GitLab, go to Projects and create a new project or use an exiting one.

-
Create a runner or use an existing one. To create a new runner, go to Settings, CI/CD, Runners and Expand. Click New Project Runner and select Platform (for example: Linux), add a Tag which we will use later in the
.gitlab-ci.yamlfile when configuring your deploy pipeline and then click Create runner.
-
Register the runner with VM.
Note: Make a note of the runner authenticaton token in case you need it later.

-
Run the
gitlab-runner registercommand and enter the following information.- GitLab instance URL: Accept the default value
https://gitlab.com. - Runner Name: Valid locally in the
config.tomlfile. For example:gitlab-oke-runner. - Enter an Executor: shell , with this value, you choose that the CI/CD instructions will run on the local machine where kubectl and OCI CLI are installed.

- GitLab instance URL: Accept the default value
-
You can review the runner configuration in the file
$HOME/.gitlab-runner/config.toml.
-
Task 3: Setup the CI/CD pipeline
-
Clone the GitLab project to your local machine.
-
Create a file named
.gitlab-ci.yamlin the project directory, containing the build and deploy instructions. In the deploy section, make sure to include the runner tag you set when creating the runner before.$ cat ~/demo-oke/.gitlab-ci.yml stages: - build - deploy build_job: stage: build script: - echo "Building the ServiceAccount project..." deploy_job: stage: deploy script: - echo "Deploying an nginx pod to the OKE cluster" - kubectl run nginx --image=nginx tags: - shell-executor -
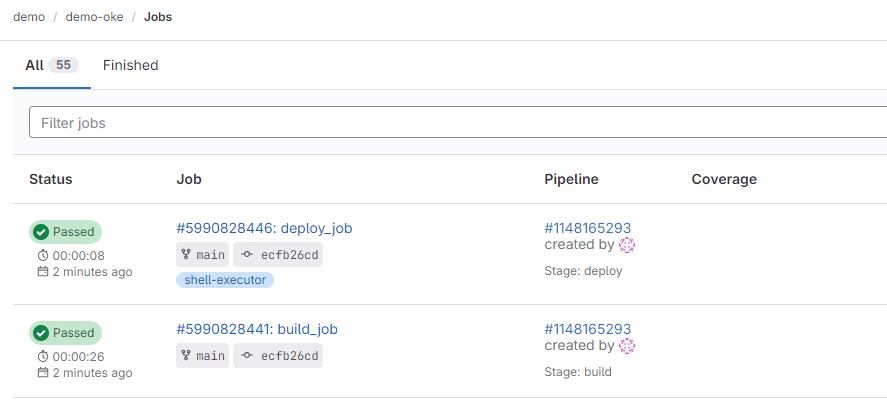
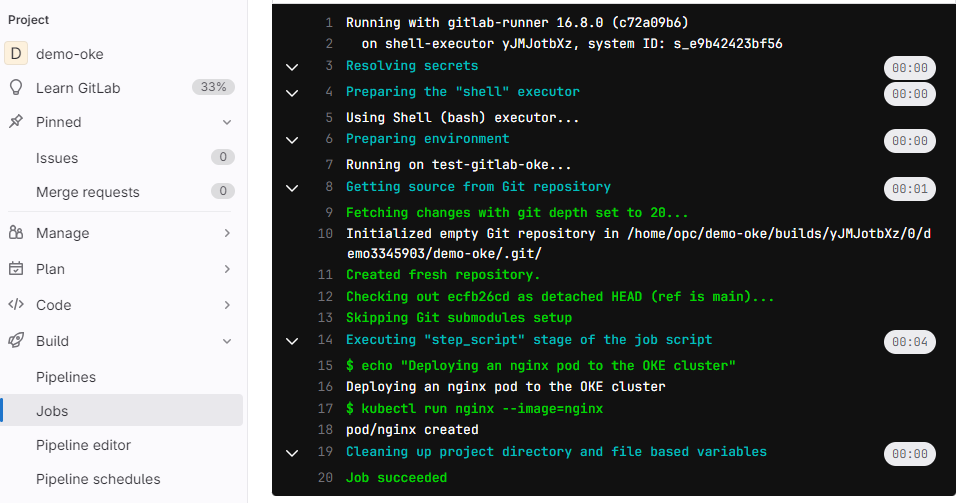
Push the changes to your GitLab project and go to Build and Jobs to check that the build and deploy pipelines are triggered and run successfully.


The pipeline deployed an nginx pod in the OKE cluster.
Notes: Make a note of the tag and key. We will choose the shell executor which will make use of the local machine resources. Otherwise, if you choose Docker for example, you need to provide in your instructions an image which installs kubectl (and OCI CLI for approach 1) in the container.
$ kubectl get pods
NAME    READY   STATUS    RESTARTS   AGE
nginx   1/1     Running   0          47h
Approach 2: Deploy to OKE from GitLab CI/CD using a Kubernetes Service Account
Repeat Tasks 1,2 and 3 from Approach 1 to set up the local VM (install kubectl, OCI CLI, GitLab Runner), register runner, create the pipeline file .gitlab-ci.yaml.
Task 1: Create a Kubernetes Service Account and add its Token
-
Create a Kubernetes service account and add its token to the
kubeconfigfile. For more information, see Adding a Service Account Authentication Token to a Kubeconfig File.Note: Make sure the service account is used, not the OCI CLI short-lived token.
-
Set the user specified in the
kubeconfigfile for the current context to be the new service account user you created using the following kubectl commands.kubectl config set-context --current --user=<service-account-name>For example:
kubectl config set-context --current --user=kubeconfig-sa
When you use a Kubernetes service account to deploy to OKE from GitLab, the process involves authenticating GitLab with the Kubernetes cluster using the service account credentials.
Next Steps
Using these tasks you can use your GitLab CI/CD pipeline to deploy to OKE. These tasks can be taken as a reference for other CI/CD tools. The integration facilitates continuous integration and delivery, allowing for rapid iteration and deployment of applications to OKE.
In this tutorial the instructions employ a shell executor for testing and handling straight forward scenarios. Alternatively, you can opt for a different executor, for example a Docker executor. In such a case the pipeline is executed within a Docker container rather than on the local machine. Running with a Docker executor will need you to specify a Docker image that includes the required utilities. Consequently, creating a custom image may be essential, incorporating tools such as kubectl and OCI CLI to meet specific pipeline requirements.
Related Links
-
Overview of Oracle Cloud Infrastructure Container Engine for Kubernetes (OKE)
-
Adding a Service Account Authentication Token to a Kubeconfig File
Acknowledgments
- Authors - Adina Nicolescu (Senior Cloud Engineer), Guido Alejandro Ferreyra (Principal Cloud Architect)
More Learning Resources
Explore other labs on docs.oracle.com/learn or access more free learning content on the Oracle Learning YouTube channel. Additionally, visit education.oracle.com/learning-explorer to become an Oracle Learning Explorer.
For product documentation, visit Oracle Help Center.
Deploy to OCI Container Engine for Kubernetes from GitLab CI/CD
F92378-01
February 2024
Copyright © 2024, Oracle and/or its affiliates.