4 Configuring Oracle Enterprise Manager for Oracle Fusion Middleware on Oracle Cloud Marketplace
This chapter helps you to access Oracle Enterprise Manager Fusion Middleware Control Console on Oracle Cloud Marketplace, and display WebCenter-related pages from where you can perform all necessary configuration, monitoring, and management tasks.
Prerequisites
Ensure to configure the following prerequisites before configuring Oracle Enterprise Manager for Oracle Fusion Middleware on Oracle Cloud Marketplace:
Configuring Oracle Enterprise Manager
Following steps help you to configure Oracle Enterprise Manager for Oracle Fusion Middleware on Oracle Cloud Marketplace:
- Navigate to
/u01/oracle/mwh/oracle_common/common/binand execute the fileconfig.shusing the command/u01/oracle/mwh/oracle_common/common/bin>./config.sh.Oracle WebLogic Server Configuration wizard appears.
- From the Create Domain screen, select Create a new domain option and click Browse to select the desired domain location. The selected location appears in the Domain Location text box. Click Next.
- From the Templates screen, select Create Domain Using Product Templates option. Available Templates appear. Select Oracle Data Integrator - Console, Agent and Enterprise Manager Plugin. All the dependent templates are selected automatically. Click Next.
- From the Application Location screen, click Browse to select the desired location for the application. The selected location appears in Application Location text box. Click Next.
- From the Administrator Account screen, provide the admin server login credentials in the following fields:
- Name
- Password
- Confirm Password and click Next.
- From the Domain Mode and JDK screen, for JDK, select Oracle HotSpot 1.8.0_191/u01/oracle/mwh/jdk1.8.0_191 option and click Next.
- From the Database Configuration Type screen, for Specify AutoConfiguration Options Using parameter, select RCU Data option and fill-in the required details for the following fields:
- Connection URL
- Schema Owner
- Schema Password
oracle.net.authentication_service TCPS oracle.net.ssl_server_dn_match false javax.net.ssl.trustStore /u01/oracle/mwh/wallet/cwallet.sso (Path of the wallet location) javax.net.ssl.keyStoreType SSO javax.net.ssl.keyStore /u01/oracle/mwh/wallet/cwallet.sso(Path of the wallet location) javax.net.ssl.trustStoreType SSOClick Save & Close. Click RCU Configuration and Click Next.Note:
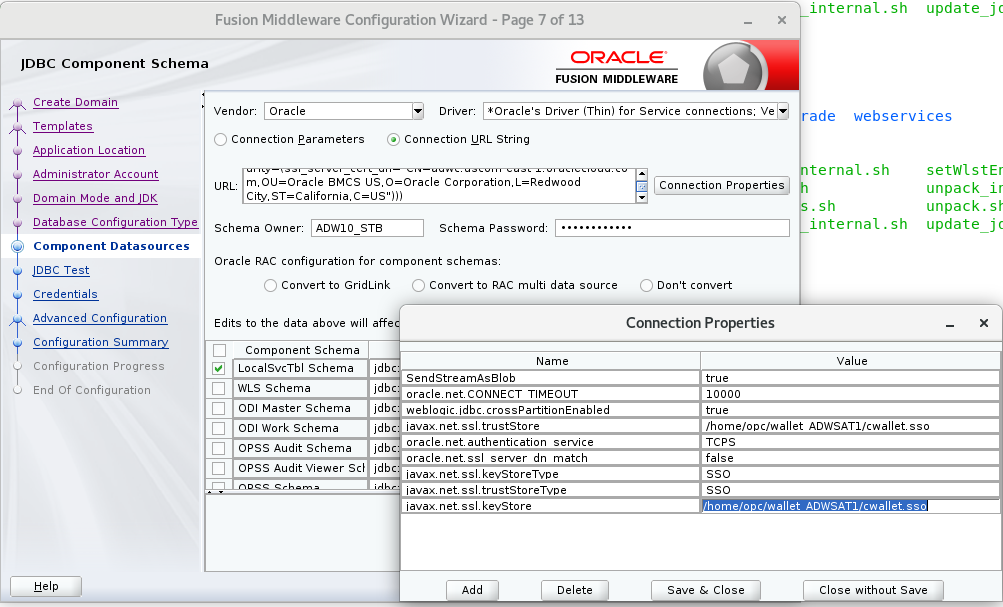
Make sure to provide the path for truststore and keystore parameters same as the path of your wallet file. - Provide the essential details in Component Datasources screen.
Note:
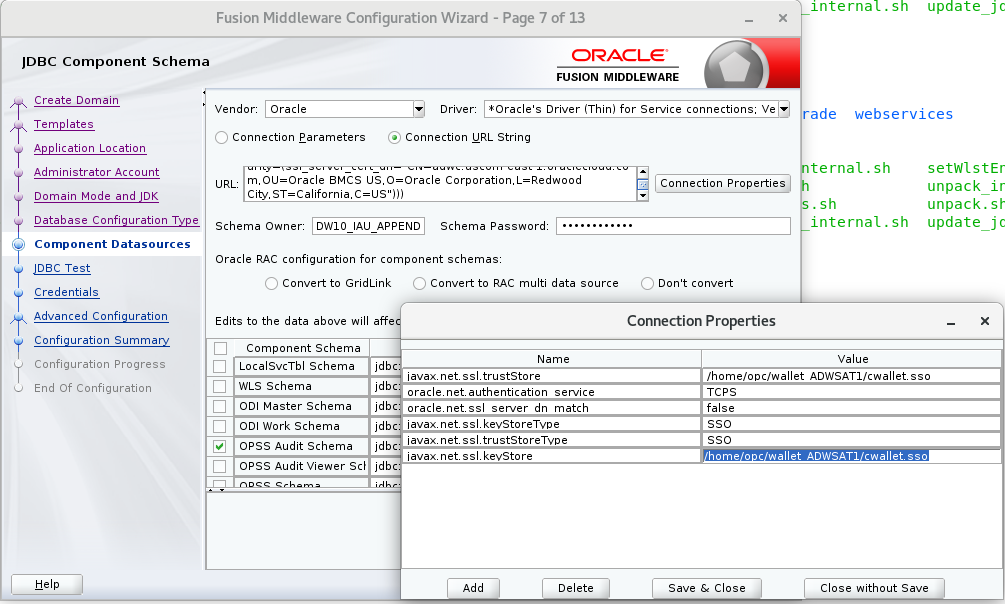
Make sure to change the connection string, connection properties for each component schema, as they are not carried forward from the previous screens.Figure 4-1 Sample for Component Datasources

Description of "Figure 4-1 Sample for Component Datasources"This image is a sample with changes for component
LocalSvcTblSchemaand you have to make changes for the following:- WLS Schema
- ODI Master Schema
- ODI Work Schema
- OPSS Audit Schema
- OPSS Audit Viewer Schema
- OPSS Schema
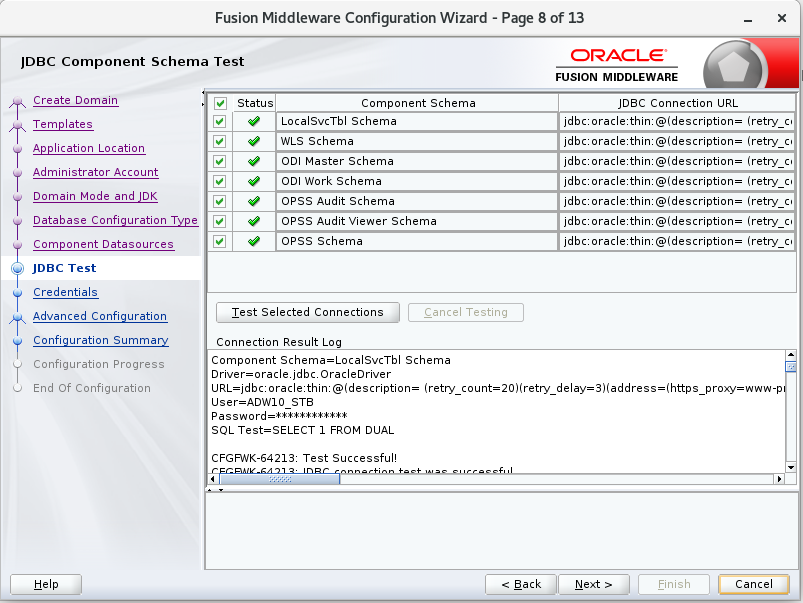
- After providing all the above details, JDBC Test screen appears. Review all the details and click Next.
- From the Credentials screen, enter the Supervisor password for your ODI instance and click Next.
- From the Advanced Configuration screen, select the check boxes for the following servers/services:
- Administration Server
- Node Manager
- Topology
- Deployments and Services and click Next.
- The Administration Server screen displays the port number in which the admin server listens. It is auto-populated by default. Click Next.
- From the Node Manager screen, provide the node manager login credentials in Username, Password and Confirm Password fields and click Next. Node manager login credentials can be same as Admin server login credentials, which means you can use the same username and password for logging into both Node manager and Admin server.
- From the Managed Servers screen, provide the server name and port details in Server Name and Listen Port columns respectively.
- From the Clusters screen, click Add, to create a new cluster. Click Next.
- The Server Templates screen displays all the available server templates. Click Add, to add new server templates, if required, else, click Next. Assign the required server template to the newly created Cluster.
- The Coherence Cluster screen displays the available cluster name and port number. Click Next.
- In the Machines screen, click Add, to add a machine and provide the name, port and address of the Node Manager. After adding a machine, add
Admin serverandODI_serverto the created machine. Click Next. - The Virtual Targets screen displays the details of configured virtual targets, if any. It includes details such as name, target, host names, URI prefix, explicit port and port offset. Click Next.
- The Partitions screen displays the details of all the available partitions. Click Next.
- The Deployments screen displays a list of all the Deployments and Deployment Targets. Click Next.
- The Service Targets screen displays a list of all the Services and Deployment Targets. Click Next.
- The Configuration Summary screen displays a summary of all the performed configurations. Click Create. Configuration Process screen appears displaying the status of the process and configurations.
- Upon completion, End of Configuration screen appears, displaying the Configuration Succeeded message along with the configured Domain Location and Admin Server URL details. Click Finish.
Other Configurations
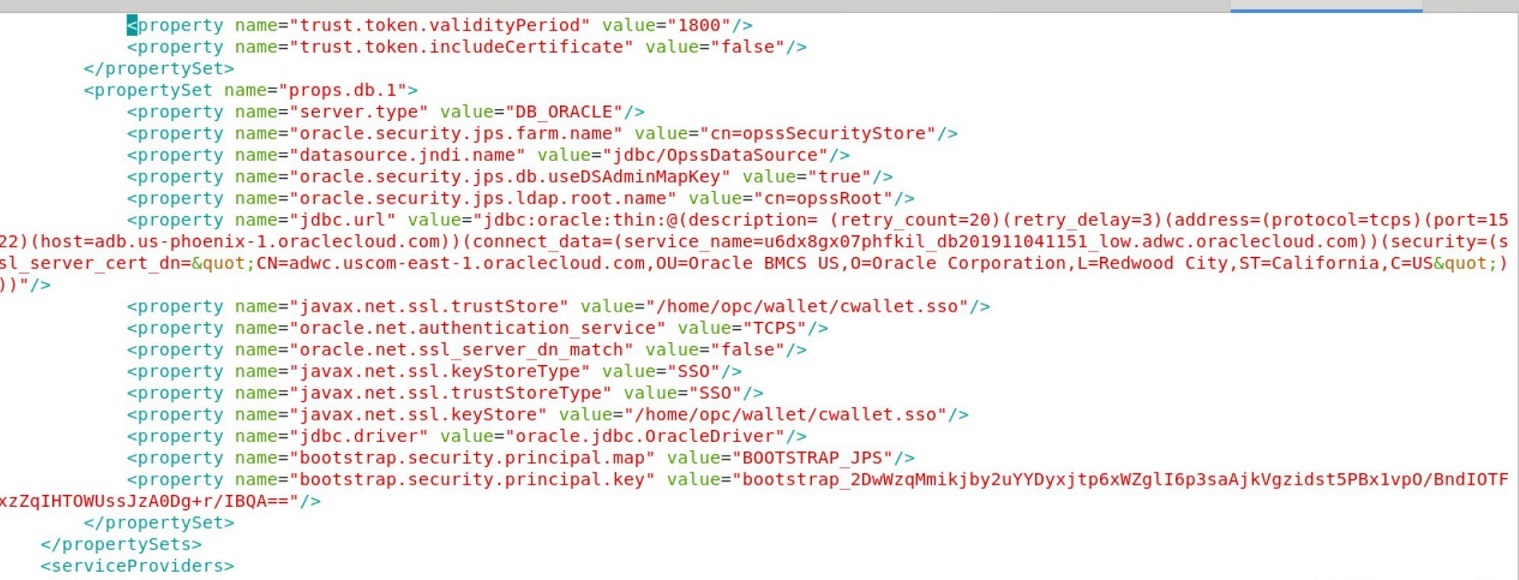
- Locate
jps-config.xmlfile and configure the following properties in yourjps-config.xmlfile. By default, you can find this file in the following location -~/oracle/user_projects/domains/base_domain/config/fmwconfigand this location is based on the created base domain.<property name="javax.net.ssl.trustStore" value="/u01/oracle/mwh/wallet_ADWSAT1/cwallet.sso"/> <property name="oracle.net.authentication_service" value="TCPS"/> <property name="oracle.net.ssl_server_dn_match" value="false"/> <property name="javax.net.ssl.keyStoreType" value="SSO"/> <property name="javax.net.ssl.trustStoreType" value="SSO"/> <property name="javax.net.ssl.keyStore" value="/u01/oracle/mwh/wallet_ADWSAT1/cwallet.sso"/> - In the command prompt, navigate to Node manager properties file
/u01/oracle/mwh/user_projects/domains/base_domain/nodemanager/nodemanger.propertiesand edit the propertySecureListener= falseand make sure the listener port is matching with the configured port. Save the file and navigate to the domain creation path and start the node manager using the following command :/u01/oracle/mwh/user_projects/domMains/base_domain/bin>./startNodeManager.sh - In the command prompt, navigate to the domain creation path (configured in the above steps) and perform the following:
- Start the Admin server using the following command:
/u01/oracle/mwh/user_projects/domains/base_domain/bin> ./startWebLogic.sh - Start the Managed server using the following command:
/u01/oracle/mwh/user_projects/domains/base_domain/bin> ./startManagedWebLogic.sh ODI_server1 http://localhost:7001The command
/startManagedWebLogic.shhelps you to start the managed server which is required to start the ODI Console and Oracle DIAgent.
- Start the Admin server using the following command:
After performing all the above configurations, navigate to a web browser and access this URL http://<<hostname>>:<<port>>/em.
http://localhost:7001/em/
After logging in, you can check the health of the servers. From the Oracle Enterprise Manager Fusion Middleware Control Console you can start and stop the servers and agents. You can also check if, the console is working by logging into the console http://localhost:managedserverport/odiconsole.


