3 Launching and Terminating Oracle Stream Analytics

Once you have completed the post installation tasks, you are ready to launch Oracle Stream Analytics, and start using it. Launching and terminating Oracle Stream Analytics is easy and you just need to run simple commands to do them.

Launching Oracle Stream Analytics

After you have installed Oracle Stream Analytics, the next step is to start the Oracle Stream Analytics server that will launch the application.

To launch Oracle Stream Analytics and start the server:

  1. Change directory to OSA-18.1.0.0.1/osa-base/bin and run ./start-osa.sh.
    You can see the following message on the console:

    OSA schema version: 18.1.0.0.1
    The schema is preconfigured and current. No changes or updates are required.

    Note:

    If you don’t see this message, check the log file in the OSA-18.1.0.0.1/osa-base/logs folder.
  2. To ensure that the server is up and running, go to Chrome browser and type localhost:9080/osa in the address bar to launch Oracle Stream Analytics.
  3. Login using your default admin credentials.
    If you do not see the home page, check the logs in the <OSA-INSTALL-DIR>/osa-base/logs folder.

Setting up Runtime for Oracle Stream Analytics Server

Before you start using Oracle Stream Analytics, you need to specify the runtime server, environment, and node details. You must do this procedure right after you launch Oracle Stream Analytics for the first time.

Do the following to set up runtime for Oracle Stream Analytics:
  1. In the Chrome browser, enter localhost:9080/osa to access Oracle Stream Analytics’ login page, and login using your credentials.

    Note:

    The password is a plain-text password.
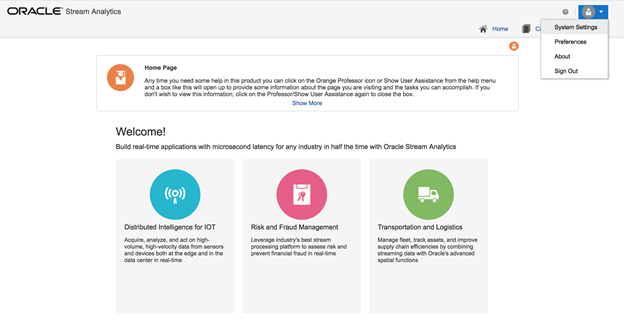
  2. Click the user profile at the top right corner, and then click System Settings, as shown in the following figure:
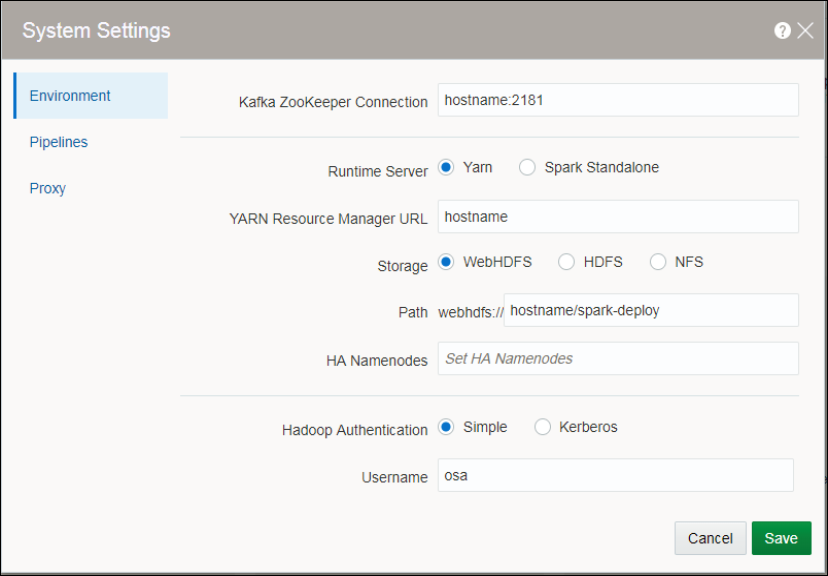
  3. In the Environment tab of the System Settings dialog box, ensure the following:
    1. In the Kafka ZooKeeper Connection field, specify the host and the port where Kafka Zookeeper is running.
      The Kafka Zookeeper connection is required to see live results while designing pipelines.
    2. Select Yarn as the Runtime Server and in the YARN Resource Manager URL field, specify the host name and port of the Hadoop cluster where the YARN resource manager is running.
    3. Select WebHDFS as Storage and in the path webhdfs:// field, specify the host name of Hadoop cluster where the Name Node is running along with a root folder, for example spark-deploy (as shown in the figure above).
      If the folder does not exist, it will automatically be created, but the user specified in the Hadoop authentication below must have write permissions.
    4. Select Simple as Hadoop Authentication because Kerberos is not supported in this version of Oracle Stream Analytics.
      The specified Username must have write permissions for the folder specified in the webhdfs:// URL.

Validating Data Flow to Oracle Stream Analytics

After you have configured Oracle Stream Analytics with the runtime details, you need to ensure that sample data is being detected and correctly read by Oracle Stream Analytics
To validate data flow into Oracle Stream Analytics, use the following steps:
  1. Copy the six lines below into a CSV file, for example sample.csv.

    ProductLn,ProductType,Product,OrderMethod,CountrySold,QuantitySold,UnitSalePrice
    Personal Accessories,Watches,Legend,Special,Brazil,1,240
    Outdoor Protection,First Aid,Aloe Relief,E-mail,United States,3,5.23
    Camping Equipment,Lanterns,Flicker Lantern,Telephone,Italy,3,35.09
    Camping Equipment,Lanterns,Flicker Lantern,Fax,United States,4,35.09
    Golf Equipment,Irons,Hailstorm Steel Irons,Telephone,Spain,5,461
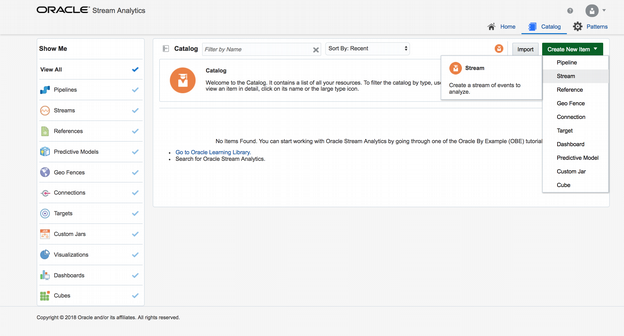
  2. In the Catalog, as shown in the image below, click Create New Item, and then click Stream. create a stream of type File.
  3. In the Type Properties page of the Create Stream dialog box, provide the Name, Description, and Tags for the Stream, select the Stream Type as File, and then select Create Pipeline with this source (Launch Pipeline Editor).
  4. Click the Next button to navigate to the Source Details page of the Create Stream dialog box.
  5. In the Source Details page, click Upload file to upload the sample.csv file, and then click Next to navigate to the Data Format page.
  6. In the Data Format page, select the CSV Predefined Format as Default and select the First record as header, and then click Next to navigate to the Shape page.
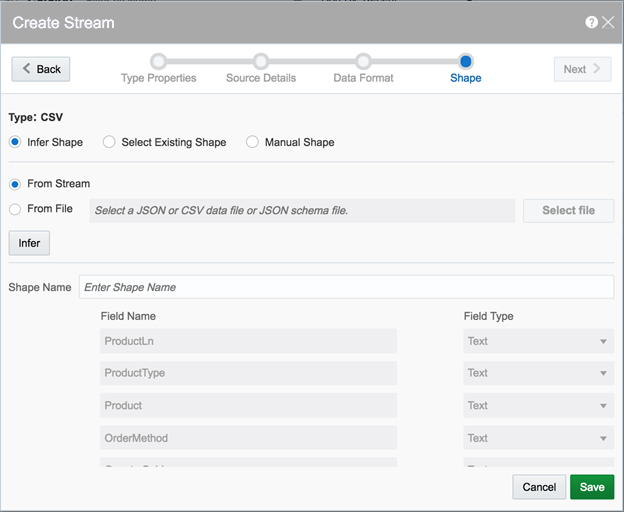
  7. In the Shape page, verify that the shape of the event is successfully inferred as in the following image, and then click Save.
  8. In the Create Pipeline dialog box, enter the Name, Description, Tags of the pipeline, select the Stream that you created, and then click Save.
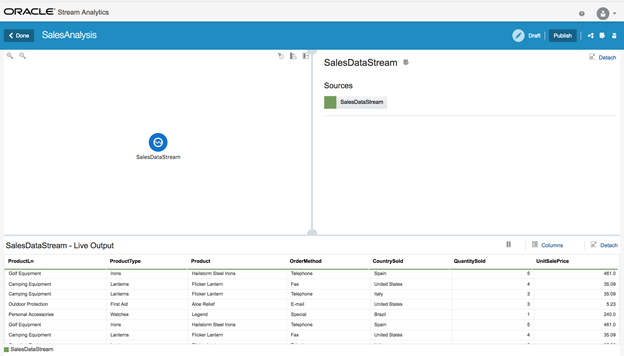
    You can see the pipeline editor and you can see the message Starting Pipeline followed by the message Listening to Events.

    Note:

    This is the first access of the cluster and it takes time to copy libraries, please be patient. You should eventually see the screenshot below with single node representing the stream source.

    Description of pipeline_editor.png follows
    Description of the illustration pipeline_editor.png

    To complete your pipeline, see Creating a Pipeline.

Terminating Oracle Stream Analytics

You can terminate Oracle Stream Analytics by running a simple command.

Use the following command to terminate Oracle Stream Analytics:

OSA-18.1.0.0.1/osa-base/bin/stop-osa.sh