First Access to the Deployment from the Service Manager
To start using your Oracle GoldenGate Microservices deployment, you have to connect to the Service Manager:
-
Open a web browser and enter the host URL where the Oracle GoldenGate Microservices deployment is installed.
The URL is similar to
http://host:port, wherehostis the name or IP address of the server that is running the Service Manager andportis the port number of the Service Manager. For a secure deployment, the URL is similar tohttps://host:9001. -
Enter the user name and password you created during deployment creation and sign in.
Add Users to a Deployment
Each deployment has its own set of users with specific roles. The administrator account user, which is created when the Service Manager is created for a host using OGGCA, can log into the Service Manager and other microservices. This user can also create users with specific roles to access or operate Oracle GoldenGate processes. This administrator account user can access all deployments that are added to this existing Service Manager.
However, all other users created from either the Service Manager or Administration Service are associated with the specific deployment. These users are not available with other deployments on the same host server.
To create users from the Service Manager or Administration Service:
-
Log in to either the Service Manager or the Administration Service.
-
From the left navigation pane, select Administrator.
-
Click Users (+) to add users.
-
Enter a unique user name.
-
Select one of the roles from the Role list box. The options are User, Operator, Administrator, and Security.
Table 3-1 Oracle GoldenGate User Roles and Privileges
Role ID Privilege Level User
Allows information-only service requests, which do not alter or effect the operation of either the MA. Examples of Query/Read-Only information include performance metric information and resource status and monitoring information.
Operator
Allows users to perform only operational actions, such as creating, starting and stopping resources. Operators cannot alter the operational parameters or profiles of the MA server.
Administrator Grants full access to the user, including the ability to alter general, non-security related operational parameters and profiles of the server.
Security
Grants administration of security related objects and invoke security related service requests. This role has full privileges.
-
Select the user type from the Type list box as Password or Certificate.
If you select the user type as Password, then the authentication is done based on the username and password.
If you select the user type as Certificate, then the user will authenticate itself by presenting a client certificate. After you select the Certificate option, you need to enter the common name (in the certificate that will be presented such CN="certuser").
Note:
The certificate is with the user and not saved by the Oracle GoldenGate service. When presented for authentication, the Oracle GoldenGate service first authenticates that the certificate presented can be trusted and then checks if the common name in the certificate has been registered as a valid user. If yes, it will assign the appropriate user role.
-
Enter information that describes the user.
-
Click Submit. The user is registered.
Edit Users
User role cannot be changed. You must delete a user and add it, as required. However, you can modify or edit the following user attributes:
- You can switch the User Type from Basic to Certificate or the other way around.
- You can also change the password for the user, if required.
To edit user attributes:
-
Navigate to the Administrator page from the Service Manager or Administration Service.
-
Click the Edit User (pencil) in the Action column of the Users table.
-
Change the required attribute.
-
Click Submit to confirm the modifications to the user attributes.
Delegate User Authentication and Authorization to an External ID Provider
Learn about delegating user authentication and authorization to an external ID provider.
Topics:
Configure the Authorization Profile to Set Up IDCS Access Credentials
Oracle GoldenGate interoperates with external identity provider Oracle Identity Cloud Service (IDCS) for authentication and authorization of user credentials that are associated with your deployment.
After you set up the Oracle Identity Cloud Service (IDCS) user credentials in OGGCA on the Administrator Account screen, you need to perform these steps to set up an authorization profile for IDCS. This authorization profile will allow connecting and accessing the IDCS server to authorize users for Oracle GoldenGate.
To configure this type of user authentication and authorization, you need to create an authorization profile in Oracle GoldenGate.
Manage Certificates for Deployments
Learn about managing certificates for deployments.
Topics:
Apply Certificates to an Oracle GoldenGate Deployment
Certificates can apply to:
-
A specific deployment: These certificates are local to the deployment. See Create Different Types of Certificates for a Secure Deployment.
-
Shared across deployments added to the same Service Manager: These are shared certificates created from the Service Manager Certificate Management page. These certificates can be shared across multiple deployments supervised by one Service Manager.
-
Different source and target deployments: These are called external certificates (extern) with different source and target deployments. See Create a RootCA External Certificate in the Target Deployment. For more information, refer to Connecting Two Deployments Using External RootCA Certificate.
Note:
Adding a non-CA self-signed certificate as a trusted certificate using Certificate Management page's CA Cert section is not supported and will result in an error.Modify Configuration for the Service Manager
Learn about how to modify configuration for the Service Manager.
Topics:
Access the Service Manager Information Page
Details Tab
Use this tab to review the selected deployment configuration. All the deployment directories that you configured with OGGCA are displayed. For Oracle database, you can only edit the Oracle GoldenGate home (OGG_HOME) directory. This allows you to use a different installation than the one you originally configured.
For SQL Server and Db2 z/OS, you need to follow the steps given in the Setting up Environment Variables for Db2 z/OS, Setting up for DB2 z/OS, and Setting up for SQL Server sections in the Using Oracle GoldenGate on Oracle Cloud Marketplace guide.
Note:
It's important to do the settings for SQL Server and DB2 z/OS to make sure that the Administration Service starts when using either of these databases.
Configuration Tab
Use this tab to review and change the selected deployment environment variables. The environment variables that you configured with OGGCA are displayed. You can add new variables, modify existing variables, and delete selected variables. For Oracle database, make sure that TNS_ADMIN is set. See Specify Environment Variables for more information.
Certificates
Use this tab to add and manage certificates for the server, client and CA certificates. There is a difference between the Certificates tab and the Certificate Management page. The Certificates tab is associated with the deployment or Service Manager because you arrive at this tab by clicking the deployment name or the Service Manager. However, the Certificate Management page allows you to manage certificates by selecting the deployment or Service Manager on that page itself.
See Manage Certificates for Deployments for more information.
Authorization Profiles
Use this tab to delegate user and group management to external ID providers such as Oracle Identity Cloud Service (IDCS). Integration with an external Identity Management (IDM) system using OpenID/OAuth2.0 protocol provides Oracle GoldenGate users with:
- A single sign-on experience
- Ease of deploying Oracle GoldenGate cloud integration with IDCS.
See Delegate User Authentication and Authorization to an External ID Provider for more information.
Modify Configuration for the Deployment
Learn about how to modify the configuration for the deployment.
Topics:
Access the Deployment Information Page
Details Tab
Use this tab to review the selected deployment configuration. All the deployment directories that you configured with OGGCA are displayed. For Oracle database, you can only edit the Oracle GoldenGate home (OGG_HOME) directory. This allows you to use a different installation than the one you originally configured.
For SQL Server and Db2 z/OS, you need to follow the steps given in the Setting up Environment Variables for Db2 z/OS, Setting up for DB2 z/OS, and Setting up for SQL Server sections in the Using Oracle GoldenGate on Oracle Cloud Marketplace guide.
Note:
It's important to do the settings for SQL Server and DB2 z/OS to make sure that the Administration Service starts when using either of these databases.
Configuration Tab
Use this tab to review and change the selected deployment environment variables. The environment variables that you configured with OGGCA are displayed. You can add new variables, modify existing variables, and delete selected variables. For Oracle database, make sure that TNS_ADMIN is set. See Specify Environment Variables for more information.
Certificates
Use this tab to add and manage certificates for the server, client and CA certificates. There is a difference between the Certificates tab and the Certificate Management page. The Certificates tab is associated with the deployment or Service Manager because you arrive at this tab by clicking the deployment name or the Service Manager. However, the Certificate Management page allows you to manage certificates by selecting the deployment or Service Manager on that page itself.
See Manage Certificates for Deployments for more information.
Authorization Profiles
Use this tab to delegate user and group management to external ID providers such as Oracle Identity Cloud Service (IDCS). Integration with an external Identity Management (IDM) system using OpenID/OAuth2.0 protocol provides Oracle GoldenGate users with:
- A single sign-on experience
- Ease of deploying Oracle GoldenGate cloud integration with IDCS.
See Delegate User Authentication and Authorization to an External ID Provider for more information.
Manage the Status of Deployment and Microservices
Learn about managing the status of the deployment and the Microservices.
Topics:
Change the State of a Deployment
The state of a deployment is visible from the Status column of the Deployments section of the Service Manager Overview page. It is either in Running or Stopped state.
Note:
If the Service Manager is registered as a system daemon, then the Service Manager along with the other servers are automatically started when the host server is (re)started.
To change the state of a deployment:
Change the State of Microservices in a Deployment
You can toggle between the states of the microservices associated with a deployment, to manage errors or apply changes to a deployment configuration in microservices. The microservices can be in the following states:
- Running
- Stopped
- Disabled
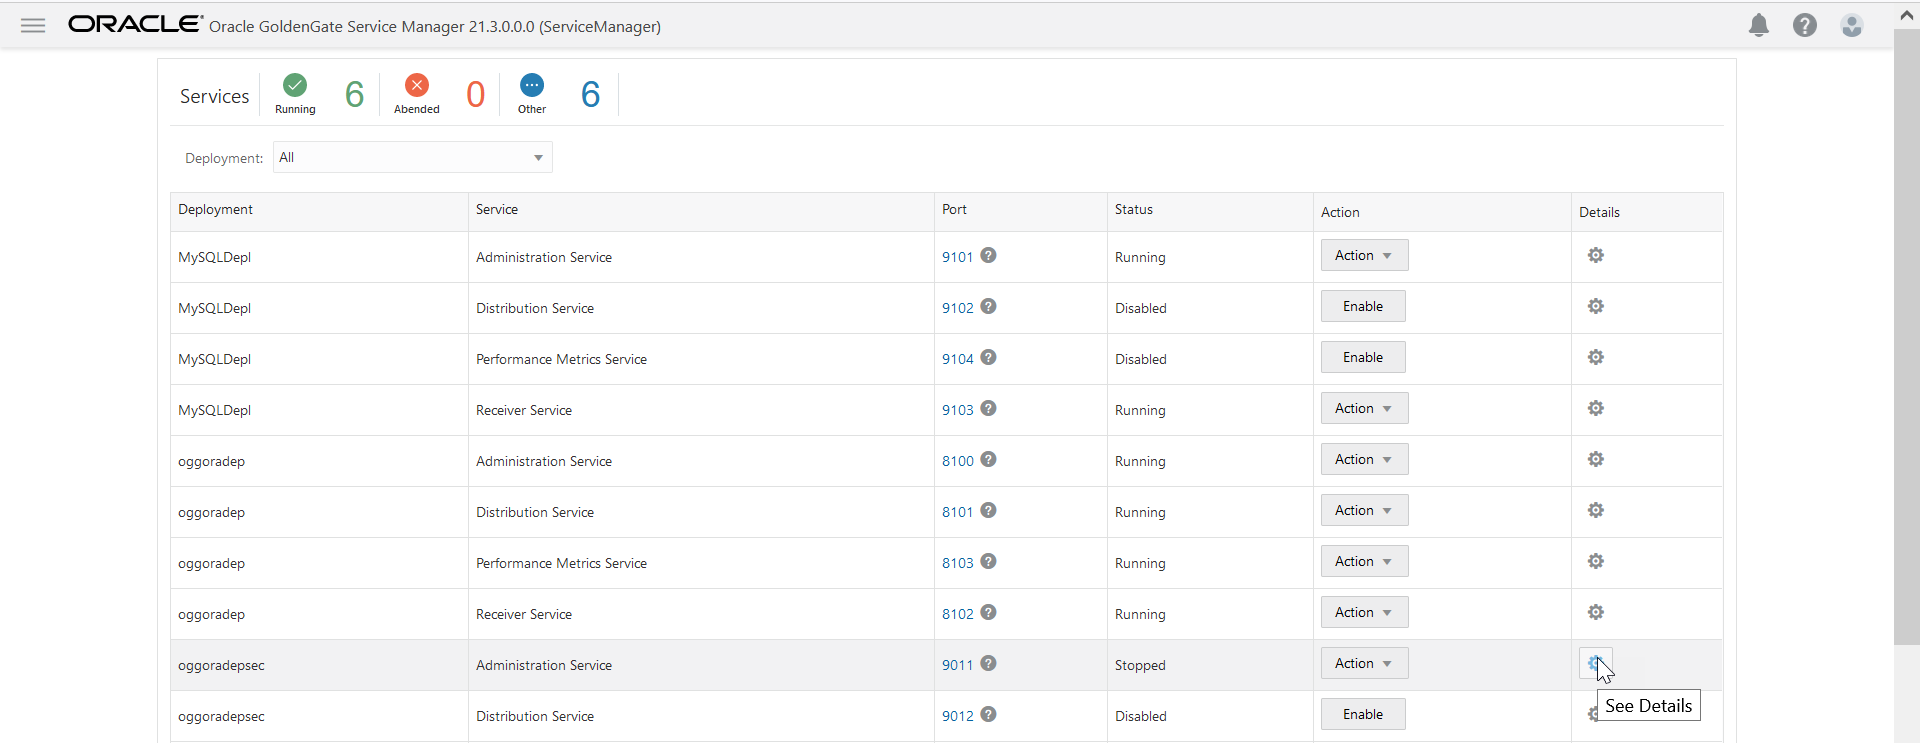
To change the state of the microservices associated with a deployment:
Manage the Microservices Configuration Details
Learn about managing the Microservices configuration details.
Topics:
View and Edit the Microservice Configuration
Use the Service Manager Overview page to view and edit the microservices configuration and restart options.
Note:
For all microservices, the configuration and restart options are the same but may have different values.
To access the configuration details of any of the microservices:
Monitor Oracle GoldenGate Processes, Trails, and Paths
Learn about how to monitor Oracle GoldenGate processes, trails, and paths.
Search and Read the Log Information from the Diagnosis Page
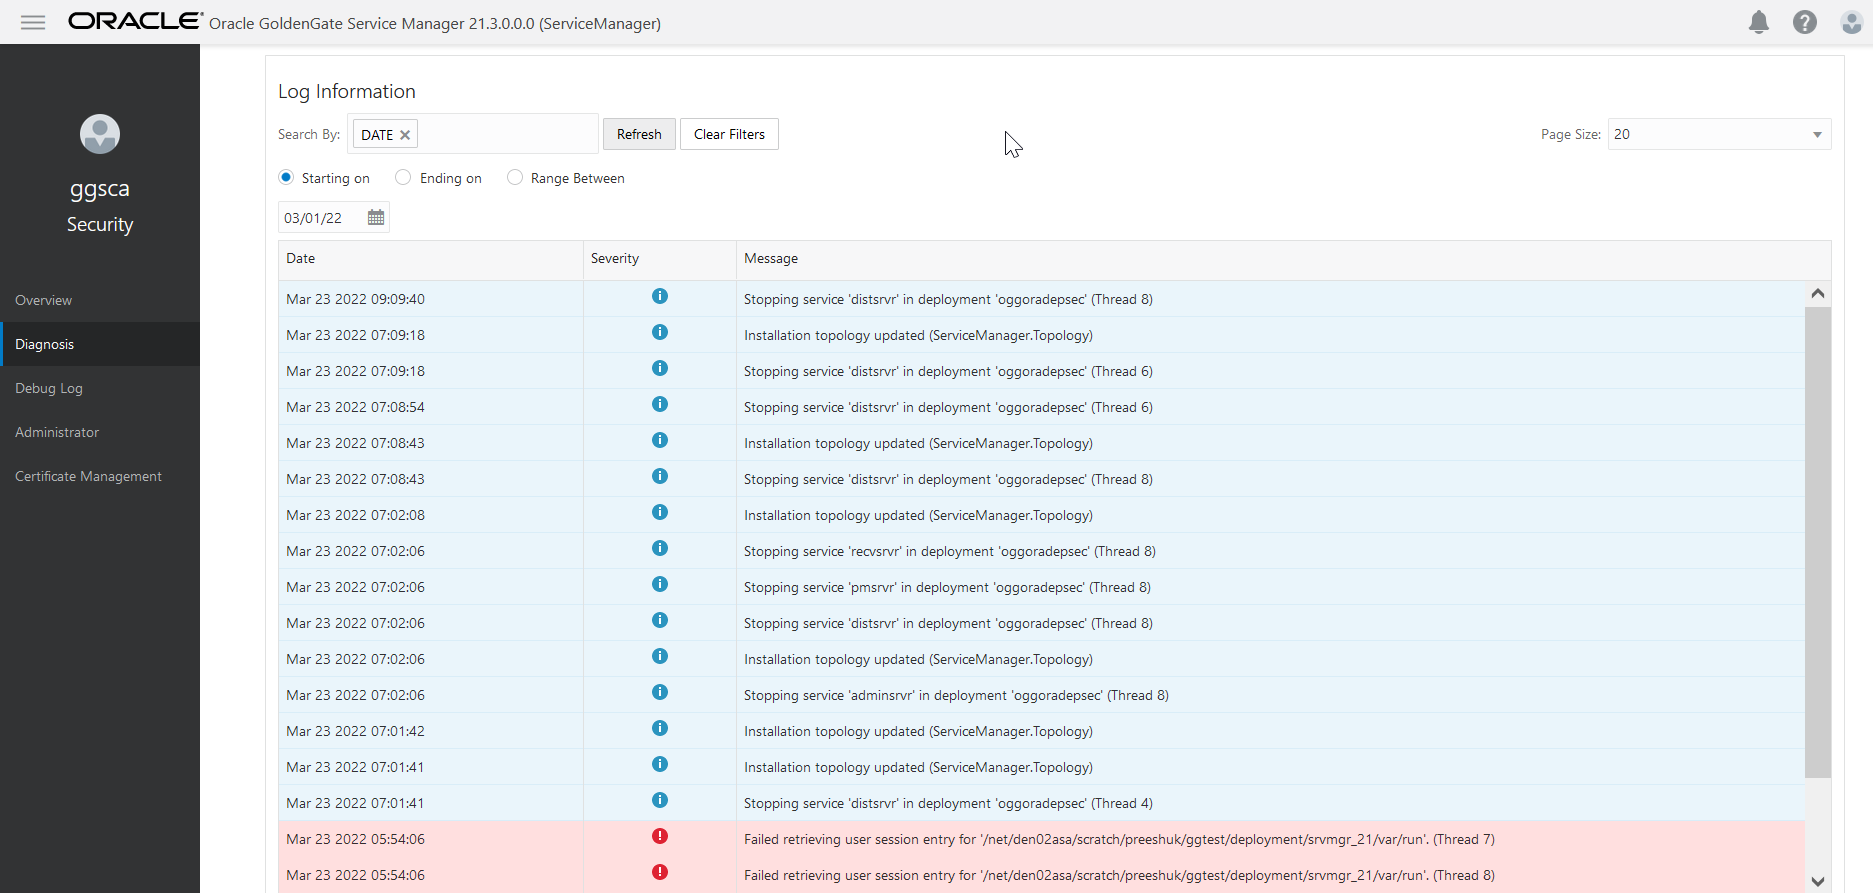
Log information allows you to monitor all the messages logged for your Service Manager. This includes processes, trails, paths, microservices, and deployments managed from the Service Manager.
Collective log information for all processes, trails, and paths associated with all deployments and microservices can be accessed from the Diagnosis page in Service Manager. Log information includes details such as the following:
-
Lag information for Extract, Replicat processes, which provides the latency value between the last record processed and its timestamp in the data source
-
Heartbeat table activities from the heartbeat history table. Also see Monitor Lag Using Automatic Heartbeat Tables
-
Status messages for Oracle GoldenGate processes, trails, and paths
-
Error messages for Oracle GoldenGate processes, trails, and paths
-
Status of deployments and microservices
-
Error messages of deployments or microservices
-
Heartbeat
You can perform the following tasks on this page:
-
Sort the Log Information table by column
-
Refresh the log using the Refresh button
-
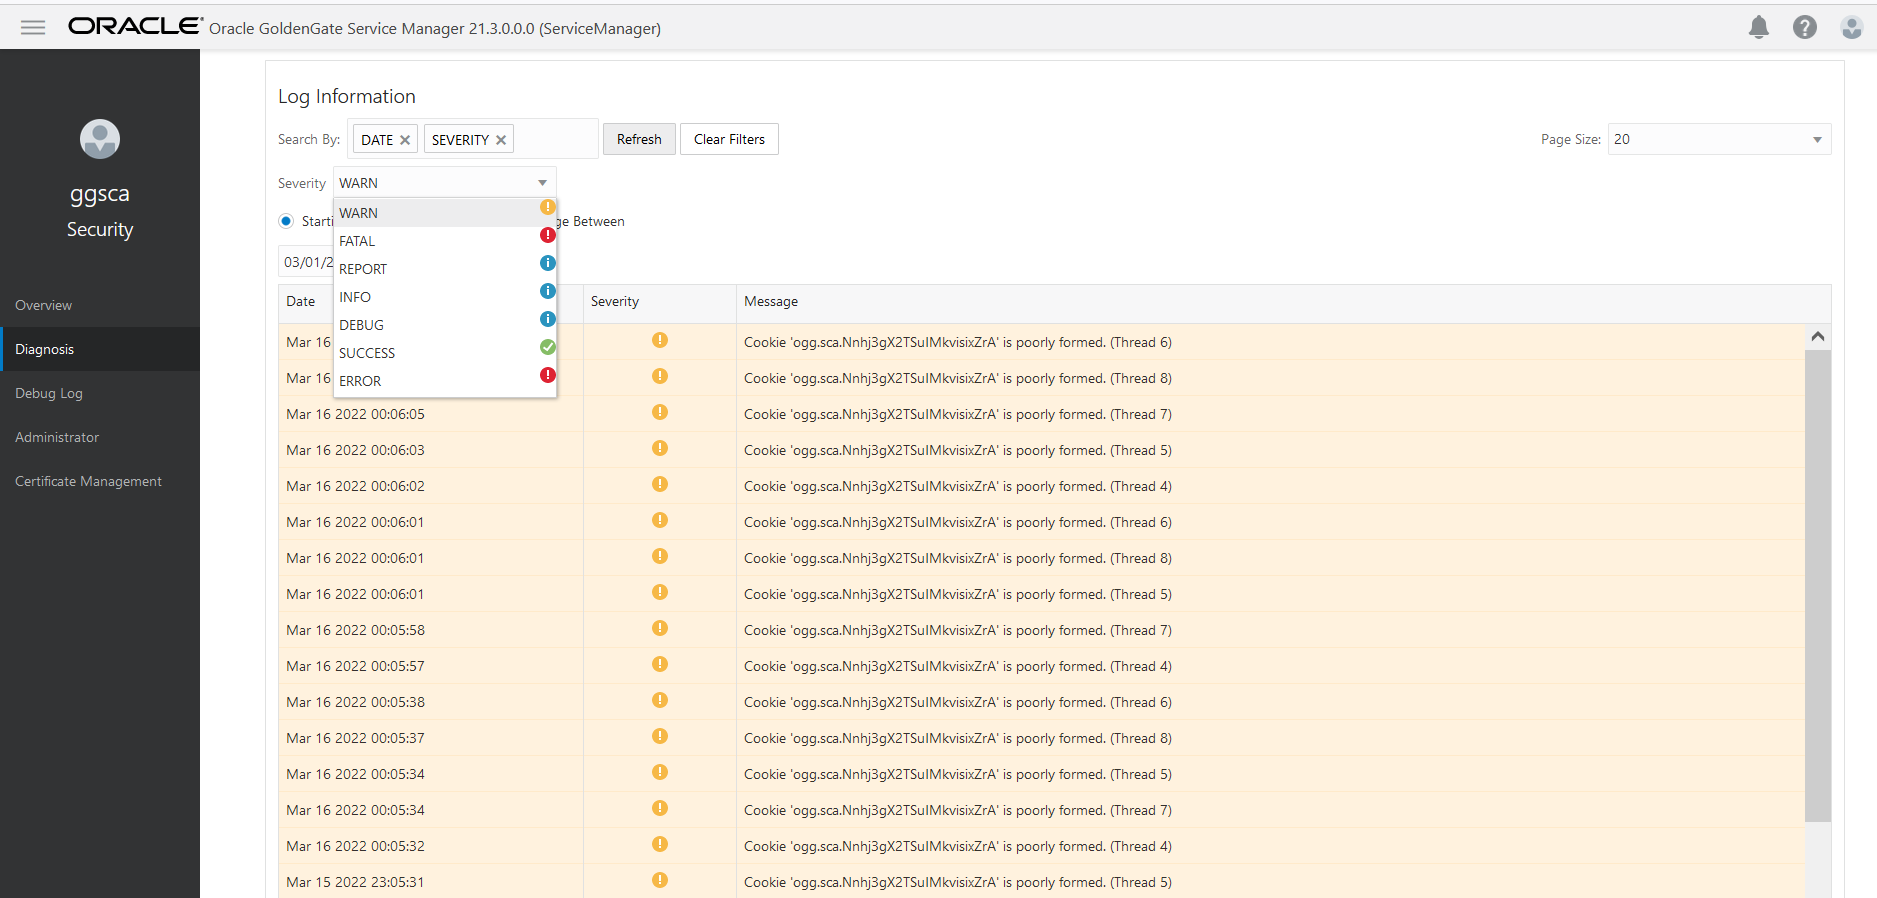
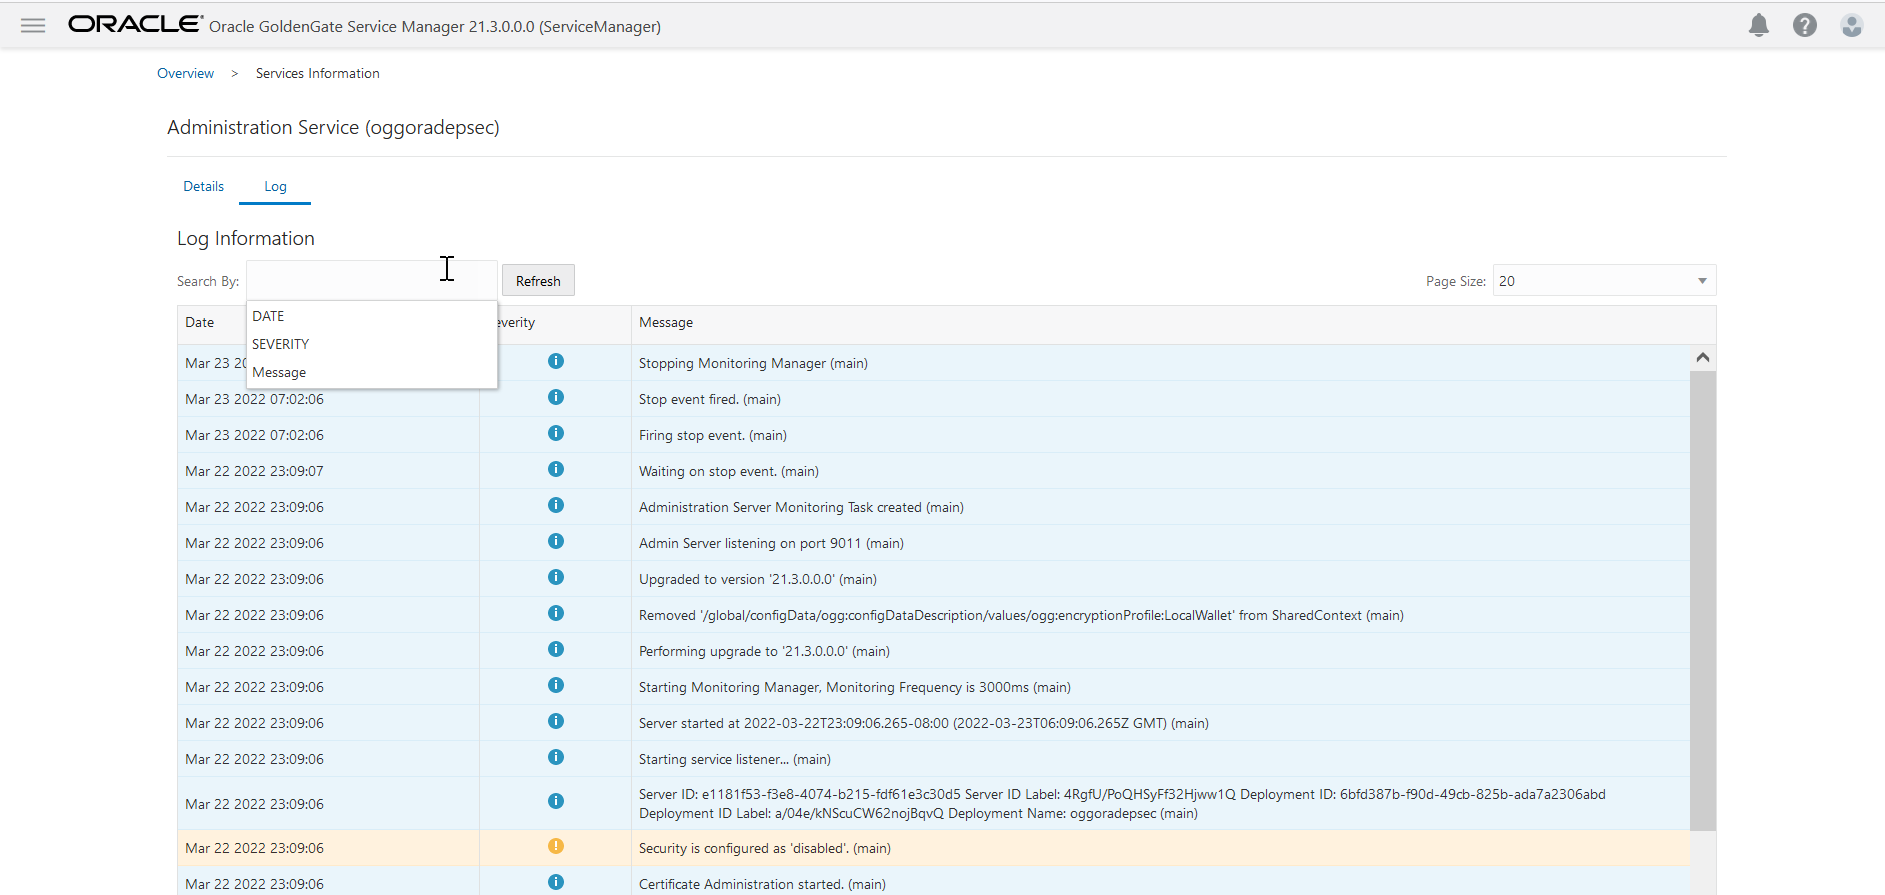
Search for specific log messages using the search criteria as date, severity, and message
Notice the Notifications tab at the bottom of the page. It displays messages from the service, which are not updated in the log due to transaction errors. For example, failure to log in to the database using the database credentials.
Access the Diagnosis page from the left navigation pane of the Service Manager. The complete log information is displayed on the page.
Search and Read Log Information for Microservices in a Deployment
Manage the Debug Log
Learn about managing the Debug Log.
Enable Debug Logging
- Click the Debug Log option from the navigation pane of the Service Manager page.
- Click the Enable Debug Log toggle switch to start logging debug information.
Use the Debug Log
- Click the Download Debug Log File option to save a local copy of the debug log.
- Click the Load Debug Log File option to view the debug log on this page.
- Click the Delete Debug Log File button to delete a debug log.
- Search for specific entries in the debug log using the Search By box, if required.
- Click Refresh to get the latest log information, if it doesn't get refreshed automatically.


