Add an Online Extract
-
Register an Extract from the Admin Client for Oracle and PostgreSQL
Extract Information Screen
From the Administration Service Home page, click the + sign next to Extracts. The Add Extract wizard is displayed.
On the Extract Information screen, select the type of Extract. Depending on the database platform, the types of Extracts that are available may be Integrated Extract, Change Data Capture Extract, and Initial Load Extract.
If you need to set up the Downstream Extract for Oracle database, enable the Downstream Extract toggle switch.
Select the type of Extract to create, and specify the following:
-
Process Name: Name of the Extract process. The name of the Extract process can be up to 8 characters.
-
Description: Description of the Extract process being created
Note:
To learn about creating initial load Extract, see About Instantiation.
Click Next.
Register Extract Screen (PostgreSQL)
Note:
Both Oracle and PostgreSQL Extracts need to be registered. However, the configuration options to register the Extract are displayed on different screens for Oracle and PostgreSQL.Note:
Also see the Guidelines and Limitations for PGOUTPUT Plugin Type.-
Source Credentials: Specify a domain for the database.
-
Alias: Specify the user ID alias used as the database connection for the source login or select from the displayed options.
-
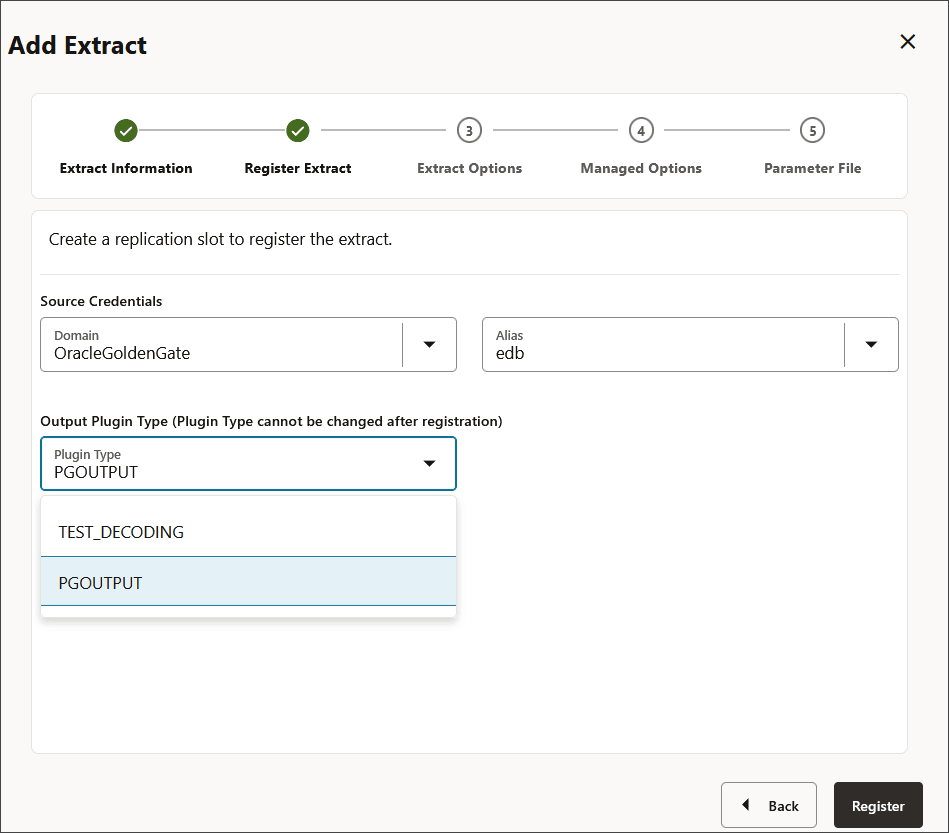
(PostgreSQL only) Plugin Type: Select the type of logical decoding plugin: TEST_DECODING or PGOUTPUT, as shown in the following diagram.

If you don't select a plugin type then the default plugin type, TEST_DECODING, is selected.
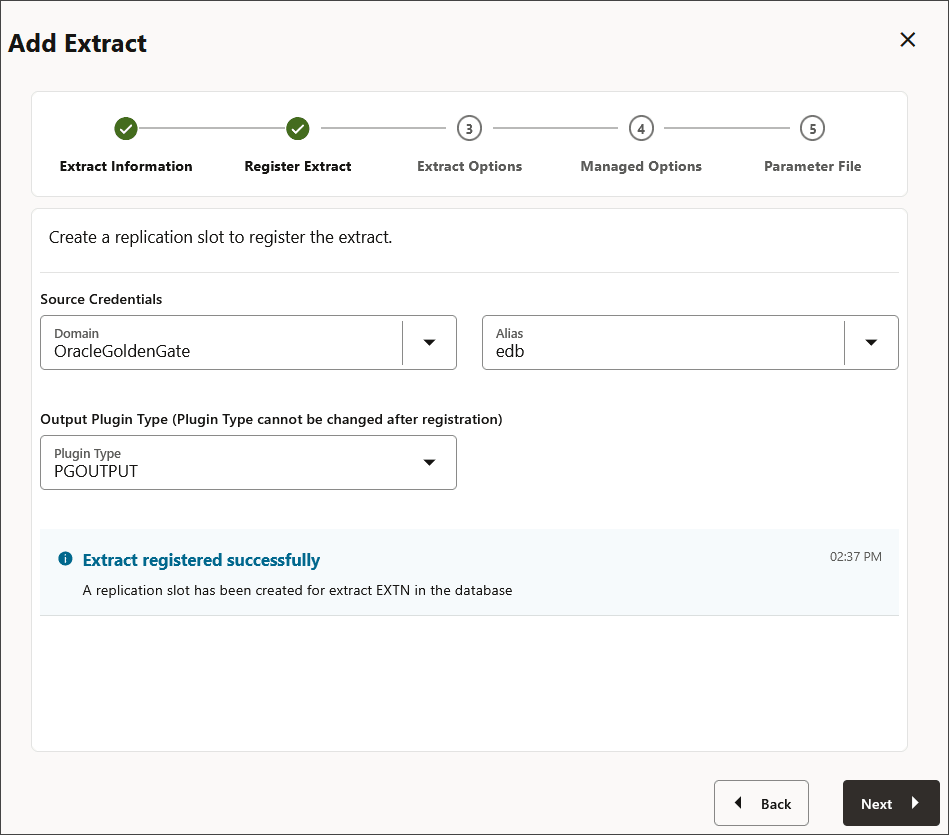
Also see Register an Extract from the Admin Client. Click Next after the Extract registration is successful.

Click Next.
Add the Extract Group
-
Extract Trail:
-
Name: Name of the Extract trail file. The name of the trail file can be upto 2 characters.
-
Subdirectory: Directory name of the subdirectory where the Extract trail is stored.
-
Trail Sequence: Sequence number of the trail.
-
Trail Size: Maximum size of the trail file.
-
Encryption Profile: Description of the encryption profile. If you have not created an encryption profile, then the Local Wallet profile would be selected, by default. To know more about creating and applying encryption profiles, see Configure an Encryption Profile.
-
Encryption Algorithm: List of encryption algorithms available for the Extract trail file.
Note:
For more information on trail file encryption, see Trail File Encryption and Encrypting Trail Files. -
(Oracle only)Registration Options: Specify the following options to register an Extract for Oracle database.
CSN: Commit Sequence Number (CSN) value.
-
Share: This drop down is used to define how to share the LogMiner data dictionary. The available options are Automatic, None, and Extract Name. Automatic means that the system decides which Extract to share. None means that the LogMiner data dictionary is not shared. Extract Name means that the LogMiner data dictionary is shared with the specified Extract.
-
Optimized: Enable this option to optimize the Extract registration.
-
Downstream Capture Screen
Valid for Oracle only.
-
Mining Credentials: Specify the domain and the user ID alias value in the Domain and Alias boxes.
-
No UserID/No Source DB Connection: Enable this toggle switch to set up the mining database connection using Active Data Guard (ADG). The options to enter the ADG Fetch Credential are displayed:
-
Domain: Domain name for the ADG fetch database.
-
Alias: Domain alias for the ADG fetch database.
Note:
Downstream Capture with ADG does not support per-PDB Extract. -
Click Next.
Managed Options Screen
On the Managed Options screen, configure the auto start and auto restart options for the Extract process. The following table provides these options:
The following table provides these options:
| Option | Description |
|---|---|
|
Profile Name |
Provides the name of the autostart and autorestart profile. You can select the default or custom options. If you have already created a profile, then you can select that profile also. If you select the Custom option, then you can set up a new profile from this section itself. |
|
Critical to deployment health |
(Oracle only) Enable this option if the profile is critical for the deployment health. Note: This option only appears while creating the Extract or Replicat and not when you set up the managed processes in the Profiles page. |
| Auto Start | Enables autostart for the process. |
| Startup Delay | Time to wait in seconds before starting the process |
| Auto Restart | Configures how to restart the process if it terminates |
| Max Retries | Specify the maximum number of retries to try to start the process |
| Retry Delay | Delay time in trying to start the process |
| Retries Window | The duration interval to try to start the process |
| Restart on Failure only | If true the task is only restarted if it fails. |
| Disable Task After Retries Exhausted | If true then the task is disabled after exhausting all attempts to restart the process. |
Click Next.
Extract Parameter File Screen
EXTRACT exte
USERIDALIAS ggeast DOMAIN OracleGoldenGate
EXTTRAIL east/ea
DDL INCLUDE MAPPED
TABLE hr.*;
Click Create and Run to create and start the Extract. If you select Create, the Extract is created but you need to start it using the Extract options.
You return to either the Administration Service home page or the Extract page where all created Extracts are listed.