Configuring FIDO2 Challenge with Yubikey in the Oracle Advanced Authentication Self-Service Portal
Introduction
OAA supports FIDO2 using:
- Yubikey.
- Windows Hello using a PIN, or with biometrics such as facial recognition and fingerprint.
- Mac Touch ID.
This tutorial shows you how to use the Self-Service Portal to configure the FIDO2 challenge factor using Yubikey in Oracle Advanced Authentication (OAA) for the purposes of multi-factor authentication.
To learn how to configure FIDO2 with Windows Hello, see Configuring FIDO2 Challenge with Windows Hello in the Oracle Advanced Authentication Self-Service Portal.
To learn how to configure FIDO2 with Mac Touch ID, see Configuring FIDO2 Challenge with Mac Touch ID in the Oracle Advanced Authentication Self-Service Portal.
Objectives
In this tutorial you will perform the following tasks:
- Configure the FIDO2 challenge factor using Yubikey in the Self-Service Portal.
Prerequisites
Before starting this tutorial ensure you have met these requirements:
- An Oracle Advanced Authentication deployment is available.
- You have access to the Self-Service Portal and can login with your user credentials.
- You have a FIDO2 compatible YubiKey installed on your device and the PIN is set.
For the purposes of this tutorial a Yubikey Series 5 Nano is used as the FIDO2 device on a Microsoft Windows computer. Refer to your Yubikey documentation on how to configure Yubikey for FIDO2 and set your PIN.
Configure FIDO2 using Yubikey in the Self-Service Portal
-
Access the Self-Service Portal. For example,
https://oaa.example.com/oaa/rui. -
Enter your user credentials. For example,
testuser/<password>. -
In the left navigation menu, select My Authenticators.
-
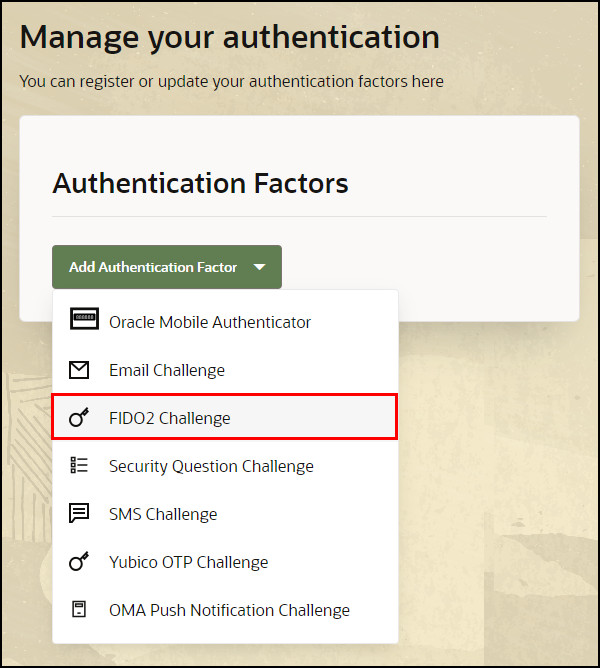
Select Add Authentication Factor and from the drop down menu select FIDO2 Challenge:
-
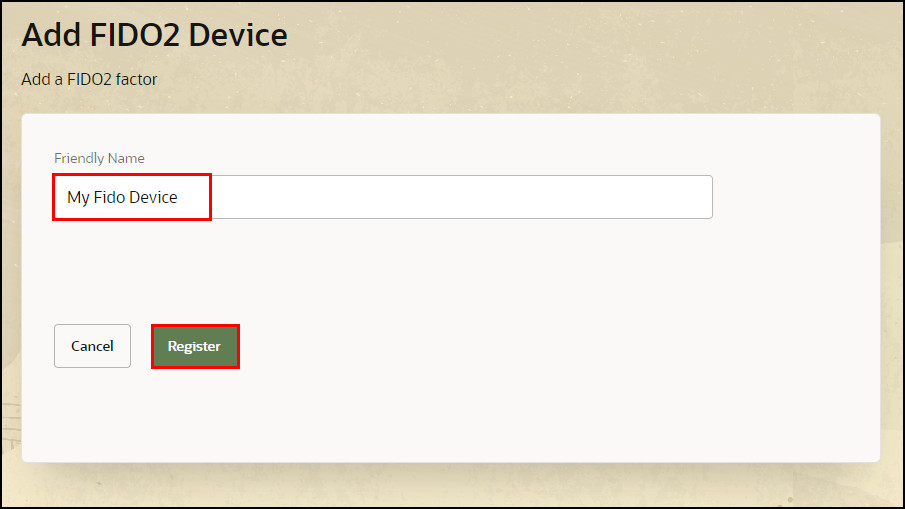
In the Add FIDO2 Device screen enter a Friendly Name, for example,
My FIDO Device. Click Register:
Description of the illustration add_friendly.jpg
-
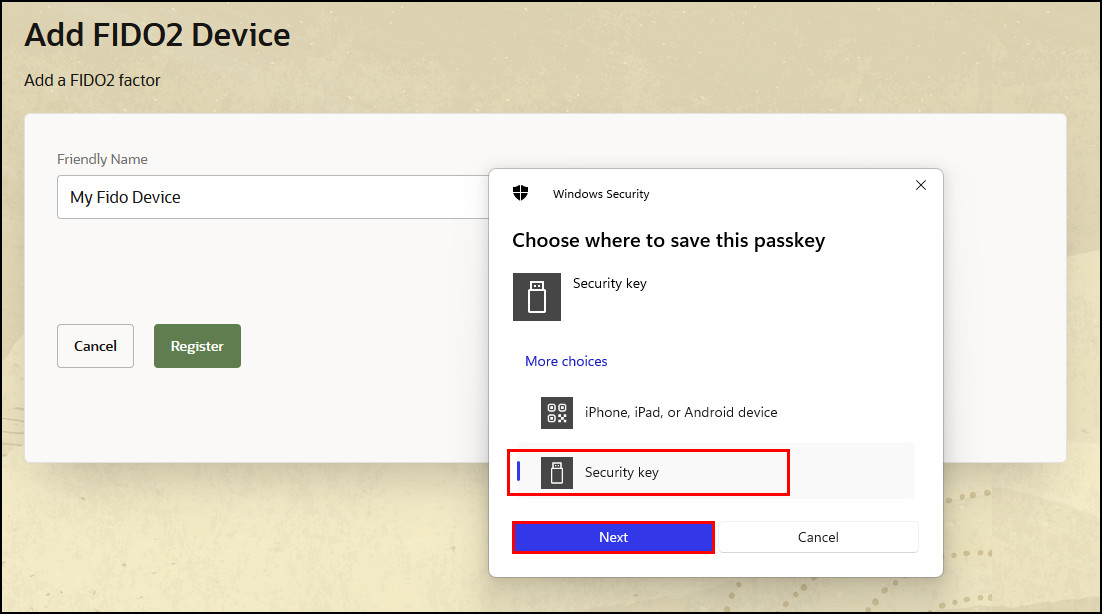
You will be presented with a
Choose where to save this passkeypage. Select Security Key and Click Next:Note: What you see on the following screens depends on the browser you are using. The examples below are from Firefox.
-
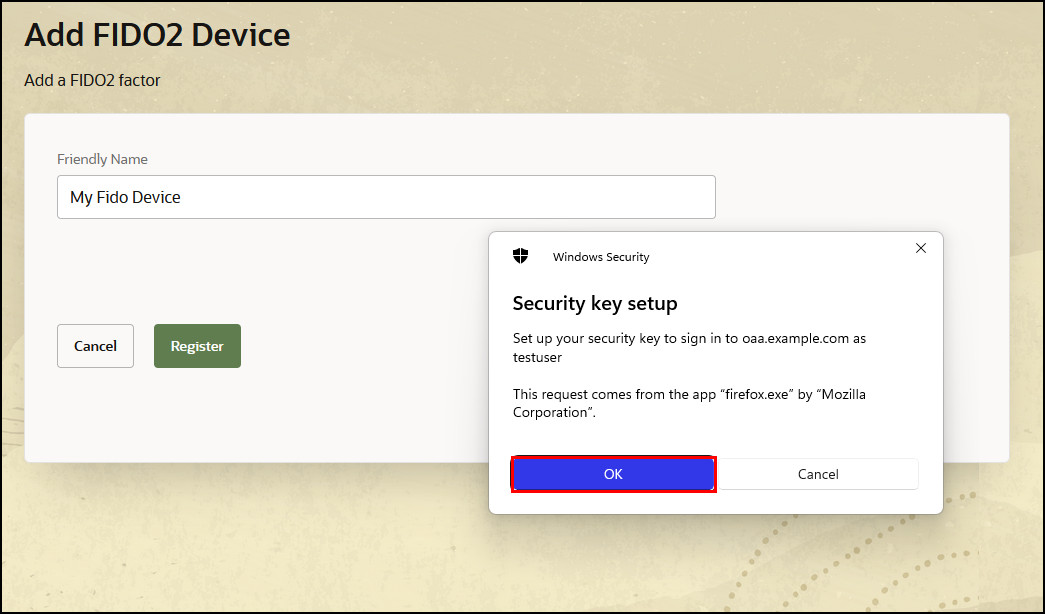
In the Security Key setup page, click OK:
-
You will be asked to enter the security PIN for your FIDO2 device:
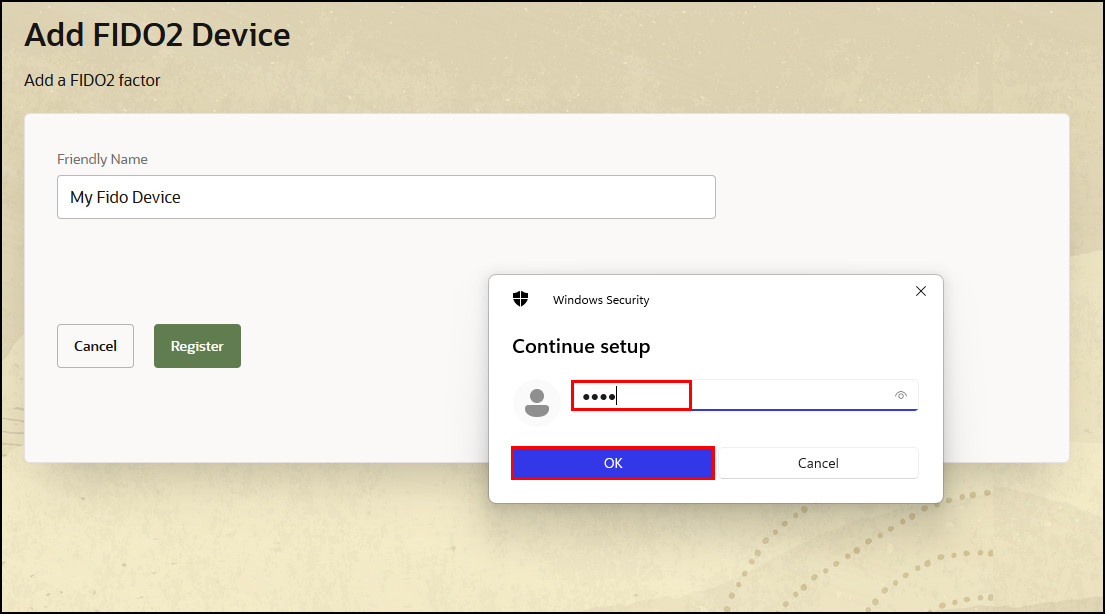
-
Once the PIN is entered you will be asked to
Touch your security key(assuming a touch based FIDO2 device):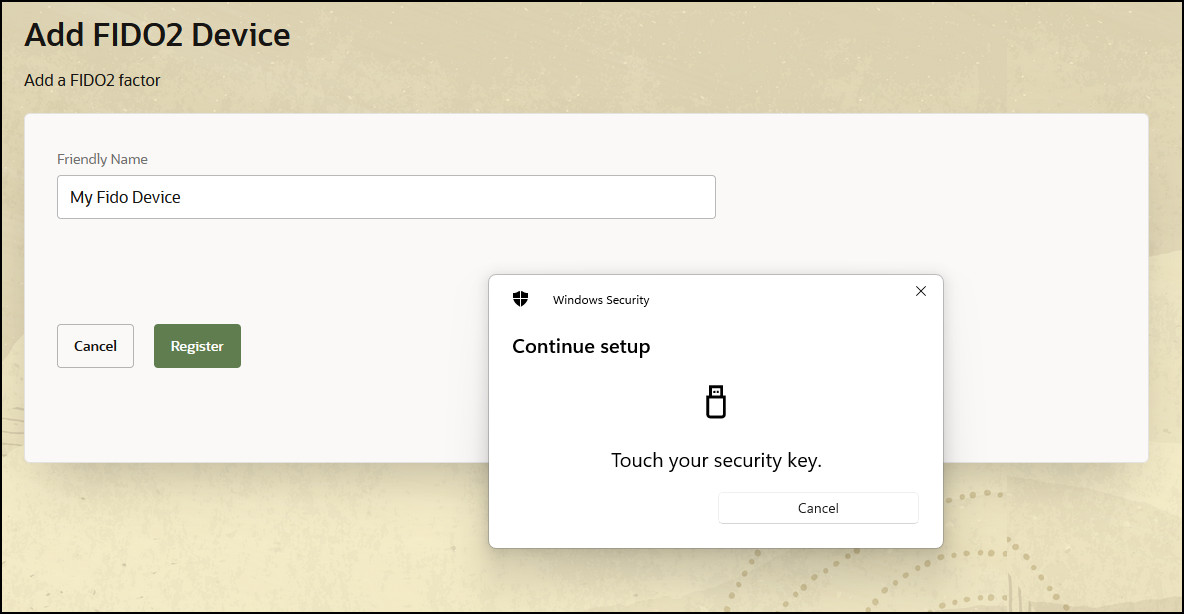
-
If successful you will see a
Passkey Savedmessage. Click OK: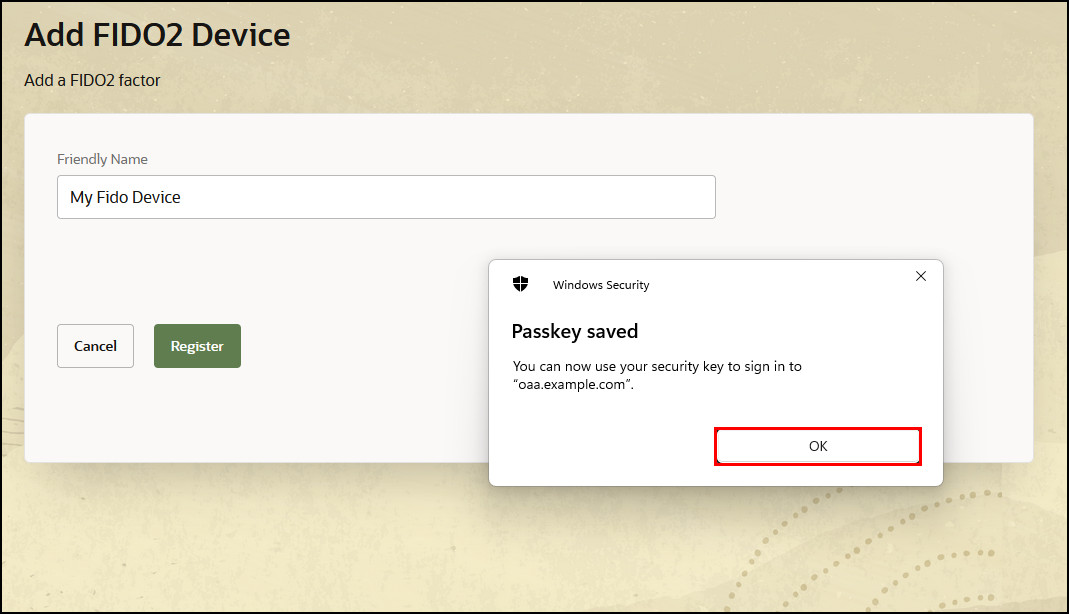
-
If the authentication with the FIDO2 device is successful, the Self-Service Portal will show the factor has been added:

Learn More
- Configuring FIDO2 Challenge with Windows Hello in the Oracle Advanced Authentication Self-Service Portal.
- Configuring FIDO2 Challenge with Mac Touch ID in the Oracle Advanced Authentication Self-Service Portal.
- To learn how to use factors when accessing an OAM protected application with MFA, see Integrate Oracle Access Management with Oracle Advanced Authentication.
Feedback
To provide feedback on this tutorial, please contact idm_user_assistance_ww_grp@oracle.com
Acknowledgements
- Author - Russ Hodgson
More Learning Resources
Explore other labs on docs.oracle.com/learn or access more free learning content on the Oracle Learning YouTube channel. Additionally, visit education.oracle.com/learning-explorer to become an Oracle Learning Explorer.
For product documentation, visit Oracle Help Center.
Configuring FIDO2 Challenge with Yubikey in the Oracle Advanced Authentication Self-Service Portal
F55485-03
July 2024