6 Extending the Functionality of the SAP SuccessFactors Connector
You can extend the functionality of the connector to address your specific business requirements.
The following topics are discussed in this section:
6.1 Configuring Transformation and Validation of Data
Configure transformation and validation of user account data by writing Groovy script logic while creating your application.
You can configure transformation of reconciled single-valued user data according to your requirements. For example, you can use First Name and Last Name values to create a value for the Full Name field in Oracle Identity Governance.
Similarly, you can configure validation of reconciled and provisioned single-valued data according to your requirements. For example, you can validate data fetched from the First Name attribute to ensure that it does not contain the number sign (#). In addition, you can validate data entered in the First Name field on the process form so that the number sign (#) is not sent to the target system during provisioning operations.
To configure transformation or validation of user account data, you must write Groovy scripts while creating your application. For more information about writing Groovy script-based validation and transformation logic, see Validation and Transformation of Provisioning and Reconciliation Attributes of Oracle Fusion Middleware Performing Self Service Tasks with Oracle Identity Governance.
Following is a sample transformation script for reference:
	def getBeneficiaryAttrFromContext(attrName) {
		if (context.beneficiary != null) {
			return context.beneficiary.getAttribute(attrName);
		}

		return null;
	}

	def getBeneficiaryPwdFromContext() {
		return context.beneficiaryPassword;
	}


	if (binding.variables != null)
	{
		if (binding.variables.containsKey("context"))
		{
			if (context.operationType != null)
			{
				if(context.operationType.equalsIgnoreCase("create"))
				{
					if (context.provisionMechanism != null)
					{
						if(context.provisionMechanism.equalsIgnoreCase("POLICY"))
						{
							Username = getBeneficiaryAttrFromContext("User Login");
							First_Name = getBeneficiaryAttrFromContext("First Name");
							Last_Name = getBeneficiaryAttrFromContext("Last Name");
							Password = getBeneficiaryPwdFromContext();
							Company = "ACE_USA";
							Job_Classification = "ADMIN-1";
							Event_Reason	= "HIRNEW";
							Business_Unit = "ACE_IND";
							Supervisor = "JDOE";
							Hire_Date = (new java.util.Date()-1);
						} //if
						else if (context.provisionMechanism.equalsIgnoreCase("REQUEST") || context.provisionMechanism.equalsIgnoreCase("ADMIN"))
						{

							if (Username == null || Username == "")
							{
								Username = getBeneficiaryAttrFromContext("User Login");
							}
							if (First_Name == null || First_Name == "")
							{
								First_Name = getBeneficiaryAttrFromContext("First Name");
							}
							if (Last_Name == null || Last_Name == "")
							{
								Last_Name = getBeneficiaryAttrFromContext("Last Name");
							}
							if (Password == null || Password == "")
							{
								Password = getBeneficiaryPwdFromContext();
							}
							if (Company == null || Company == "") {
								Company = "ACE_USA";
							}
							if (Job_Classification== null || Job_Classification == "")
							{
								Job_Classification = "ADMIN-1";
							}
							if (Event_Reason== null || Event_Reason == "")
							{
								Event_Reason = "HIRNEW";
							}
							if (Business_Unit== null || Business_Unit == "")
							{
								Business_Unit	= "ACE_IND";
							}
							if (Supervisor== null || Supervisor == "")
							{
								Supervisor = "JDOE";
							}
							Hire_Date = (new java.util.Date()-1);
							}//else if
					}
				}

			}
		}
	}
6.2 Configuring Action Scripts
You can configure Action Scripts by writing your own Groovy scripts while creating your application.
For information on adding or editing action scripts, see Updating the Provisioning Configuration in Oracle Fusion Middleware Performing Self Service Tasks with Oracle Identity Governance.
6.3 Configuring the Connector for Multiple Installations of the Target System
You must create copies of configurations of your base application to configure it for multiple installations of the target system.
The London and New York offices of Example Multinational Inc. have their own installations of the target system, including independent schema for each. The company has recently installed Oracle Identity Governance, and they want to configure it to link all the installations of the target system.
6.4 Understanding OData API Dictionary
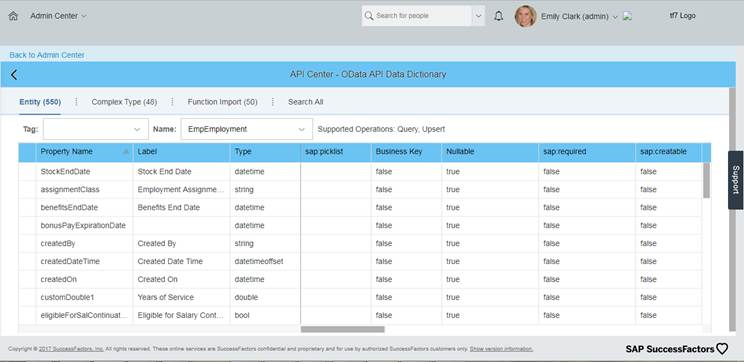
The OData API Dictionary component stores a bundle of object entities. Each SuccessFactors instance contains ready-to-use object entities. The object entities in the OData API Dictionary can also be customized as per requirement.
6.4.1 About OData API Dictionary
Every SuccessFactors instance has several object entities. The OData API Dictionary bundles these object entities and presents them in a tabular format. The SuccessFactors object entities contain information such as allowed operations, attributes (also referred to as property name) and labels.
6.4.2 Viewing OData API Dictionary in the SAP SuccessFactors Connector
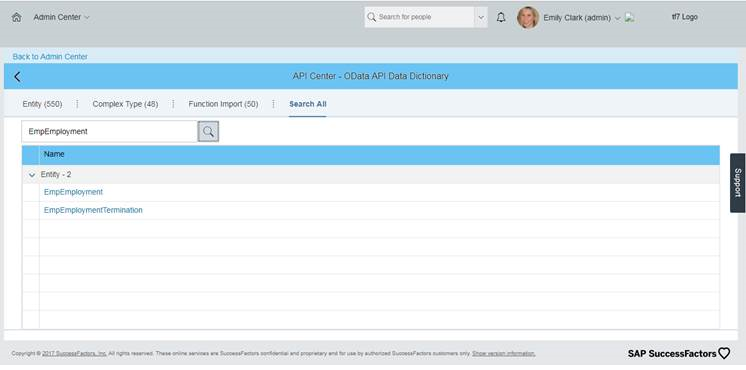
SAP SuccessFactors provides an option to view existing object entities listed under the OData API Dictionary link.
6.4.3 Adding Custom Attributes and Object Entities in Oracle Identity Governance
SAP SuccessFactors provides a ready-to-use OData API Dictionary. Apart from the ready-to-use object entities present in the OData API Dictionary, if you require a new attribute and a new object entity, then you need to customize the OData API Dictionary. Using the OData API Dictionary component, all customized object entities are mapped to their corresponding attributes in the target system.
-
Firstly in your SuccessFactors instance, you need to search for the custom attribute that is present in the OData API Dictionary. Make a note of the custom attribute and the entity object below which this custom attribute is listed. For more information about customizing the OData API Dictionary, contact SAP SuccessFactors support.
- After obtaining the required information about custom attribute and object entity, you need to add this new attribute to Oracle Identity Governance. This new attribute provides a mapping between the custom attribute and the target system.
- Log in to Identity Self Service by using the System Administration account.
- Go to the Manage tab and click the Applications box. The Applications page appears.
- From the Applications page, from the Actions menu, click Create, and then select Target. The Application Template page appears.
- From the Application Template page, navigate to Schema Attribute page.
- From the Schema Attribute, click Add Attribute to add a new row to the table. Provide the following Application Attribute details:
- Display Name: Enter the display name for the attribute in Oracle Identity Governance.
- Target Attribute: Enter the target attribute name. For SuccessFactors, enter PerPersonal.formalName.
- Data Type: Select the String data type from the list.
- Mandatory: Select if the attribute is mandatory for target provisioning.
- Provision Field: Select Yes from the list.
- Recon Field: Select Yes from the list.
- Key Field: Select No from the list.
- Case Insensitive: Do not make any modifications to this attribute.
- Click Save to save your changes.
6.4.4 Providing Values in Static Lookups
SuccessFactors provides an option to add values to the static lookup definition. Adding values is a requirement to associate code and the meaning values in the target system. To add values in the static lookups for SuccessFactors, first you need to check if any code value is present for the attribute under consideration. If a code value is present, then the same needs to be added to the corresponding lookup definition in Oracle Identity Governance.
San Mateo (US_SFO). The US_SFO is the value which needs to be provided as the Code and the value San Mateo (US_SFO) or just the name of the location San Mateo as the Meaning value for the static Lookup Location. These two values need to be present under Lookup.Location in Oracle Identity Manager Process Form page.
Figure 6-2 Providing Values in a Static Lookup

Description of "Figure 6-2 Providing Values in a Static Lookup"
- Log in to Oracle Identity System Administration.
- Click Lookups from the left navigation pane. The Search and Select Lookup Type window appears.
- From the Search and Select Lookup Type window, search and open the lookup for which the new static value needs to be added, and click Search.
- From the search results, select the Lookup for which the new static value needs to be added and click the edit icon. The Edit Lookup Type window appears.
- In the Edit Lookup Type window, click the create Lookup icon and enter values for Code and Meaning attributes. For the Code attribute, provide the target attribute name and for the meaning attribute, provide the process form name.
- Click Save to save your changes.
