29 Publishing Content from WebCenter Sites to Oracle Content and Experience

As an administrator, you can configure WebCenter Sites to reuse and publish content to Oracle Content and Experience. Once WebCenter Sites content is in Oracle Content and Experience, it can be delivered across other non-web channels such as Oracle Marketing Cloud, chatbots thereby fostering content reuse and consistent messaging.

To resuse WebCenter Sites content in Oracle Content and Experience:

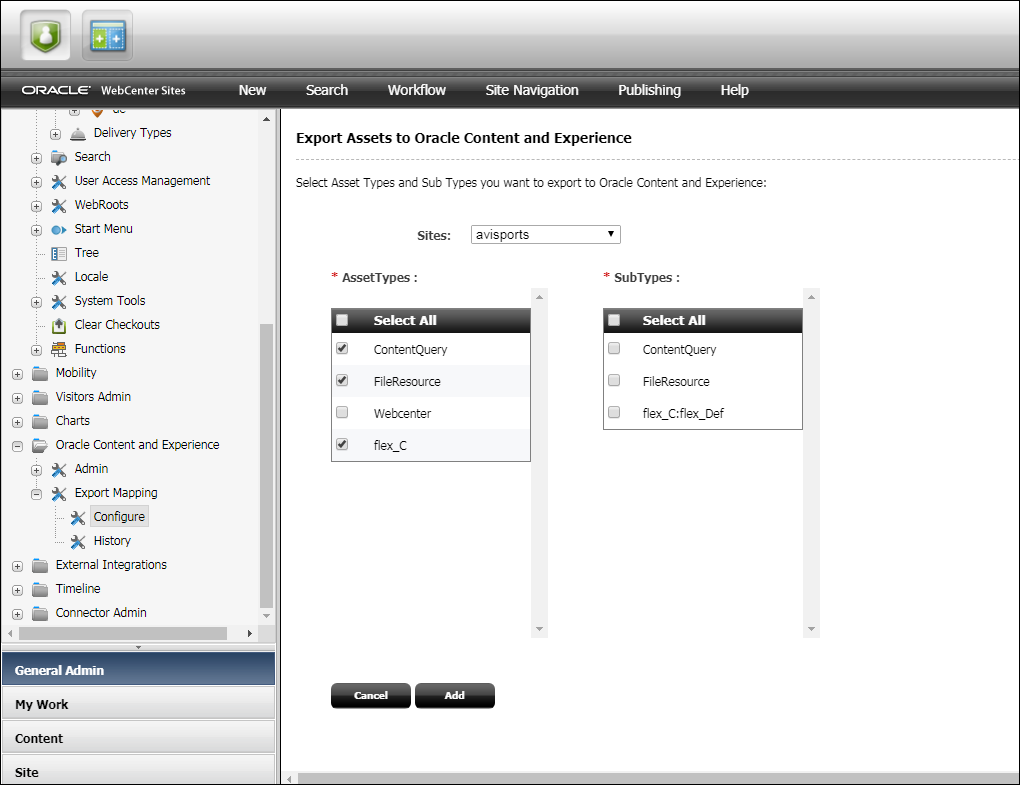
  1. You need to create an OCE mapping to include the asset types and sub types and then create a new destination and select the delivery type.
  2. Approve the assets types and sub types that you have selected for publishing.
  3. After publishing the assets into a zip file, upload it to Oracle Content and Experience.
  4. Start importing asset types and dependencies to Oracle Content and Experience as content types and content items.

Content creators can reuse these assets in their website to deliver the content to multiple channels.

Topics:

29.1 Configuring Assets Types

Create an OCE mapping to include the asset types and sub types.

To configure assets types:

  1. On the source WebCenter Sites system, log in to the Admin interface.
  2. In the General Admin tree, expand the Content Cloud Admin node, expand the Export Mapping node, and double-click Configure.
  3. Click the Add New OCE Mapping button.
  4. Select Asset Types and Sub Types, and then click Add.

    Figure 29-1 Adding Assets and Assets Types

    Description of Figure 29-1 follows
    Description of "Figure 29-1 Adding Assets and Assets Types"

29.2 Creating OCE Destination

You need to create a new OCE destination on WebCenter Sites and select the required delivery type.

To create a new destination:

  1. In the General Admin tree, expand the Admin node, expand the Publishing node, and then expand the Destinations node.
  2. Under the Destinations node, double-click Add New.
  3. In the Add New Destination form, configure the fields on this form as follows:
    • Name: Enter a unique name for the destination.
    • Delivery Type: Select Export to OCE: Export to Oracle Content and Experience.
    • Send Email on Failure: If publishing fails and email notices to that effect are required, select the check box. Enter the recipient's email address in the Email Addresses field. (This field is available only when Send Email on Failure is selected.)
    • Verbose Output: Select this option to activate detailed error logging during the publishing process. When selected, messages in addition to error messages are written to the PubMessage table. Because additional information lengthens the publishing process, select this parameter only for troubleshooting.
    • More Arguments: This parameter is reserved for future use; no additional arguments can be specified at this time.
    • Sites: Select the sites whose assets can be approved for and published to this destination.
    • Roles (Approve for Publish): Select the roles to which you are assigning approval privileges. All users who are assigned these roles are allowed to approve assets.
    • Roles (Publish): Select the roles to which you are assigning publish privileges. All users assigned these roles can publish.
  4. Click Add New Destination.

29.3 Approving Assets for Publishing

For publishing your assets, the assets and their dependencies need to be approved first. Each publishing destination has an option to approve multiple assets.

To approve a group of assets:

  1. In the General Admin tree, expand the Admin node, expand the Publishing node, expand the Destinations node, and then expand the destination to approve assets for.
  2. Under that destination, double-click the Approve Multiple Assets option.
  3. In the Approve Assets form, from the Sample Queries list on the right, select a query. If the exact query that you require is not present, select the query that is most like the one wanted.
    WebCenter Sites creates a SQL query based on the items that you selected and displays it in the Query box.
  4. (Optional) If necessary, edit the SQL query.
  5. Click in the Approve in Batches of field and enter a numeric value. The default is set to 500.
  6. Specify the Approve Previously Approved Assets option as follows:
    • If you want WebCenter Sites to ignore all previous approvals and approve again, select Yes. This is the option to use if previous approvals have become invalid such as a change in default templates for that destination.
    • If you want WebCenter Sites to approve only the assets that have not yet been approved, select No. This is the correct choice when you are sure that previously approved assets are still valid.
  7. Click Approve for Publish.

29.4 Publishing Assets

After approving the assets, you need to publish them. The process for publishing assets for OCE destination is same as for any other destination.

To publish your approved assets:

  1. In the button bar, click Publishing.
  2. In the Publish Console, select your destination, for example, PublishToOCE of delivery type Export to OCE from the drop-down list and then click Select Destination.

    Review the assets that are ready to be published.

  3. Click Publish. The approved assets are added to a .zip file.

    A confirmation message opens. Click OK to proceed.

    On publishing the assets, a zip file having approved assets is created.

  4. On the Publish Console Active tab, you can observe that the session is running.
  5. When the session completes, click the History tab to view the session summary for this session.
  6. Mouse over the session information to view summary information; click Log to view the session log files.

29.5 Downloading Published Assets

Publishing to OCE destination creates a .zip file consisting of all the assets and its type. You can download the zip file on your local system.

To download published assets:

  1. In the General Admin tree, expand the Content Cloud Admin node, expand the Export Mapping node, and double-click History.
  2. The Oracle Content and Experience Publish History page shows the history of the published sessions.
  3. You can download the zip file of your destination. The zip file contains the published assets. These assets will be mapped to the content types of Oracle Content and Experience.

29.6 Importing Published Assets to Oracle Content and Experience

Importing the published assets to Oracle Content and Experience involves two steps:
  • Upload the zip file to Oracle Content and Experience.
  • Import the published asset into your repository.

To import published assets:

  1. Log in to Oracle Content and Experience.
  2. Select Documents from the left bar, create your folder and click Upload to upload the zip file from your local system.
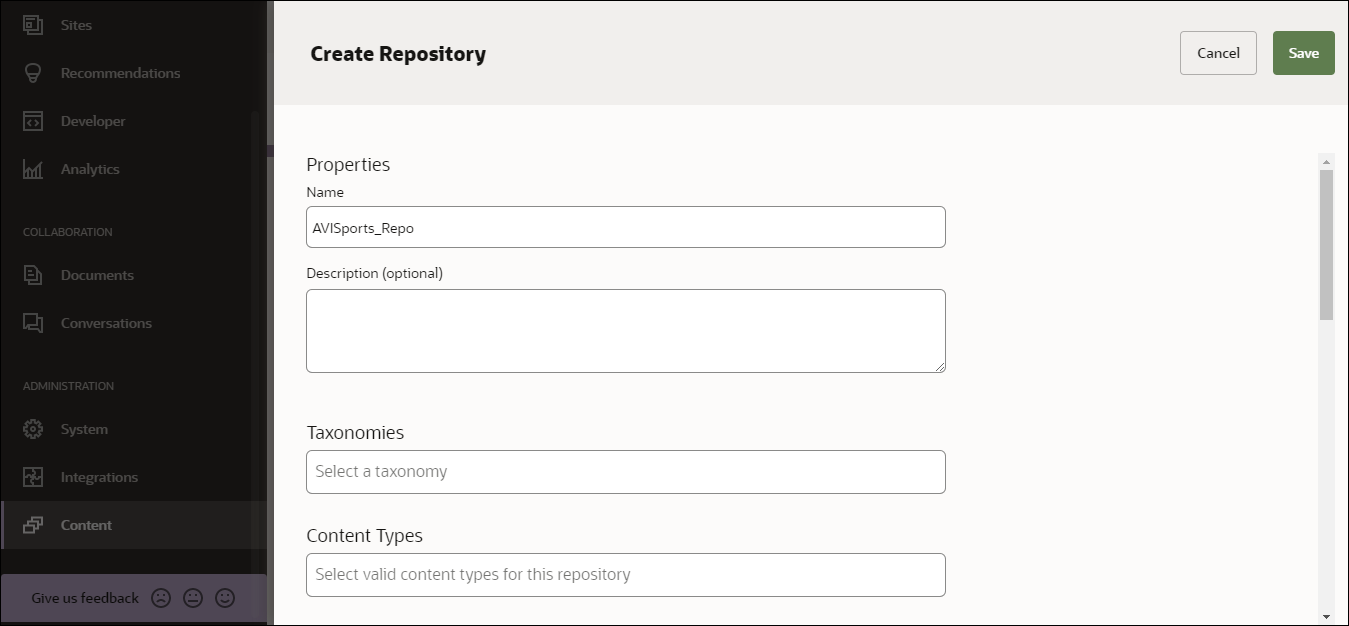
  3. You need to create a new or use an existing repository to import content from WebCenter Sites. To create a repository, click Content at the bottom of the left bar. On the Content screen, select Repositories from the drop-down menu and click Create. On the Create Repository screen, enter the name of the repository and click Save to save the repository.
  4. After the new repository is created, click on your repository. Now, you can import the content into your repository. On the Content screen, click Import Content.
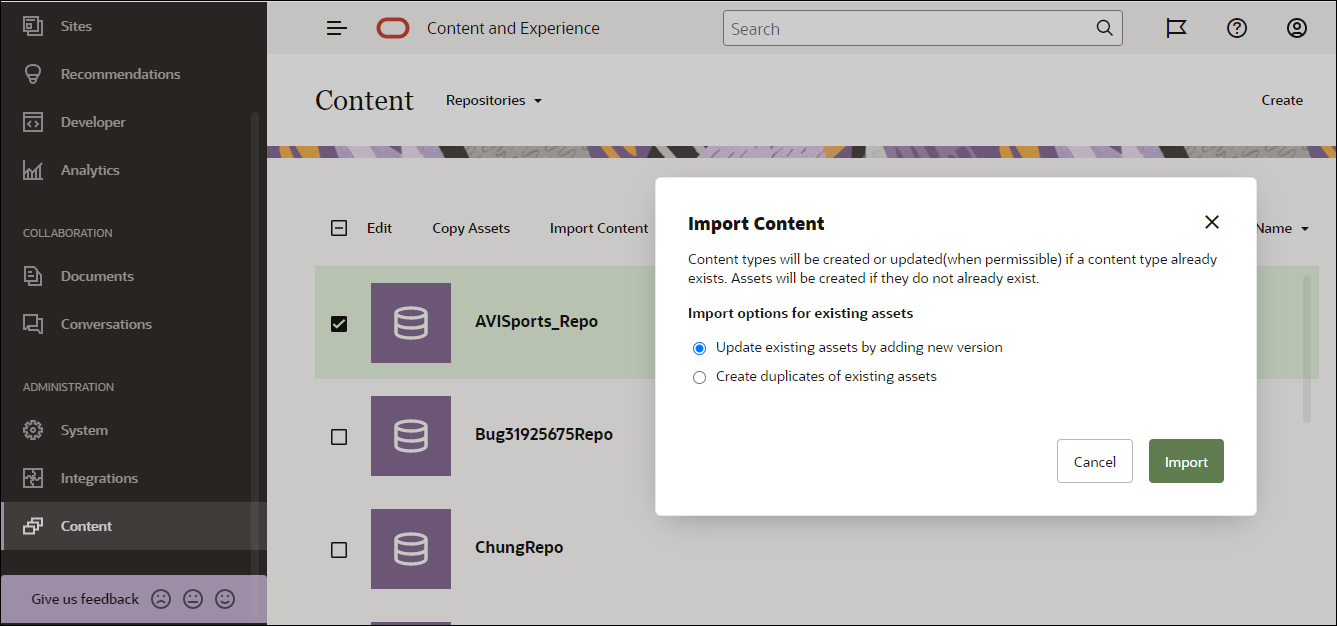
  5. On the Pick a File screen, select your WebCenter Sites mapping (zip) file from the Documents folder and click OK. On the Import Content screen, select Update existing assets by adding new version and click Import as shown below.
  6. When the import is successful, a message "Successfully Imported Content Package <filename>.zip" will be displayed.
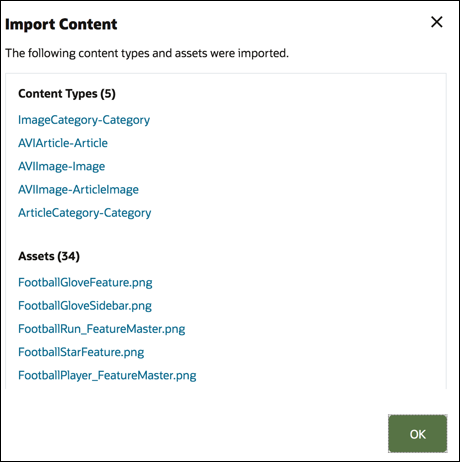
  7. Click Details to view the summary page, generated once mappings are uploaded into your repository. A sample summary page is shown below:

    Figure 29-5 View Imported Assets

    Description of Figure 29-5 follows
    Description of "Figure 29-5 View Imported Assets"

29.7 Importing Modified Assests from WebCenter Sites to Oracle Content and Experience

If the content in WebCenter Sites is updated, which has been already exported to OCE, the latest changes can be synced to the exported content in OCE. You have to follow the same steps that have been followed to export the content for the first time from WebCenter Sites to OCE.

To import modified assests to OCE:

  1. Create a new or use an existing OCE publish destination.
  2. Approve and publish modified asset to the new or existing destination.
  3. Export the mapping into the zip file.
  4. Import the new exported mapping into OCE in the old repository (for example, AVISports_Repo). You can see the assets will be updated to version 2 (v2).
29.8 Limitations

The following are the limitations of this tool:
  • Proxy assets are not published.
  • Embedded assets are not published as is.
  • Engage or recommendations are not published.
  • All non-content assets such as Templates, CSElements, and Controllers are not published.