The software described in this documentation is either no longer supported or is in extended support.
Oracle recommends that you upgrade to a current supported release.
Chapter 4 Provisioning Client Systems
Oracle supports the provisioning of Oracle Linux servers as Spacewalk client systems. You can use Spacewalk to manage Fedora-based clients and other systems by using upstream client binaries and repositories. However, note that Oracle does not provide support for these clients.
Oracle provides Spacewalk Client packages for Oracle Linux 5 and
Oracle Linux 6, for both i386 and
x86_64 architectures. For Oracle Linux 7, only
packages for the x86_64 architecture are
provided.
If you configure a Spacewalk server to mirror the Spacewalk Client 2.6 channel that is provided on the Oracle Linux yum server and then enable this channel for a kickstart profile, Spacewalk automatically installs the Spacewalk Client software on any Oracle Linux server that it provisions and registers this server as a Spacewalk Client. You can use the spacewalk-common-channels command to configure the Spacewalk Client 2.6 channel as described in Section 2.3, “Configuring Software Channels to Obtain Packages From the Oracle Linux Yum Server”.
4.1 About Kickstart Trees, Distributions, and Profiles
You can use kickstart to automate the installation of Oracle Linux systems and then use Spacewalk to provide packages during the installation.
If you want to provision bare-metal systems and virtual machines, create a distribution in Spacewalk for each combination of Oracle Linux release and system architecture that you want to install by using kickstart.
You need to set up a local directory such as
/var/distro-trees on your Spacewalk server that
contains the entire kickstart tree for each distribution, which
includes the installation kernel, the initial ram-disk image,
installation files, and information about the repositories. This
directory must be readable and accessible by the
httpd and tomcat6 services.
The kickstart tree does not need to include any packages, as
Spacewalk provides these.
Relative to the root of the kickstart tree, the installation
kernel and initial ram-disk images should be located at
./images/pxeboot. For example, if the root of
the kickstart tree for Oracle Linux 6 (x86_64)
server installation is
/var/distro-trees/ol6-x86_64-server, the
installation kernel and the initial ram-disk images would be
located at
/var/distro-trees/ol6-x86_64-server/images/pxeboot.
See Section 4.2, “Setting Up Kickstart Trees”.
You create a kickstart distribution by associating a kickstart tree with existing channels. A client boots by using the kickstart tree but installs its software packages from the existing channels. The packages that are installed on the client will be as up to date as those that are currently available from the channels.
See Section 4.3, “Working With Kickstart Distributions”.
Currently, you cannot use the spacewalk-repo-sync --sync-kickstart command to create a kickstart distribution from the channels that are available on the Oracle Linux yum server or on ULN.
After you have created a kickstart distribution, you can use it with kickstart profiles. Typically, each profile provisions a different type of server. You can configure a profile to generate a kickstart file, or you can use an existing kickstart file. You can associate as many profiles with a single distribution as you need to provision servers that share the same combination of Oracle Linux release and system architecture.
4.2 Setting Up Kickstart Trees
To set up a kickstart tree for a distribution on the Spacewalk server, do the following:
-
If the root for all kickstart trees, typically,
/var/distro-trees, does not already exist, create this directory. If required, set its SELinux file type ashttpd_sys_content_tso thathttpdandtomcat6can make the files available:-
Create the
rootdirectory for the kickstart tree as follows:#
mkdir -p /var/distro-trees/ol7u2-x86_64-server -
If SELinux is enabled in enforcing mode on your system, do the following:
-
Use the semanage command to define the default file type of the kickstart tree as
httpd_sys_content_t.#
/usr/sbin/semanage fcontext -a -t httpd_sys_content_t "/var/distro-trees(/.*)?" -
Use the restorecon command to apply the file type to the entire directory hierarchy.
#
/sbin/restorecon -R -v /var/distro-treesNoteThe semanage and restorecon commands are provided by the
policycoreutils-pythonandpolicycoreutilspackages.
-
-
-
Download the full Oracle Linux Media Pack DVD image for the Oracle Linux release and system architecture from the Oracle Software Delivery Cloud at https://edelivery.oracle.com/linux and mount it on a suitable mount point.
NoteFor the mount to succeed, you will need to create the
/var/distro-trees/oldirectory if it does not already exist.Nun-arch-server#
mount -o loop /var/ISOs/DVDimage.iso /var/distro-trees/olNun-arch-serverThe following table lists some of the full Oracle Linux Media Pack DVD image files that are available for Oracle Linux releases.
NoteThe information in the following table is correct at the time of publication. However, newer versions might have been released since this table was published.
Release
Architecture DVD Image File
Oracle Linux 5 Update 11
i386V47134-01.isoOracle Linux 5 Update 11
x86_64V47133-01.isoOracle Linux 6 Update 9
i386V860938-01.isoOracle Linux 6 Update 9
x86_64V860937-01.isoOracle Linux 7 Update 3
x86_64V834394-01.iso -
Create an entry in the
/etc/fstabfile so that the system always mounts the DVD image after a reboot./var/ISOs/V100082-01.iso /var/distro-trees/OL7u2-x86_64-server iso9660 loop,ro 0 0
-
If you want to associate a kickstart tree with a software channel or to be able to boot iPXE clients, create a symbolic link from
/var/www/htmlto/var/distro-trees.#
ln -s /var/distro-trees /var/www/html/distro-treesThe installation images will then be available at a URL such as
https://, whereswksvr_FQDN/distro-trees/olNun-arch-server/imagesswksvr_FQDNis the FQDN of the Spacewalk server or proxy.You should be able to see the contents of the mounted installation image listed at the URL by using a browser. If you cannot see the files, do the following:
-
Edit the
/etc/httpd/conf/httpd.conffile and enable support for directory indexing and symbolic links by specifyingOptions Indexes FollowSymLinksin the<Directory "/var/www/html">section. -
Reload the
httpdservice.#
service httpd reload
-
4.3 Working With Kickstart Distributions
If you want to create a kickstart distribution that uses a kickstart tree with existing software channels, you can use either the Spacewalk web interface or the Spacewalk CLI.
4.3.1 Working With Kickstart Distributions by Using the Spacewalk Web Interface
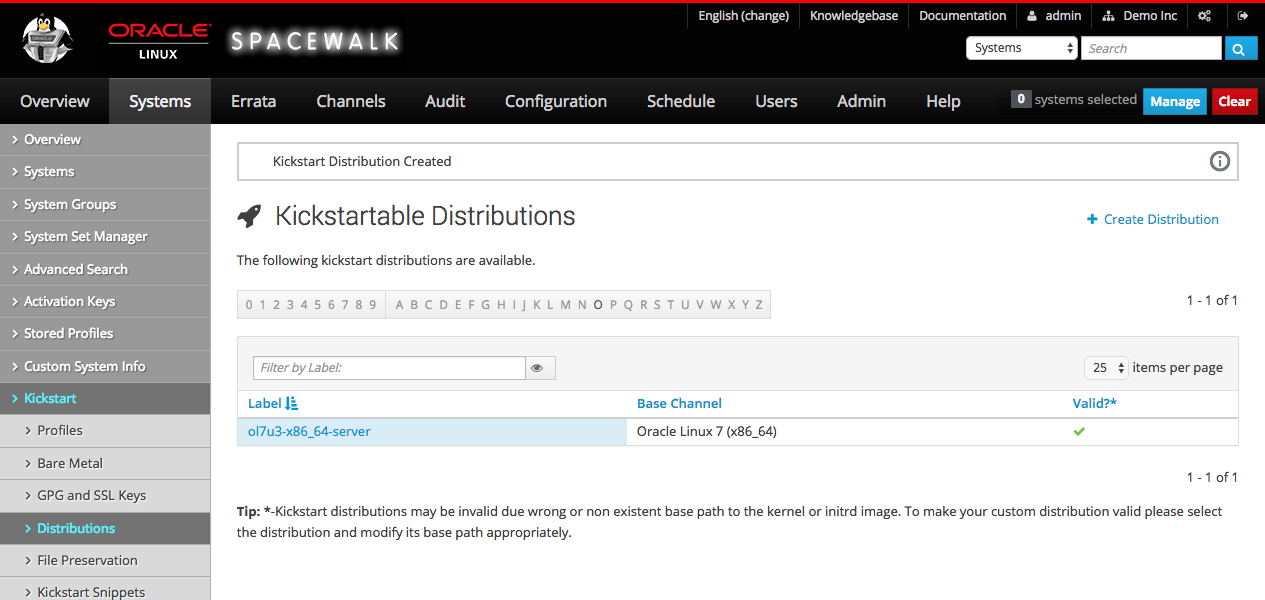
Go to Systems, select Kickstart and then Distributions.
-
To create a distribution:
-
Click + create new distribution.
-
On the Create Activation Key page, enter the key settings in the following fields:
- Distribution Label
-
Enter a label for the distribution, for example,
ol7u2-x86_64-server. - Tree Path
-
Enter the path of the kickstart tree for the distribution, for example,
/var/distro-trees/ol7u2-x86_64-server. - Base Channel
-
Select the base channel with which the distribution is associated, for example,
Oracle Linux 7 (x86_64) Base. - Installer Generation
-
Select the operating system release that provided the installer, for example,
Red Hat
                      Enterprise Linux 7/Oracle Linux 7
. - Kernel Options
-
Enter any options that should be specified when booting the installation kernel, for example,
noapicortext. - Post Kernel Options
-
Enter any options that should be specified when booting the installed system's kernel, for example,
3orselinux=0.
-
Click Create Kickstart Distribution to create the distribution.
-
-
To view a distribution, select its entry to display its details.
-
To modify a distribution:
-
Select the distribution whose settings you want to edit.
-
On the Edit Kickstart Distribution page, modify the settings as required.
-
If you want to create, modify, or delete kickstart variables:
-
Select the Variables tab.
-
On the Kickstart Variables page, define new variables or edit or delete existing variable entries.
-
Click Update Variables to save your changes.
-
Select the Edit tab to return to the Edit Kickstart Distribution page.
-
-
Click Update Kickstart Distribution to save your changes.
-
-
To delete a distribution:
-
Select the distribution that you want to delete.
-
On the Edit Kickstart Distribution page, click delete distribution and then click Delete Distribution to confirm.
-
4.3.2 Working With Kickstart Distributions by Using the spacecmd Command
Create a distribution by using the distribution_create command, as shown in the following example:
spacecmd {SSM:0}> distribution_create
Name: ol7-x86_64-server
Path to Kickstart Tree: /var/distro-trees/ol7-x86_64-server

Base Channels
-------------
oraclelinux6-x86_64
oraclelinux7-x86_64

Base Channel: oraclelinux7-x86_64

Install Types
-------------
fedora
generic_rpm
rhel_2.1
rhel_3
rhel_4
rhel_5
rhel_6
rhel_7
suse

Install Type: rhel_7
To list all activation keys, use the distribution_list command:
spacecmd {SSM:0}> distribution_list
ol6-x86_64-server
ol7-x86_64-server
To display the details of an activation key, use the distribution_details command:
spacecmd {SSM:0}> distribution_details ol7-x86_64-server
Name:    ol7-x86_64-server
Path:    /var/distro-trees/ol7-x86_64-server
Channel: oraclelinux7-x86_64
To delete an activation key, use the distribution_delete command:
spacecmd {SSM:0}> distribution_delete ol7-x86_64-server
ol7-x86_64-server

Delete distribution tree(s) [y/N]: y
4.4 Working With Kickstart Profiles
A kickstart configuration file contains all of the information
that kickstart requires to perform an automated installation of a
server. Every Oracle Linux installation creates a kickstart file,
which is /root/anaconda-ks.cfg. You can use
this file to repeat an installation, or you can customize the
settings in this file for different system configurations. The
file is also useful for troubleshooting a boot-time problem with
an installed system. You can use Spacewalk to create a kickstart
profile that generates a kickstart file or you can create a
profile that contains a kickstart file that you have uploaded or
copied into Spacewalk.
You can use either the Spacewalk web interface or the Spacewalk CLI to configure kickstart profiles.
4.4.1 Adding GPG Keys and SSL Certificates by Using the Spacewalk Web Interface
Oracle Linux ships with the GPG key that is required for each version by default. However, you must manually add GPG keys for any third-party vendors.
The Oracle GPG key that is appropriate for the installed version
is stored by default at
file:///etc/pki/rpm-gpg-RPM-GPG-KEY on every
Oracle Linux server.
Add a GPG key or SSL certificate to Spacewalk as follows:
-
Go to Systems, select Kickstart and then GPG and SSL Keys to display the GPG Public Keys and SSL Certificates page.
-
Click Create Stored Key/Cert to display the Create GPG/SSL Key page.
-
Enter a text description of the key or certificate in the Description field.
-
Select GPG or SSL, as appropriate, from the Type pull-down menu.
-
Either click Browse and select the key or certificate file to upload or paste the file contents into the Key contents field.
NoteGPG keys must be in ASCII, not binary, format.
-
Click Create Key.
After you have added the GPG keys and SSL certificates to Spacewalk, you can associate them with kickstart profiles as described in Section 4.4.2, “Working With Kickstart Profiles by Using the Spacewalk Web Interface”.
4.4.2 Working With Kickstart Profiles by Using the Spacewalk Web Interface
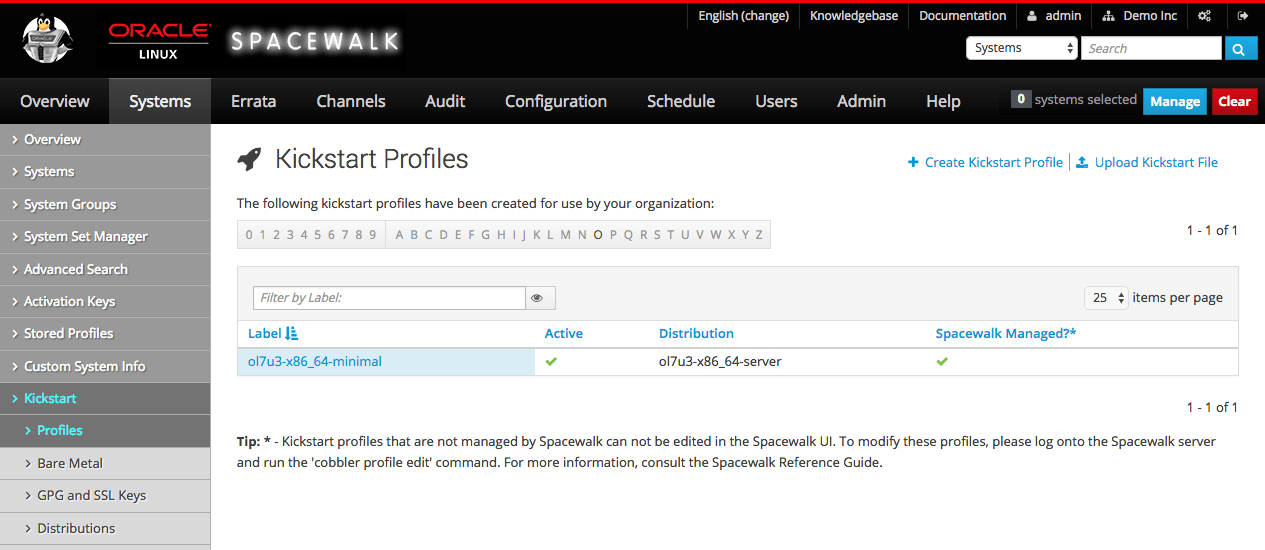
Go to Systems, select Kickstart and then Profiles.
-
To create a profile that contains a kickstart file generated by Spacewalk:
-
Click + create new kickstart profile.
-
On Step 1, Create kickstart Profile page, enter the profile settings in the following fields:
- Label
-
Enter a label for the profile, for example,
ol7u2-x86_64-minimal. - Base Channel
-
Select the base channel with which the distribution is associated, for example,
Oracle Linux 7 (x86_64) Base. - Kickstartable Tree
-
Select the kickstart distribution with which the profile is associated, for example,
ol7u2-x86_64-server. - Virtualization Type
-
Select the virtualization type.
For Oracle Linux installations on virtual machines that are hosted by Oracle VM or Oracle VM VirtualBox, select None.
For Oracle Linux 6 and Oracle Linux 7 as a KVM guest, select KVM Virtualized Guest.
Click Next.
-
On Step 2, Distribution File Location page, click Next to accept the default download location that Spacewalk creates from the kickstart tree.
-
On Step 3, Root Password page, enter and verify the root password for newly installed systems, and click Finish to create the profile.
You can now configure the kickstart profile itself. The following steps describe the changes that are usually required to create a useable profile.
NoteAt any stage, you can select Kickstart File to view the kickstart file that Spacewalk would generate from the profile by using the saved configuration settings.
-
Select Kickstart Details to display the Details page.
-
On the Details page, you can do the following:
-
Edit the Kickstart label.
-
Change the virtualization type.
-
Activate or de-activate the profile.
-
Configure custom post and pre script logging.
-
Choose whether to save a copy of the kickstart configuration to
/rooton an installed system. -
Select an organization default profile.
-
Specify installation and post-installation kernel options.
-
Add a description of the profile.
Click Update Kickstart to save your changes.
-
-
Select Operating System and select the check boxes for the child channels that you want to associate with the profile.
NoteTo enable Spacewalk to register the system automatically, select the Spacewalk Client channel.
The Software URL path is the virtual location where Spacewalk hosts the installation packages. It is not a real path in the file system.
Click Update Kickstart to save your changes.
-
(Optional) Select Variables to define any kickstart variables that you require, then click Update Variables to save your changes.
-
Select Advanced Options to modify the kickstart options, then click Update Kickstart to save your changes.
For more information about the available kickstart options, see Appendix A, Kickstart Options.
-
If you intend to install bare-metal systems, select Bare Metal Kickstart and follow the instructions on the Bare Metal Kickstart page. This page lists the URL of the kickstart file that you can use to install bare-metal systems and enables you to define the IP address ranges that are associated with the profile.
-
-
Select System Details to display the Details page:
-
On the Details page, you can do the following:
-
Choose the default SELinux mode for the installed system.
-
Enable or disable Spacewalk configuration file management by selecting or deselecting the Enable Spacewalk Configuration Management check box.
NoteYou must also include the
rhncfg,rhncfg-actions, andrhncfg-clientpackages for installation. -
Enable or disable Spacewalk remote commands by selecting or deselecting the Enable Spacewalk Remote Commands check box.
NoteYou must also include the
rhncfg,rhncfg-actions, andrhncfg-clientpackages for installation. -
Choose whether to reuse an existing profile, replace the existing profile, or create a new profile but retain the existing profile.
-
Change the root password for installed systems.
NoteIf you make any other changes on this page, you must re-enter and verify the root password.
Click Update System Details to save your changes.
-
-
Select Locale, then select the default time zone for installed systems and whether the hardware clock uses UTC, and click Update Locale Preferences to save your changes.
-
Select Partitioning to define the partitions to be created during installation, then click Update Partitions to save your changes.
NoteClear the partitioning configuration if you select the automatic-partitioning option
autoparton the Advanced Options page. -
Select GPG & SSL to display a list of the GPG keys and SSL certificates that are known to Spacewalk. Select the keys and certificates that should be imported into the
%postsection of the kickstart profile, then click Update Keys to save your selection.For information about adding a GPG key or SSL certificate to Spacewalk, see Section 4.4.1, “Adding GPG Keys and SSL Certificates by Using the Spacewalk Web Interface”.
-
-
Select Software to display the Package Groups page.
-
Edit the list of packages to be installed:
-
For sample lists of packages, see Appendix B, Sample Minimum Package Lists.
-
The
@ Baseentry installs a minimal group of packages that are required to install a system.If you want to specify the list of base packages explicitly, select the Don't install @Base package group check box.
-
If you do not want the installation to halt if it cannot locate a package, select the Ignore missing packages check box.
-
If you have associated the Spacewalk Client channel with the profile, Spacewalk installs the Spacewalk Client packages automatically. You do not need to specify them in this list.
-
If you enable configuration file management and remote commands by selecting the Enable Spacewalk Configuration Management and Enable Spacewalk Remote Commands check boxes on the Details page, include the
rhncfg,rhncfg-actions, andrhncfg-clientpackages. -
If you want to be able to apply updates and actions to a client system immediately from the Spacewalk server, include the
osadpackage. -
For Oracle Linux 5 installations, exclude the
pirut,up2date, andup2date-gnomepackages from installation by inserting a dash character (-) in front of the package names, as shown in the following example:@Base -pirut -up2date -up2date-gnome
You must exclude these packages to enable the Spacewalk client software to install correctly.
-
-
Click Update Packages to save your changes.
-
-
Select Activation Keys, then select the activation key to associate with the profile, and click Update Activation Keys to save your changes.
NoteA Spacewalk server activates the channels that are associated with an activation key when it registers the Spacewalk client at the end of the provisioning process. Enabling the Spacewalk Client channel by specifying the activation key is not sufficient to install the Spacewalk client software during the kickstart process. Instead, you must specify the packages in the kickstart profile. The channels that are available to a Spacewalk client during a kickstart installation and the channels that are available after installation are independent. You can use channels during a kickstart installation that are not available after installation if the activation key does not enable them.
-
Select Scripts to define commands that you want to run on the system before or after installation.
You can configure a preinstallation or post-installation script by using the following fields:
- Scripting Language
-
(Optional) The path name of the script language interpreter, such as
/usr/bin/python.Leave blank if you want to run bash shell commands.
- Script Name
-
Enter a name for the script.
- Script Contents
-
Select the script type from the pull-down list: Shell, XML, Ruby, Python, or perl, and enter the script in the text area.
- Script Execution Time
-
Select the time at which the script is executed from the pull-down list: Pre Script for before installation or Post Script for after installation.
- nochroot
-
(Optional) Select whether the script should run outside a chroot jail.
- erroronfail
-
(Optional) Select to stop the installation if an error occurs when the script runs.
- Template
-
(Optional) Select to enable Cobbler templating for the script.
NoteIf you want to be able to apply updates and actions to a client system immediately from the Spacewalk server, include the
osadpackage for installation, which contains the OSA daemon and use the following kickstart option to enable theosadservice:services --enabled=osad
If you do not enable configuration file management and remote commands by selecting the Enable Spacewalk Configuration Management and Enable Spacewalk Remote Commands check boxes on the Details page, you can alternatively include the
rhncfg,rhncfg-actions, andrhncfg-clientpackages for installation and configure rhn-actions-control to run on the client system in the post-installation shell:rhn-actions-control --enable-all
For more information, see the
rhn-actions-control(8)manual page. -
-
To create a profile that contains a kickstart file that you upload or copy into Spacewalk, do the following:
-
Click upload new kickstart file.
-
On the Kickstart Details page, enter the key settings in the following fields:
- Label
-
Enter a label for the profile, for example,
ol6-x86_64-custom. - Kickstartable Tree
-
Select the kickstart distribution with which the profile is associated, for example.
ol6-x86_64-server. - Virtualization Type
-
Select the virtualization type. For Oracle Linux installations on virtual machines that are hosted by Oracle VM or Oracle VM VirtualBox, select None.
-
Do one of the following:
-
Copy and paste the contents of a kickstart file into the File Contents text box.
-
Click Browse..., then select the path of a kickstart file and click Upload file to upload it to the File Contents text box.
-
-
If necessary, edit the kickstart file contents in the File Contents text box.
-
Click Update.
-
-
To view a profile, select its entry to display its details.
-
To modify a profile, do the following:
-
Select the profile for which you want to modify settings.
-
Select each tab and page that contains settings that you want to modify.
-
Click the Confirmation button on each page to save your changes.
-
-
To delete a profile, do the following:
-
Select the distribution that you want to delete.
-
On the Kickstart Details page, click delete kickstart and then click Delete Kickstart to confirm.
-
4.4.3 Working With Kickstart Profiles by Using the spacecmd Command
You can list all of the kickstart profiles by using the kickstart_list command as follows:
spacecmd {SSM:0}> kickstart_list
ol6u6-x86_64-minimal
To display the details of a kickstart profile, use the kickstart_details command:
spacecmd {SSM:0}> kickstart_details ol6u6-x86_64-minimal
Name:        ol6u6-x86_64-minimal
Label:       ol6u6-x86_64-minimal
Tree:        ol6-x86_64-server
Active:      True
Advanced:    False
Org Default: False

Configuration Management: False
Remote Commands:          False

Software Channels
-----------------
ol6u6-x86_64

Advanced Options
----------------
auth --enableshadow --passalgo=sha256
bootloader --location mbr
clearpart --all
firewall --disabled
keyboard us
lang en_US
network --bootproto dhcp
rootpw $5$ZdYXHxbNqu76Q5dG$.KWiOPyrGk8V5q/FEqYbWpCZdD5St387sn7jOyPH400
selinux --permissive
timezone America/New_York
url --url /var/distro-trees/ol6-x86_64-server

Software
--------
@ Base

Crypto Keys
-----------
RHN-ORG-TRUSTED-SSL-CERT

Variables
---------
org = 1
To display the contents of the kickstart file that a profile generates, use the kickstart_getcontents command:
spacecmd {SSM:0}> kickstart_getcontents ol6u6-x86_64-minimal
# Kickstart config file generated by Spacewalk Config Management
# Profile Label : ol6u6-x86_64-minimal
# Date Created  : 2015-06-11 11:34:15.157666

install
text
network --bootproto dhcp
url --url http://swksvr.mydom.com/ks/dist/ol6-x86_64-server
lang en_US
keyboard us
zerombr
clearpart --all
bootloader --location mbr
timezone America/New_York
auth --enableshadow --passalgo=sha256
rootpw --iscrypted $5$ZdYXHxbNqu76Q5dG$.KWiOPyrGk8V5q/FEqYbWpCZdD5St387sn7jOyPH400
selinux --permissive
reboot
firewall --disabled
skipx
autopart
...
The spacecmd command provides a large number of commands for managing kickstart profiles. Use the help command to find out more information:
spacecmd {SSM:0}> help

Documented commands (type help <topic>):
========================================
...
kickstart_addactivationkeys
kickstart_addchildchannels
kickstart_addcryptokeys
kickstart_addfilepreservations
kickstart_addoption
kickstart_addpackages
kickstart_addscript
kickstart_addvariable
kickstart_clone
kickstart_create
kickstart_delete
kickstart_details
kickstart_diff
kickstart_disableconfigmanagement
kickstart_disableremotecommands
kickstart_enableconfigmanagement
kickstart_enablelogging
kickstart_enableremotecommands
kickstart_export
kickstart_getcontents
kickstart_getupdatetype
kickstart_import
kickstart_import_raw
kickstart_importjson
kickstart_list
kickstart_listactivationkeys
kickstart_listchildchannels
kickstart_listcryptokeys
kickstart_listcustomoptions
kickstart_listoptions
kickstart_listpackages
kickstart_listscripts
kickstart_listvariables
kickstart_removeactivationkeys
kickstart_removechildchannels
kickstart_removecryptokeys
kickstart_removefilepreservations
kickstart_removeoptions
kickstart_removepackages
kickstart_removescript
kickstart_removevariables
kickstart_rename
kickstart_setcustomoptions
kickstart_setdistribution
kickstart_setlocale
kickstart_setpartitions
kickstart_setselinux
kickstart_setupdatetype
kickstart_updatevariable
...
spacecmd {SSM:0}> help kickstart_create
kickstart_create: Create a Kickstart profile
usage: kickstart_create [options]

options:
  -n NAME
  -d DISTRIBUTION
  -p ROOT_PASSWORD
  -v VIRT_TYPE ['none', 'para_host', 'qemu', 'xenfv', 'xenpv']
4.5 Installing Client Systems by Using Kickstart
To install a client system from a generated kickstart file, you can do one of the following:
-
Boot the system from a real or virtual CD-ROM drive by using a boot ISO image or a full DVD image that you have downloaded from the Oracle Software Delivery Cloud at https://edelivery.oracle.com/linux, specifying the network location of the kickstart file as a boot option.
This installation method is suitable for installing virtual machines or if you need to install only a small number of bare-metal systems at a local site.
-
After configuring DHCP to support network booting of PXE clients and Cobbler to support the requirements of individual clients, boot the system from the network.
This installation method is suitable for installing virtual machines or if you need to install bare-metal systems at both local and remote sites.
4.5.1 Configuring Cobbler and DHCP to Support Network Booting
The following procedure assumes that you have configured a DHCP server on the same system as the Spacewalk server. If DHCP is already provided on your network, you will need to work with your Network Administrator to configure network (PXE) boot support.
To configure Cobbler and DHCP to support the booting of client systems over the network, follow these steps:
-
Install the
cobbler-loadersanddhcppackages.#
yum install cobbler-loaders dhcp -
To configure Cobbler to manage the DHCP service, edit
/etc/cobbler/settingsand modify themanage_dhcpsetting.manage_dhcp: 1
-
Edit the DHCP server configuration template file (
/etc/cobbler/dhcp.template) and change the subnet configuration for your local configuration.The following example show how to select either the pxelinux boot loader for BIOS-based PXE clients or the GRUB boot loader for UEFI-based PXE clients:
# ******************************************************************
# Cobbler managed dhcpd.conf file
#
# generated from cobbler dhcp.conf template ($date)
# Do NOT make changes to /etc/dhcpd.conf. Instead, make your changes
# in /etc/cobbler/dhcp.template, as /etc/dhcpd.conf will be
# overwritten.
#
# ******************************************************************

ddns-update-style interim;

allow booting;
allow bootp;

ignore client-updates;
set vendorclass = option vendor-class-identifier;
option pxe-system-type code 93 = unsigned integer 16;
set pxetype = option pxe-system-type;

option domain-name "mydom.com";

subnet 192.168.1..0 netmask 255.255.255.0 {
  option domain-name-servers 192.168.1.1;
  option broadcast-address 192.168.1.255;
  option routers 192.168.1.254;
  default-lease-time 14400;
  max-lease-time 28800;
  pool {
    range 192.168.1.101 192.168.1.200;
  }
}

#for dhcp_tag in $dhcp_tags.keys():
    ## group could be subnet if your dhcp tags line up with your subnets
    ## or really any valid dhcpd.conf construct ... if you only use the
    ## default dhcp tag in cobbler, the group block can be deleted for a
    ## flat configuration
# group for Cobbler DHCP tag: $dhcp_tag
group {
        #for mac in $dhcp_tags[$dhcp_tag].keys():
            #set iface = $dhcp_tags[$dhcp_tag][$mac]
    host $iface.name {
        hardware ethernet $mac;
        #if $iface.ip_address:
        fixed-address $iface.ip_address;
        #end if
        #if $iface.hostname:
        option host-name "$iface.hostname";
        #end if
        #if $iface.netmask:
        option subnet-mask $iface.netmask;
        #end if
        #if $iface.gateway:
        option routers $iface.gateway;
        #end if
        if substring(vendorclass, 0, 9)="PXEClient" {
          if pxetype=00:06 or pxetype=00:07 {
              filename "/grub/grub.efi";
          } else {
              filename "/pxelinux.0";
          }
        }
        ## Cobbler defaults to $next_server, but some users
        ## may like to use $iface.system.server for proxied setups
        next-server $next_server;
        ## next-server $iface.next_server;
    }
        #end for
}
#end for
The previous example also configures a pool of generally available IP addresses in the range
192.168.1.101through 192.168.1.200on the192.168.1/24subnet. Systems in this pool do not boot by using PXE.All comments or commented-out DHCP directives in
/etc/cobbler/dhcp.templateare preceded by a double hash (##) to prevent Cobbler from interpreting them.Spacewalk configures Cobbler to use TFTP to serve the boot-loader configuration files from the
/var/lib/tftpbootdirectory. For more information about the format of these files, see Section 4.5.3, “About Boot Loader Configuration Files”.If you want DHCP to support network booting of iPXE clients, see Section 4.5.4, “Configuring DHCP to Support iPXE Clients”.
-
If SELinux is enabled in
enforcingmode on your system, configure SELinux for Cobbler operation as follows:-
Permit the
httpdservice to act as a proxy for Cobbler.#
setsebool -P httpd_can_network_connect=1 -
Set the
public_content_tfile type on the/var/lib/tftpbootfile and/var/www/cobbler/imagesdirectory hierarchies as follows:#
/usr/sbin/semanage fcontext -a -t public_content_t "/var/lib/tftpboot/.*"#/usr/sbin/semanage fcontext -a -t public_content_t "/var/www/cobbler/images/.*"NoteThe semanage command is provided by the
policycoreutils-pythonpackage.
-
-
Restart the
cobblerdservice:#
service cobblerd restart -
Start the
httpdservice and configure it to start after a reboot.#
service httpd start#chkconfig httpd onNoteIf you make any changes to
/etc/cobbler/dhcp.template, run the cobbler sync command.If you make any changes to
/etc/cobbler/settings, restart thecobblerdservice and then run the cobbler sync command. -
To support booting of UEFI-based PXE clients, copy the
/boot/efi/EFI/redhat/grub.efifile to/var/lib/tftpboot/grub.#
cp /boot/efi/EFI/redhat/grub.efi /var/lib/tftpboot/grub -
Configure the firewall to allow access through DHCP requests.
For Oracle Linux 6:
#
iptables -I INPUT -i eth1 -p udp --dport 67:68 --sport 67:68 -j ACCEPT#service iptables saveIn the previous example, the server expects to receive requests on interface
eth1.For Oracle Linux 7:
#
firewall-cmd --permanent --zone=public --remove-interface=enp0s3#firewall-cmd --permanent --zone=internal --add-interface=enp0s3#firewall-cmd --permanent --zone=internal --add-port=67/udp#firewall-cmd --permanent --zone=internal --add-port=68/udp#firewall-cmd --reloadIn the previous example, the server expects to receive requests on interface
enp0s3in theinternalzone.
4.5.2 Adding a PXE Client To Be Provisioned by Spacewalk
Add a PXE client to be provisioned by Spacewalk as follows:
-
List the kickstart profiles in Spacewalk that are usable by Cobbler.
#
cobbler profile listol6u6-x86_64-devsys:1:SpacewalkDefaultOrganization ol6u6-x86_64-server:1:SpacewalkDefaultOrganization -
Use the cobbler system add command to define the host name, MAC address, and IP address of the target PXE client and the profile that you want to install, as shown in the following example:
#
cobbler system add --name=svr1.mydom.com --hostname=svr1.mydom.com --mac=08:00:27:c6:a1:16\--ip=92.168.1.253 --profile=ol6u6-x86_64-server:1:SpacewalkDefaultOrganizationIf you are provisioning a client that uses an IP address from a DHCP address pool, you might use a command such as the following:
#
cobbler system add --name=devsys2 --hostname=devsys2\--profile=ol6u6-x86_64-devsys:1:SpacewalkDefaultOrganization\--kopts="ksdevice=eth0"The --kopts option enables you to specify options to be added to the kernel boot line. In this example,
ksdevice=eth0specifies the network interface that kickstart should use for installation, which prevents the installation pausing to prompt you to choose which network interface to use. -
By default, GRUB displays a boot menu for UEFI-based clients and prompts you to choose an entry. To prevent GRUB from displaying this menu, edit the
/etc/cobbler/pxe/grubsystem.templatefiile and adddefault=0,hiddenmenu, andtimeout=0entries, as shown in the following example:default=0 hiddenmenu timeout=0 title $profile_name root (nd) kernel $kernel_path $kernel_options initrd $initrd_path -
Run the cobbler sync command:
#
cobbler synctask started:YYYY-MM-DD_hhmmss_sync task started (id=Sync, time=date) ... generating PXE configuration files generating: /var/lib/tftpboot/pxelinux.cfg/01-08-00-27-c6-a1-16 generating: /var/lib/tftpboot/grub/01-08-00-27-c6-a1-16 rendering DHCP files generating /etc/dhcp/dhcpd.conf ... *** TASK COMPLETE ***Cobbler creates pxelinux and GRUB boot configuration files for the client in the
/var/lib/tftpboot/pxelinux.cfgand/var/lib/tftpboot/grubfiles. These files are named for the client's MAC address prefixed by01-, which represents the ARP hardware type for Ethernet, and use dashes to separate each byte value instead of colons. These client-specific files are based on the/etc/cobbler/pxe/pxesystem.templateand/etc/cobbler/pxe/grubsystem.templatefiles.Cobbler also creates generic
pxelinux.cfg/defaultandgrub/efidefaultboot configuration files from/etc/cobbler/pxe/pxeprofile.templateand/etc/cobbler/pxe/grubprofile.template.Cobbler adds an entry for the client to the
/etc/dhcp/dhcpd.conffile, which is based on/etc/cobbler/dhcp.template, as shown in the following example:# group for Cobbler DHCP tag: default group { host generic1 { hardware ethernet 08:00:27:c6:a1:16; fixed-address 192.168.1.253; option host-name "svr1.mydom.com"; if substring(vendorclass, 0, 9)="PXEClient" { if pxetype=00:06 or pxetype=00:07 { filename "/grub/grub.efi"; } else { filename "/pxelinux.0"; } } next-server swksvr.mydom.com; } } -
Display the PXE systems that are known to Cobbler.
#
cobbler system listsvr1.mydom.com
4.5.3 About Boot Loader Configuration Files
A boot-loader configuration file for BIOS-based PXE clients uses pxelinux configuration settings, as shown in the following Oracle Linux 6 example:
default ol6u6
prompt 0
timeout 1
label ol6u6
        kernel /images/ol6-x86_64:1:SpacewalkDefaultOrganization/vmlinuz
        ipappend 2
        append initrd=/images/ol6-x86_64:1:SpacewalkDefaultOrganization/initrd.img \
          ksdevice=bootif lang=en_US kssendmac text \
          ks=http://192.168.1.3/cblr/svc/op/ks/system/svr1.mydom.com
Do not use the \
line-continuation character. This character is used in the
example to denote that the line has been broken for printing.
The append directive and all of its arguments
must be on the same line.
To enable the boot: prompt to be displayed,
change the value of prompt to 1. To display
the prompt, press Shift or
Alt at the console.
The default directive identifies the default
boot entry by its label value,
ol6u6.
Pxelinux boots the client by using the default boot entry after
timeout/10 seconds.
The kernel directive defines the name of the
kernel executable and the append directive
defines any parameters that should be appended when loading the
kernel, such as the name of the ram-disk image and the location
of the kickstart file.
The ipappend 2 directive specifies that the
Installer should use the same network interface as the system
used to boot.
For pxelinux, the kernel and ram-disk image file paths are
relative to /var/lib/tftpboot. The default
boot loader configuration file for pxelinux is
/var/lib/tftpboot/pxelinux.cfg/default
A boot-loader configuration file for UEFI-based PXE clients uses GRUB configuration settings:
default=0
hiddenmenu
timeout=0

title ol6u6-x86_64-server:1:SpacewalkDefaultOrganization
    root (nd)
    kernel /images/ol6-x86_64:1:SpacewalkDefaultOrganization/vmlinuz \
      ksdevice=bootif lang=en_US kssendmac text \
      ks=http://192.168.1.3/cblr/svc/op/ks/system/svr1.mydom.com
    initrd /images/ol6-x86_64:1:SpacewalkDefaultOrganization/initrd.img
Note the following additional important points about boot loader configuration:
-
Do not use the
\line-continuation character. This character is used in the example to denote that the line has been broken for printing. The kernel directive and all of its arguments must be on the same line. -
The
timeout=0andhiddenmenudirectives cause the default kernel to boot immediately without allowing you to press a key to display a menu or modify the configuration of a boot entry. The default kernel is defined as the first entry (0), which is the only entry listed in this file. -
The
rootdirective defines that the kernel and initial ram-disk image files are available on the network device(nd), indicating that the files are available by using TFTP. -
The
kerneldirective defines the name of the kernel executable and any parameters that should be appended when loading the kernel, such as the location of the installation packages, and how to access these packages. Theinitrddirective specifies the initial ram-disk image file. -
For GRUB, the kernel and ram-disk image file paths are relative to
/var/lib/tftpboot/grub. The default boot loader configuration file for GRUB is/var/lib/tftpboot/grub/efidefault.
To support different types of client, a configuration file can be named for the following:
-
Client's UUID (for example,
a8943708-c6f6-51b9-611e-74e6ac80b93d) -
Client's MAC address prefixed by
01-, which represents the ARP hardware type for Ethernet, and by using dashes to separate each byte value instead of colons (for example,01-80-00-27-c6-a1-16) -
Client's IP address expressed in hexadecimal without any leading 0x (for example,
C0A801FDrepresents the IP address 192.168.1.253)
Cobbler writes client boot configuration files to both
/var/lib/tftpboot/grub and
/var/lib/tftpboot/pxelinux.cfg to handle both
UEFI or BIOS-based PXE clients.
The boot loader looks for a configuration file in the following order until it finds a matching file name:
-
UUIDa8943708-c6f6-51b9-611e-74e6ac80b93d) -
01-(for example,MAC_address01-80-00-27-c6-a1-16) -
Full 32 bits of the IP address (for example,
C0A801FD) -
Most significant 28 bits of the IP address (for example,
C0A801F) -
Most significant 24 bits of the IP address (for example,
C0A801) -
Most significant 20 bits of the IP address (for example,
C0A80) -
Most significant 16 bits of the IP address (for example,
C0A8) -
Most significant 12 bits of the IP address (for example,
C0A) -
Most significant 8 bits of the IP address (for example,
C0) -
Most significant 4 bits of the IP address (for example,
C) -
default(BIOS) orefidefault(EFI)
For more information about GRUB, type the info grub command to access the GRUB manual.
For more information about pxelinux, see http://www.syslinux.org/wiki/index.php/PXELINUX.
4.5.4 Configuring DHCP to Support iPXE Clients
iPXE extends the capabilities of PXE in many ways, including the following:
-
iPXE clients can boot by using HTTP, iSCSI, AoE, and FCoE
-
The boot process can be controlled by using scripts
-
DNS lookup is available
-
Booting across wide area networks or the Internet is possible
The gpxelinux.0 boot loader provides some
iPXE features, such as DNS lookup and HTTP file transfer, and is
available in the syslinux package. It does
not support iPXE commands or scripts.
You can use gpxelinux.0 with BIOS-based PXE
clients and with UEFI-based PXE clients in legacy mode but not
in UEFI mode.
To configure the DHCP service to support iPXE clients, follow these steps:
-
Edit the DHCP server configuration template file
/etc/cobbler/dhcp.templateas follows:-
Add the following lines to define the iPXE options for DHCP:
option space ipxe;
option ipxe-encap-opts code 175 = encapsulate ipxe;
option ipxe.priority code 1 = signed integer 8;
option ipxe.keep-san code 8 = unsigned integer 8;
option ipxe.skip-san-boot code 9 = unsigned integer 8;
option ipxe.syslogs code 85 = string;
option ipxe.cert code 91 = string;
option ipxe.privkey code 92 = string;
option ipxe.crosscert code 93 = string;
option ipxe.no-pxedhcp code 176 = unsigned integer 8;
option ipxe.bus-id code 177 = string;
option ipxe.bios-drive code 189 = unsigned integer 8;
option ipxe.username code 190 = string;
option ipxe.password code 191 = string;
option ipxe.reverse-username code 192 = string;
option ipxe.reverse-password code 193 = string;
option ipxe.version code 235 = string;
option iscsi-initiator-iqn code 203 = string;
option ipxe.pxeext code 16 = unsigned integer 8;
option ipxe.iscsi code 17 = unsigned integer 8;
option ipxe.aoe code 18 = unsigned integer 8;
option ipxe.http code 19 = unsigned integer 8;
option ipxe.https code 20 = unsigned integer 8;
option ipxe.tftp code 21 = unsigned integer 8;
option ipxe.ftp code 22 = unsigned integer 8;
option ipxe.dns code 23 = unsigned integer 8;
option ipxe.bzimage code 24 = unsigned integer 8;
option ipxe.multiboot code 25 = unsigned integer 8;
option ipxe.slam code 26 = unsigned integer 8;
option ipxe.srp code 27 = unsigned integer 8;
option ipxe.nbi code 32 = unsigned integer 8;
option ipxe.pxe code 33 = unsigned integer 8;
option ipxe.elf code 34 = unsigned integer 8;
option ipxe.comboot code 35 = unsigned integer 8;
option ipxe.efi code 36 = unsigned integer 8;
option ipxe.fcoe code 37 = unsigned integer 8;
option ipxe.vlan code 38 = unsigned integer 8;
option ipxe.menu code 39 = unsigned integer 8;
option ipxe.sdi code 40 = unsigned integer 8;
option ipxe.nfs code 41 = unsigned integer 8;
-
If you do not use a proxy DHCP server, specify the following line to speed up negotiation with the DHCP server:
option ipxe.no-pxedhcp 1;
-
Add the following line to define the
user-classoption:option user-class code 77 = string;
-
Configure the DHCP server to provide the IP addresses of name servers that iPXE clients can use to resolve domain names to IP addresses:
option domain-name-servers 192.168.1.1, 192.168.1.4, 192.168.1.8;
-
Configure DHCP to specify the
gpxelinux.0boot loader for non-iPXE clients and the URI of a boot script for iPXE clients:if exists user-class and option user-class = "iPXE" { filename "http://web.mydom.com/pxeboot.ipxe"; } else { filename "gpxelinux.0"; }In the previous example, pure iPXE clients run the HTTP-served boot script
pxeboot.ipxe.The following is an example of a boot script for an iPXE client:
#!ipxe

dhcp
kernel http://swksvr.mydom.com/distro-trees/ol6u6-x86_64-server/images/pxeboot/vmlinuz
initrd http://swksvr.mydom.com/distro-trees/ol6u6-x86_64-server/images/pxeboot/initrd.img
boot vmlinuz initrd=initrd.img ksdevice=bootif lang=en_US kssendmac text \
ks=http://192.168.1.3/cblr/svc/op/ks/profile/ol6-x86_64-minimal:1:SpacewalkDefaultOrganization
dhcp configures the client's network interfaces.
kernel downloads the installation kernel.
initrd downloads the initial ram-disk image file.
boot boots the downloaded installation kernel. Boot line parameters, such as the name of the initial ram-disk file and the location of the kickstart file, are specified as additional arguments.
Do not use the
\line-continuation character. This character is used in the example to denote that the line has been broken for printing. The boot command and all of its arguments must be on the same line.For more information, see http://ipxe.org/scripting and http://ipxe.org/cmd.
Non-iPXE clients boot by using
gpelinux.0. A configuration file forgpxelinux.0is named in the same way as forpxelinux.0as described in Section 4.5.3, “About Boot Loader Configuration Files”. Unlikepxelinux.0, you can use HTTP to access the installation kernel and initial ram-disk image files.The following is an example of a configuration file for
gpxelinux.0:prompt 0 default ol6u6 timeout 0 label ol6u6 kernel http://swksvr.mydom.com/distro-trees/ol6u6-x86_64-server/images/pxeboot/vmlinuz append initrd=http://swksvr.mydom.com/distro-trees/ol6u6-x86_64-server/images/pxeboot/initrd.img \ ksdevice=bootif lang=en_US kssendmac text \ ks=http://192.168.1.3/cblr/svc/op/ks/profile/ol6-x86_64-minimal:1:SpacewalkDefaultOrganization ipappend 2
Do not use the
\line-continuation character. This character is used in the example to denote that the line has been broken for printing. Theappendkeyword and all of its arguments must be on the same line.
-
-
Run the cobbler sync command:
#
cobbler synctask started:YYYY-MM-DD_hhmmss_sync task started (id=Sync, time=date) ... rendering DHCP files generating /etc/dhcp/dhcpd.conf ... *** TASK COMPLETE ***The Cobbler service regenerates the
/etc/dhcp/dhcpd.conffile and reloads thedhcpdservice.If you make any further changes to
/etc/cobbler/dhcp.template, run the cobbler sync command. You do not need to run this command if you change the content of the boot loader configuration files.
4.6 Creating a Kickstart Profile in Cobbler
You can also create kickstart profiles in Cobbler outside of Spacewalk. As for Spacewalk, a profile defines how to configure an installation if the target client has to perform a certain role. For example, you might want to configure a system as a web or database server. To create a profile in Cobbler, you associate a kickstart file with a distribution.
Cobbler-only profiles are not visible from within Spacewalk.
You can use the cobbler profile list command as follows to list the profiles that are known to Cobbler:
# cobbler profile list
   ol6u6-x86_64
To find out which kickstart file a profile uses, run the cobbler profile report command:
# cobbler profile report ol6u6-x86_64 | grep Kickstart
Kickstart                      : /var/lib/cobbler/kickstarts/sample.ks
Kickstart Metadata             : {}
The default sample.ks file and other kickstart
files that Cobbler provides in
/var/lib/cobbler/kickstarts are unlikely to be
suitable for provisioning clients.
To create a new profile for a distribution, follow these steps:
-
Create the kickstart file to associate with a distribution.
For example, the following file, named
ol6u6_basic_server.ks, contains a kickstart definition for a basic Oracle Linux 6 server:# Oracle Linux 6 Basic Server # Use text-based installation text # Install using HTTP from a URL provided by Cobbler url --url=$tree # Define localized settings lang en_US.UTF-8 keyboard us timezone --utc America/New_York # Configure network interface settings network --onboot yes --device eth0 --bootproto dhcp --noipv6 # root password is an SHA-512 hash provided by Cobbler rootpw --iscrypted $default_password_crypted authconfig --enableshadow --passalgo=sha512 # Allow only SSH connections firewall --service=ssh # Configure SELinux enforcing mode selinux --enforcing # Perform a new installation, removing all existing partitions # before configuring the new boot loader and disk partitions install zerombr clearpart --drives=sda --all --initlabel bootloader --location=mbr --driveorder=sda --append="crashkernel=auto rhgb quiet" autopart # Shutdown and power off the system after installation is finished # to allow you to change the boot order or make other changes. poweroff # Alternatives are halt (default), reboot, and shutdown, # which might not be suitable for unattended installations # Package groups and packages to be installed %packages ... %end
For sample package lists, see Appendix B, Sample Minimum Package Lists.
NoteThis example requires that you configure an SHA-512 password hash for the
default_password_cryptedsetting in/etc/cobbler/settings.The previous example does not take advantage of the power of kickstart templating and snippets for managing large numbers of profiles and systems in Cobbler. For more information, see the
cobbler(1)manual page and http://www.cobblerd.org/. -
If SELinux is enabled in
enforcingmode on your system and you create the kickstart file in a directory other than/var/lib/cobbler/kickstarts, for example/var/kickstart, do the following:-
Type the semanage command to define the default file type of the directory hierarchy as
cobbler_var_lib_t:#
/usr/sbin/semanage fcontext -a -t cobbler_var_lib_t "/var/kickstart(/.*)?" -
Type the restorecon command to apply the file type to the entire directory hierarchy.
#
/sbin/restorecon -R -v /var/kickstart -
For each kickstart file in the directory, type the chcon command to set the SELinux user to
system_u.#
chcon -u system_u /var/kickstart/*.ks
If SELinux is enabled in
enforcingmode on your system, and you create the kickstart file in/var/lib/cobbler/kickstartsor in a directory on which you have defined the default file type ascobbler_var_lib_t, type the chcon command to set the SELinux user of the file tosystem_u:#
chcon -u system_u ol6u6_basic_server.ksYou can use the ls -Z command to display the context:
#
ls -Z ol6u6_basic_server.ks-rw-rw-r--. root root system_u:object_r:cobbler_var_lib_t:s0 ol6u6_basic_server.ksThe correct SELinux context for a kickstart file used by Cobbler is
system_u:object_r:cobbler_var_lib_t:s0. -
-
Create the profile by running the cobbler profile add command:
#
cobbler profile add --name=ol6u6_basic_server --distro=ol6u6-x86_64\--kickstart=/var/lib/cobbler/kickstarts/ol6u6_basic_server.ksNoteIf the command returns the error
kickstart not
            found
for a file that does exist at the specified path, the file's SELinux context is incorrect. See the previous step for details of how to set the correct SELinux context on a file. -
Display the profiles that are now known to Cobbler by running the cobbler profile list command.
#
cobbler profile listol6u6-x86_64 ol6u6_basic_serverThe
ol6u6-x86_64profile is unlikely to be usable. If you want to remove a profile, use the cobbler profile remove command, as shown in the following example:#
cobbler profile remove --name=ol6u6-x86_64#cobbler profile listol6u6_basic_serverNoteRemoving a profile also removes any client
systemdefinitions that you have created from that profile.
You can now define the PXE clients that Cobbler can provision based on the profile that you created. See Section 4.6.1, “Adding a PXE Client To Be Provisioned by Cobbler”.
4.6.1 Adding a PXE Client To Be Provisioned by Cobbler
To add a PXE client to be provisioned by Cobbler, follow these steps:
-
Define the host name, MAC address, and IP address of the target PXE client and the profile that you want to installl by using the cobbler system add command:
#
cobbler system add --name=svr1 --hostname=svr1 --mac=08:00:27:c6:a1:16\--ip=10.0.0.253 --profile=ol6u6_basic_serverIf you are provisioning a desktop client that uses an IP address from a DHCP address pool, you might use a command such as the following:
#
cobbler system add --name=devsys2 --hostname=devsys2 --profile=ol6u6_devsys --kopts="ksdevice=eth0"The --kopts option enables you to specify options to be added to the kernel boot line. In this example,
ksdevice=eth0specifies the network interface that kickstart should use for installation, which prevents the installation pausing to prompt you to choose which network interface to use. -
By default, GRUB displays a boot menu for UEFI-based clients and prompts you to choose an entry. To prevent GRUB from displaying this menu, edit
/etc/cobbler/pxe/grubsystem.templateand adddefault=0,hiddenmenu, andtimeout=0entries, as shown in the following example:default=0 hiddenmenu timeout=0 title $profile_name root (nd) kernel $kernel_path $kernel_options initrd $initrd_path -
Run the cobbler sync command.
#
cobbler synctask started:YYYY-MM-DD_hhmmss_sync task started (id=Sync, time=date) ... generating PXE configuration files generating: /var/lib/tftpboot/pxelinux.cfg/01-08-00-27-c6-a1-16 generating: /var/lib/tftpboot/grub/01-08-00-27-c6-a1-16 rendering DHCP files generating /etc/dhcp/dhcpd.conf ... *** TASK COMPLETE ***Cobbler creates pxelinux and GRUB boot configuration files for the client in
/var/lib/tftpboot/pxelinux.cfgand/var/lib/tftpboot/grub. These files are named for the client's MAC address prefixed by01-, which represents the ARP hardware type for Ethernet, and use dashes to separate each byte value instead of colons. These client-specific files are based on/etc/cobbler/pxe/pxesystem.templateand/etc/cobbler/pxe/grubsystem.template.Cobbler also creates generic
pxelinux.cfg/defaultandgrub/efidefaultboot configuration files from/etc/cobbler/pxe/pxeprofile.templateand/etc/cobbler/pxe/grubprofile.template.Cobbler adds an entry for the client to
/etc/dhcp/dhcpd.conf, which is based on/etc/cobbler/dhcp.template, as shown in the following example:# group for Cobbler DHCP tag: default group { host generic1 { hardware ethernet 08:00:27:c6:a1:16; fixed-address 10.0.0.253; option host-name "svr1"; if substring(vendorclass, 0, 9)="PXEClient" { if pxetype=00:06 or pxetype=00:07 { filename "/grub/grub.efi"; } else { filename "/pxelinux.0"; } } next-server 10.0.0.6; } } -
Display the systems that are known to Cobbler by running the cobbler system list command:
#
cobbler system listsvr1 svr2
4.6.2 Removing a PXE Client Definition From Cobbler
To remove a PXE Client definition from Cobbler, follow these steps:
-
Display the systems that are known to Cobbler by typing the cobbler system list command:
#
cobbler system listsvr1 svr2 -
Specify the name of the system that you want to remove by typing the cobbler system remove, as shown in the following example where
svr2is the system that you want to remove:#
cobbler system remove --name=svr2 -
Run the cobbler sync to update the Cobbler configuration.
#
cobbler synctask started:YYYY-MM-DD_hhmmss_sync task started (id=Sync, time=date) ... generating PXE configuration files rendering DHCP files generating /etc/dhcp/dhcpd.conf ... *** TASK COMPLETE *** -
Verify that
svr2has been removed as follows:#
cobbler system listsvr1
4.7 Provisioning KVM Hosts With Spacewalk
The following procedure describes how to use Spacewalk to provision a KVM host. Before performing this procedure, ensure that you have done the following:
-
You are familiar with how to set up and use activation keys and kickstart profiles in Spacewalk and how to configure Cobbler, DHCP, and boot loaders to support network installation of client systems.
See Chapter 3, Working With Activation Keys in Spacewalk, Section 4.4, “Working With Kickstart Profiles”, and Section 4.5, “Installing Client Systems by Using Kickstart”.
-
You have set up a base channel and kickstartable tree for the Oracle Linux distribution that you want to install on the KVM host.
-
The system that you configure as a KVM host must have VT-x acceleration enabled in the BIOS or UEFI firmware and be able to forward this capability to any KVM guests. Suitable systems are bare-metal systems with VT-x enabled and Oracle VM virtual machines that have been configured with this capability. Oracle VirtualBox virtual machines do not support this functionality and are not suitable.
To provision a KVM host, follow these steps:
-
In Spacewalk, create an activation key that is specific to KVM hosts on the desired platform: Oracle Linux 6 (
x86_64) or Oracle Linux 7 (x86_64).Enter the key settings as follows:
- Description
-
Enter a description for the key, for example,
Oracle Linux 7 (x86_64) KVM host. - Key
-
Enter a meaningful label for the activation key, for example,
kvmhost-oraclelinux7-x86_64. - Usage
-
Leave blank to enable unlimited use by clients.
- Base Channels
-
Select the base channel with which the key is associated:
Oracle Linux 7 (x86_64)
                Base
. - Add-on Entitlements
-
If you are running the KVM hypervisor on Oracle Linux 6 or Oracle Linux 7, you should enable the Virtualization entitlement. This entitlement installs additional packages on the target host so that Spacewalk is able to identify and manage virtual guests on that host.
- Universal Default
-
Select if the key should be used as the default activation key for all newly-registered systems.
NoteOracle strongly recommends that you do not associate any channels with a universal default key. Spacewalk uses the universal default key if a key is not specified so it might be used by any version of any operating system.
-
In Spacewalk, create a kickstart profile for KVM host systems on the desired platform and do the following:
-
Associate the activation key that you created in Step 1 with the profile.
-
Enter the profile settings as follows:
- Label
-
Enter a label for the profile. for example,
kvmhost-ol7u2-x86_64. - Base Channel
-
Select the base channel with which the distribution is associated, for example,
Oracle Linux 7
                    Update 2 (x86_64) Base
. - Kickstartable Tree
-
Select the kickstart distribution with which the profile is associated, for example,
ol7u2-x86_64-server. - Virtualization Type
-
Select the virtualization type as None.
-
Configure the following software packages, which kickstart should install on the host, in addition to the
@Baseand@Corepackages:- Virtualization packages (required for a KVM host):
-
-
@virtualization-hypervisor -
@virtualization-tools
-
- Virtualization packages (recommended):
-
-
qemu-kvm-tools(provides debugging and diagnostic utilities.) -
virt-manager(provides a graphical virtual machine manager that you can use with KVM.) -
virt-viewer(provides a graphical console client for connecting to virtual machines)
-
- Graphical desktop packages (required to use the Virtual Machine Manager):
-
-
@^graphical-server-environment(provides a full graphical server environment) -
@fonts -
@gnome-desktop(select alternate desktop environment such as KDE if preferred) -
@x11
-
- Spacewalk client packages (recommended):
-
-
rhncfg -
rhncfg-actions -
rhncfg-client
-
- Suggested optional packages:
-
-
@input-methods(Only include if thegraphical-server-environmentis enabled. Otherwise, not recommended.) -
@internet-browser(Only include if thegraphical-server-environmentis enabled. Otherwise, not recommended.) -
@multimedia(Only include if thegraphical-server-environmentis enabled. Otherwise, not recommended.) -
kexec-tools -
osad(enables you to apply updates and actions to a client system immediately from the Spacewalk server)
-
-
In the kickstart profile, configure any kickstart advanced options that you require, such as
keyboard,lang, ornetwork. -
Set up the
%preor%postsections for any pre or post-installation configuration that you want kickstart to perform.For example, you can enable configuration file management and remote commands by including the
rhncfg,rhncfg-actions, andrhncfg-clientpackages and configuring rhn-actions-control to run in the post-installation shell:rhn-actions-control --enable-all
-
-
Configure Cobbler or DHCP to provide IP and TFTP settings so that the guest being installed can access the appropriate boot loader to continue the provisioning process.
-
Configure the boot-loader configuration file that the boot loader uses to locate the installation kernel, the ram-disk image, and the kickstart file that is served by Spacewalk.
-
After setting up the Spacewalk kickstart profile, Cobbler, DHCP, and boot-loader configuration, boot the target host system from the network, which starts the installation process.
4.8 Provisioning KVM Guests With Spacewalk
The following procedure describes how to use Spacewalk to provision KVM guests.
Before you begin, ensure that you have done the following:
-
Familiarize yourself with how to set up and use activation keys and kickstart profiles in Spacewalk and how to configure Cobbler, DHCP, and boot loaders to support network installation of client systems.
See Chapter 3, Working With Activation Keys in Spacewalk, Section 4.4, “Working With Kickstart Profiles”, and Section 4.5, “Installing Client Systems by Using Kickstart”.
-
Familiarize yourself with how to use KVM to configure a KVM guest, for example by using the graphical Virtual Machine Manager.
NoteTo use KVM to configure a KVM guest, you must install the
spacewalk-koanpackage on the KVM host. -
You have set up a base channel and kickstartable tree for the Oracle Linux distribution that you want to install on the KVM guest.
To provision a KVM guest, follow these steps:
-
In Spacewalk, create an activation key that is specific to KVM hosts on the desired platform: Oracle Linux 6 (
x86_64) or Oracle Linux 7 (x86_64). Enter the key settings as follows:- Description
-
Enter a description for the key for example,
Oracle Linux 7 (x86_64) KVM guest. - Key
-
Enter a meaningful label for the activation key, for example,
kvmguest-oraclelinux7-x86_64. - Usage
-
Leave blank to enable unlimited use by clients.
- Base Channels
-
Select the base channel with which the key is associated:
Oracle Linux 7 (x86_64) Base. - Add-on Entitlements
-
Note
No add-on entitlements are required for a virtual guest. The Virtualization entitlement is only required for virtual hosts. Do not select it when creating a virtual guest kickstart profile.
- Universal Default
-
Select this option if the key should be used as the default activation key for all newly-registered systems.
NoteOracle strongly recommends that you do not associate any channels with a universal default key. Spacewalk uses the universal default key if a key is not specified so it might be used by any version of any operating system.
-
In Spacewalk, create a kickstart profile for KVM host systems on the desired platform:
-
Associate the activation key that you created with the profile.
-
Enter the profile settings as follows:
- Label
-
Enter a label for the profile, for example,
kvmguest-ol7u2-x86_64. - Base Channel
-
Select the base channel with which the distribution is associated, for example,
Oracle Linux 7
                    Update 2 (x86_64) Base
. - Kickstartable Tree
-
Select the kickstart distribution with which the profile is associated, for example,
ol7u2-x86_64-server. - Virtualization Type
-
For a KVM guest, select the virtualization type as KVM Virtualized Guest. KVM supports only HVM guests.
-
Configure the software packages that kickstart should install on the host in addition to the
@Basepackage. The intended function of the guest system determines the set of packages. However, Oracle recommends the following additional packages for a KVM guest that is also a Spacewalk client:-
@guest-agents(agents used when running under a hypervisor) -
@guest-desktop-agents(agents used when running as a virtualized desktop) -
acpid(enables you to control the power state of the guest from the host) -
osad(enables you to apply updates and actions to a client system immediately from the Spacewalk server) -
rhncfg -
rhncfg-actions -
rhncfg-client
-
-
In the kickstart profile, configure any kickstart advanced options that you require, such as
keyboard,lang, ornetwork. -
Set up the
%preor%postsections for any pre or post-installation configuration that you want kickstart to perform.For example, you can enable configuration file management and remote commands by including the
rhncfg,rhncfg-actions, andrhncfg-clientpackages and configuring rhn-actions-control to run in the post-installation shell:rhn-actions-control --enable-all
-
-
If you want to install the guest by using PXE network booting and kickstart, do the following:
-
Configure Cobbler or DHCP to provide IP and TFTP settings so that the guest being installed can access the appropriate boot loader to continue the provisioning process.
-
Configure the configuration file that the boot loader uses to locate the installation kernel, the ram-disk image, and the kickstart file served by Spacewalk.
-
After setting up the Spacewalk kickstart profile, Cobbler, DHCP, and boot-loader configuration, boot the target guest system from the network to start the installation process.
If you want to install the guest by using a network installation, use a boot image that is made available over HTTP by the Spacewalk server. You can use a full ISO image, a UEK boot image, or a RHCK boot image in conjunction with kickstart, depending on your requirements.
-