- Oracle Exadata X9-2 Database Server Service Manual
- Servicing the Front LED Indicator Module
- Install the Front LED Indicator Module
Install the Front LED Indicator Module
- Attach an antistatic wrist strap to your wrist, and then to a metal area on the chassis.
- Unpack the replacement FIM and place it on an antistatic mat.
-
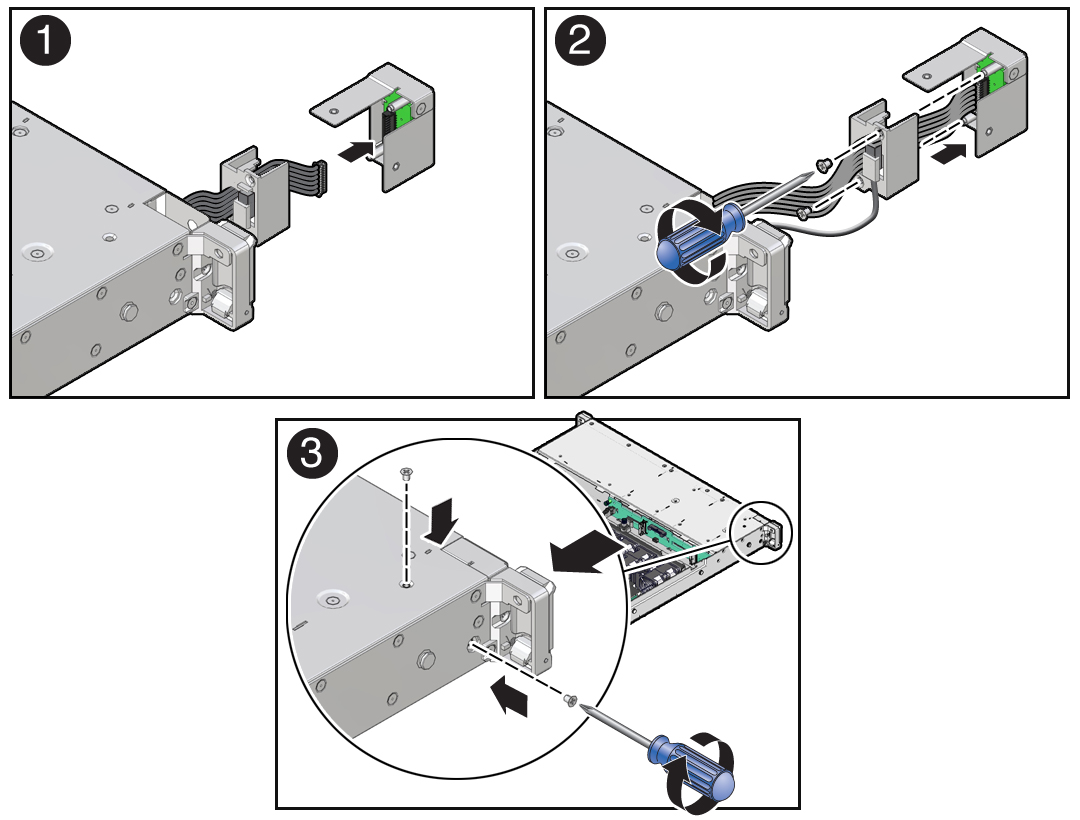
If not installed, install the FIM cable through the plastic temperature sensor
housing [1].

- Connect the FIM cable to the replacement FIM assembly [1, 2].
- Using a Phillips screwdriver, tighten the two screws to secure the temperature sensor housing to the FIM assembly [2].
- Carefully insert the FIM assembly into the front panel of the server chassis [3].
- Install and tighten the two Phillips screws to secure the FIM assembly to the server chassis [3].
-
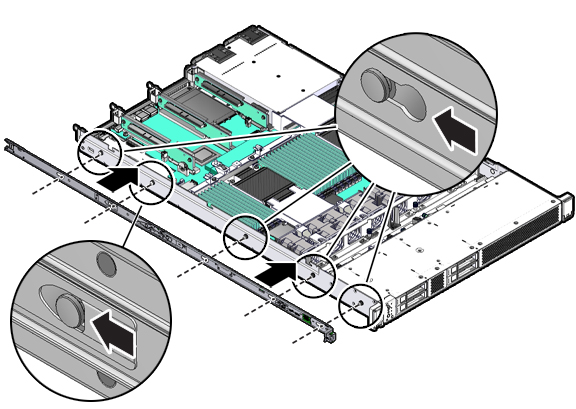
(Optional) If required, reattach the left-side mounting bracket to the server
chassis.

- Position the mounting bracket against the chassis so that the five keyhole openings on the mounting bracket are aligned with the five locating pins on the side of the chassis.
- When the heads of the five chassis locating pins protrude through the five keyhole openings in the mounting bracket, pull the mounting bracket toward the front of the chassis until the mounting bracket clip locks into place with an audible click.
- Verify that the locating pin is engaged with the mounting bracket clip.
-
Return the server to operation.
- Reinstall the server into the rack.
- Reconnect the power cords to the power supplies, and power on the server.
- Verify that the System OK status indicator is lit.