- Oracle Exadata X9-2 Database Server Service Manual
- Servicing the OCP Network Interface Card
- Install the OCP Network Interface Card
Install the OCP Network Interface Card
- Unpack the replacement OCP NIC.
-
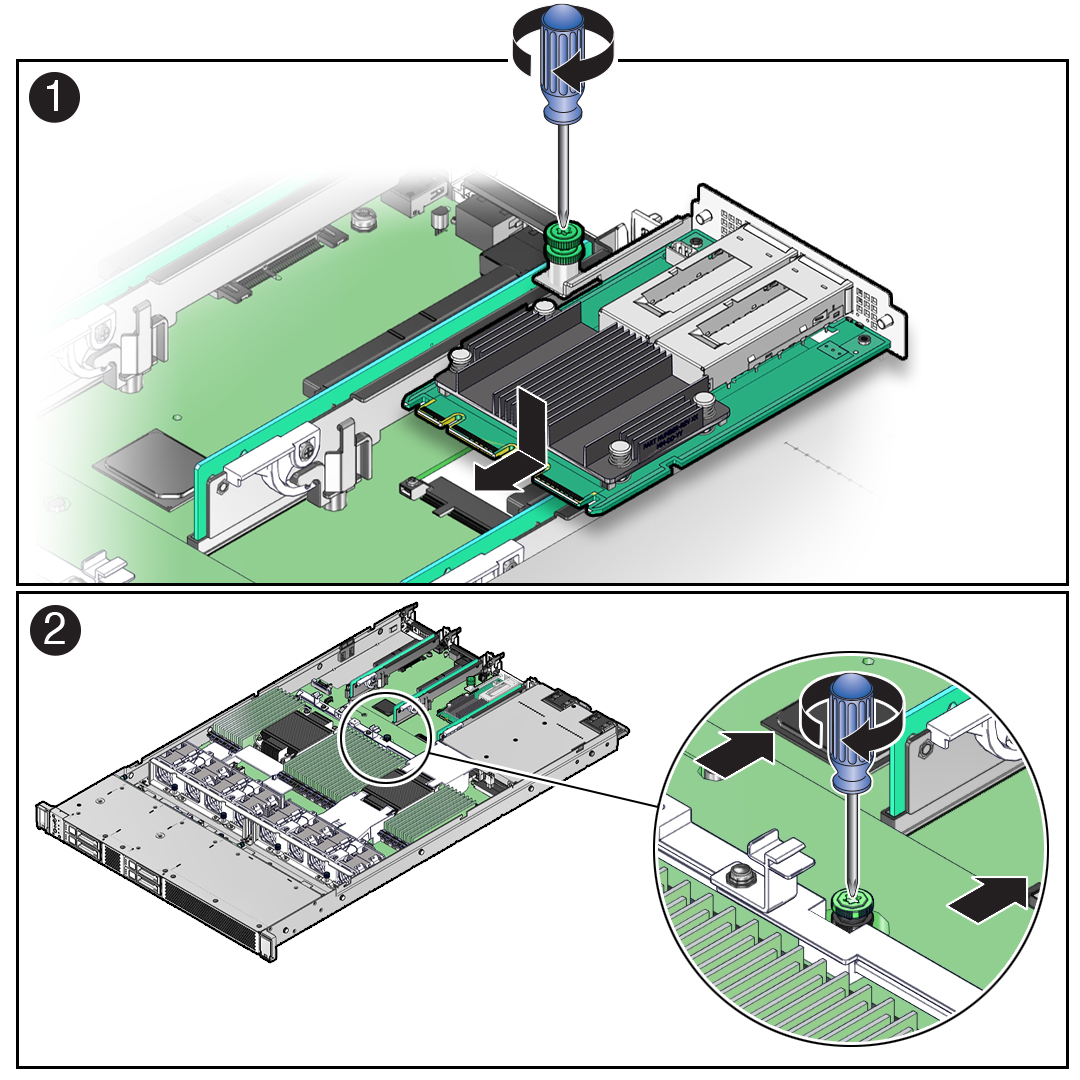
Insert the OCP NIC into the server chassis [1].

- Align the OCP NIC connector with the motherboard connector slot, then gently push the OCP NIC connector into the motherboard connector slot [1].
- Using a Torx T25 screwdriver, tighten the green captive (retention) screw to secure the OCP NIC to the motherboard [1].
-
Grasp the motherboard handle and the motherboard front finger loop, and then
slide the motherboard toward the rear of the server until the OCP NIC QSFP
connectors fit correctly into the rear panel cutouts [2].
Note:
Ensure that all indicators, controls, and connectors on the rear of the motherboard fit correctly into the rear panel cutouts. - Using a Torx T25 screwdriver, tighten the green captive screw to secure the motherboard to the server chassis [2].
-
Reinstall the following reusable components:
-
Power supplies
-
PCIe risers with attached PCIe cards
-
Fan modules
See Install a Fan Module.
-
Air baffles
-
-
Return the server to operation.
- Install the server top cover.
- Return the server to the normal rack position.
- Reconnect the data cables to the ports and cards listed in Step 1.b.
- Reconnect the power cords to the power supplies, and power on the server.
- Verify that the System OK status indicator is lit.