- Oracle Exadata X9-2 Database Server Service Manual
- Servicing the NVMe Cables
- Remove NVMe Cables
Remove NVMe Cables
-
Prepare the server for service.
- Power off the server and disconnect the power cords from the power supplies.
- Extend the server to the maintenance position.
- Attach an antistatic wrist strap to your wrist, and then to a metal area on the chassis.
- Remove the server top cover.
-
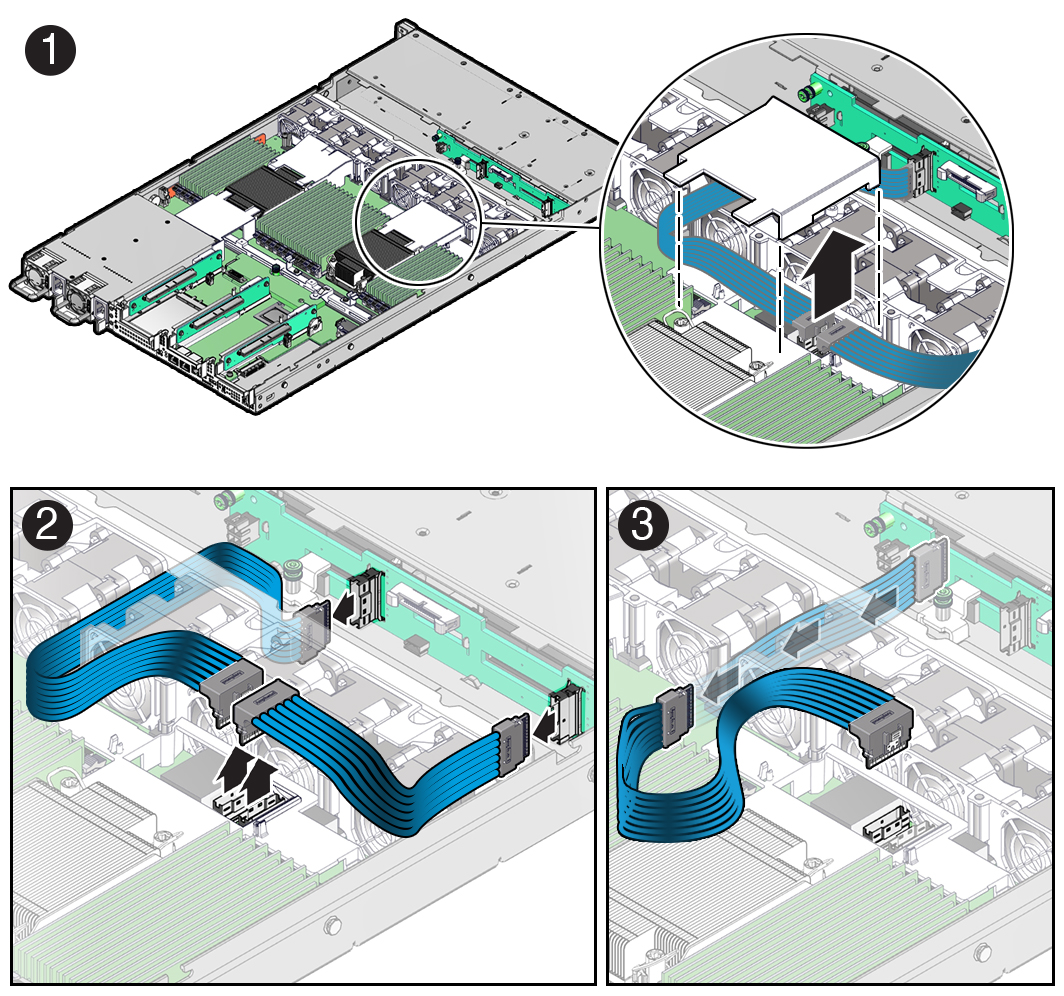
Remove the P0 upper air baffle [1].
Lift the air baffle up and out of the chassis and set it aside.
-
Disconnect the NVMe A and B cables from the disk backplane by pressing the
latch on the cable connector and then pulling out the connector [2].

-
Disconnect the NVMe A and B cables from the motherboard NVMe connectors
[2].
Note:
(Optional) To ease the disconnecting of cables, you might need to remove the FM0 fan module. See Remove a Fan Module. - Carefully lift the NVMe A cable from the left-side trough and gently pull the NVMe B cable through the center cable trough and remove them from the server [2, 3].