- Oracle Exadata X9-2 Database Server Service Manual
- Servicing the Temperature Sensor
- Remove the Temperature Sensor
Remove the Temperature Sensor
-
Prepare the server for service.
- Power off the server and disconnect the power cords from the power supplies.
- Remove the server from the rack.
- Attach an antistatic wrist strap to your wrist, and then to a metal area on the chassis.
- Remove the server top cover.
-
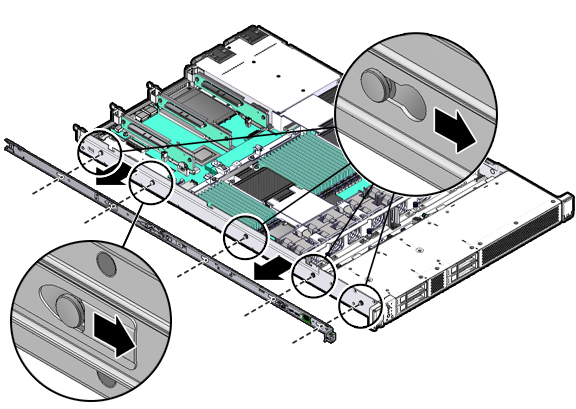
Remove the left-side mounting bracket from the server chassis.

- Lift up on the mounting bracket clip to disengage the clip from the chassis locating pin.
- Pull the mounting bracket toward the rear of the chassis until all five chassis locating pins protrude through the five keyhole openings in the mounting bracket.
- Lift the mounting bracket off the locating pins and set it aside.
-
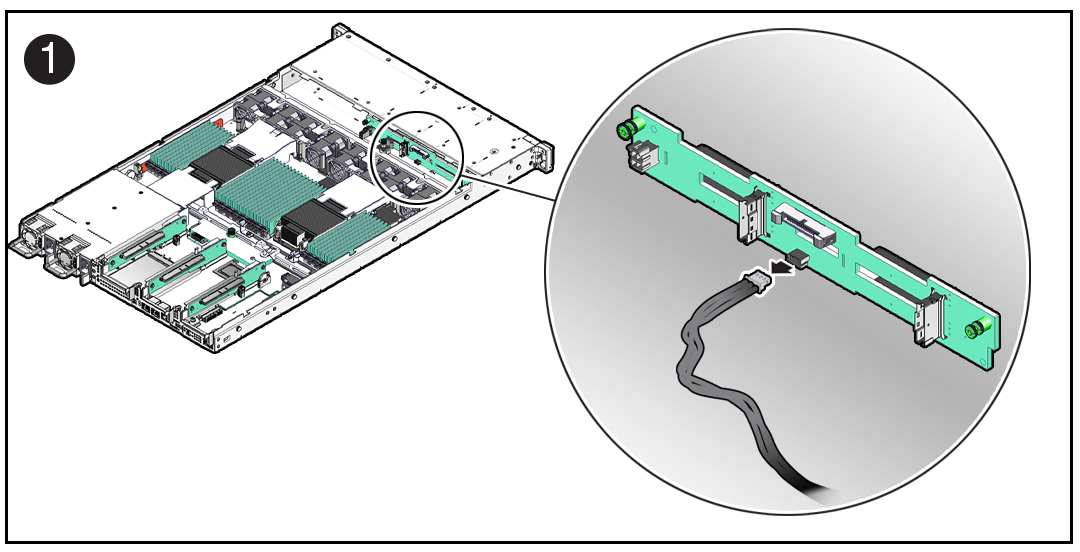
Disconnect the temperature sensor cable from the disk backplane.

-
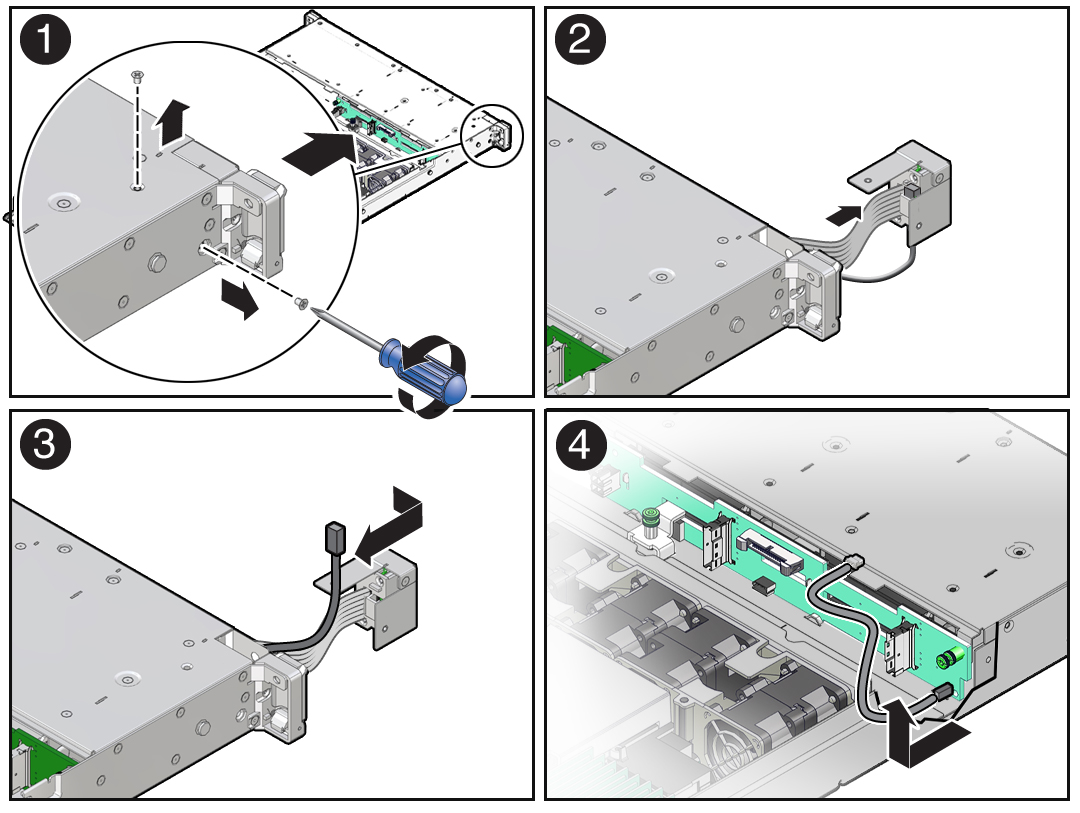
Using a Phillips screwdriver, remove the two screws that secure the front
indicator module (FIM) assembly to the server chassis [1].

- Carefully slide the FIM assembly toward the front of the server to remove it from the chassis [2].
- Remove the temperature sensor from the plastic housing by pulling the sensor from its seated location. Then remove the sensor cable by pulling it through the slit in the housing [2, 3].
- Remove the temperature sensor and cable by carefully pulling the sensor cable rearward and through the left-front chassis sidewall. Then lift the temperature sensor from the chassis [4].