Create Oracle Content Management Base Asset Repository
This next section is specific to the Oracle Sales and Service business objects that you want to expose this OCM integration into. In this example, we will be using service requests, but any Fusion Sales and Service business object can be updated using these steps such as opportunities, campaigns, events, etc.
For each service request (as an example) that is created in the Oracle Sales and Service application, a corresponding collection will be created inside a specified OCM base asset repository.
It is important to note that a unique OCM enterprise user with content administrator privileges should be created for this integration as this user will have full access to all the OCM asset repository collections that are created. We will refer this user as the integration user.
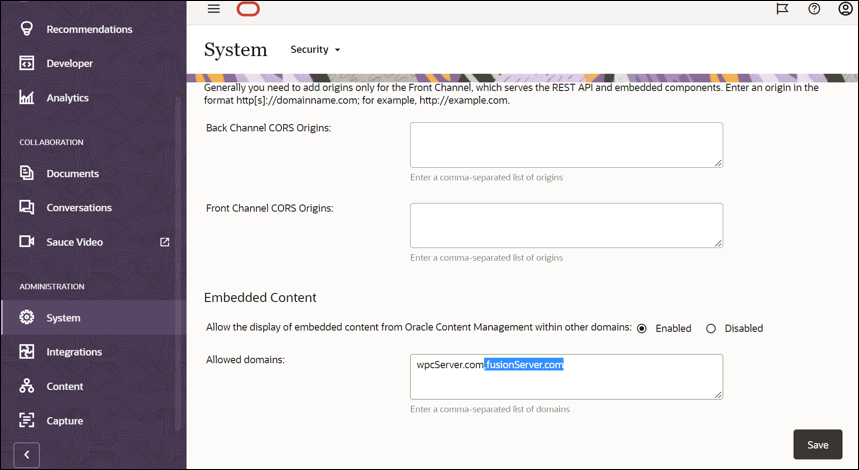
Configure OCM Embedded UI Security Settings
- Sign in to Oracle Content Management as the integration user.
- In the left navigation menu, click ADMISTRATION, and then
System.
Note:
If the System option is not available on the navigation menu, then the current user does not have content administrator permissions. - Select Security from the drop-down menu just to the right of the System text on the main page.
- In the Embedded Content section, make sure Allow the display of embedded content from Oracle Content Management within other domains is enabled.
- In the Allowed domains field, add the URL of the Oracle Sales and Service application that will be used in this integration (for example, fusionServer.com). If other servers already exist in the list, just add this server at the end separated by a comma with no spaces.
- Click Save.
Create a Taxonomy
- In the left navigation menu, click ADMISTRATION and then
Content.
Note:
If the Content option is not available on the navigation menu, then the current user does not have Content administrator permissions. - Select Taxonomies from the drop-down menu just to the right of the Content text on the main page.
- Click Create on the right side of the page, complete the
following fields:
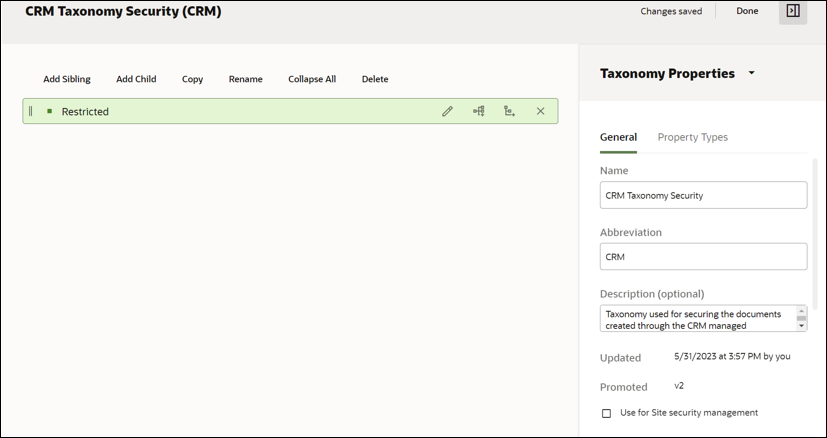
- In the Create Taxonomy Security dialog, in the Name field, specify the name of the taxonomy (for example, CRM Taxonomy Security).
- In the Description field, enter the text “Taxonomy used for securing the documents created through the CRM managed attachments”.
- Select Create.
- In the taxonomy page, select Add Category, in the
Category Name field just created change the value to
Restricted and then Enter.
Note:
Other categories can also be added, but for this demo we have kept the taxonomy simple. - Click Done in the upper right of the page.
- From the list of taxonomies, select the check box just to the left of the taxonomy that was just created.
- Click Promote.
- In the Promote Taxonomy dialog, select the Confirm to proceed check box.
- Click Promote.
Create a Base Asset Repository
- Select Repositories from the drop-down menu just to the right of the Content text on the main page.
- Click Create on the right side of the page and then select
Business Repository from the drop-down list, complete the following
fields:
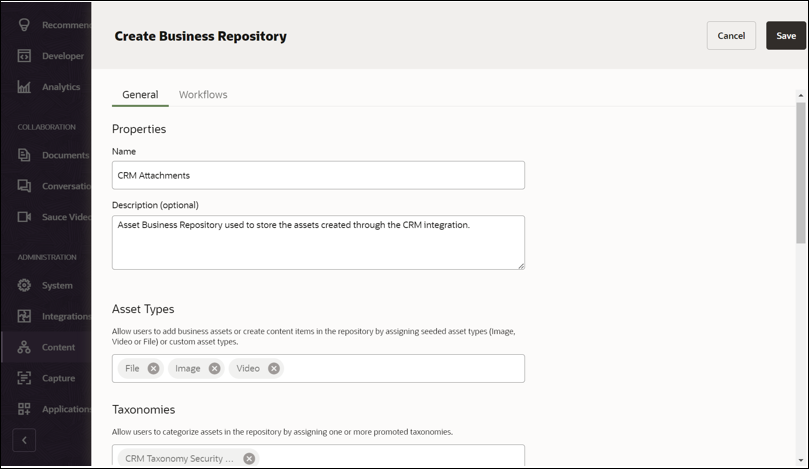
- In the Create Business Repository dialog, in the Name field, specify the name of the repository (for example, CRM Attachments).
- In the Description field, enter the text “Asset Business Repository used to store the assets created through the CRM integration.”.
- In the Asset Types field, add the asset types you would like to allow in the CRM attachments repository. For example, add File, Image, and Video types to the repository to support most general documents. However, Digital Assets as well as Content Items can be supported through this integration as well.
- In the Taxonomies field, add the taxonomy that was also created above (for example, CRM Taxonomy Security).
- Click Save.
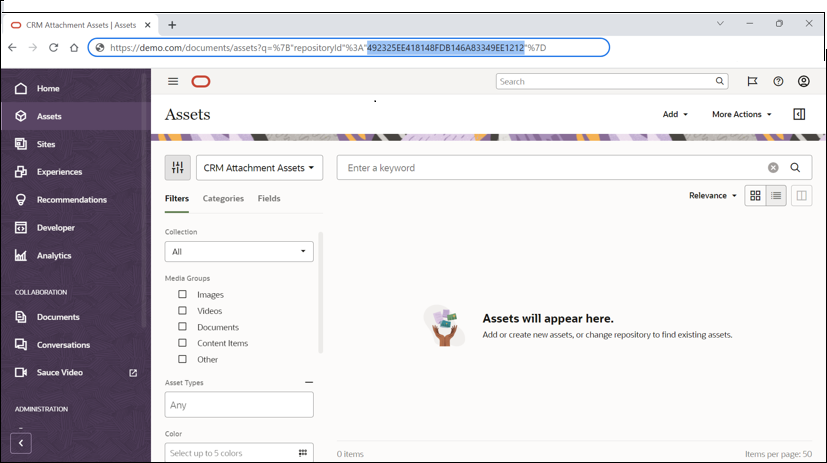
- Open the developer console window in your browser (for example, by pressing F12 in Chrome).
- In the left navigation menu, click Assets.
- From the drop-down menu, select the repository that was created in the steps above (for example, CRM Attachments).
- In the browser URL, copy the unique repository ID for this specific repository (for example, F00558AD5D464EE795B1FD4D0C42FFFF). This unique asset repository ID will be used later in the integration as the OCMBaseRepositoryId.
Note:
Users must be manually shared as at least a viewer to this base asset repository either directly or indirectly through a group for this integration to work.


