Grant Access to OCM
Fusion users must be given access to the CRM Attachments repository in order for them to work with these attachments. For this to occur, these users must already have enterprise user access to the OCM (see Set Up Users and Groups in Administering Oracle Content Management ) as well as be given access directly to the CRM Attachments repository following the steps below.
Create OCM Groups
In order to easily manage the CRM integration, it is important to create OCM
groups related to the integration:
- In the upper right of the Oracle Content Management page, click your integration user avatar and select Groups from the drop-down menu.
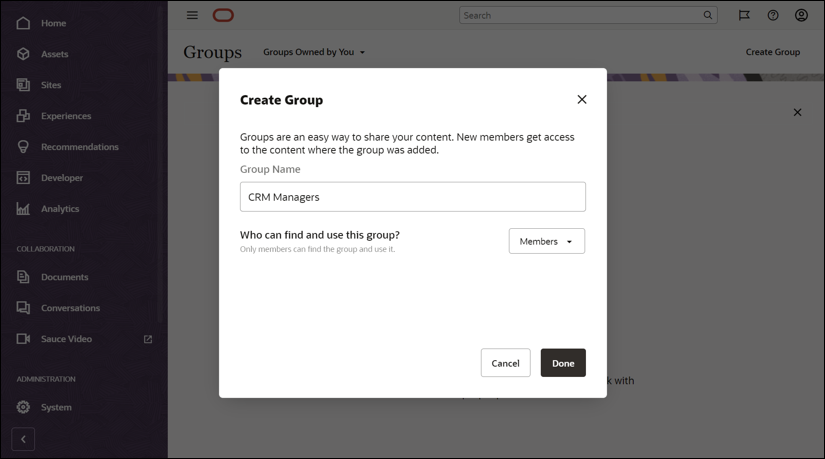
- Click Create Group on the right side of the page, complete
the following fields:
- In the Group Name field, specify the name of the group for users that will be able to restrict documents (for example, CRM Managers). In this example these users will be able to contribute (add, modify, or delete attachments in the CRM Attachments repository) as well as categorize attachments as Restricted.
- Replace the Anyone option with the Member option in the drop-down menu.
- Click Done.
- In the CRM Manager page:
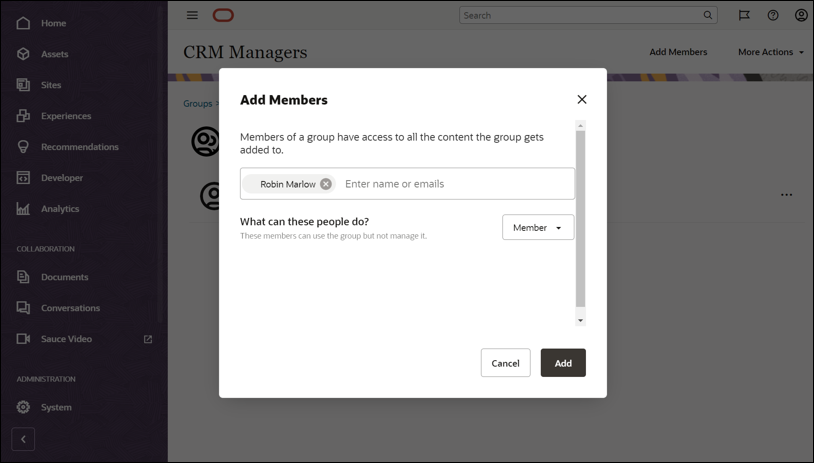
- Click Add Members in the right side of the page.
- Enter the user(s) that are to be part of the CRM Managers group.
- Replace the Manager option with the Member option in the drop-down menu.
- Click Add.
- Repeat the above steps adding a CRM Contributors group in which these users will be able to contribute (view, add, modify, or delete) attachments that have not been categorized as Restricted in the CRM Attachments repository.
- Also, repeat these above steps adding a CRM Viewers group in which these users can only view attachments that have not been categorized as Restricted.
Set Up Restricted Repository Security
- In the left navigation menu, click ADMISTRATION and then Content.
- Select Repositories from the drop-down menu just to the right of the Content text on the main page.
- Select the check box next to the Repository that was created earlier (for example, CRM Attachments).
- In the menu bar above the Repositories list, select Add
Members, complete the following fields:
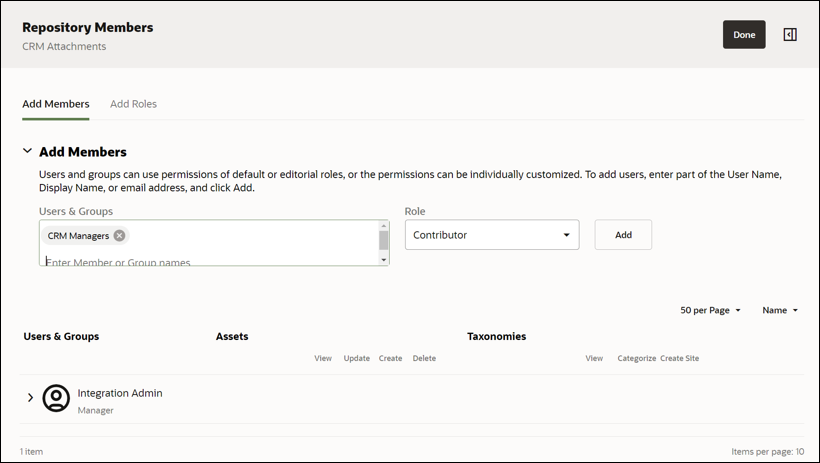
- In the Users and Groups field, specify the name of the group that will be able to restrict documents (for example, CRM Managers).
- In the Role field, select Contributor.
- Click Add.
Set Up Contributor Repository Security
- In the Repository Members page, complete the following fields:
- In the Users and Groups field, specify the name of the group that will be able to contribute to the repository (for example, CRM Contributors).
- In the Role field, select Contributor.
- Click Add.
- To the far right of the group that was just added (for example, CRM
Contributors), select the Edit member icon, complete the
following fields:
- Under the Taxonomies section, in the Any Category field, unselect the View check box which will also automatically unselect the Categorize check box. This prevents these users from seeing attachments that have been assigned any categories (for example, the Restricted category).
- Click Save.
Set Up Viewer Repository Security
- In the Repository Members page, complete the following fields:
- In the Users and Groups field, specify the name of the group that will only be able to view attachments within the repository (for example, CRM Viewers).
- In the Role field, select Viewer.
- Click Add.
- To the far right of the group that was just added (for example, CRM
Viewers), select the Edit member icon, complete the following
fields:
- Under the Taxonomies section, in the Any Category field, unselect the View check box. This also prevents these users from seeing attachments that have been assigned any categories (for example, the Restricted category).
- Click Save.


