Verify the Integration in the Sandbox
Now, we can verify if the integration was set up properly by creating the Oracle Sales and Service business object (using service requests in this example).
Make sure that the service request has an Assets tab, and when the Assets tab is selected, the OCM embedded UI is properly loaded showing the proper OCM folder created for the service request. These steps will also verify if the assets can be added to the service request and if resolve has been configured, verify that OCM documents are being copied into the OCM asset repository collection.
It is important to note that every user that accesses the service request within the Oracle Sales and Service application must also reside within OCM. The user IDs of OCM and the Oracle Sales and Service application must be the same.
Create a New Service Request
- Click the site name just to the right of the
 in the upper left corner of the page and then
select the Service tab.
- In the Service page, select the Service Requests application.
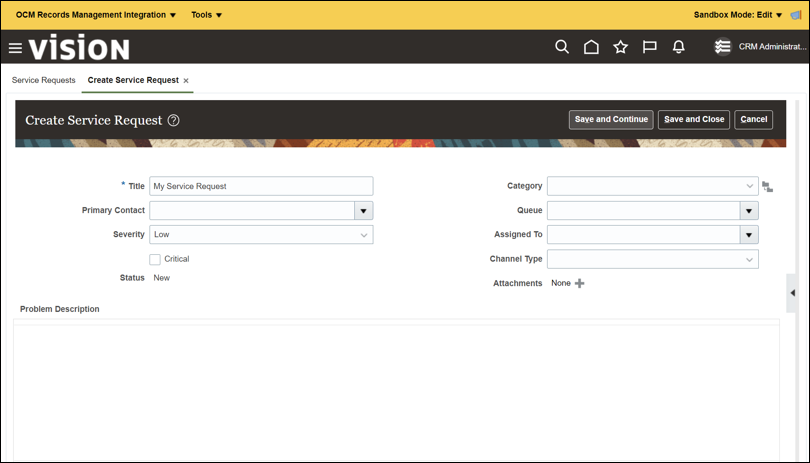
- On the Service Requests page, click Create Service Request.
- On the Create Service Requests page, complete the
following fields:
- On the Create Service Request page, in the Title field, enter the service request name (for example, My Service Request).
- Click Save and Continue.
Add Assets
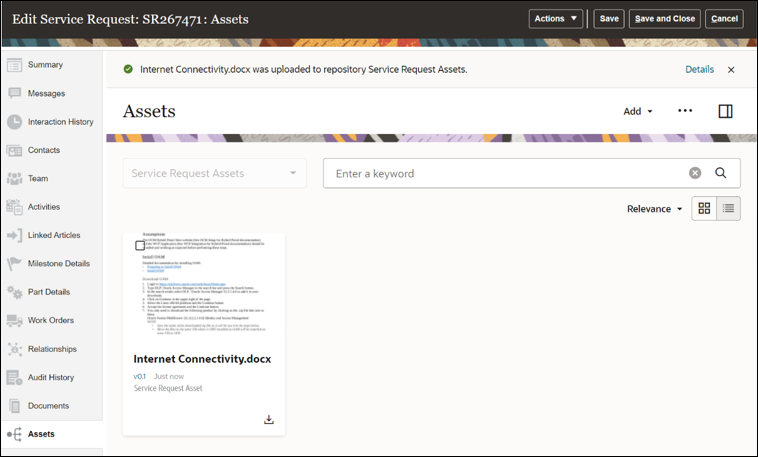
- Click the Assets tab from the left navigation
menu to load the related assets repository collection in the
OCM embedded UI.
Note:
Sign in as the same user as in the Oracle Sales and Service application (these users must match between systems). If not already logged into OCM, you must allow popups for the login window to appear. Also, if you are using Chrome in Incognito mode, you must allow cookies as well. - Click Add drop-down in the upper right of the Assets page and then select Add from this computer.
- Select a document you want to upload into the asset repository collection for this specific service request.
- In the Add To Repository: Service Request Assets
dialog, click Done.
Verify the Resolve Feature
Note:
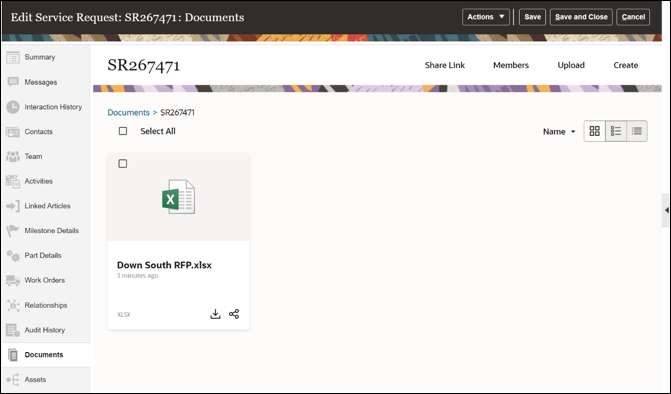
This validation is only required if the Oracle Sales and Service business object has the Resolve option and has been configured with OCM document integration. See Learn About How to Extend Oracle Sales and Service Business Objects with Document Collaboration for more information on document integration.- Click the Documents tab from the left navigation menu to load the related documents in the OCM embedded UI.
- Select Upload in the upper right of the Documents page and the document you want to add to this service request.
- Once the document has been uploaded, in the upper right of the page, select the Actions drop-down menu and Resolve.
- In the Resolve Service Request dialog, select
Resolve.
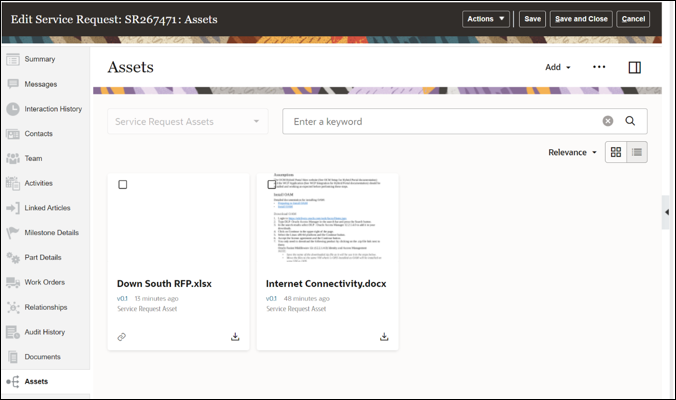
- Select the Assets tab to verify that the
document was successfully copied to assets.
Note:
The OCM server internally copies these documents to assets in the background, so it may take several minutes for them to appear in the Assets tab. If the documents have not yet appeared, wait a minute or two and either refresh the page or click on a different tab and then back onto the Assets tab.


