Promote a Standby Environment

The following cutover and downtime procedures require downtime of your on-premises Oracle E-Business Suite deployment.

WARNING:

Before proceeding with the promotion procedure, you must ensure that no concurrent requests are in the Running or Pending state. All running concurrent requests must be completed to a logical end.

Select the Standby Environment

First, select the Standby environment you want to promote and open the Promote Environment wizard:

  1. From the Oracle E-Business Suite Cloud Manager, navigate to the Environments page.
  2. Either:
    • Open the Action menu and select Promote for the standby environment you want to promote.
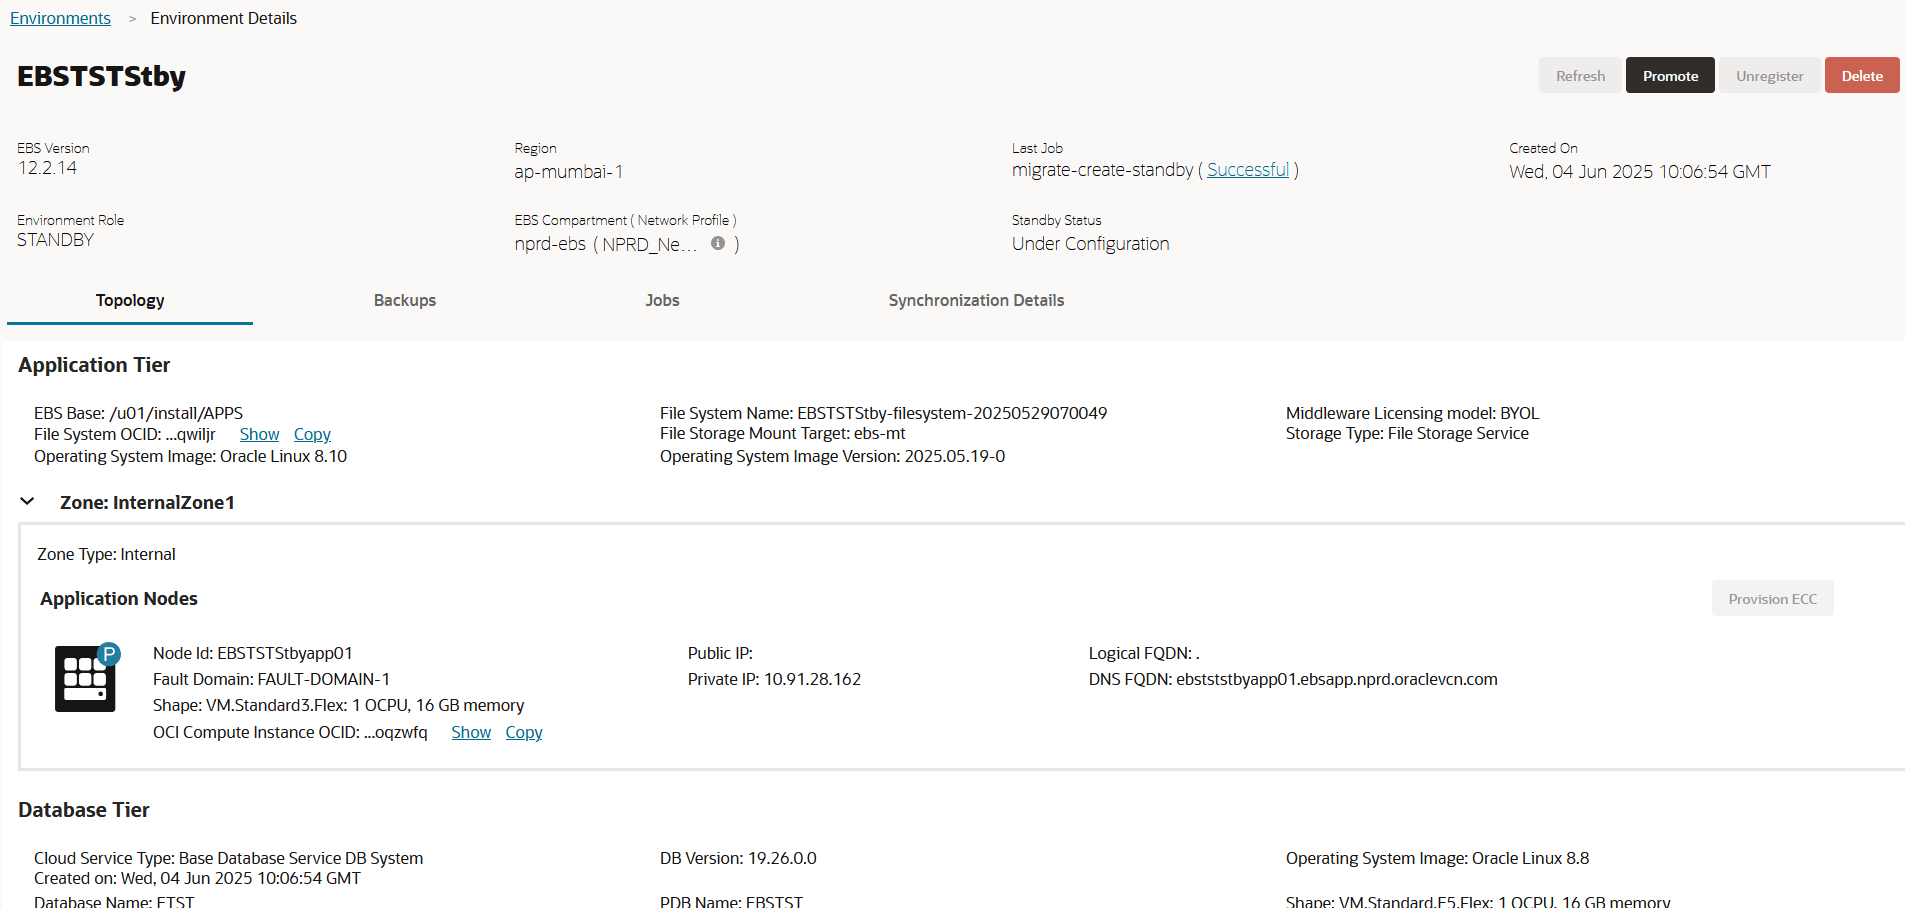
    • Select the standby environment and, on its Environment Details page click Promote. This option is illustrated below:

Enter Standby Environment Details

Next, enter the Standby environment details.

Note:

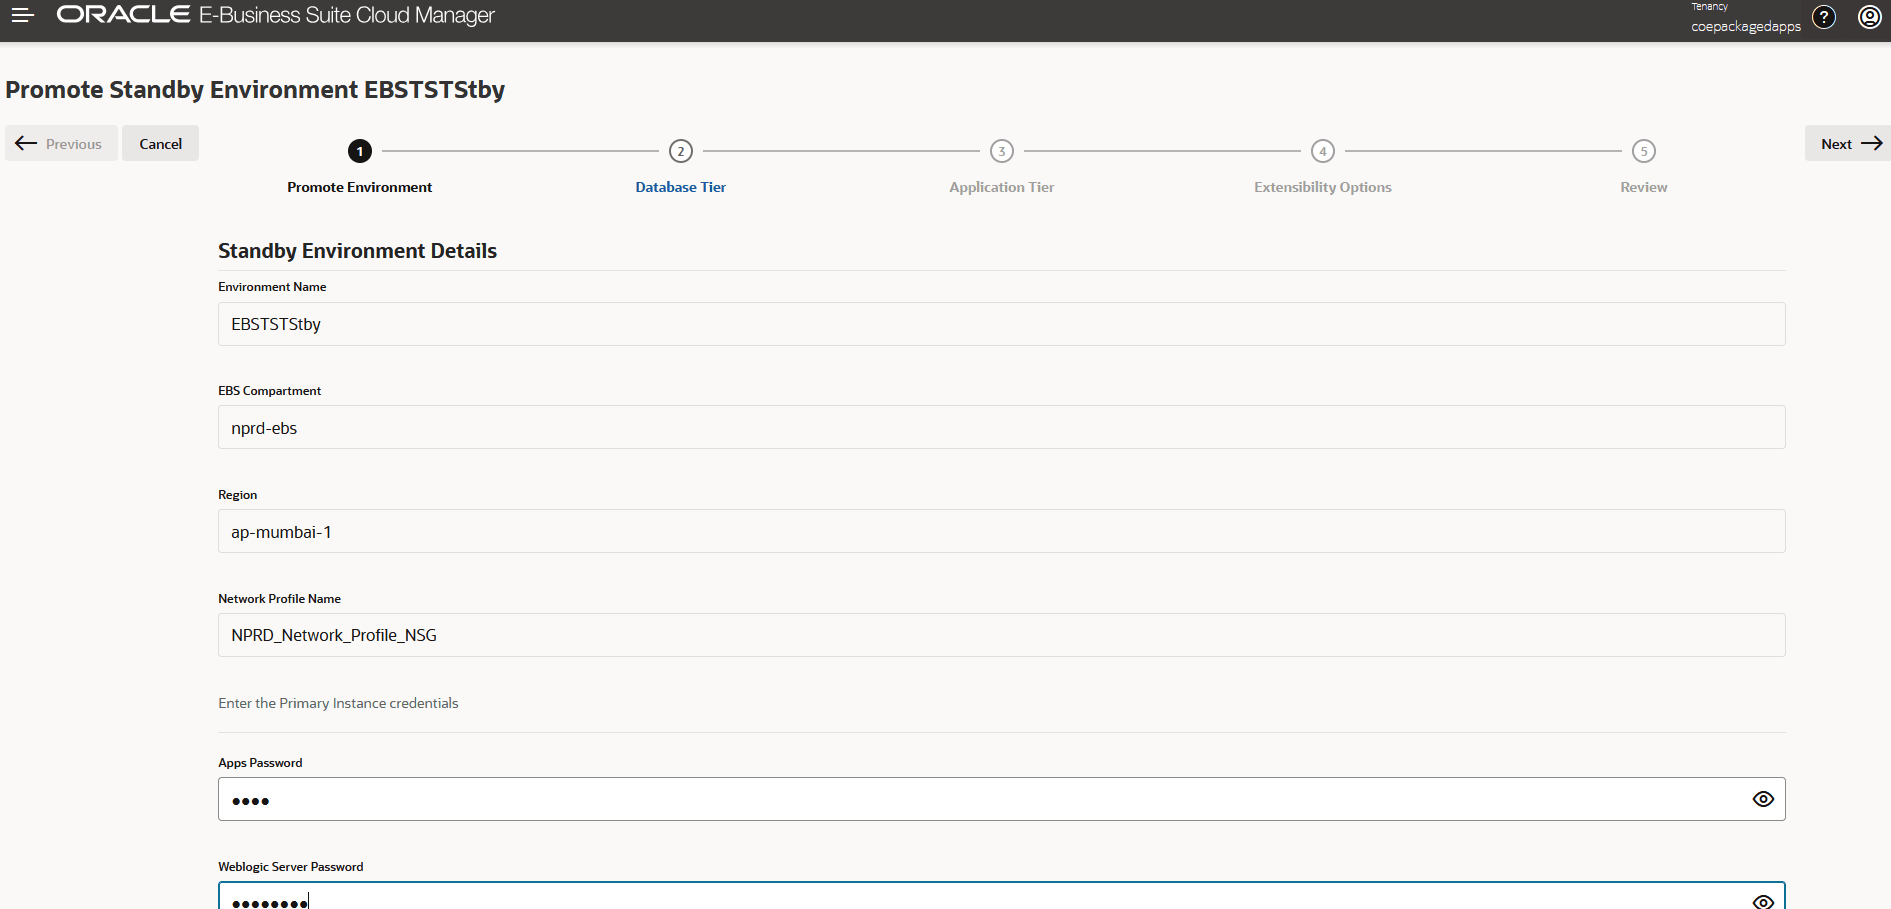
the Environment Name, EBS Compartment, Region, and Network Profile Name are fixed details that cannot be changed during promotion.
  1. Enter the Primary Instance credentials:
    • Enter the APPS Password.
    • Enter the WebLogic Server Password.
  2. Optionally, enter tagging information in the Tags region:
    • Tag Namespace: Select a predefined tag namespace or select None (add a freeform tag).
    • Tag Key: Enter the name you use to refer to the tag.
    • Value: Enter the value for the tag key.
  3. 3. Click Next.

Enter Database Tier Information

On the Database Tier page, enter database tier credentials.

Note:

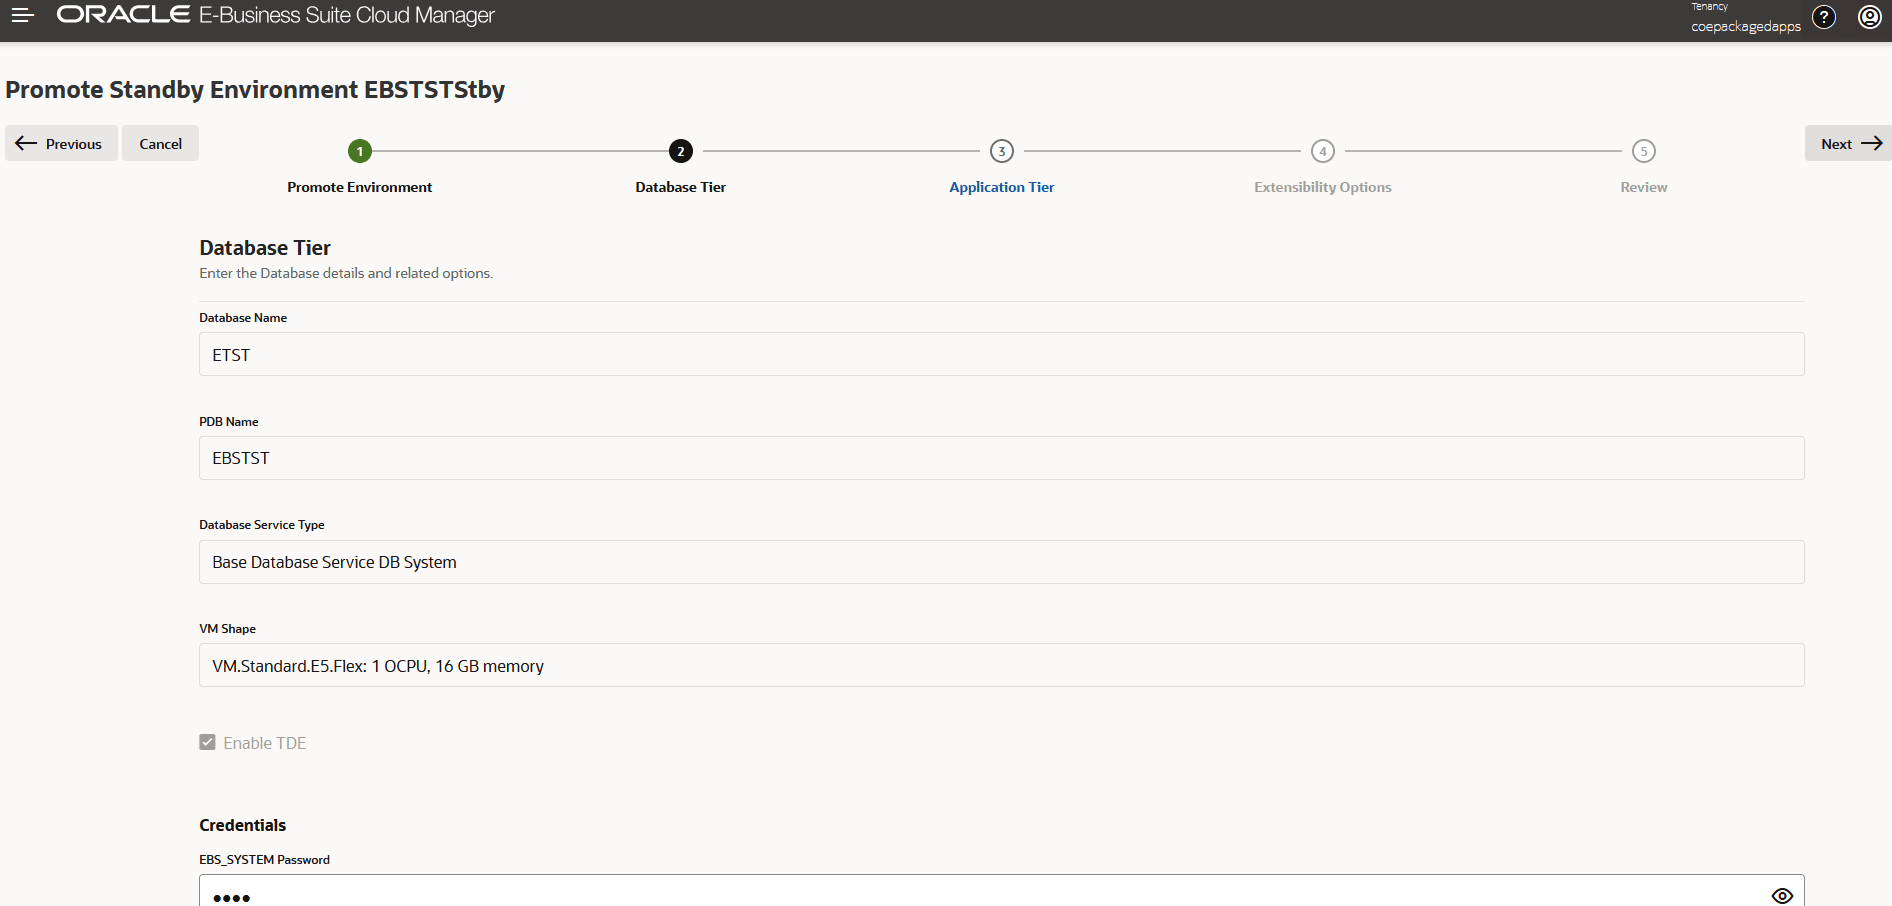
The Database Name, PDB Name, Database Service Type, VM Shape, and the Enable TDE checkbox selection are fixed details that cannot be changed during promotion.
  1. 2. Enter the EBS_SYSTEM Password.
  2. 3. Enter the SYS Password. This is the current SYS user password.
  3. 4. Enter the Wallet Password.
  4. Click Next.

Enter Application Tier Information

Now, enter the application tier information.

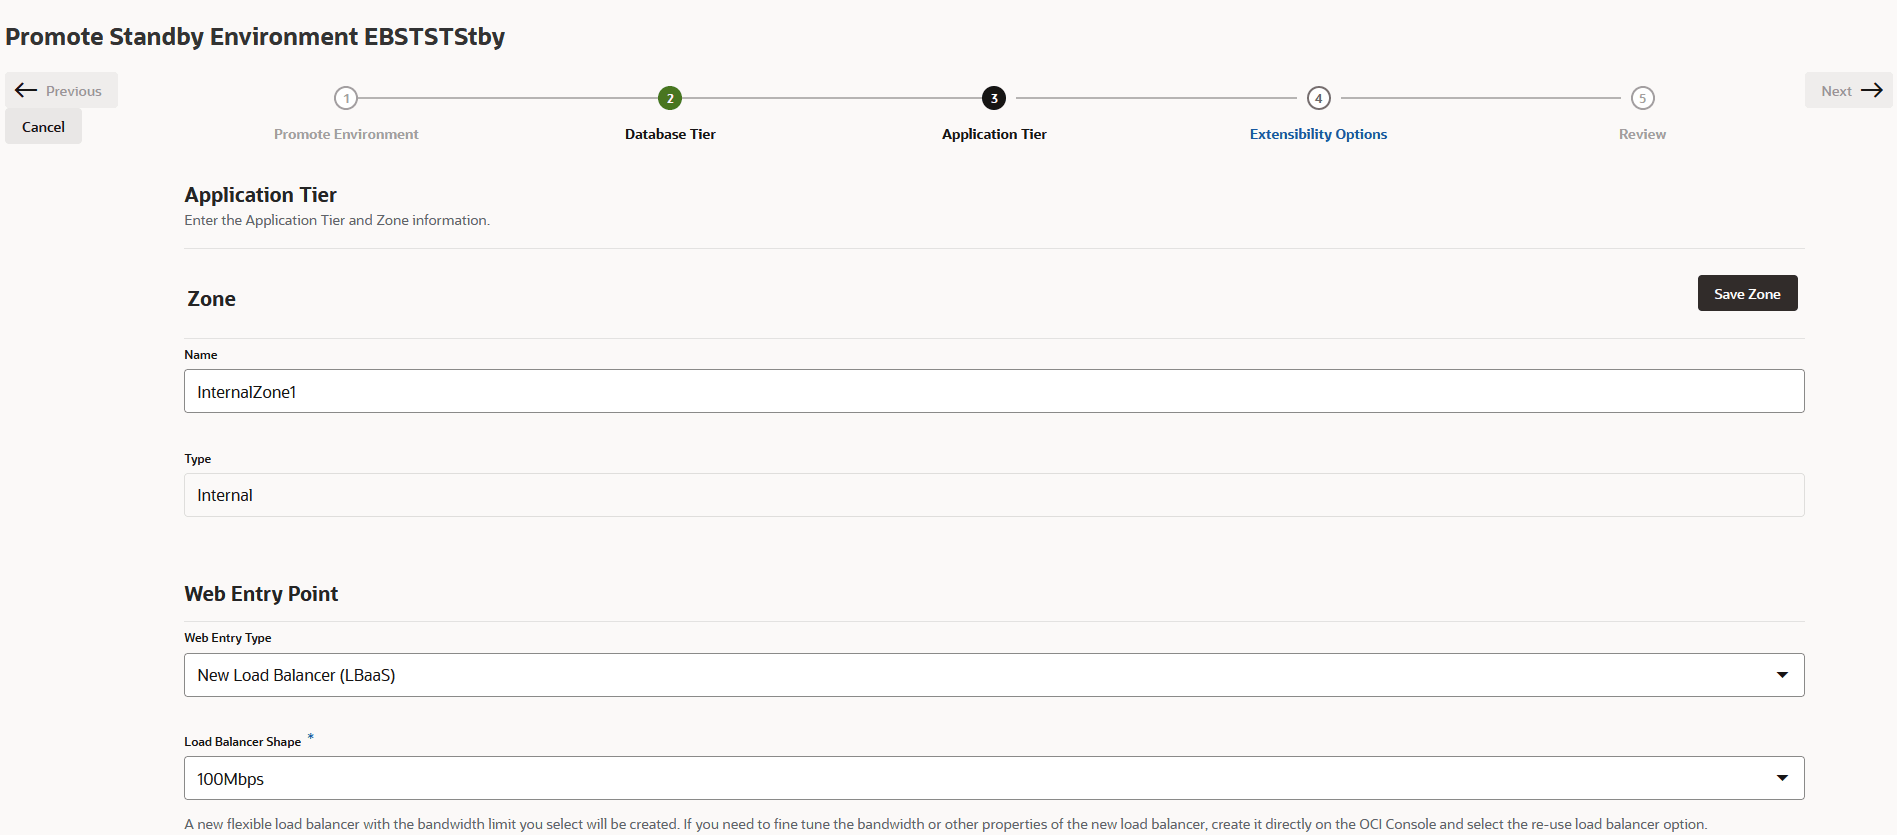
  1. Define your zones in the Zone region. Define your internal zone first. Enter values for the following properties:
    • Name
    • Type

    Note:

    You can have multiple zones across subnets. You can configure your environment such that your functional redirection per zone is in accordance with functional affinity.

    Also, you can have a load balancer shared between multiple zones of the same type. This configuration allows for two separate URLs to resolve to the same IP address and the shared load balancer will target one back-end set or another.

    Note too that you have flexibility in your configuration. One zone, Zone A, can have one load balancer assigned to it, while another two zones, Zone B and Zone C, can have a second load balancer assigned to them.

    For more information on zones, refer to My Oracle Support Knowledge Document 1375670.1, "Oracle E-Business Suite Release 12.2 Configuration in a DMZ" (see "Explore More" for the link).
  2. In the Web Entry Point region, enter values for the following properties:
    • Web Entry Type: Choose one of the following:
      • New Load Balancer (LBaaS)
      • Use OCI Load Balancer
      • Manually Configured Load Balancer to select a manually deployed existing load balancer
      • Application Tier Node to choose the primary application tier as the entry point
    • Load Balancer Shape: If you chose New Load Balancer (LBaaS) as the web entry type, a new flexible shape load balancer will be created. Select the maximum bandwidth for your new load balancer. For example: 100 Mbps. The minimum bandwidth will default to 10 Mbps.
    • OCI Load Balancer: If you chose Use OCI Load Balancer, select the load balancer to use.
    • Protocol: Select the protocol for access to the environment, either http or https.
    • Hostname: Enter the host name for your web entry point. The web entry host name must be in lowercase. For example: myhost
    • Domain: Enter the domain for your web entry point. The web entry domain name must be in lowercase. For example: example.com
    • Port: Select the port for your web entry point.

      If there is no load balancer, then the port is automatically populated depending on the protocol: 8000 for http and 4443 for https.

      Otherwise, select the appropriate port for use with your load balancer, such as 80 for http or 443 for https.

      Note:

      to allow access to the Oracle E-Business Suite login URL, your network administrator must define an ingress rule in the load balancer security list. See "Create Network Resources For Deploying Oracle E-Business Suite Environments" (see "Explore More" for the link).
  3. When promoting an environment that uses the File Storage service, the File System details are shown by default:
    • File System Type (Shared)
    • File System Name
    • File System OCID
    • File Storage Mount Target
    • Storage Type

    Caution:

    You must ensure you specify enough storage for your nodes.

    Refer to "Oracle E-Business Suite Installation Guide: Using Rapid Install" for guidelines on space usage (see "Explore More" for the link).

    If you choose Non-Shared, you must specify a value for Block Volume Storage for every node in Application Tier Nodes.

  4. In the Logical Host region, enter values for:
    • Logical Hostname Prefix: if you chose Automatic, enter your desired hostname prefix. You do not need to enter this if you chose Manual for your logical host option, but you will be prompted for the Logical Hostname for your nodes in the Application Tier Nodes region.
    • Logical Domain: Enter the logical domain.
  5. In the Application Tier Nodes region, enter properties for each node.

    Note:

    You can define a specific shape for each application tier node.
    • Logical Hostname
    • Logical FQDN
    • Shape: You can change the shape of the node. When choosing a flexible shape, for example, VM.Standard.E3.Flex, use the sliders to choose the number of OCPUs and the amount of memory (GB).
    • Block Volume Storage
    • Fault Domain: Select the fault domain. For more information, see "Fault Domains" (see "Explore More" for the link).
  6. To save your zone definition, click Save Zone.
  7. If you want to define additional zones, click Add Zone.
  8. When you have completed adding your zones, click Next.

Specify Your Extensibility Options

On the Extensibility Options page, select the Job Definition.

  1. Select the Job Definition Promote standby instance for migration activity from on-premise to OCI, 19c DB on VM DB system.
    You do not need to speficy Task Parameters or Job Definition Details for this job.
  2. Click Next.

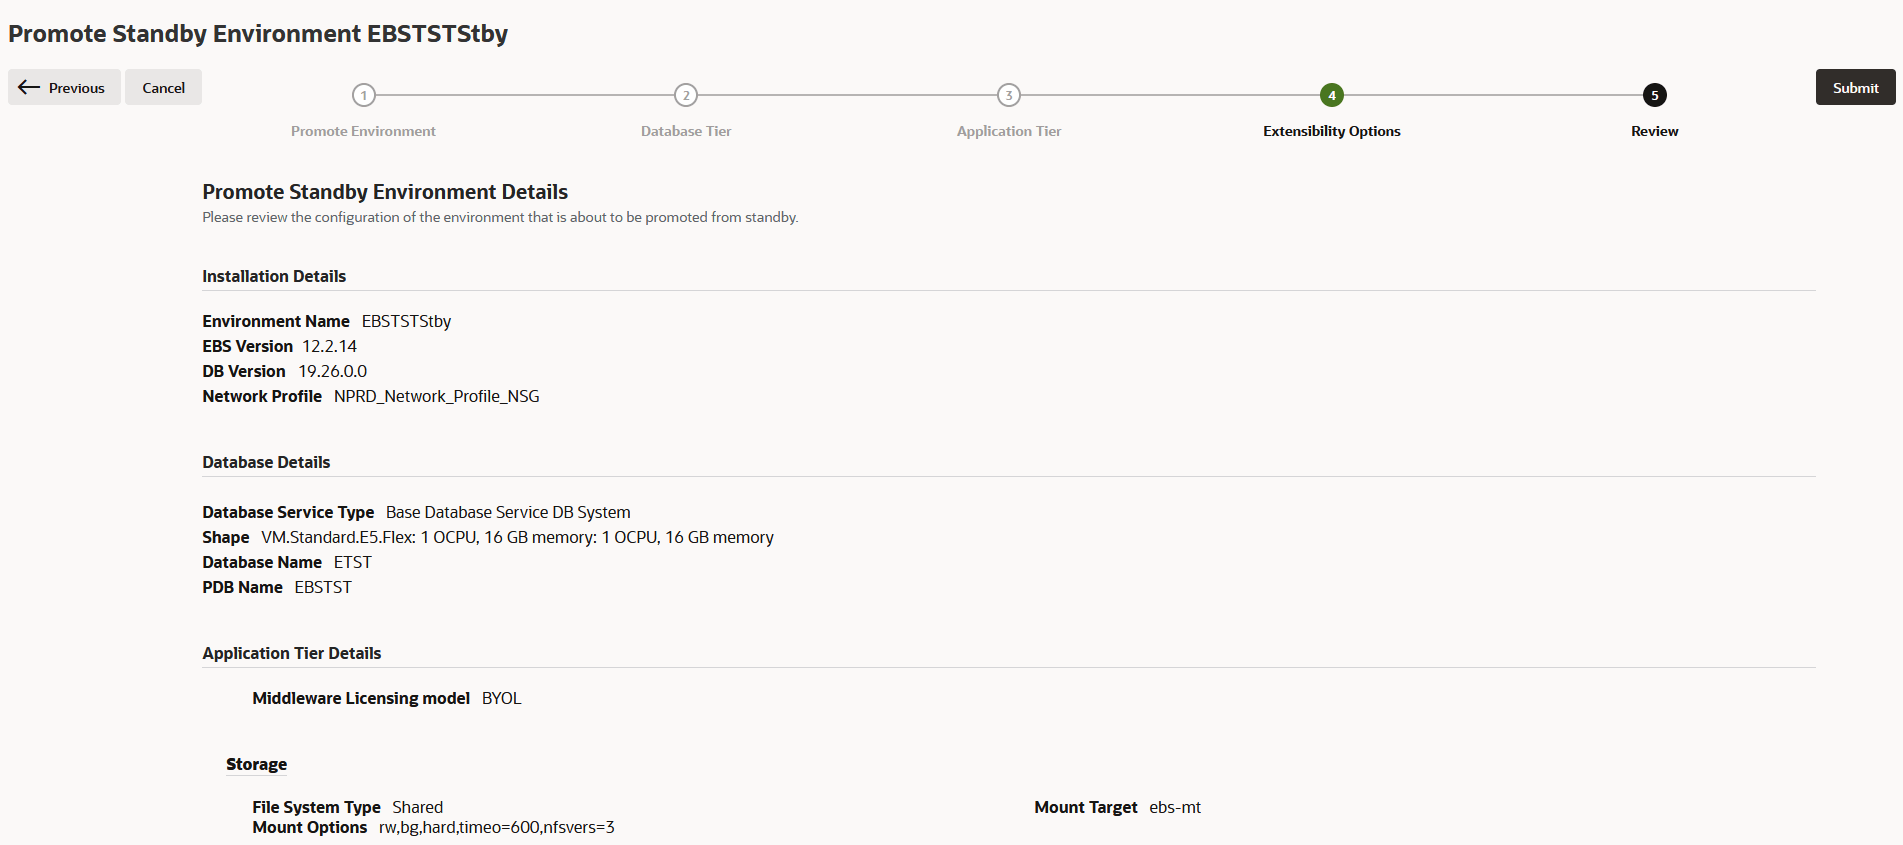
Review, Submit, and Monitor the Job

Once you've reviewed and are satisfied with the installation and database details, start the promotion. Promotion will take around five hours and you can monitor progress on the Job Details page.
As the Promote Standby process completes, the source EBS applications and database are brought down and the target EBS application and database are up and running, ready to be accessed by end user.
  1. On the Review page, carefully review the information you entered in the previous steps. You can use the Previous button to go back and fix any errors.
  2. When you're ready, click Submit. You can monitor the job on the Job Details page. For example:

    Note:

    In this example, the process took about five hours.
As the "Promote Standby" Action completes, the source EBS applications and database will be brought down and the target EBS applications and database will be up and running, ready to be accessed by end users.