Deploy the Blueprint
Make sure that you have access to an OCI tenancy and that you have admin privileges to provide sufficient CPU/GPU instances.
- Install an OKE cluster using the Terraform module below. An OKE cluster with a
single node pool will be created with 6 worker nodes.
- Click Deploy to Oracle Cloud below.
- Give your stack a name (for example oke-stack).
- Select the compartment where you want OCI AI Blueprints deployed.
- Provide any additional parameters (such as node size, node count) according to your preferences.
- Click Next, then Create, and finally click Run apply to provision your cluster.
- Sign in to the Oracle Cloud
Infrastructure console and from the home page click, Storage and then
under Object Storage click
Buckets. Provide a bucket name that you will use in the
OCI AI Blueprints deployment.
Click the bucket that you created and click Pre-authenticated requests (PAR) link under Resources. Give a name for PAR, change the Access type to Permit object reads and writes and click Pre-authenticated requests. When completed, copy the PAR URL and save it somewhere as you will need it when you deploy the CPU Inferencing blueprint.
- Install OCI AI Blueprints in the new OKE cluster. After successful deployment, you will have a URL to access the OCI AI Blueprints console.
- In the OCI AI Blueprints main page, there are several blueprints available for
deployment under Blueprint Binary, scroll down and click
Deploy under CPU
Inference.
- Select CPU Inference with mistral and the
VM-Standard.E4. Flex option.
Use the default parameters and change the Pre-authenticated request URL created above. Do not change any values in the Configure Parameters section.
Please note the parameters:
"recipe_container_env": [
{

"key": "MODEL_NAME",

"value": "mistral"

},

{

"key": "PROMPT",

"value": "What is the capital of Spain?"

}
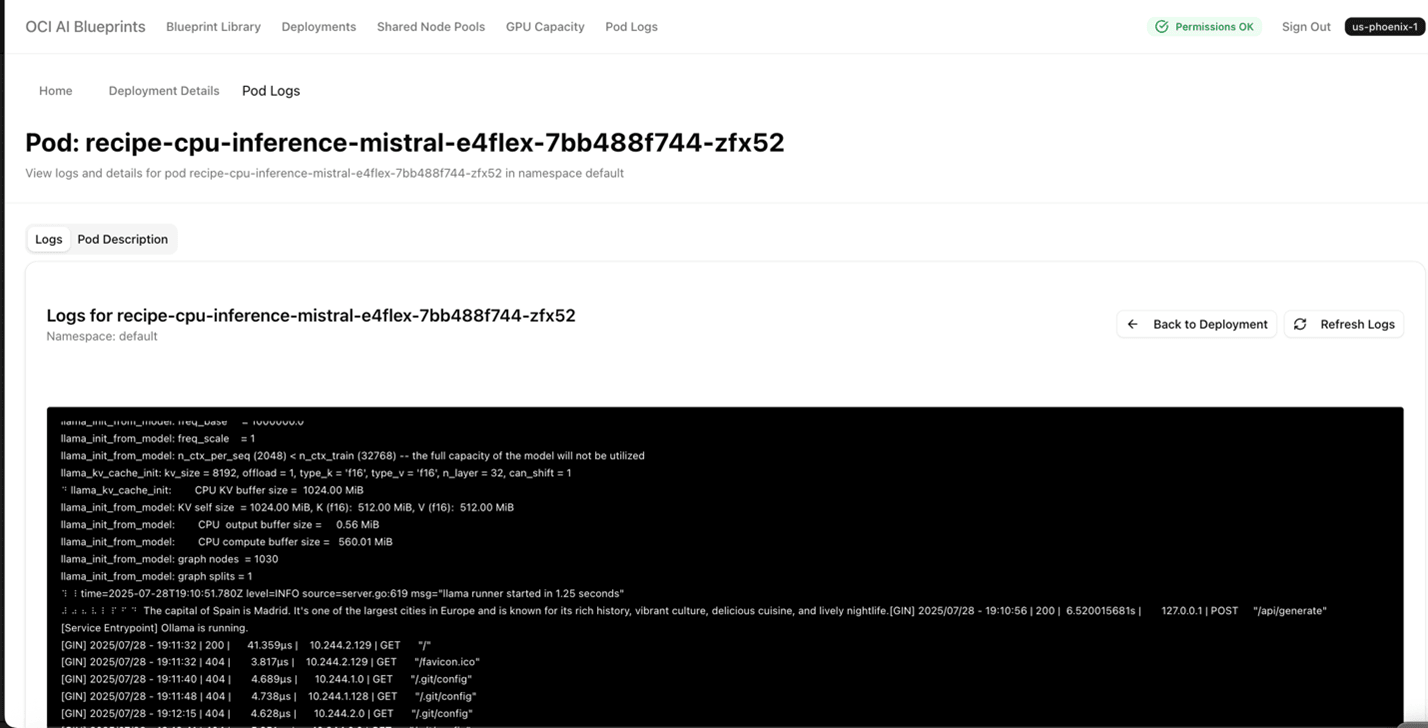
After successful deployment of the CPU Inferencing blueprint, the output of the above prompt will be displayed in the Kubernetes Pod log.
- Click Deploy Blueprint. Once the blueprint is successfully deployed, you will notice a name such as cpu inference mistral E4Flex that lists a deployment status of Monitoringwith the creation date and the number of nodes and E4 shapes.
- In the Deployment list, click the cpu inference mistral E4Flex link which will take you to the deployment details with the public endpoint. Click the public endpoint and you will see a message such as "ollama is running".
- Return to the the cpu inference mistral E4Flex
page and scroll down to Pod logs . Click
View and Log details.
A page similar to the following will be displayed giving you the
output.

- Select CPU Inference with mistral and the
VM-Standard.E4. Flex option.