Replacing an Oracle ZFS Storage ZS5-4 Power Supply

Caution:

If a power supply fails and you do not have a replacement available, do not remove the failed power supply. This maintains the proper air flow and prevents possible equipment damage.

Storage controllers are equipped with redundant, hot-swappable power supplies. Use the following procedure to replace an Oracle ZFS Storage ZS5-4 power supply.
  1. Identify the faulted power supply.
    • If you are not physically at the system, from the Maintenance BUI menu, select Hardware, click the right-arrow icon apply icon for the controller, click PSU, and note the ID of the faulted power supply, which has an amber icon. To highlight the location of the power supply in the controller picture, click on the power supply ID. To view details about the faulted power supply, click its information icon information icon and then click Active Problems.

    • If you are physically at the system, the amber Service Action Required indicator on the power supply should be lit.

    Note:

    The fans of a failed power supply might still be spinning when the system is powered on. You can remove a power supply while the fans are still spinning.
  2. Lift up on the power cord retaining clip to disengage it from the cord.
  3. Disconnect the power cord from the faulted power supply.
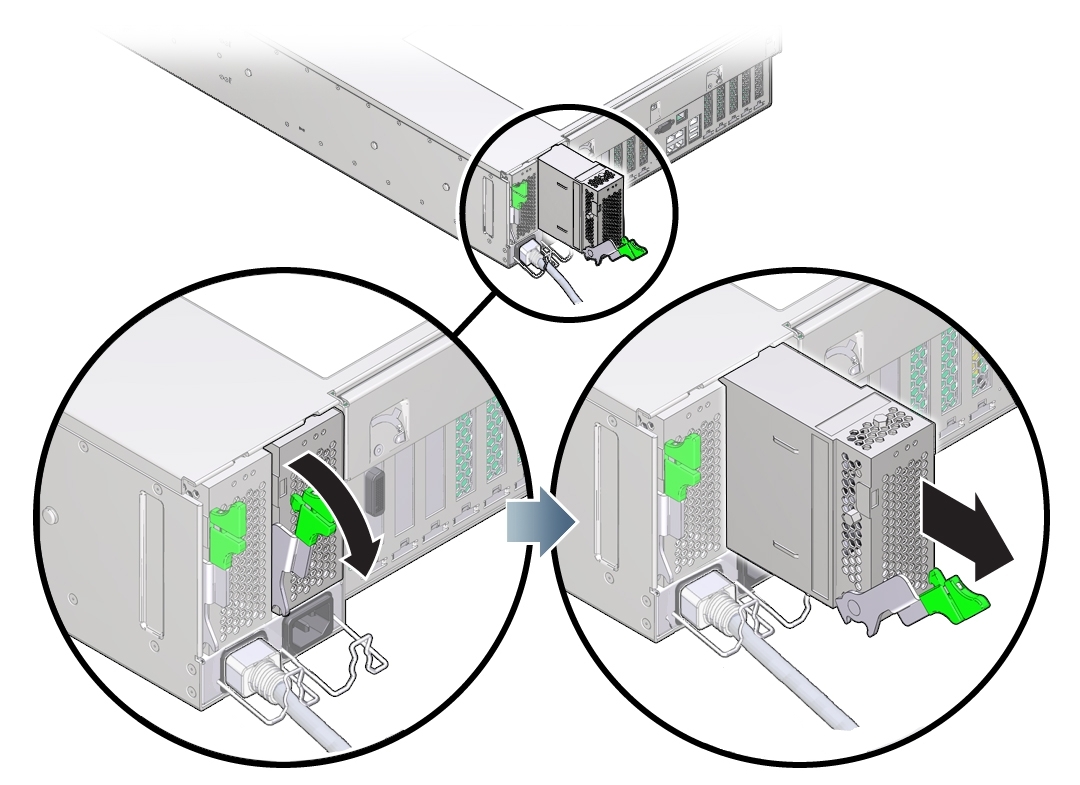
  4. To unlock the power supply handle, squeeze the release latch.

    An illustration showing how to remove a power supply from the controller.
  5. To disengage the power supply, rotate the release latch fully downward.

    This action disengages the power supply from the internal power supply backplane connector.

  6. Shut down the controller using one of the power-off methods described in Powering Off the Controller.
  7. Ensure that the replacement supply handle is in the open position.
  8. Align the power supply with the empty power supply bay.
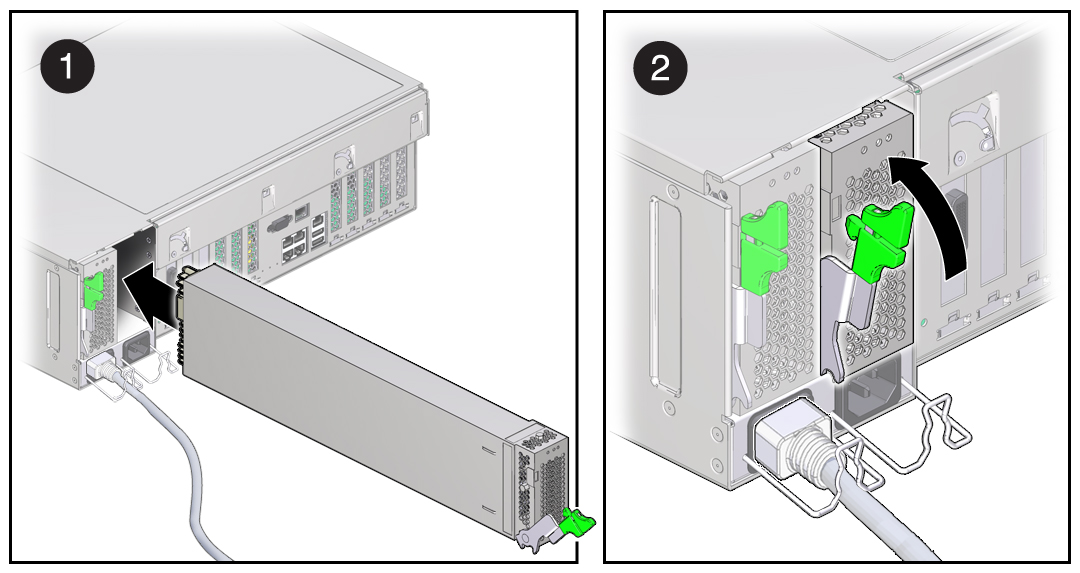
  9. Slide the power supply into the bay [1] until it stops.
  10. To seat the power supply, rotate the release handle upward [2] until it locks in place.

    Note:

    The latch at the hinge of the handle must engage the slot at the bottom of the power supply bay.

    This action of rotating the handle upward draws the power supply into the controller and engages it with the internal connector.


    A multistep illustration showing how to install a power supply in the controller.
  11. Connect the power cord to the power supply.
  12. Verify that the green AC Present status indicator is lit.
  13. From the Maintenance BUI menu, select Hardware. Click the right-arrow icon apply icon for the controller, click PSU, and verify that the status icon light on icon is green for the newly installed power supply. To view details about the new power supply, click its information icon information icon .
  14. If a fault does not self-clear, see Repairing Active Problems.