Replacing an Oracle ZFS Storage ZS5-4 Fan Module

Unpack the replacement fan module and get it ready to insert into the controller chassis as soon as the faulted fan is removed.

Caution:

Operating a controller for an extended period of time with fans removed reduces the effectiveness of the cooling system and could damage the equipment. Therefore, this task needs to be done within a limited period of time.

Fan modules are hot-swappable and can be removed and installed while the storage controller is running without affecting other hardware capabilities. Use the following procedure to replace an Oracle ZFS Storage ZS5-4 fan module.
  1. Identify the faulted fan module.
    • If you are not physically at the system, from the Maintenance BUI menu, select Hardware, click the right-arrow icon apply icon for the controller, click Fan, and note the ID of the faulted fan module, which has an amber icon. To highlight the location of the fan module in the controller picture, click on the fan module ID. To view details about the faulted fan module, click its information icon information icon and then click Active Problems.

    • If you are physically at the system, the amber Service Action Required indicator on the fan module should be lit.

  2. Extend the controller from the rack as described in Extending the Controller from the Rack.
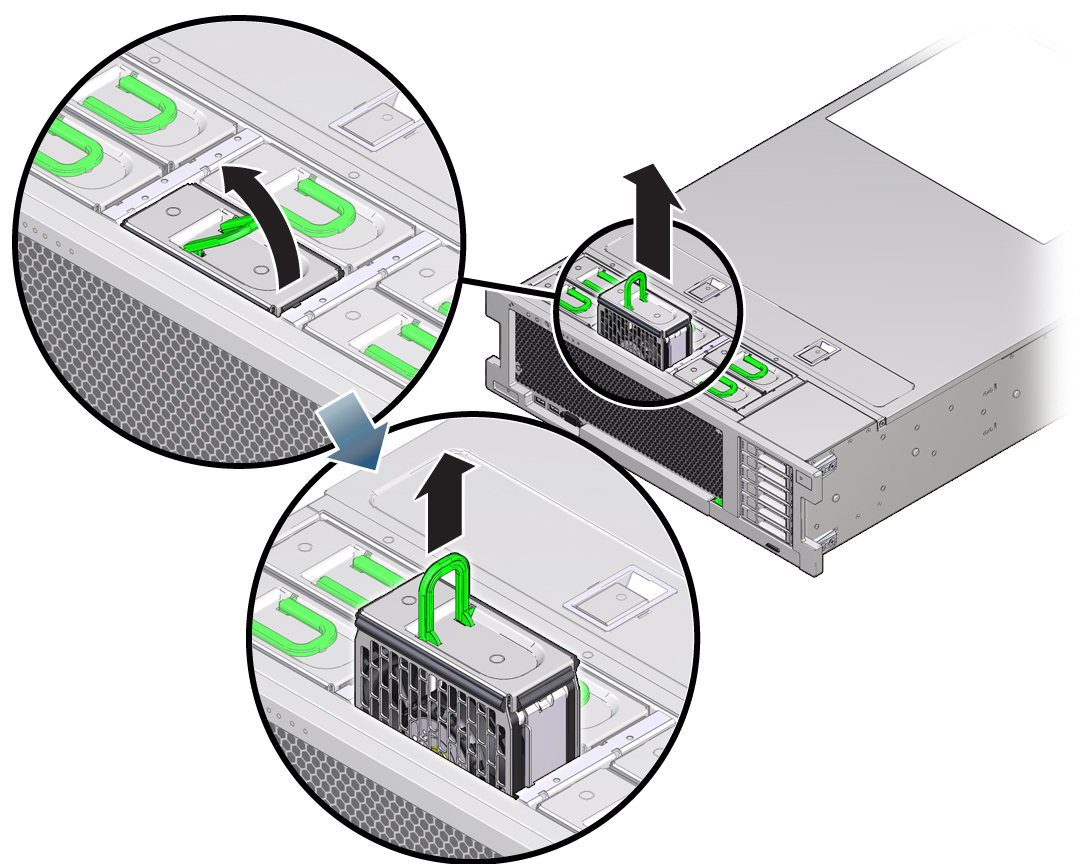
  3. Lift the green handle at the top of the fan module to unlock the module, and pull the module straight up and out.

    Caution:

    Excessive movement or rocking of the fan module during removal can cause damage to the internal connector on the fan module board. When removing a fan module, do not rock it back and forth.

    Figure showing how to remove a fan module.
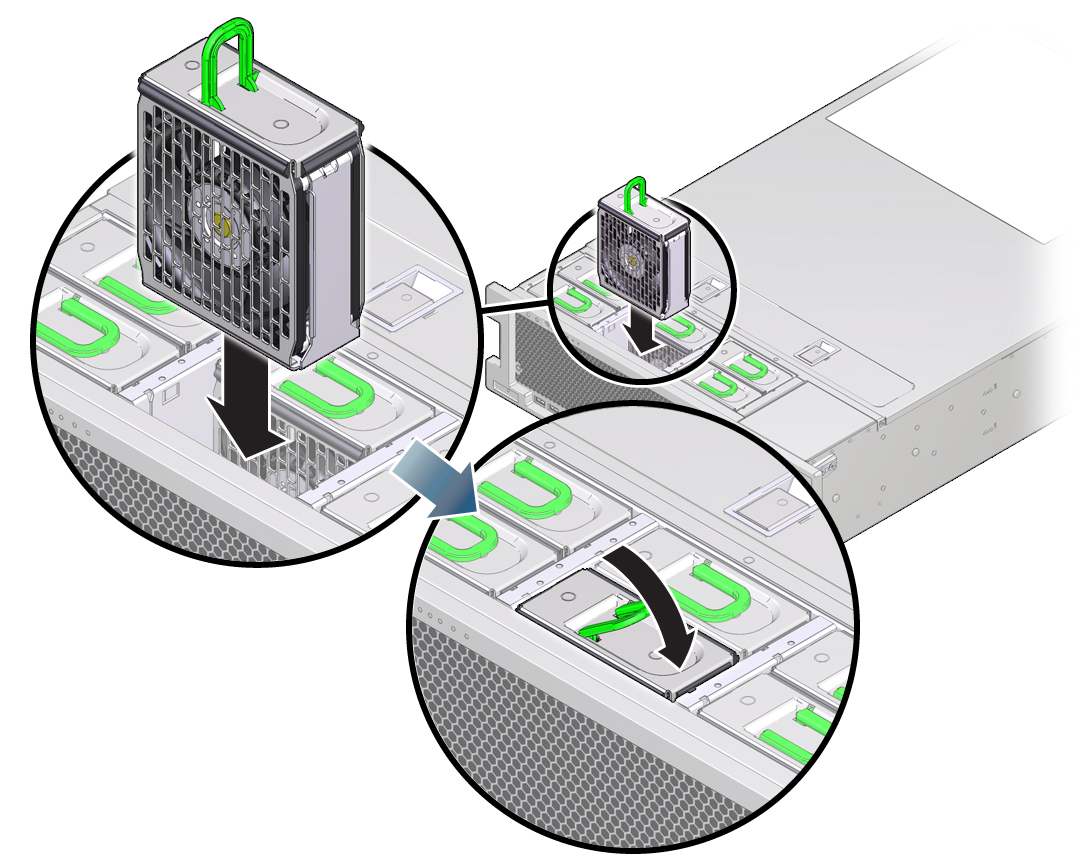
  4. Position the replacement fan module so the connector on the bottom of the module is aligned with the connector on the inside of the slot and all keying and labeling are correctly positioned.

    The fan modules are keyed to ensure that they are installed in the correct orientation.


    An illustration showing how to install a fan module in the controller.
  5. Slide the fan module into the slot until it stops.
  6. Press downward on the top of the fan module, on the Press Here to Latch label, until the fan module is fully seated.
  7. Replace the top cover on the chassis.
  8. Return the controller to the normal rack position by pushing the release tabs on the side of each rail while slowly pushing the storage controller into the rack.
  9. Verify that the green OK indicator is lit.
  10. Verify that the Top Fan indicator and the Service Action Required indicator on the controller front panel are not lit.
  11. From the Maintenance BUI menu, select Hardware. Click the right-arrow icon apply icon for the controller, click Fan, and verify that the status icon light on icon is green for the newly installed fan module. To view details about the new fan module, click its information icon information icon .
  12. If a fault does not self-clear, see Repairing Active Problems.