A Installation and Configuration Screens
This appendix contains images and descriptions of the Oracle GoldenGate-specific screens used by the Oracle Universal Installer (OUI). This information is contained in the following sections:
-
Section A.1, "Installation Screens for Oracle GoldenGate Monitor"
-
Section A.2, "Repository Creation Utility (RCU) Screens for Oracle GoldenGate Monitor"
-
Section A.3, "Configuration Wizard Screens for Oracle GoldenGate Monitor"
A.1 Installation Screens for Oracle GoldenGate Monitor
This section shows examples of the Oracle Universal Installer screens for Oracle GoldenGate Monitor. These screens are:
A.1.1 Welcome
This screen introduces you to the product installer.

Description of the illustration welcome.gif
This page provides two important pieces of information:
-
A navigation pane on the left that summarizes the tasks the installer will help you complete. Each item in the navigation pane represents a specific installer screen that will prompt you for information required to install the software.
-
Information about any prerequisites you might need to perform before continuing with the installation.
Review the information on this screen carefully to be sure you have performed all the necessary prerequisites.
A.1.2 Installation Location
Use this screen to specify the location of your Oracle home directory.
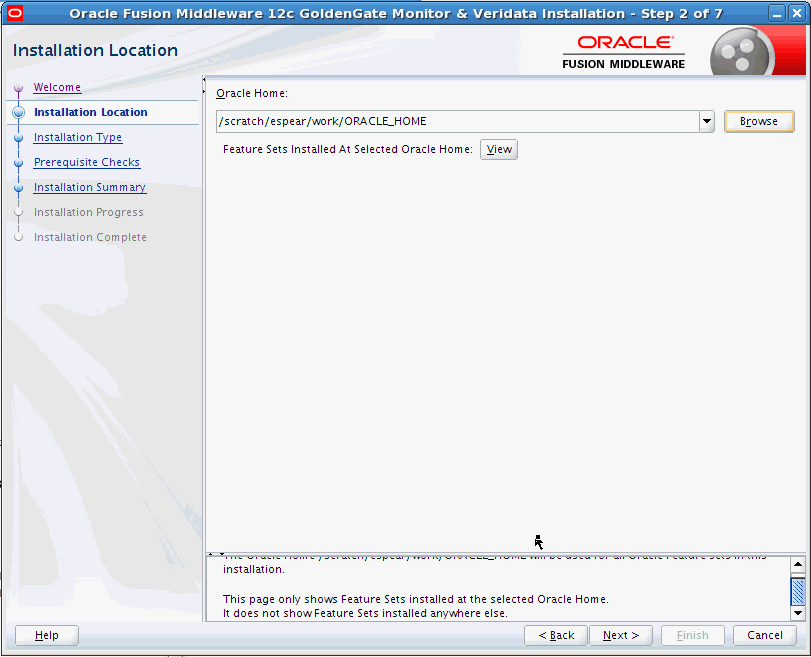
Description of the illustration inst_loc.gif
If you have an existing directory into which one or more Oracle products have already been installed, that directory can be viewed in the drop-down list. You can see which products are installed in that particular directory by clicking View next to "Features Sets Installed at Selected Oracle Home."
If you want your product to be installed in a new directory, type the full path of your new directory in the Oracle Home field; the installer will create the specified directory for you.
If you are installing Oracle Fusion Middleware Infrastructure, then the Oracle Common home (oracle_common) directory will be created inside the specified Oracle home directory. The Oracle Common home contains services that are shared across all Oracle Fusion Middleware products.
A.1.3 Installation Type
Use this screen to specify the installation type, which defines which products and features are installed.
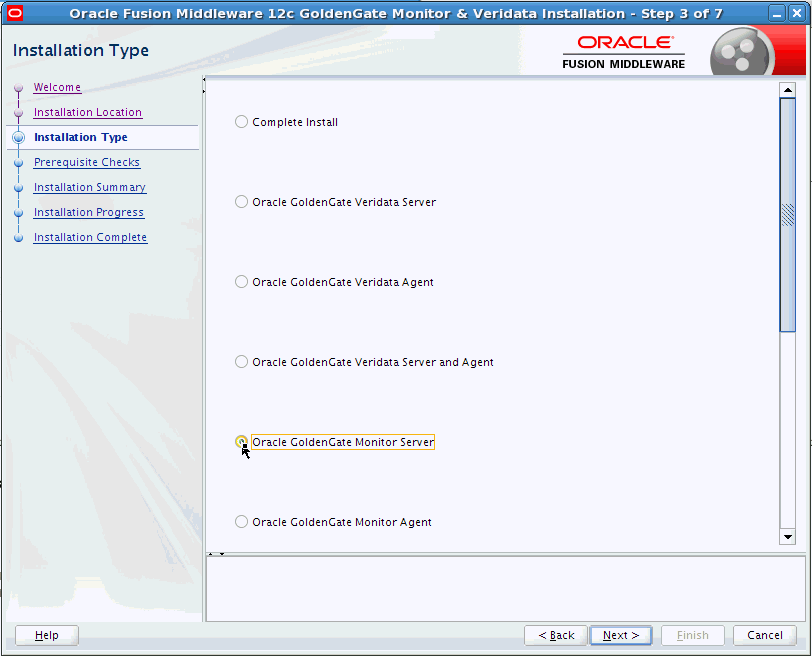
Description of the illustration inst_type.gif
The options you see on this screen will differ depending on the product you are installing. Refer to Section 3.1.3, "Install the Product" for specific details.
A.1.4 Prerequisite Checks
This screen analyzes the host computer to ensure that specific operating system prerequisites have been met.
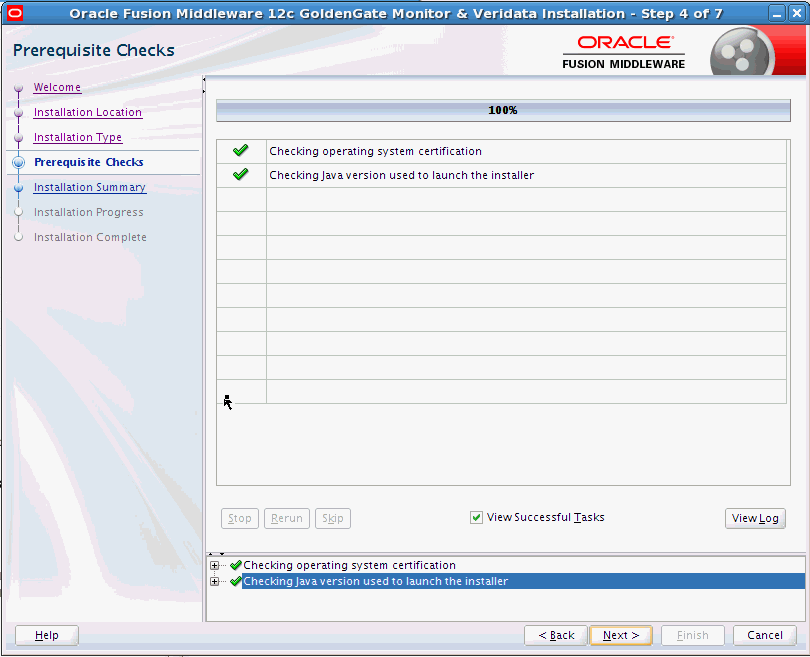
Description of the illustration pre_req_checks.gif
The following table describes the options on this screen:
| Button | Description |
|---|---|
| Stop | Click this button to stop prerequisite checking for all components. |
| Rerun | Click this button if you have encountered any warning or error messages, addressed them appropriately, and want to try the prerequisite checking again. |
| Skip | Click this button to ignore any error or warning messages and continue with the installation. |
| View Successful Tasks | This check box is selected by default, and shows the list of tasks in the main part of the screen as they are completed.
De-select this check box if you do not want to see the list of tasks. |
| View Log | Click this button to open a separate window containing a detailed log file of the prerequisite checking. |
A.1.5 Installation Summary
This screen contains a list of the feature sets you selected for installation, along with the approximate amount of disk space to be used by the feature sets once installation is complete.
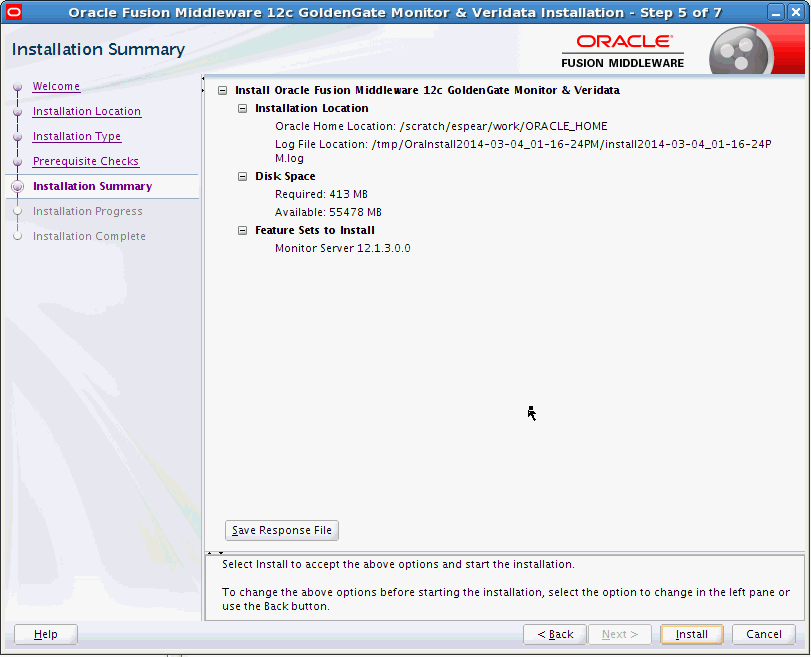
Description of the illustration inst_summary.gif
You can click an individual component to display its approximate installed size.
Click Save Response File to save this configuration to a response file, which can be used later in a silent install situation. See Chapter 2, "Using the Oracle Universal Installer in Silent Mode" in Installing with the Oracle Universal Installer for more information about response file and silent installation.
A.1.6 Installation Progress
This screen shows the progress of the installation. When the progress bar reaches 100%, the installation is complete.
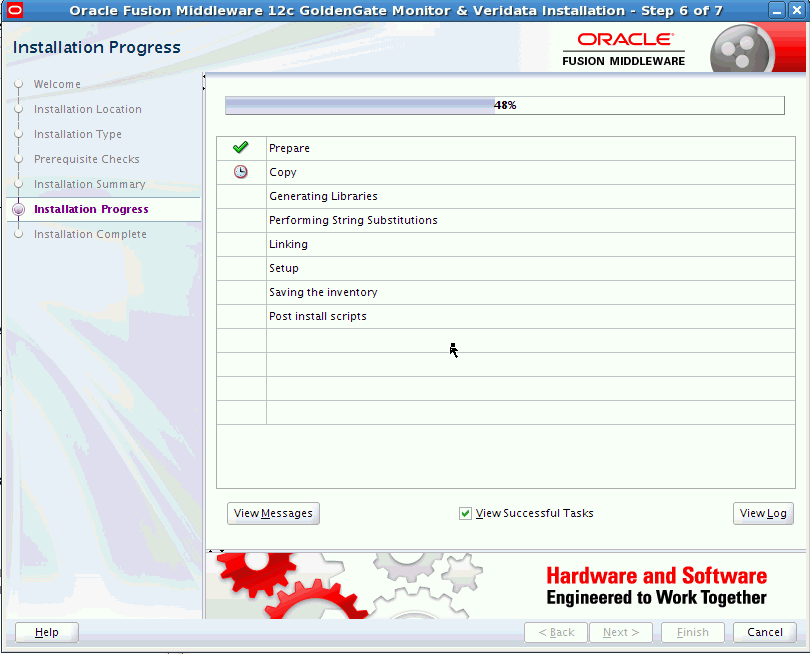
Description of the illustration inst_progress.gif
The following table describes the options on this screen.
| Button | Description |
|---|---|
| View Messages | Click View Messages to see the installer messages at the bottom of the screen, where the billboard is located. Click the button again to return to the billboard. |
| View Successful Tasks | This check box is selected by default, and shows the list of tasks in the main part of the screen as they are completed.
De-select this check box if you do not want to see the list of tasks. |
| View Log | Click View Log to see the installer log; the log will be displayed in a separate window. |
A.1.7 Installation Complete
This screen appears at the conclusion of the installation and provides a summary of the products and features that were installed.
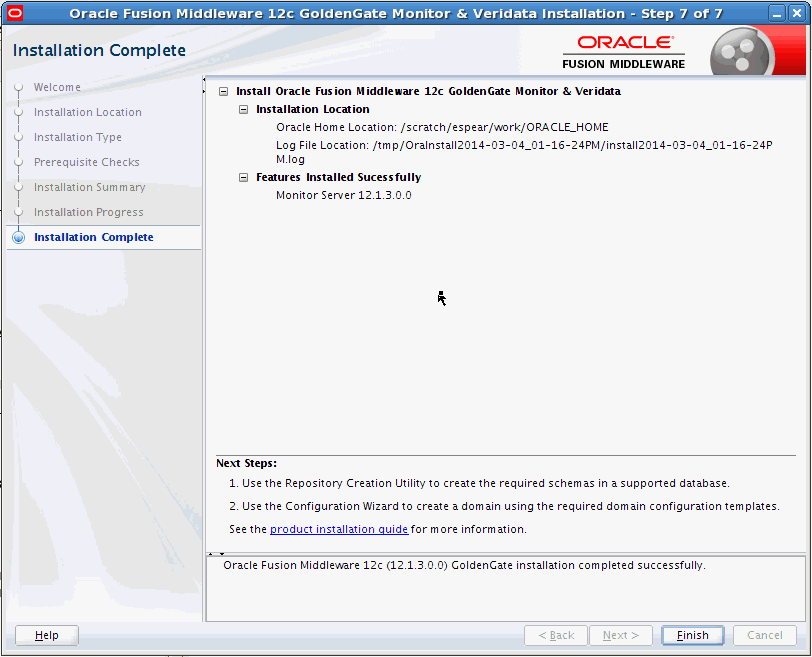
Description of the illustration inst_complete.gif
A.2 Repository Creation Utility (RCU) Screens for Oracle GoldenGate Monitor
This section provides sample images of the screens used to create a data repository for Oracle GoldenGate Monitor Server. These screens are:
The following examples comprise an overview of the RCU screens that apply to Oracle GoldenGate Monitor. For more detailed information on these screen and repository creation in general, see Creating Schemas with the Repository Creation Utility, particularly "Understanding Repository Creation Utility Screens".
A.2.1 Welcome
This screen introduces you to the product installer.
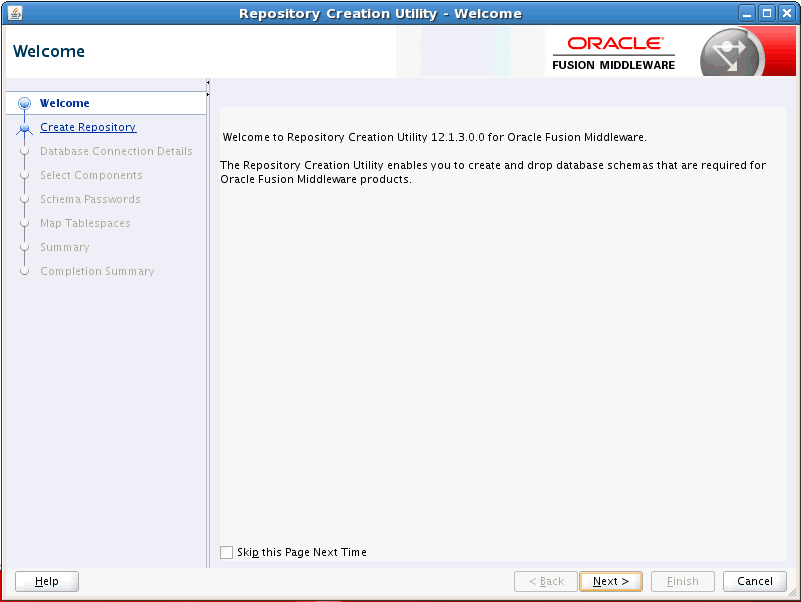
Description of the illustration rcu_welcome.gif
A.2.2 Create Repository
Use this screen to select the action you want to perform.
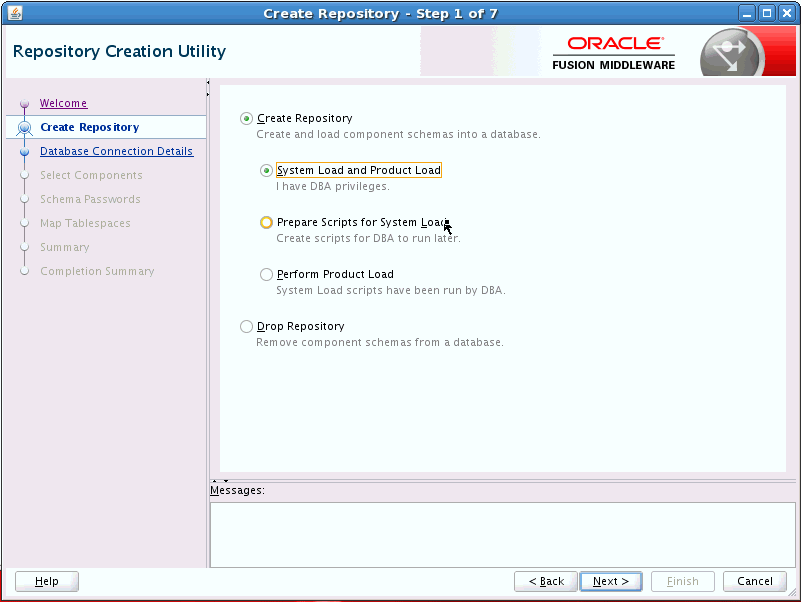
Description of the illustration rcu_create.gif
A.2.3 Database Connection Details
Use this screen to specify the connection credentials to the database in which you will be creating or dropping your schemata.
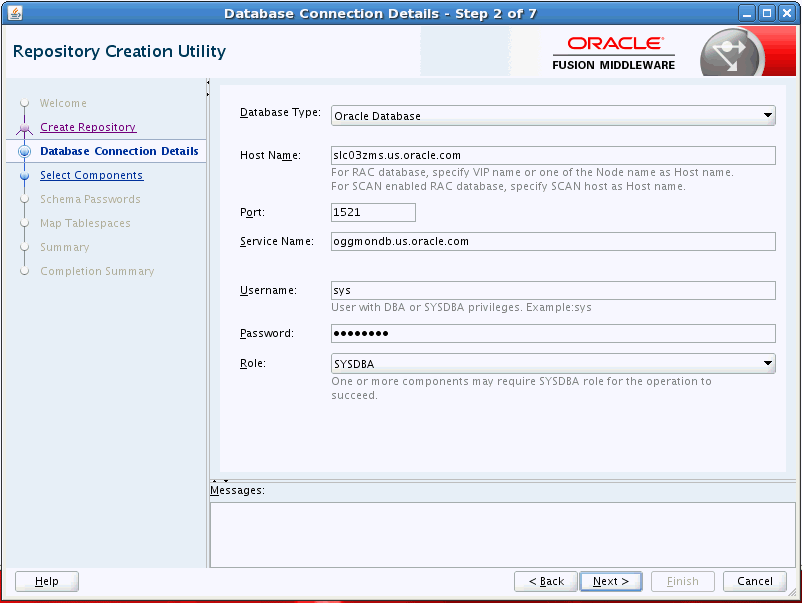
Description of the illustration rcu_conx_details.gif
A.2.4 Select Components
Use this screen to select the components for the database you are creating. Components will vary depending upon which database you will be running.
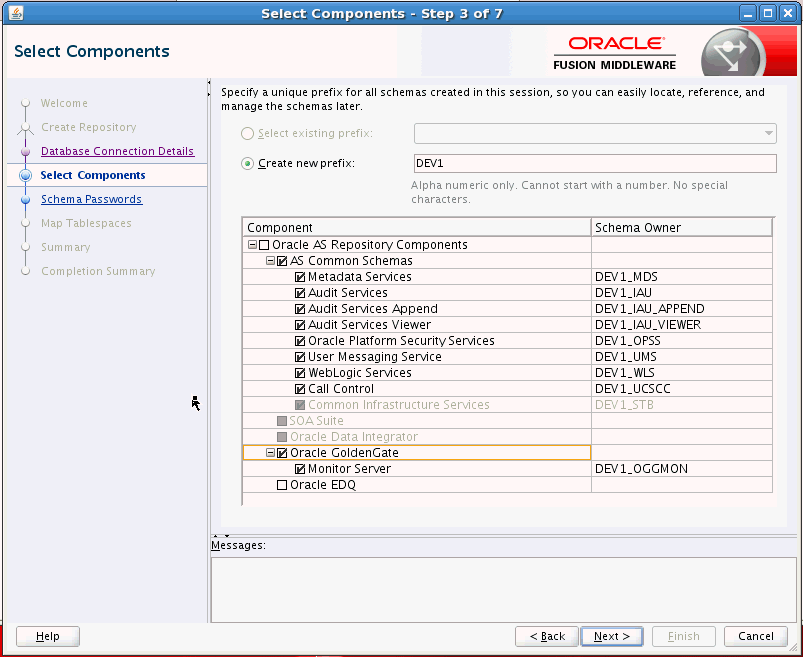
Description of the illustration rcu_sel_comp.gif
A.2.5 Schema Passwords
Use this screen to define the passwords for the main and auxiliary scheme users.
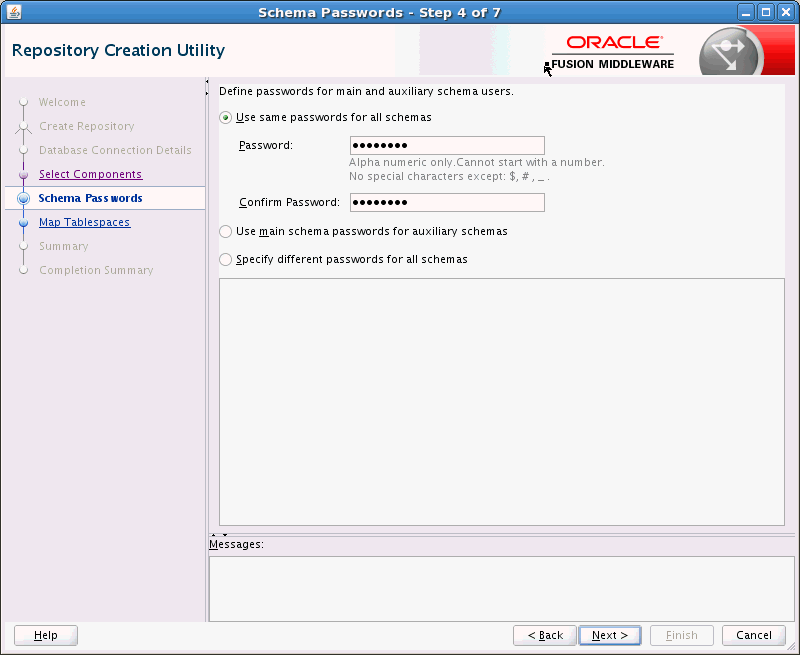
Description of the illustration rcu_schema_pw.gif
A.2.6 Map Tablespaces
This screen lists the tablespaces for the selected components.
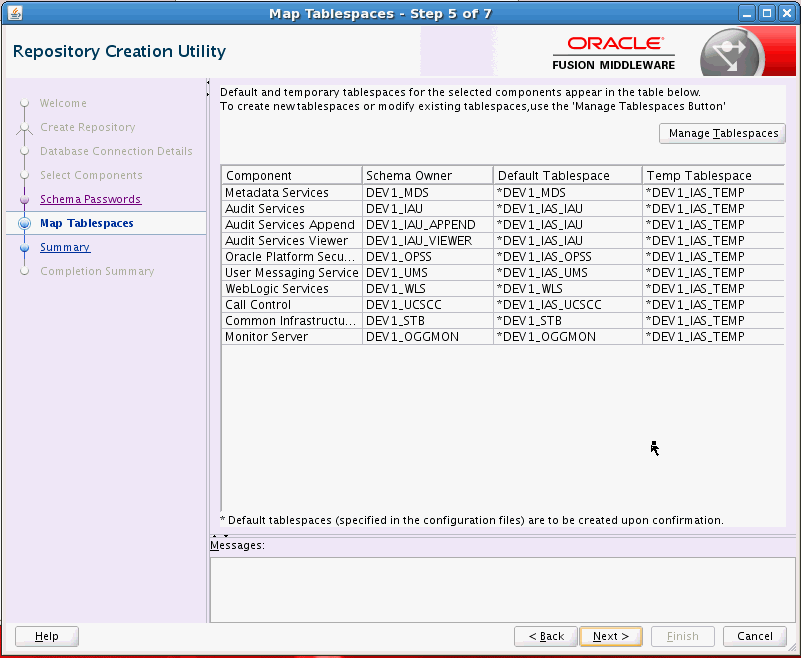
Description of the illustration rcu_map_tspace.gif
A.2.7 Summary
This screen summarizes the details of the repository you are creating.
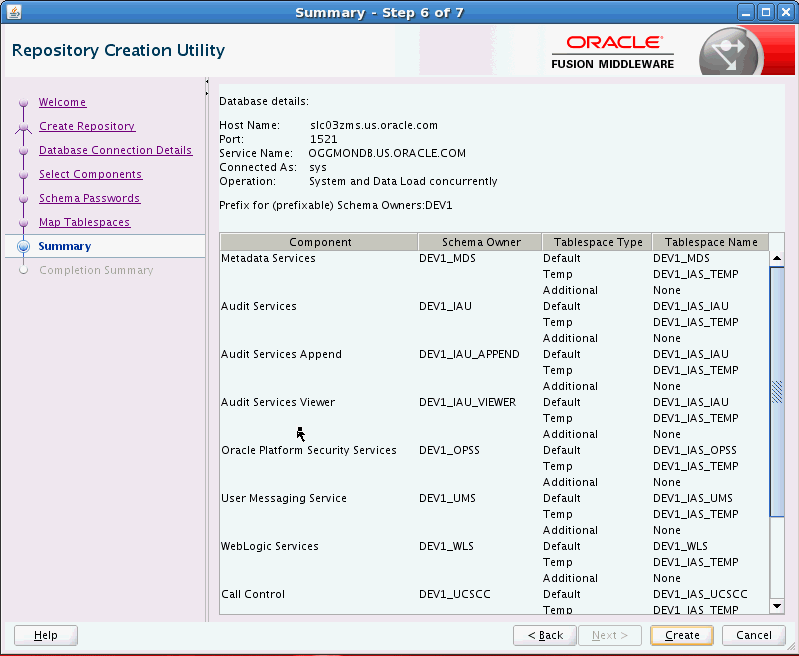
Description of the illustration rcu_summary.gif
A.2.8 Completion Summary
This screen contains information about the log files that were created from this RCU operation. You can click on the name of a particular log file to view the contents of that file.
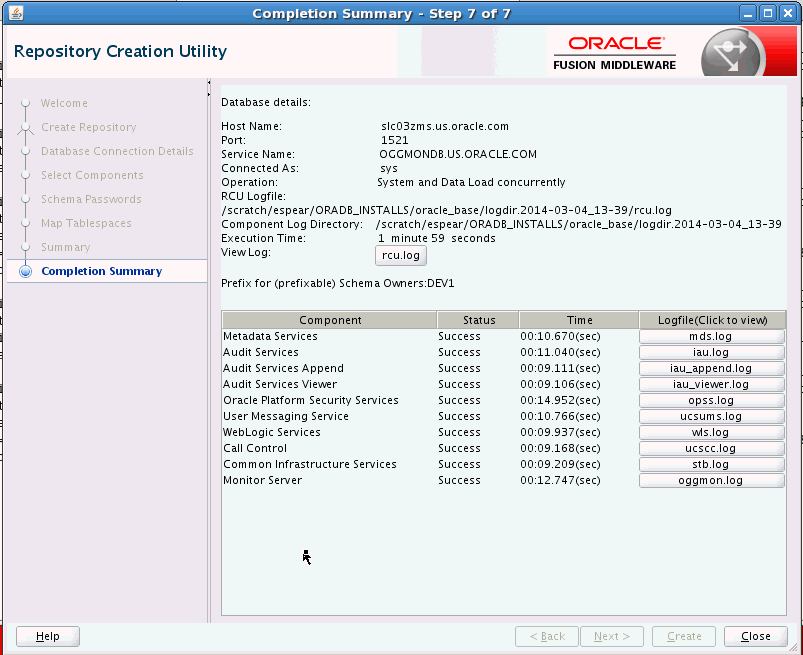
Description of the illustration rcu_complete.gif
If there were any problems encountered during schema creation, you can troubleshoot the issue by using the log files.
If errors are encountered during a Create operation, or if a Create operation fails for any component, the Cleanup for failed components check box appears on this page and is selected by default. If selected, RCU will perform cleanup operations for the component that failed during the Create operation. If you choose not to select this check box, you can cleanup the failed component at a later time by performing a Drop operation for the failed component(s).
A.3 Configuration Wizard Screens for Oracle GoldenGate Monitor
This section provides samples of the screens used to configure a Oracle WebLogic Server domain for Oracle GoldenGate Monitor Server. These screens are:
The following examples comprise an overview of the Configuration Wizard screens that apply to Oracle GoldenGate Monitor. For more detailed information on these screens and domain configuration in general, see Creating WebLogic Domains Using the Configuration Wizard.
A.3.1 Configuration Type
Use this screen to define why you are using the Configuration Wizard: to create a new domain or update an existing domain.
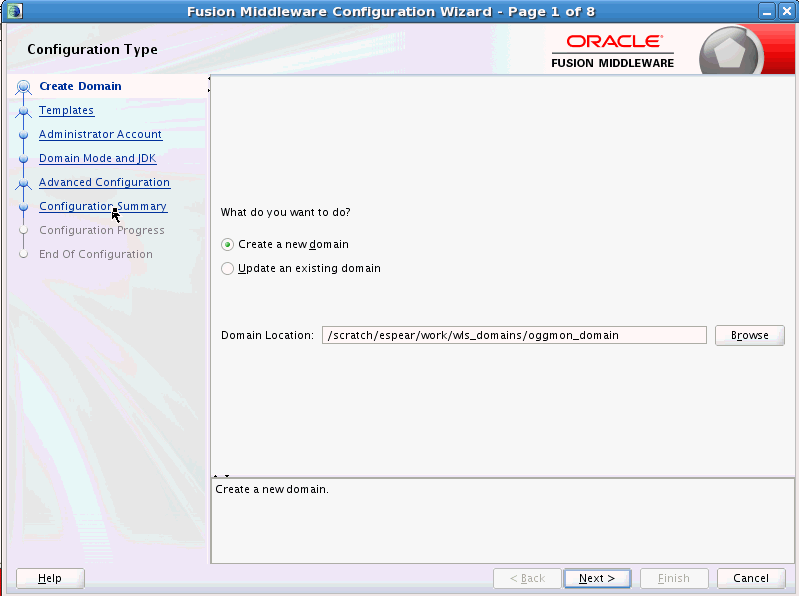
Description of the illustration cw_create_dom.gif
A.3.2 Templates
Use this screen to choose whether to create or extend a domain that is configured automatically to support selected products, or to create or extend a domain based on an existing domain or application template. Each template in the displayed list is associated with a single product template (a JAR file) which configures the required domain resources for the product. If the selected template has dependencies on other templates, the dependency templates are automatically selected or included in the domain.
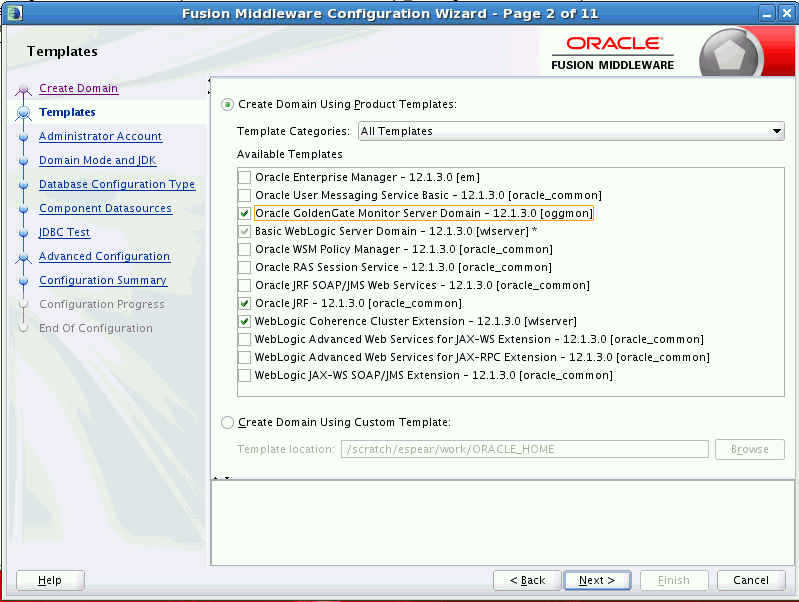
Description of the illustration cw_template.gif
A.3.3 Administrative Account
Use this screen to define the default WebLogic Administrator account for the domain. This account is used to boot and connect to the domain's Administration Server.
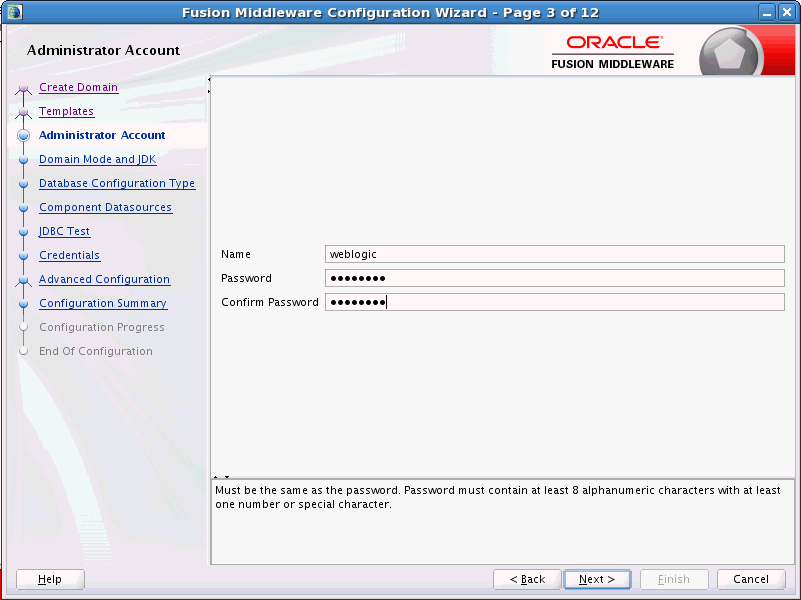
Description of the illustration cw_admin_acct.gif
A.3.4 Domain Mode and JDK
Use this section to specify whether you want to run Oracle GoldenGate Monitor in Production mode or Development mode.
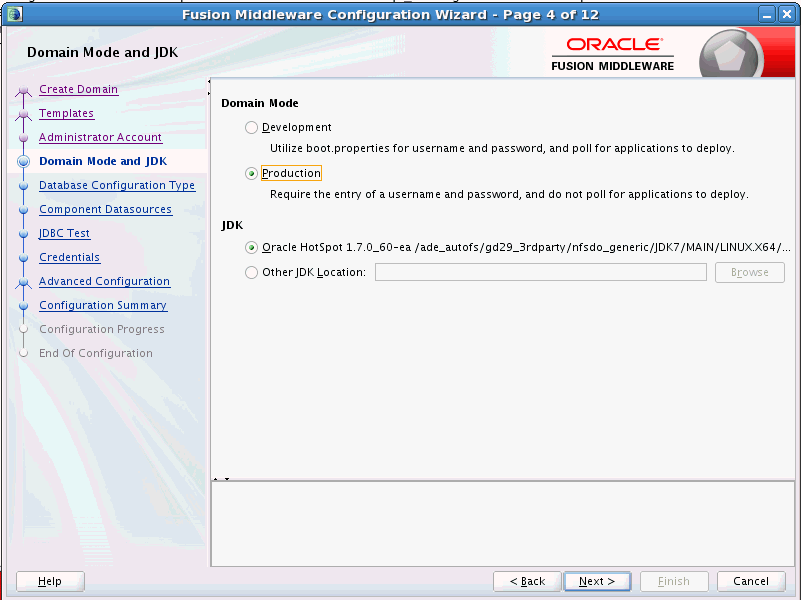
Description of the illustration cw_dom_mode_jdk.gif
A.3.5 Database Configuration Type
Use this screen to specify the information for connecting to the database to retrieve schema information that will be used to populate the schema fields on subsequent component schema screens.
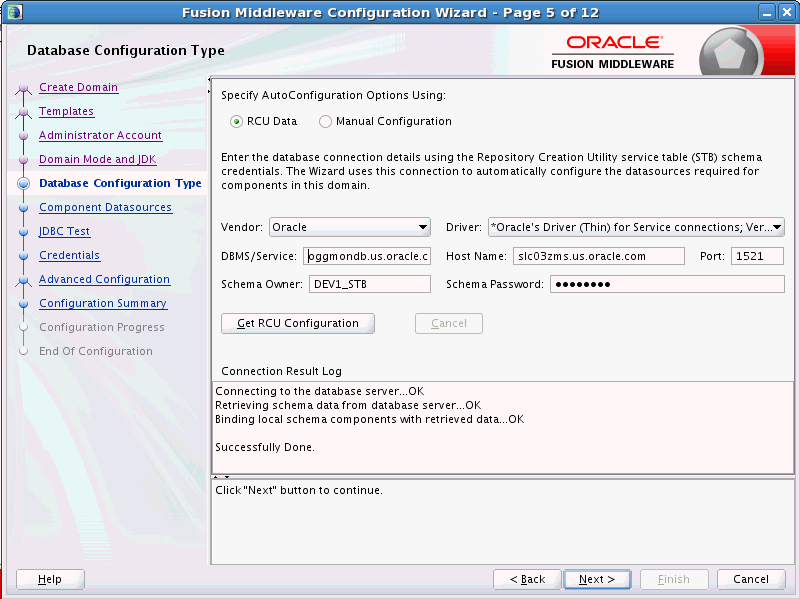
Description of the illustration cw_db_config_type.gif
A.3.6 JDBC Component Schema
Use this screen to configure the JDBC component schema settings, such as database driver, schema owner, password, and so on.
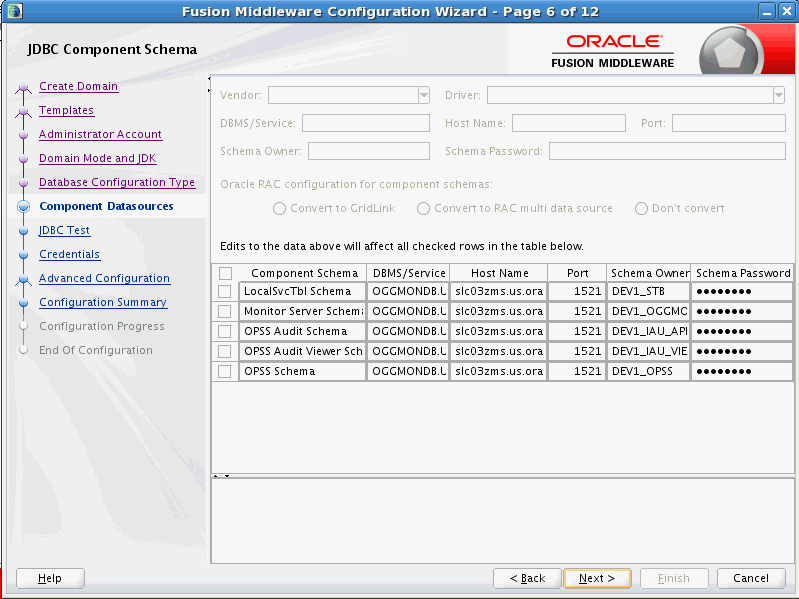
Description of the illustration cw_jdbc_comp_schema.gif
A.3.7 JDBC Component Schema Test
Use this screen to test the configurations that you specified for the data sources in the previous screen. Note that:
-
If the JDBC driver JAR file for a data source is not in the classpath, the data source is not selectable for testing.
-
If you are updating a domain, all data sources that exist in the original domain are not selected by default. Only new data sources are selected and tested by default.
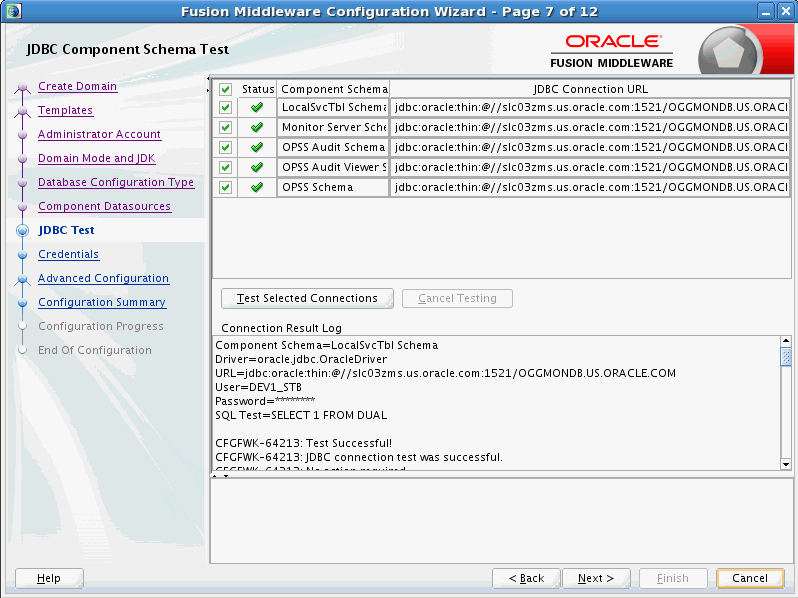
Description of the illustration cw_jdbc_test.gif
A.3.8 Credentials
Use this screen to provide credentials for each key in the domain.
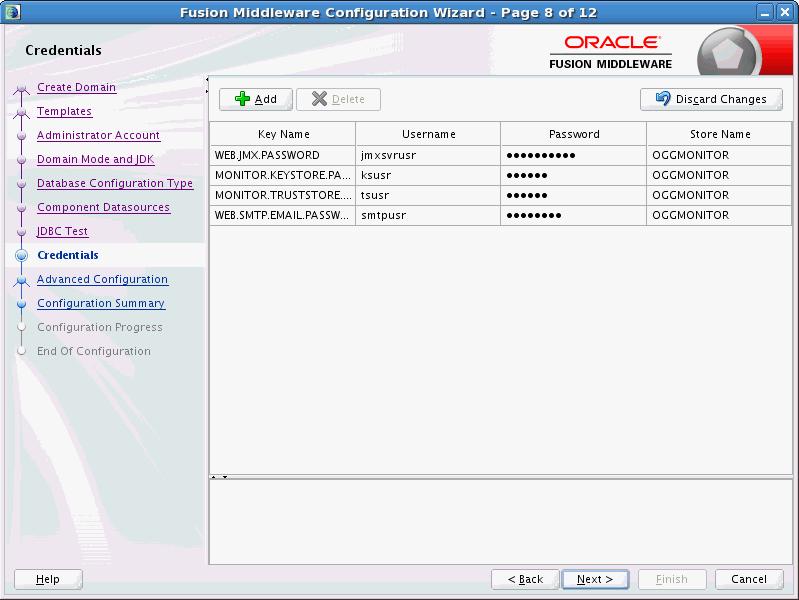
Description of the illustration cw_credentials.gif
A.3.9 Advanced Configuration
Use this screen to select the categories (if any) for which you want to perform advanced configuration. For each category you select, the appropriate configuration screen is displayed to allow you to perform advanced configuration. If you do not select any items on this screen, the Configuration Summary screen is displayed next.
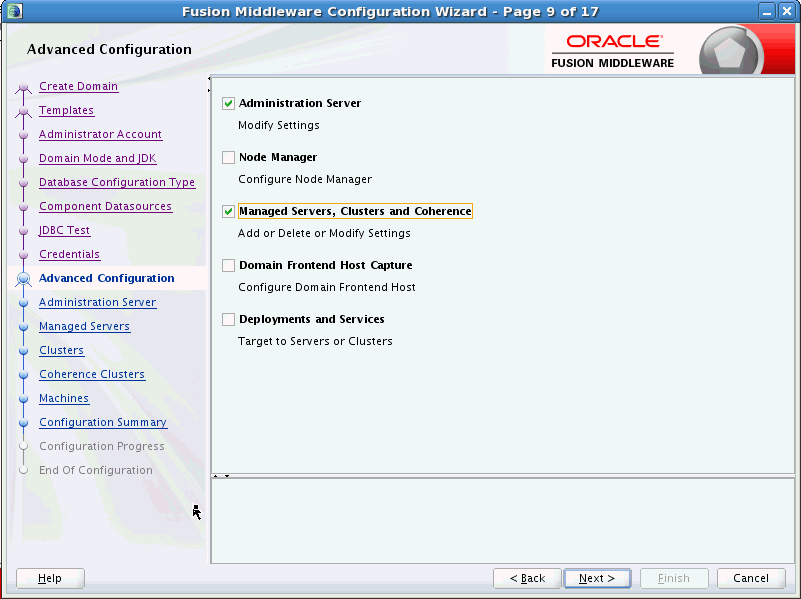
Description of the illustration cw_adv_config.gif
Note:
The categories that are listed on this screen depend on the resources defined in the templates you selected for the domain.A.3.10 Administration Server
Use this screen to configure or change the following Administration Server settings.
-
Server
-
Listen address
-
Listen port
-
Enable SSL
-
SSL listen port
-
Server Groups
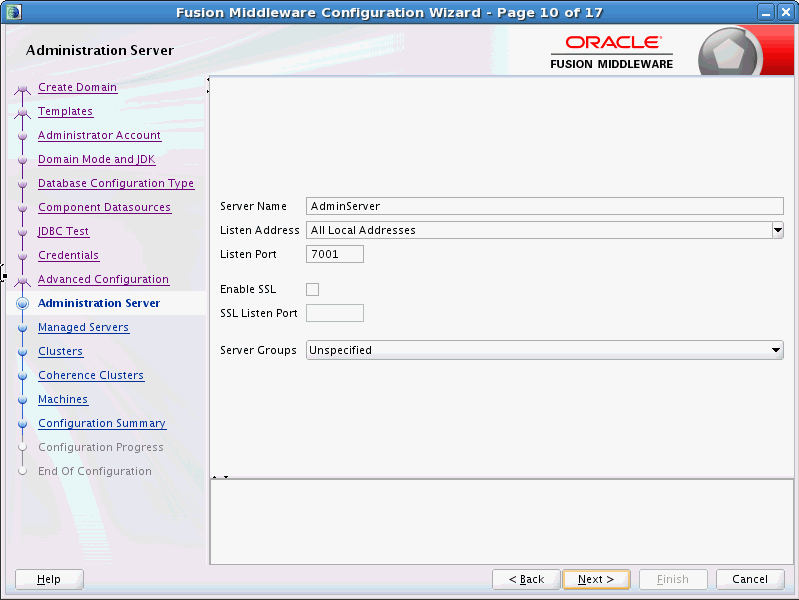
Description of the illustration cw_ad_svr.gif
A.3.11 Managed Servers
Use this screen to add, delete, or clone Managed Servers, and assign a user-expandable server group (if available) to a Managed Server. You can also change the settings for an existing Managed Server.
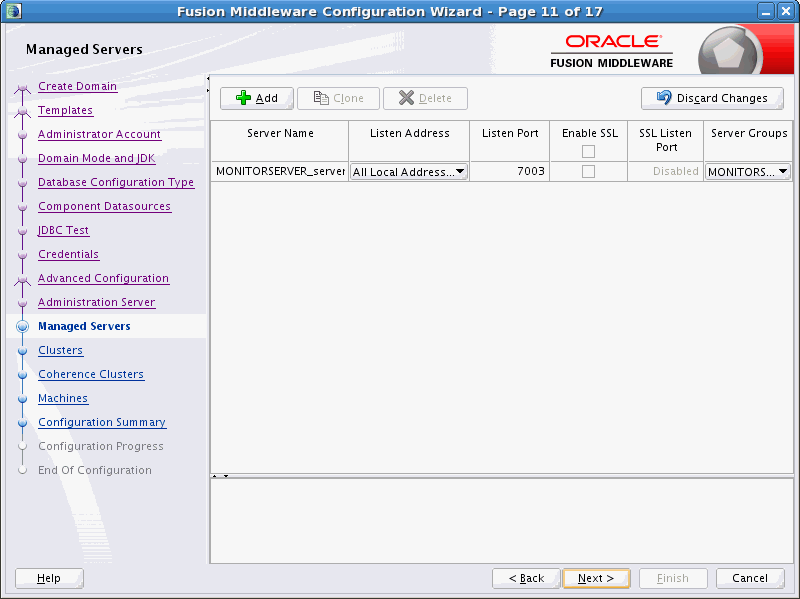
Description of the illustration cw_man_svr.gif
A.3.12 Clusters
Use this screen to add or delete clusters. You can also change the Cluster Name and Cluster Address settings for an existing cluster.
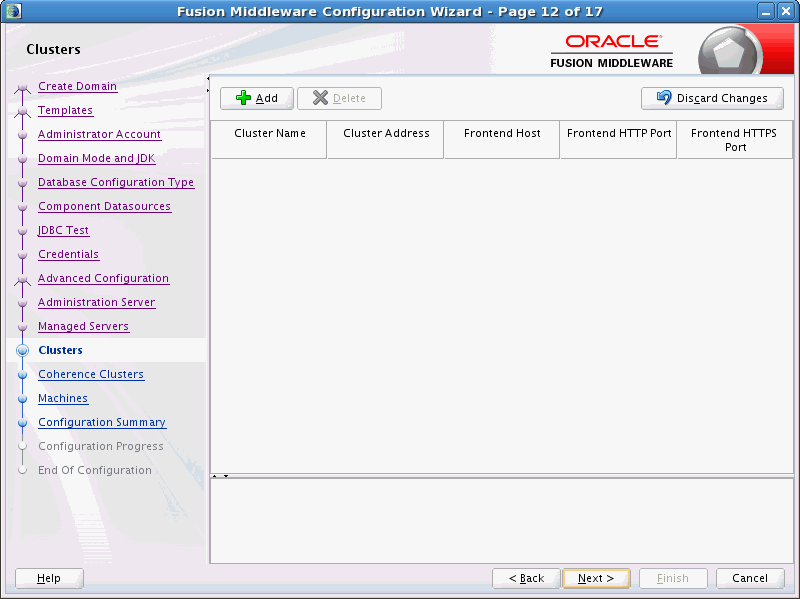
Description of the illustration cw_clusters.gif
A.3.13 Coherence Cluster
This screen is displayed only if you included Coherence in the WebLogic Server installation.
A.3.14 Machines
Use this screen to add or delete machines, or to modify the settings for an existing machine.
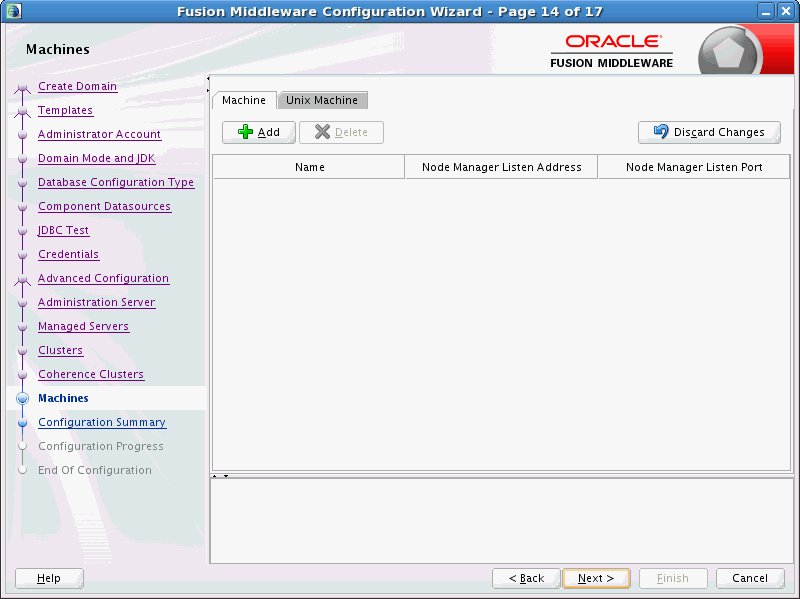
Description of the illustration cw_machines.gif
A.3.15 Configuration Summary
Use this screen to review the detailed configuration settings of your domain before continuing.
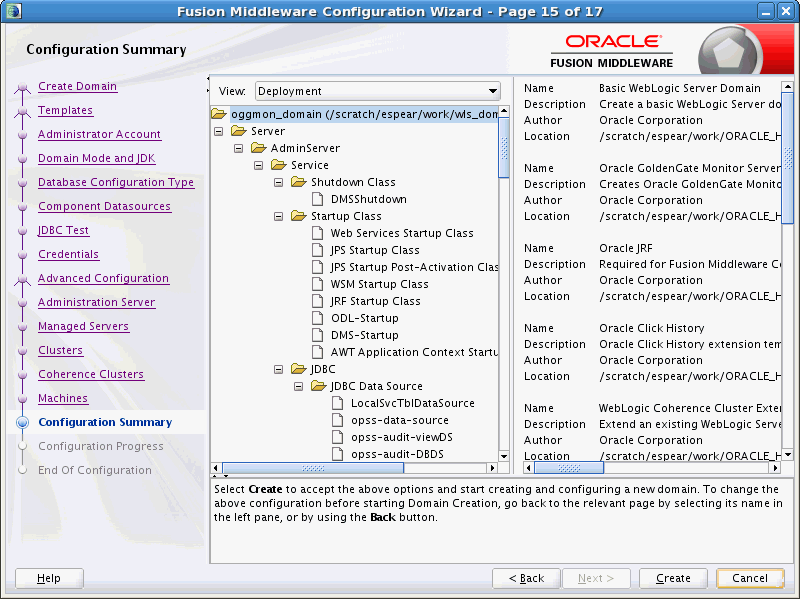
Description of the illustration cw_summary.gif
A.3.16 Configuration Progress
This screen uses a progress bar and message panel to indicate the progress of your domain configuration process.
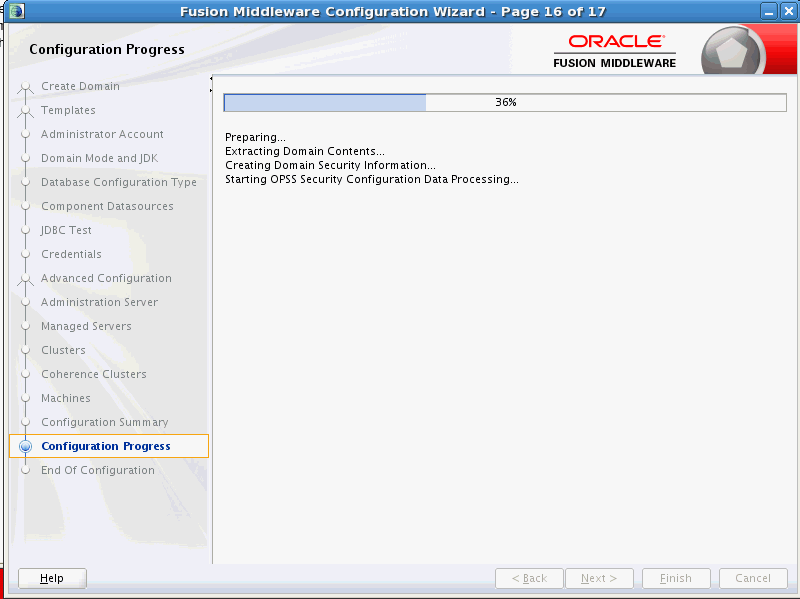
Description of the illustration cw_config_prog.gif
A.3.17 Configuration Success
This screen appears when domain creation has successfully completed.
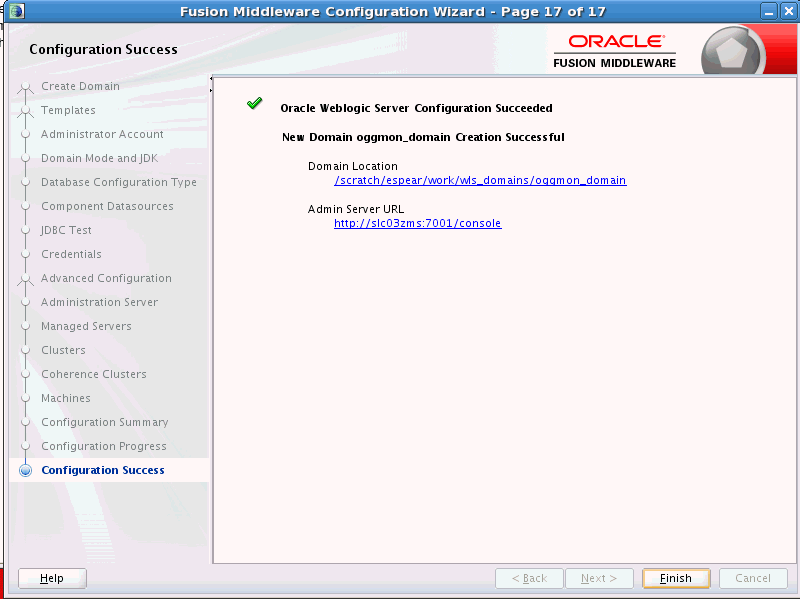
Description of the illustration cw_success.gif