Integrated interview help text, also known as commentary, is provided in an Oracle Web Determinations application to help people understand the questions that they are being asked, and the screens they are being presented.
Oracle Web Determinations uses HTML documents for each question on the screen. In other words, for every question there is a corresponding HTML document.
Clicking on a question will load the help for that question.
In addition to question-related help, help can also be provided for at the screen level or at the word-level. Clicking on the screen title or word, will open the help for that screen or word.
Generate commentary files for attributes and screens
You can automatically generate commentary files for your project from
Oracle Policy Modeling. To do this:
Select Build | Generate
Commentary Files…. This opens the Generate
Commentary Files dialog box.
By default, the commentary files will be located in \Development\include\commentary\<rulebase language>. To view the files in this location, click the Explore button. NOTE: The default commentary plug-in fetches HTML files out of the rulebase archive here. This default commentary plug-in can be replaced with a custom-developed one that returns commentary from some other location like a database or external web server. For more information on using another commentary plug-in, see the Oracle Policy Automation Developer's Guide.
By default, the commentary template will be located in C:\Program Files\Oracle\Policy Modeling\Templates. This template should include any styles, headings and information that are to be reasonably common across all attributes. To select a different commentary template, use the browse button to locate and select another file.
Select whether you want to create commentary files: * for screens * for attributes on screens * for other base level attributes
(including attributes for which automatic screens will be shown)
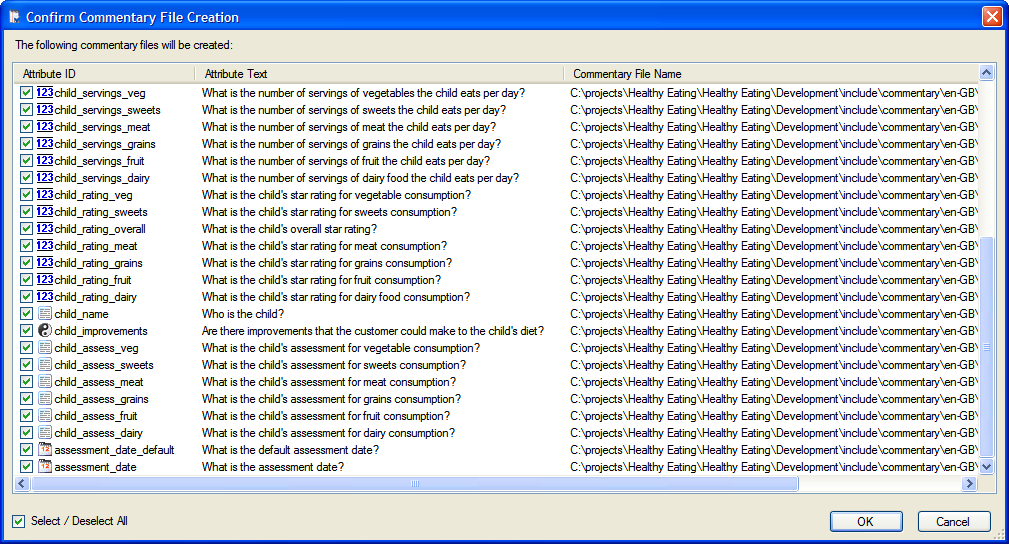
Click Create. The Confirm
Commentary File Creation dialog box will open. This displays a list of attributes and screens
that meet your chosen criteria. The commentary file
name is <attribute id>.html. (NOTE: If you change the commentary file name, the commentary will not be displayed for that attribute/screen.)
Ensure
that the check box is ticked for any attributes and screens that you want to create commentary
files for, then click OK. (The "default" (this rulebase) commentary file which is created will only appear on the locale selection screen. This screen is only displayed if translations have been added to the rulebase, ie if the rulebase can be run in more than one language.)
You will then be advised when the commentary
files have been generated and asked if you want to view them. Click OK to open the folder containing the commentary file, or click Cancel to return to Oracle Policy Modeling.
Create commentary for a word in a label or question
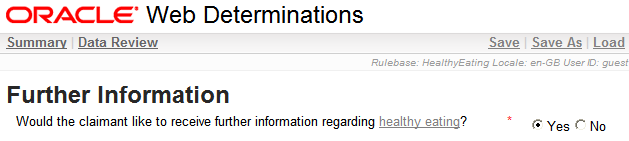
You can also create "per-word" commentary for words in labels and questions. For example, the question "What is the claimant's weekly net pay?" could have the word "pay" as a link to commentary which provides a definition of the term.
To add commentary for a word in a question or label:
In Oracle Policy Modeling, open your screens file and select the relevant question or summary screen.
Select the label or question that you want to add per-word commentary to.
Change the text of the label or question to include the HTML tag for the commentary in the following format: <a href="../../../../commentary/<project name>/<rulebase language>?target=<file name>"><link text></a> For example, "What is the claimant's weekly net <a href="../../../../commentary/Web Determinations/en-US?target=pay">pay</a>?". NOTES: (i) If the link is on the summary screen one less "../" is required (because the link text is relative to the screen URL path). For example, <a href="../../../commentary/Web Determinations/en-US?target=pay">pay</a>. (ii) To make the per-word commentary appear in a separate pop-up window, include "target="_blank"" in the HTML, eg "What is the claimant's weekly net <a href="../../../../commentary/Web Determinations/en-US?target=pay" target="_blank">pay</a>?".
Click OK.
Create a commentary file named exactly the same as the filename specified in the HTML text (eg "pay.html").
Put the commentary file in the commentary directory for the project (ie \Development\include\commentary\<rulebase language>).
NOTE: When using per-word commentary in question text (ie on an attribute input control), the standard commentary file for that attribute must not exist (that is, either delete it or do not create it when generating the commentary files). Otherwise the control will render somewhat unusably as a link-within-a-link.
Make the commentary open in a new window
The default behaviour is for commentary to appear in the same window (that is, as a pane on the right hand side of the window) when a question or screen is clicked on. If you want to have the commentary open in a new window you need to make the following change to the appearance.properties file:
Open the appearance.properties file which is located in \Release\web-determinations\WEB-INF\classes\configuration for the project.
Change the opa-commentary-type setting from "frameset" to "popup".
Save and close the file. TIP: You will need to close and restart your Web Determinations investigation to see this change take effect.
NOTE: Setting the commentary to open in a new window doesn't work when running Web Determinations in the debugger; it only works when running Web Determinations in an external web browser.
Update a commentary file
To update a commentary file:
Browse to the commentary file on your local drive: \Development\include\commentary\<project language>. (TIP: Alternatively, you can select Build | Generate
Commentary Files and click the Explore button next to the Commentary Location field to open the directory containing the commentary files.)
Double click the file to open it.
Edit the file as required and then save it.
NOTE: Changes to commentary files will not appear until you re-build and start a new Web Determinations session.
Delete a commentary file
To delete a commentary file:
Browse to the commentary file on your local drive: \Development\include\commentary\<project language>. (TIP: Alternatively, you can select Build | Generate
Commentary Files and click the Explore button next to the Commentary Location field to open the directory containing the commentary files.)
Right-click and select Delete. Click Yes to confirm the file deletion.
NOTE: If there is no commentary file for a particular attribute or screen, the question or screen will not appear as a link in the application.