ノート:
- このチュートリアルでは、Oracle Cloudへのアクセスが必要です。無料アカウントにサインアップするには、Oracle Cloud Infrastructure Free Tierの開始を参照してください。
- Oracle Cloud Infrastructureの資格証明、テナンシおよびコンパートメントに例の値を使用します。演習を完了するときは、これらの値をクラウド環境に固有の値に置き換えます。
Oracle Cloud InfrastructureのPulumiを使用したコンピュート・インスタンスおよびVCNのデプロイ
イントロダクション
このチュートリアルでは、Pulumiを使用してコンピュート・インスタンスおよびVirtual Cloud Networks (VCN)をデプロイします。PulumiのシンプルさとOracle Cloud Infrastructure (OCI)の堅牢なインフラストラクチャにより、デプロイメント・プロセスを容易に自動化する方法を学習します。OCIリソースを簡単にデプロイおよび管理する方法を学習し、クラウド・デプロイメントの新しい可能性を引き出します。
目標
- OCIのPulumi Infrastructure as Code (IaC)ツールを使用して、コンピュート・インスタンスおよびVCNリソースをデプロイします。
前提条件
- Pulumi、OCIプロバイダをインストールおよび構成し、OCIの環境変数を設定します。詳細は、Oracle Cloud InfrastructureでのPulumi Infrastructure as Codeのインストールおよび構成を参照してください。
タスク1: VCNの作成
Pulumiを使用してVCNをデプロイします。
-
Pulumiプロジェクトの新規ディレクトリを作成します。
-
端末またはコマンド・プロンプトを開きます。
-
Pulumiプロジェクトを作成するディレクトリに移動します。
cdコマンドを使用してディレクトリを変更できます。 -
プロジェクトに新しいディレクトリを作成します。
たとえば次のようにします。
mkdir my-oci-project
cd my-oci-project
-
-
次のコマンドを実行して、OCI Pythonテンプレートを使用して新しいPulumiプロジェクトを作成します。ここでは、パルミのプログラミング言語としてpythonを使用していますが、任意のサポートされているプログラミング言語を使用できます。
pulumi new oci-python -
Pulumiは、プロジェクトの構成を依頼します。必要な情報(プロジェクト名、プロジェクトの説明、スタック名など)を入力し、「Enter」をクリックします。
たとえば次のようにします。
Project name: my-oci-project Project description: This is an example of OCI Compute and VCN deployment Stack name: Dev -
コードをコピーしてカスタマイズします。
-
Pulumiは、プロジェクト・ディレクトリに
__main__.pyという名前の基本的なPythonファイルを作成します。 -
このファイルは、テキストエディタまたはIDE VSコードを使用して開きます。
-
PulumiのPython SDKを使用してOCIインフラストラクチャ・コードを作成し、VCN、サブネット、セキュリティ・グループなどを定義します。たとえば、提供されたPythonコードを
__main__.pyという名前の新しいファイルにコピーし、プレースホルダ値を実際のOCIコンパートメントIDおよび表示名に置き換えてコードをカスタマイズします。これらの変更により、リソースが正しいコンパートメントに作成され、意味のある名前を持つことが保証されます。"""A OCI Python Pulumi program""" import pulumi import pulumi_oci as oci from pulumi_oci import core from pulumi_oci import identity # Create a New VCN test_vcn = oci.core.Vcn("test_vcn", compartment_id="ocid1.compartment.oc1...xx...xxx", cidr_block="10.0.0.0/16", display_name="ocinetwork", dns_label="ocinetwork" ) #Code block for InternetGateway test_internet_gateway = oci.core.InternetGateway("test_internet_gateway", compartment_id="ocid1.compartment.oc1...xx...xxx", vcn_id=test_vcn.id, enabled="true", display_name="internet_gateway") #Code block for route table and attach to IG test_route_table = oci.core.RouteTable("test_route_table", compartment_id="ocid1.compartment.oc1...xx...xxx", vcn_id=test_vcn.id, display_name="route_table_ig", route_rules=[oci.core.RouteTableRouteRuleArgs( network_entity_id=test_internet_gateway.id, destination="0.0.0.0/0", destination_type="CIDR_BLOCK", )]) #Code block for security list security_list_resource = oci.core.SecurityList("securityListResource", compartment_id="ocid1.compartment.oc1...xx...xxx", vcn_id=test_vcn.id, display_name="sc_list", egress_security_rules=[oci.core.SecurityListEgressSecurityRuleArgs( destination="0.0.0.0/0", protocol="all", destination_type="CIDR_BLOCK", stateless=False, )], ingress_security_rules=[ oci.core.SecurityListIngressSecurityRuleArgs( protocol="6", source="0.0.0.0/0", description="Sor SSH", tcp_options=oci.core.SecurityListIngressSecurityRuleTcpOptionsArgs( max=22, min=22, ), source_type="CIDR_BLOCK", stateless=False, ), oci.core.SecurityListIngressSecurityRuleArgs( protocol="1", source="0.0.0.0/0", description="ICMP", icmp_options=oci.core.SecurityListIngressSecurityRuleIcmpOptionsArgs( type=3, code=4, ), source_type="CIDR_BLOCK", stateless=False, ) ] ) # Create a Public Subnet test_public_subnet = oci.core.Subnet("test_public_subnet", cidr_block="10.0.0.0/24", compartment_id="ocid1.compartment.oc1...xx...xxx", vcn_id=test_vcn.id , display_name="public_subnet", dns_label="publicsubnet", prohibit_internet_ingress="False", prohibit_public_ip_on_vnic="False", route_table_id=test_route_table.id, security_list_ids=[security_list_resource.id]) # Create a Private Subnet test_Private_subnet = oci.core.Subnet("test_private_subnet", cidr_block="10.0.1.0/24", compartment_id="ocid1.compartment.oc1...xx...xxx", vcn_id=test_vcn.id , display_name="private_subnet", dns_label="privatesubnet", prohibit_internet_ingress="true", prohibit_public_ip_on_vnic="true")
このコードは、OCIのVCNと関連リソースをプロビジョニングします。インターネット・ゲートウェイを作成し、ルーティング用にルート表をアタッチし、ネットワーク・トラフィックを制御するためのセキュリティ・リストを設定します。また、それぞれがCIDRブロックやDNSラベルなどの特定のネットワーク構成を持つ、VCN内にパブリック・サブネットとプライベート・サブネットの両方が作成されます。これにより、プライベート・サブネットによってインスタンスへのインターネット・アクセスおよびパブリックIPの割当てが禁止され、ネットワーク・セキュリティが強化されます。
-
-
VCNコードをデプロイします。
-
次のコマンドを実行して、VCNリソースをデプロイします。
pulumi up -
Pulumiは、コードで定義されたリソースを検出し、デプロイメントの確認を求めます。変更を確認し、プロンプトが表示されたら、
yesと入力して続行します。
-
-
デプロイメントが完了したら、VCNおよびその他のリソースがOCIにプロビジョニングされていることを確認します。OCIコンソールを確認するか、Oracle Cloud Infrastructureコマンドライン・インタフェース(OCI CLI)を使用してコンパートメントのリソースをリストできます。
タスク2: コンピュート・インスタンスの作成
Pulumiを使用してOCI Computeインスタンスを既存のVCNに追加することで、OCIデプロイメントを拡張しましょう。
-
Pulumiプロジェクトにアクセスするには、Pulumiプロジェクトを含むディレクトリに移動し、
__main__.pyファイルを開きます。 -
次のコードをコピーして
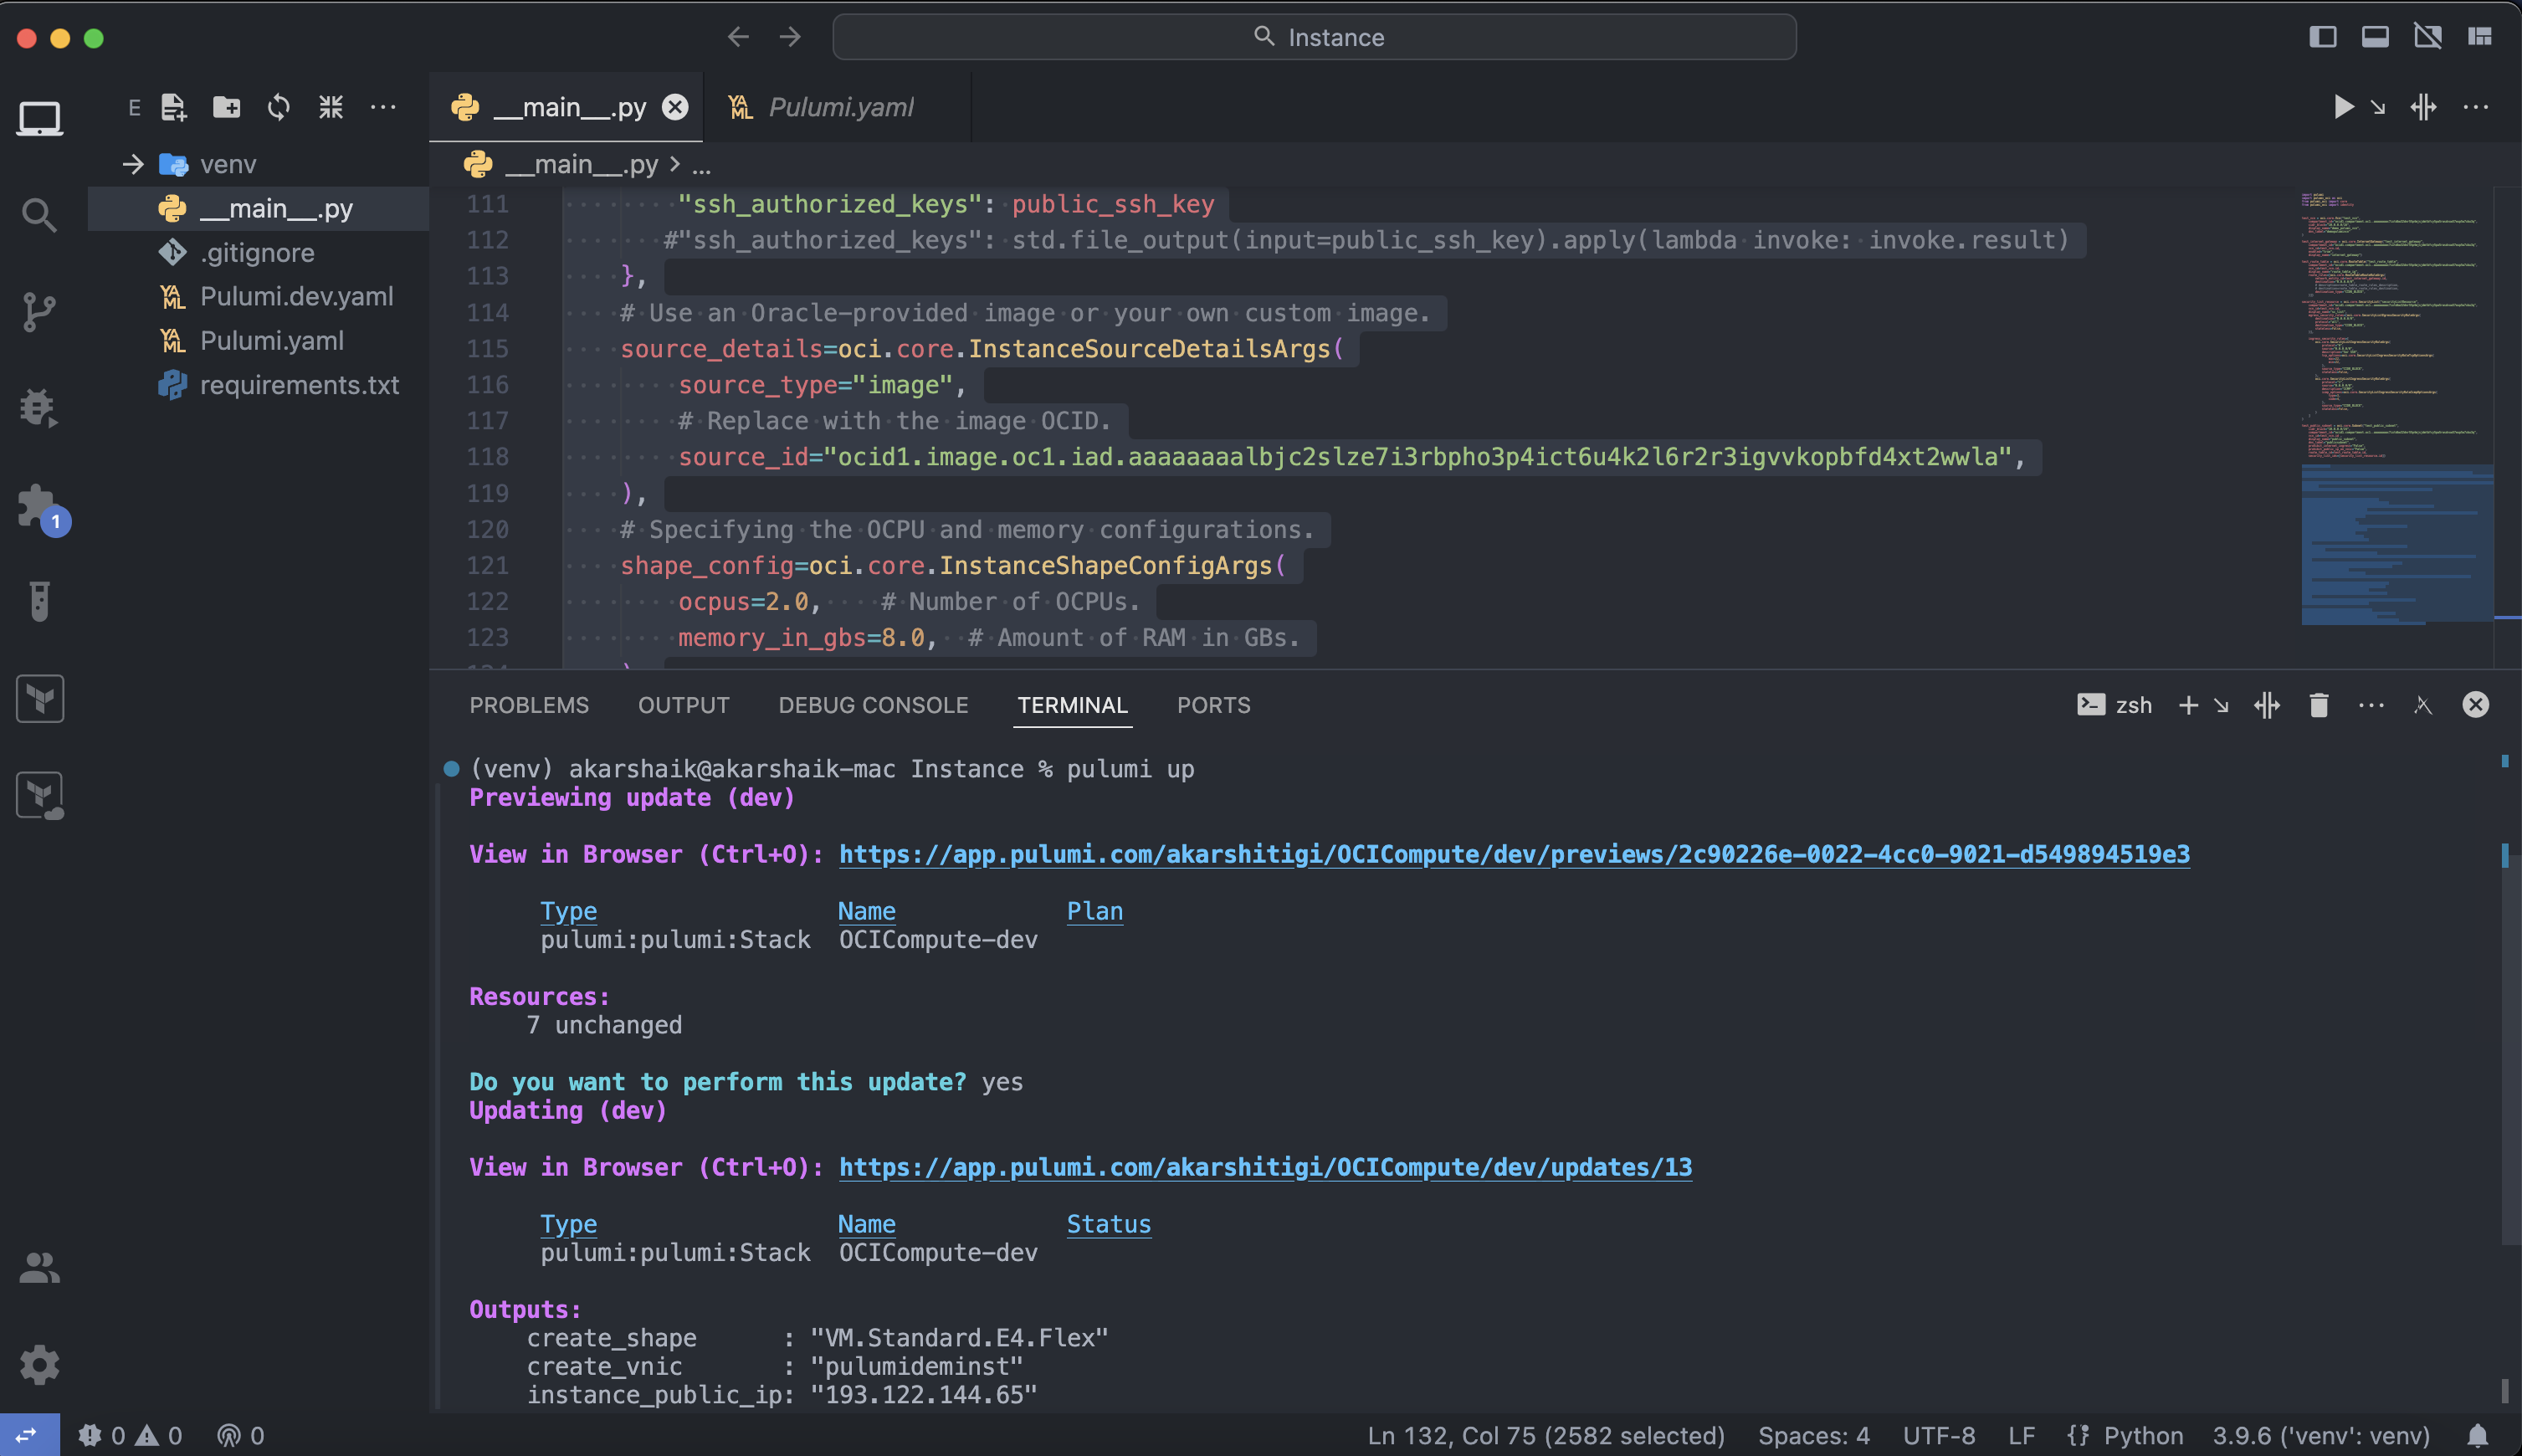
__main__.pyファイルに貼り付け、既存のVCNデプロイメント・コードの後に更新します。# Create a Compute Instance compartment_id = "ocid1.compartment.oc1..xxxxxx" test_availability_domains = oci.identity.get_availability_domains(compartment_id="ocid1.compartment.oc1.xxx") public_ssh_key = "Copy and Paste the Public SSH Key" instance = oci.core.Instance("my-vm-instance", # Replace with your desired availability domain. availability_domain=test_availability_domains.availability_domains[0].name, # Replace with your compartment ID. compartment_id="ocid1.compartment.oc1..xxxxxxxx", # Using VM.Standard.E4.Flex shape. shape="VM.Standard.E4.Flex", # Replace with your subnet ID. create_vnic_details=oci.core.InstanceCreateVnicDetailsArgs( assign_private_dns_record=True, assign_public_ip="true", display_name="pulumideminst", subnet_id=test_public_subnet.id, ), # Metadata for the instance, including SSH keys for access. metadata={ "ssh_authorized_keys": public_ssh_key #"ssh_authorized_keys": std.file_output(input=public_ssh_key).apply(lambda invoke: invoke.result) }, # Use an Oracle-provided image or your own custom image. source_details=oci.core.InstanceSourceDetailsArgs( source_type="image", # Replace with the image OCID. source_id="ocid1.image.oc1.iad.aaaaaaaalbjc2slze7i3rbpho3p4ict6u4k2l6r2r3igvvkopbfd4xt2wwla", ), # Specifying the OCPU and memory configurations. shape_config=oci.core.InstanceShapeConfigArgs( ocpus=2.0, # Number of OCPUs. memory_in_gbs=8.0, # Amount of RAM in GBs. ), # Additional arguments like display name, can be specified here. display_name="pulumidemo_instance",) # Exporting the public IP of the instance. pulumi.export('instance_public_ip', instance.public_ip), pulumi.export('create_shape', instance.shape) pulumi.export('create_vnic', instance.create_vnic_details) pulumi.export('create_vnic', instance.create_vnic_details["display_name"])ocid1.compartment.oc1.xxxxxxxをコンパートメントIDに、VM.Standard.E4.Flexを目的のインスタンス・シェイプに、ocid1.image.oc1.iad.xxxxxxxを目的のイメージIDに、YOUR_SSH_PUBLIC_KEYをSSH公開キーに置き換えます。 -
変更を
__main__.pyに保存し、Pulumiコマンドライン・インタフェースを使用して更新されたスタックをデプロイします。pulumi up -
デプロイメント後、コンピュート・インスタンスがVCN内で正常にプロビジョニングされたことを確認します。OCIコンソールを確認することも、OCI CLIを使用してコンパートメント内のインスタンスをリストすることもできます。
-
SSHを介してOCI Computeインスタンスにアクセスできるようになりました。アクセスに必要なセキュリティ・グループおよびルールが構成されていることを確認します。

関連リンク
承認
- 著者 - Akarsha I K (クラウド・アーキテクト)、Maninder Flora (クラウド・アーキテクト)
その他の学習リソース
docs.oracle.com/learnの他のラボをご覧いただくか、Oracle Learning YouTubeチャネルで無料のラーニング・コンテンツにアクセスしてください。また、education.oracle.com/learning-explorerにアクセスしてOracle Learning Explorerになります。
製品ドキュメントは、Oracle Help Centerを参照してください。
Deploy Compute Instance and VCN using Pulumi in Oracle Cloud Infrastructure
F99043-01
May 2024