| Oracle® Java ME Embedded Getting Started Guide for the Reference Platform (Freescale FRDM-K64F) Release 8.1 Developer Preview E55005-02 |
|

 Previous |
 Next |
| Oracle® Java ME Embedded Getting Started Guide for the Reference Platform (Freescale FRDM-K64F) Release 8.1 Developer Preview E55005-02 |
|
Previous |
Next |
Beta Draft: 2014-11-14
This chapter contains information about using Java ME SDK 8.1 to install and run applications.
This chapter contains the following sections:
To connect to the K64F board via a serial port, perform the following steps.
Plug in a micro-USB type B connector to the K64F board and another end of the USB cable to your host computer.
Plug one end of a network cable into a switch, router, or network wall socket, and the other end to the K64F board.
Start a PuTTY executable file on your desktop computer.
Select Serial as a connection type.
Specify the COM port that corresponds to the K64F board, which is displayed in the Windows Device Manager as mbed SerialPort(COMxx), and the default baud rate 9600, as shown in Figure 2-1.
Figure 2-1 Serial Connection to the K64F Board
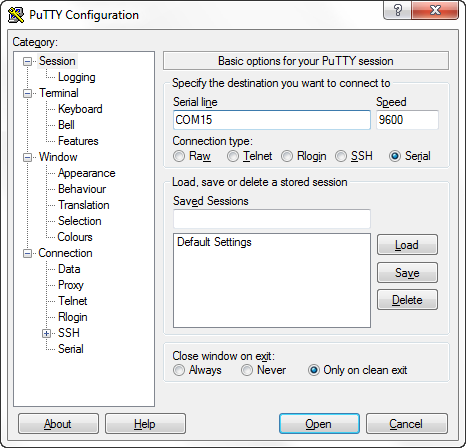
Click Terminal category and select the Implicit CR in every LF option.
|
Note: It is recommended that you save the session and load it in future connections. |
Click Open.
Press Reset button on the board.
After the connection is established, the PuTTY terminal windows displays the IP address of the K64F board and other logging messages.
If you manually installed the Oracle Java ME Embedded software on the K64F board, then you need to add the board to the Device Connection Manager as described in this section.
Ensure that the K64F board is connected to your host computer and to a network socket.
Right-click the Oracle Java ME SDK Device Manager icon on the notification area and choose Manage Device Connections.
If there is no Device Manager icon, start the Java ME SDK Device Connections Manager located at <SDK Installation Folder>/bin/device-manager.exe
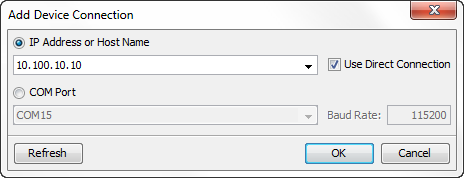
Click Add and select the type of connection.
Select the IP Address or Host Name option if you want to establish a network connection to the board. Then type the IP address of the K64F board reported earlier in the PuTTY terminal window and click OK.
Select the COM Port option, if you want to establish a serial connection. Then choose the COM port number in the drop-down list and click OK.
Figure 2-2 Adding IP Address of the K64F Board
After the K64F board is registered, the Device Connections Manager displays its IP address in the Connections column and its status is Connected as shown in Figure 2-3.
Figure 2-3 Device Connections Manager with K64F Connected
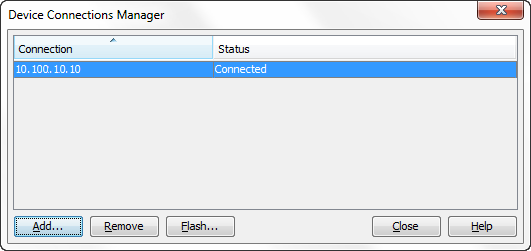
Note that the host-side firewall, if not configured properly, can cause connection issues. In this case the Status column displays Connecting. Edit your firewall configuration settings to open TCP port 2201.
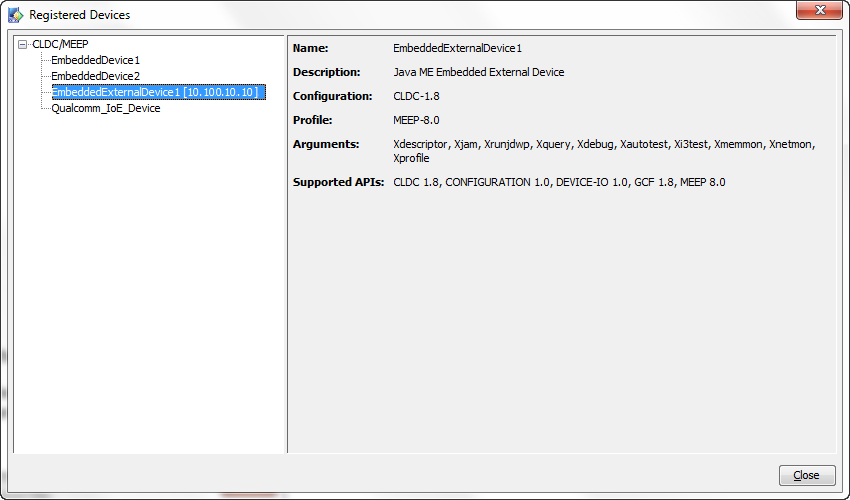
The registered device obtains a name of the form EmbeddedExternalDevice1. To learn the name of the device, right-click the Java ME Device Manager icon on the notification area and click Registered Devices. EmbeddedExternalDevice2 [10.100.10.10] in Figure 2-4 corresponds to the Freescale FRDM-K64F board.
If you want to change the type of connection to the K64F board, do the following.
In the Device Connections Manager window, remove the K64F board.
Right-click the Device Connections Manager icon on the notification area and choose Exit.
Start the Device Connection Manager again and add the K64F board using another type of connection.
You can use the Java ME Platform SDK 8.1 to install and run applications. Note that you can run only one application at a time.
In the Windows Start menu, find the Java ME Platform SDK 8.1 and launch the Device Selector utility.
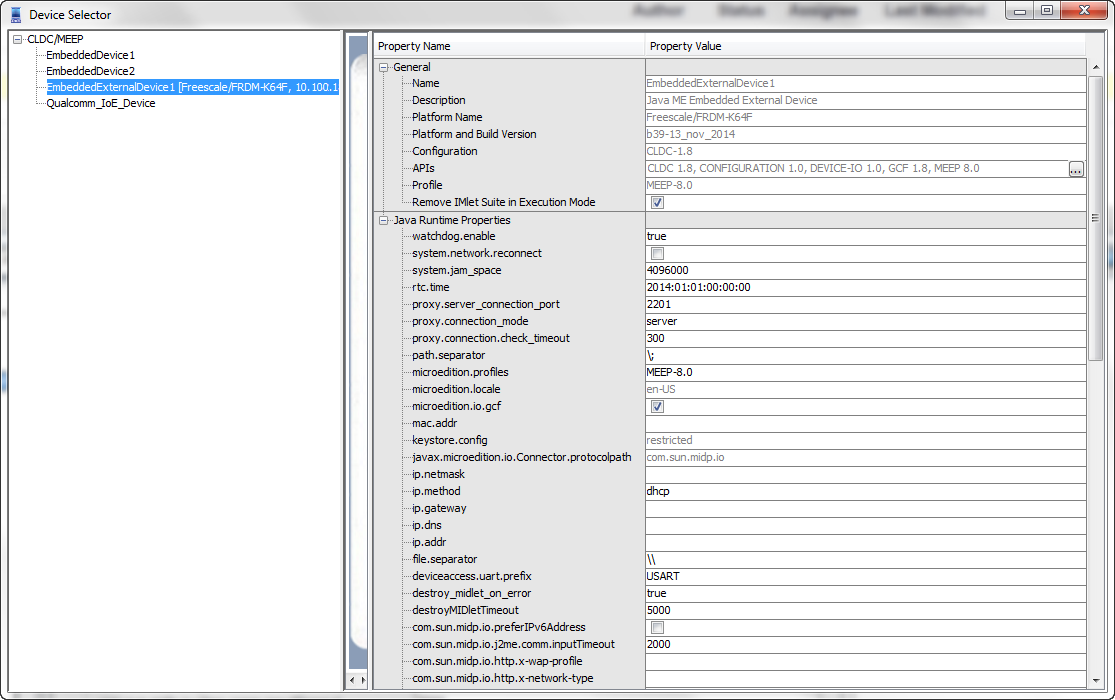
Because you have added the device to the Device Connections Manager, the Device Selector displays it among the available devices. EmbeddedExternalDevice1 [Freescale/FRDM-K64F, <IP Address>] in Figure 2-5 corresponds to the Freescale FRDM-K64F board.
Right click on EmbeddedExternalDevice1 [Freescale/FRDM-K64F] and select Run JAR or JAD command.
Select the target .JAR or .JAD file and wait until the Device Selector installs the application.
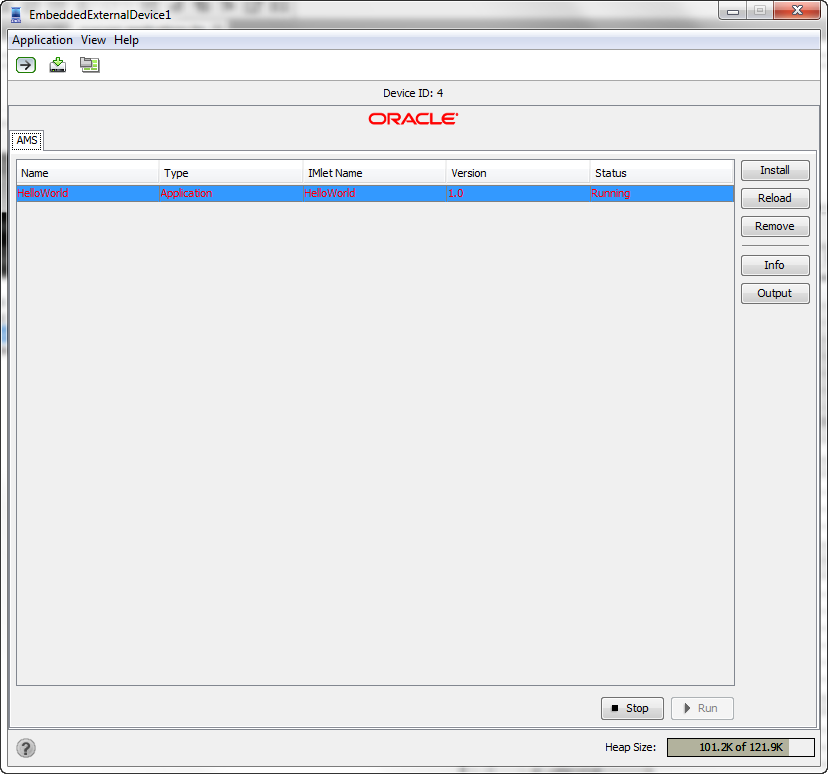
If an IMlet is installed successfully, the Device Selector runs it automatically. Figure 2-6 shows the HelloWorld application running. You can use Stop and Run buttons to manage the application.
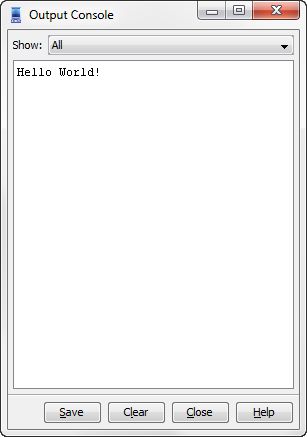
Click Output to view the results of the IMlet execution.
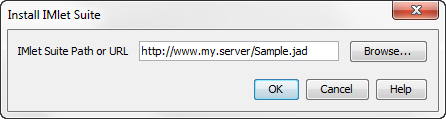
At any time you can install more IMlets by clicking Install button or the corresponding icon. You can specify any location in the file system of the host computer or any URL. The latter option is shown in Figure 2-8.
You can use the Command-Line Interface (CLI) to install, run, stop, and remove your applications. Before you proceed with procedures below, study the CLI introduction at
http://docs.oracle.com/javame/8.1/me-dev-guide/agentconsole.htm.
The following procedure explains how to install and run an IMlet by using the CLI.
Connect to the K64F board as described in Connecting to the K64F Board via a Serial Port.
Change to the directory with the extracted binary ZIP on the host desktop and then change to the util directory.
Start the Developer Agent program by typing the following command:
C:\mydir\util java -jar proxy.jar -socket <K64F IP Address>
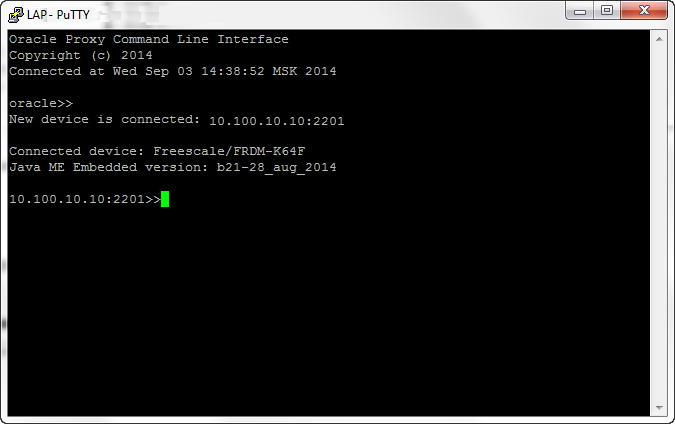
You should see an output similar to the following:
Trying to open socket connection with device: <IP Address>:2201
Connected to the socket Socket[addr=/<IP address>, port 2201, localport=54784]
Connect to the CLI, as described in the Java ME Embedded Developer's Guide. After you successfully connected to the CLI, you should see the following output in the PuTTY terminal window.
Type the following command:
ams-install file:///C:/<some directory>/HelloWorld.jad hostdownload
Note that <some directory> must be an actual path to your HellowWorld.jad file. You should see the following feedback as the application is installed:
<<ams-install,start install,file:///c:<some directory>/HelloWorld.jad
<<ams-install,install status: stage DOWNLOADING_DESCRIPTOR, 0%
<<ams-install,install status: stage VERIFYING, 100%
<<ams-install,install status: stage DONE, 100%
<<ams-install,OK,install success
You can also install an IMlet from a remote server by using the following command:
<<ams-install http://<some URL>/HelloWorld.jad
Type ams-list at the prompt to check if the HelloWorld IMlet is listed. In the following example, the suite id of HelloWorld is 0.
ams-list
<<ams-list,0.HelloWorld|Vendor,STOPPED
<<ams-list,OK,1 suites are installed
Start the HelloWorld application with the following command:
ams-run 0
<<ams-run,OK,started
Stop the HelloWorld application with the following command:
ams-stop 0
<<ams-stop,OK,stopped
See the Using the Command-Line Interface section of the Java ME Embedded Developer's Guide for more information about the available CLI commands.
To run the signed IMlets on the K64F board, ensure that the system date and time are set on the board correctly.
The date and time are set by the rtc.time property in the jwc_properties.ini file. The default value is 2014:01:01:00:00:00.
You can change the time either by editing the jwc_properties.ini file on the SD card or by using the set-property command as follows:
set-property rtc.time YYYY:MM:DD:HH:MM:SS
save-properties
Press the Reset button to restart Java on the board.
Whenever you encounter that the time changed to its default value, follow the described procedure to restore the actual time.
The Freescale FRDM-K64F board is a memory constrained device which implies that developers should take care to reduce memory usage of applications. The K64F board has approximately 60 Kb RAM for applications.
To reduce the memory usage of application, apply the following guidelines.
Turn off the debugging information during compilation
Use obfuscation to remove unnecessary classes and reduce the size of symbol information
Limit the number and size of application classes and objects
Consider removing or reducing non-essential functionality in the application code
|
 Copyright © 2014, Oracle and/or its affiliates. All rights reserved. Legal Notices |
|