Refining Selections of Data
As you specify which data members to include in an analysis, you create selections of data from the data source. Each selection specifies the criteria for a set of members for a particular column, such as Product or Geography. Each selection consists of one or more steps. A step is an instruction that affects the selection, such as add Product members whose values contain the text "ABC." The order in which steps are performed affects the selection of data. Each step acts incrementally on the results from previous steps, rather than acting on all the members for that column.
For more information, see About Filters and Selection Steps.
Creating Selection Steps
You create a selection step to provide the instructions for specifying the criteria for selections of data from the data source. When you add a column to an analysis, an implicit "Start with all members" step is added. The "all" implies all the members of the column after filters are applied.
For example, you can create a step to specify criteria for the following members in an Office column: Baltimore, Austin, and Athens.
To create a selection step for an analysis:
-
Open the analysis for editing.
-
Select the Criteria tab.
-
Display the Selection Steps pane by clicking Show Selection Steps Pane on the toolbar.
-
Click Then, New Step, and select the kind of step to create. For example, you can specify a list of selected members for the step.
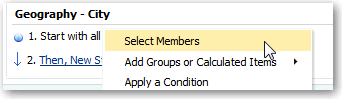
Description of the illustration filtering27.gif
Depending on your selection, the New Member Step, New Select Existing Groups and Calculated Items, New Group, New Calculated Item, or New Condition Step dialog is displayed.
-
For a member step, select Add, Keep Only, or Remove from the Action list.
The following table describes what you can do with these options:
Option Description Add Use this option to add the selected members to the selection. Keep Only Use this option to keep only the selected members and remove all others. For example, you can keep only the sales that are generated by a selected Sales Associate.
Remove Use this option to remove the selected members from the selection. For example, you can remove the Eastern and Western regions from the selection.
-
If you are creating a member step, then move the members to include in the step from the Available area to the Selected area.
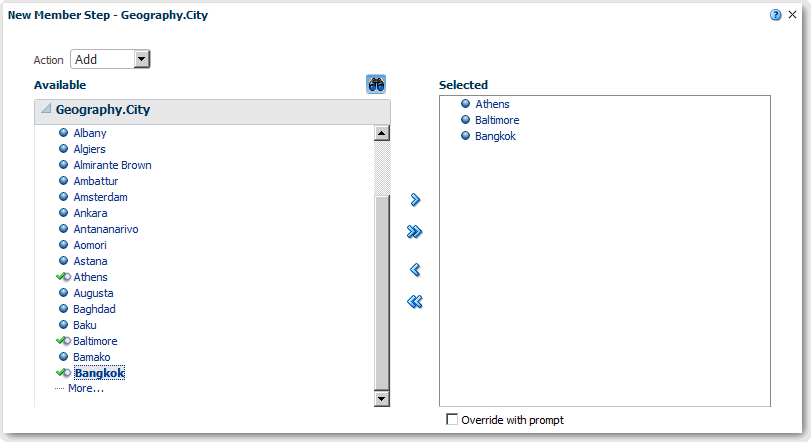
Description of the illustration filtering28.gif
-
For a step that involves a group or calculated item, select an existing group or calculated item or create a new one.
-
If you are creating a step that involves a condition, then select the appropriate condition type. For example, select X>=Y to correspond to something like Sales >= Costs. For more information, see Advanced Techniques: Creating Condition Steps.
Description of the illustration filtering29.gif
-
Specify the appropriate values for the condition such as the action, measure, and operator to use for the values of the column.
-
Click OK.
Editing Selection Steps
You can edit existing selection steps. For example, you can edit a member step for the Offices column in the Brand Revenue analysis. You can add Augusta to the list of cities.
To edit a selection step for an analysis:
-
Open the analysis for editing.
-
Click on the Results tab.
-
On the Selection Steps pane, hover the mouse pointer over the selection step that you want to edit.
-
Click the pencil icon on the toolbar. A dialog is displayed to correspond to that type of selection step.
-
Perform the appropriate edits. For example, add one or more members from the column to the step.
-
Click OK.
To edit a selection step that has been saved as a group object:
-
In the Catalog pane, navigate to the location of the saved object.
-
On the Catalog pane toolbar, click Edit.
-
In the Edit Group dialog, perform the appropriate edits.
-
Click OK.
Saving Selection Steps for Reuse
If you have created a set of selection steps, then you can reuse them if you save them as a group in the catalog. For example, you can reuse the selection steps for the Offices column as a group object. Doing this enables the set to be used inline with the Brand Revenue analysis.
Note:
You can save a set of selection steps only if the set includes more than just a single Start With step in the list for a column. You cannot save a set of steps if one of the step includes a calculated item.For more information about reusing groups, see Reusing a Group or Calculated Item in an Analysis.
To save selection steps as a group object:
-
Open the analysis for editing.
-
On the Results tab, display the Selection Steps pane.
-
Click Save Selection Steps to the far right of the column name.
The Save Selection Steps dialog is displayed.
-
In the Save In field, specify a location where you want to save the selection steps. If you want to keep the filter for your personal use, then save it in /My Folders/subfolder. If you want to share the filter with others, save it in /Shared Folders/subfolder.
-
Enter a name for the saved selection steps.
-
Click OK.
The selection step is saved as an object in the catalog.
Advanced Techniques: Creating Condition Steps
The Creating Selection Steps section describes the general procedure for creating selection steps. One type of step that you can create is a condition step. You specify that members are selected from a column based on a condition. The condition can be one of various types including based on measures or on top/bottom values. This member list is dynamic and determined at runtime. For example, you can select the top 5% of members based on Brand Revenue.
To create a condition step:
-
Open the analysis for editing.
-
Select the Criteria tab.
-
Display the Selection Steps pane by clicking Show Selection Steps Pane on the toolbar.
-
Click Then, New Step, then select Apply a Condition.
-
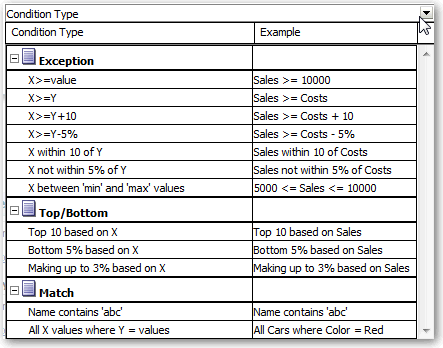
In the New Condition Step dialog, select the type of condition to create, as described in the following table.
Type Description Exception Select members using comparison values for measure columns. A sample condition is "Sales > Cost +10%." Top/Bottom Select the specified number of members after ranking the members by the specified measure column. You can specify an exact number of members or a percentage of the total members. Sample conditions are "Top 10 based on Sales" and "Top 5% based on cost. Match Select members based on matches with text strings and attribute values. A sample condition is "Name contains abc." This type is available only for columns that have a data type of string. Time/Ordinal Select members based on ranges of time and on hierarchical levels. A sample condition is "From July 2012 to December 2012." This type is available only for columns with a data type that relates to time.
Description of the illustration filtering29.gif
The components in this dialog differ slightly, depending on which type you select.
-
In the Action box, select the type of action to create for the members. You can select to add the selected members to the selection, keep only the selected members and remove all others. Or, you can select to remove the selected members from the selection.
-
In the box beside the action type, select the column for whose members you are creating the condition step.
-
Enter the appropriate values for the various fields of the dialog. For example, select the Operator based on the type of condition. For example, select Within for the Exception type.
-
Use the Override with box to specify whether an analysis prompt, a dashboard prompt, or a variable can override the values that you specify in this condition. Depending on what you are overriding, you can override certain values with a prompt, a presentation variable, a session variable, or a repository variable.
If you select a variable type, then enter the name of the variable in the field. For example, suppose that you have a column called EMPLOYEE_ID. You can specify USER as the session variable with which to override the value of that column. When a user signs in, the column value is set to his user name. For more information on variables, see Advanced Techniques: Referencing Stored Values in Variables.
In a list of steps, specify that only one step in the list can be overridden by a prompt or presentation variable.
-
In the For area, qualify all of the dimensions of the analysis other than the dimension whose members you want to select. Do this when creating condition steps of type Exception or Top/Bottom. For each dimension, you select which of its members to include. You can select specific members, or All, which specifies to aggregate the members when creating the condition. For example, suppose that you are qualifying the Region dimension. You can select a specific region, such as East, whose value is used in the New Condition Step dialog condition. If you select All, then the values of all regions are aggregated and used in the condition.
You can use the For area to create a qualified data reference (QDR). A QDR is a qualifier that limits one or more of the dimensions to retrieve a single value for a measure column. A QDR is useful when you want to temporarily reference a measure column value without affecting the current status of the dimensions. The following is an example of a QDR:
Add members of Total Products (Rgd Sk Lvl) where "A - Sample Sales"."Base Facts"."1- Revenue", For: Cust Segments Hier: 'Active Singles', 'Baby Boomers' is greater than "A - Sample Sales"."Base Facts"."1- Revenue", For: Cust Segments"When you specify a QDR, you can specify multiple members for limiting the dimensions. When you specify multiple members, the measure column value is aggregated using the default aggregation. For example, suppose that you want to create a condition for displaying those Regions in which Units is greater than 100. Suppose that you create a QDR for the Year dimension that specifies 2010 and 2011 and that the default aggregation is Sum. If the values for 2010 and 2011 for the Central region are 50 and 60 respectively, then both those years are displayed. Their sum exceeds the 100 units that was indicated.
-
Click OK.