2 Working on Tasks in Process Workspace
This chapter describes how to set user preferences and act on tasks with Oracle Business Process Management Workspace, including claiming and releasing tasks; reassigning, delegating, and routing tasks; associating comments and attachments to tasks; and setting rules and vacation periods.
This chapter contains these topics:
-
Section 2.1, "Claiming and Releasing Tasks in Process Workspace"
-
Section 2.2, "Modifying History Approval Options in the Task Details Page"
-
Section 2.3, "Reassigning and Delegating Tasks in Process Workspace"
-
Section 2.4, "Adding Comments and Attachments to Tasks in Process Workspace"
-
Section 2.6, "Setting Rules, Vacation Periods, and Notification Preferences in Process Workspace"
-
Section 2.8, "Creating Subtasks in Tasks in Process Workspace"
-
Section 2.9, "Acting on Tasks that Require Passwords in Process Workspace"
-
Section 2.10, "Acting on a Task that Requires a Digital Signature in Process Workspace"
-
Section 2.12, "Evidence Store Service and Digital Signatures"
For information about troubleshooting human workflow issues, see Oracle Fusion Middleware Administrator's Guide for Oracle SOA Suite and Oracle Business Process Management Suite, "Human Workflow Troubleshooting".
2.1 Claiming and Releasing Tasks in Process Workspace
If a task is assigned to a group or multiple users, then the task must be claimed first. Claim is the only action available in the Task Action list for group or multiuser assignments. After a task is claimed, all applicable actions are listed.
Note:
If the task has the auto claim option set, the user does not need to claim the task. The custom action is available for the user.If a task is assigned to a group or multiple users, it can be released by the user who claimed it. Any of the other assignees can then claim and complete the task.
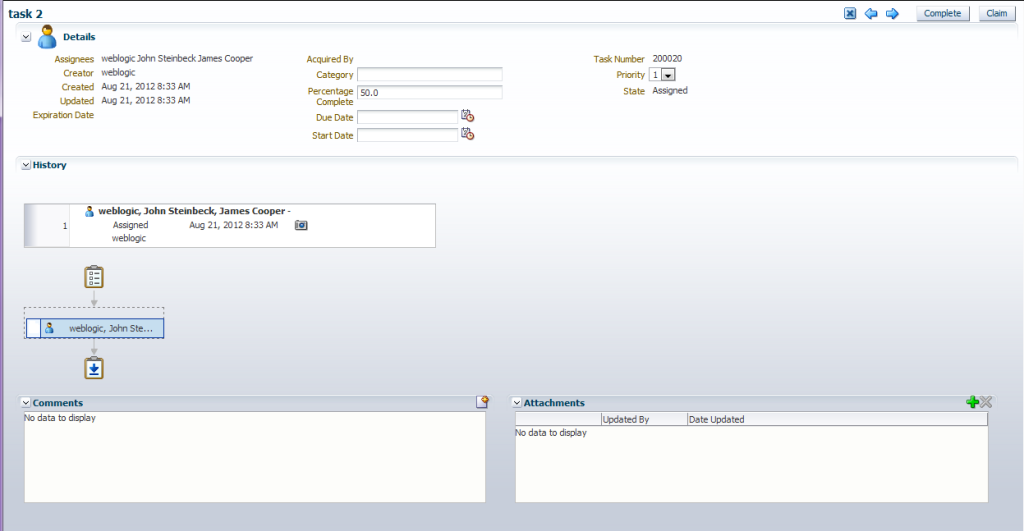
To claim a task, open it in the Task Details page, then click the Claim button.
Similarly, to release a task, open it in the Task Details page, then click the Release button.
Figure 2-1 shows part of a Task Details page with the Claim button in the upper right corner.
2.2 Modifying History Approval Options in the Task Details Page
This section includes the following topics:
-
Section 2.2.1, "Combining Repeated Approvals of a Task in the History"
-
Section 2.2.3, "Including New Participants in an Existing Task"
2.2.1 Combining Repeated Approvals of a Task in the History
At times you may want to combine tasks that have identical approval sequences into one combined approval—for example, to approve a purchase order that has many identical line items each requiring its own approval. Rather than approving each line item one-by-one, you can combine them into a single approval and then approve that combined task.
After you combine tasks into one repeated approval, you cannot alter the sequence of those tasks; for example, you cannot add, edit, or delete a participant in that task.
To combine repeated approvals of a task:
-
In the Process Workspace task list, select the task. The Task Details window appears.
-
In the Task Details window, expand the History section.
-
Click Options as shown in Figure 2-2.
-
Verify that Combine Repeated Approvals is selected. This is the default setting.
To separate the tasks, clear the Combine Repeated Approvals check box.
-
Click Apply.

2.2.2 Excluding System Approvals from a Task
To remove all system generated updates from the History of a task, you must select the option to exclude system approvals. To select Exclude system approvals:
-
In the Process Workspace task list, select the task. The Task Details window appears.
-
In the Task Details window, expand the History section.
-
Click Options as shown in Figure 2-2.
-
Select Exclude system approvals.
-
Click Apply.
2.2.3 Including New Participants in an Existing Task
To include new participants in a task, you must select the Including Future Approvals option in the History pane. This option adds participants to the task history and displays the actions they perform on the task.
-
In the Process Workspace task list, select the task for which you want to include new participants. The Task Details window appears.
-
In the Task Details window, expand the History section.
-
Click Options as shown in Figure 2-2.
-
Verify that Include Future approvals is selected. This is the default setting.
To disable this option, clear the Include Future approvals check box.
-
Click Apply.
2.3 Reassigning and Delegating Tasks in Process Workspace
To reassign or delegate a task:
-
In the Task Details window, from the Actions list, select Reassign. The Reassign Task dialog box appears.
-
Select either Reassign or Delegate.
Delegate differs from Reassign in that the privileges of the delegatee are based on the delegator's privileges. This function can be used by managers' assistants, for example.
-
Enter a user or group name or browse for a user or group name, as shown in Figure 2-3. You can use an asterisk (*) as a wildcard.
A supervisor can reassign tasks to any of his or her subordinates at any time.
-
Select the users or groups to which you are reassigning and click OK.
You can reassign to multiple users or groups. One of the assignees must claim the task.
Note:
When task details have been upgraded from an earlier release, you may see a "Request Failed" error when executing the Reassign action. Actually, the reassign completes, and when you click OK again, a popup says the task is already assigned.To eliminate the error message, upgrade your taskflow applications by opening them in Oracle JDeveloper, then redeploy the task form.
2.4 Adding Comments and Attachments to Tasks in Process Workspace
You can add comments and attachments to a task by using the Task Details page.
For details about the Task Details page, see Section 1.3.2.2, "Using the Process Workspace Task Details Page"
-
In the My Tasks page, from the worklist pane, select the task to which you want to add a comment. The details for that task appear.
-
In the comments section of the Task Details page, specify whom you want to see the comment by clicking either:
-
Only task participants. This option shares the comment with previous and future assignees of this particular task.
-
All process participants. This option shares the comment with all participants in the process, regardless of the tasks assigned to them.
-
-
In the Create Comment dialog box, enter your comment.
Note:
-
If you are the initiator of the task, then your comment is shared with all process participants and not only with task assignees. The option to share with only task participants is not available to you.
-
Comments added to a task also appear in any subtasks of that task.
-
-
Click OK.
To add an attachment to a task:
-
In the Tasks page, from the worklist pane, select the task to which you want to add an attachment. The details for that task appear.
-
In the Attachments section of the Task Details page, click Add. The Add Attachment dialog box appears.
-
In the Add Attachment dialog box, select to share the attachment with either of the following:
-
Only task participants. This option shares the attachment with previous and future assignees of this particular task.
-
All process participants. This option shares the attachment with all participants in the process, regardless of the tasks assigned to them.
-
-
Select the attachment type.
If the task is not using Oracle WebCenter Content, then you see the following options:
-
URL. Selecting this option opens fields in which you specify the name and URL of the file.
-
Desktop File. Selecting this option opens a search field from which to browse for the file on your computer.
If the task is using Oracle WebCenter Content, then you see the following options:
-
URL. Selecting this option opens fields in which you specify the name and URL of the file.
-
Upload File to UCM. Selecting this option uploads the desktop file to Oracle WebCenter Content. When you select it, another dialog box prompts you for some or all of the following depending on how the task is modeled:
-
Description (optional)
-
Folder name: The folder in WebCenter Content server to which the attachment is uploaded. You must type the full folder path in WebCenter Content server. To display the Contribution Folders level in WebCenter Content, enter a forward slash (/), as shown in Figure 2-4. To display a list of destination folder within the Contribution Folders level, enter a forward slash (/), as shown in Figure 2-5.
Figure 2-4 Uploading an Attachment to Oracle WebCenter Content

Description of "Figure 2-4 Uploading an Attachment to Oracle WebCenter Content"
-
Document type: From this list, select the WebCenter Content document type.
-
Account (optional): From this list, select the account name.
-
Revision (optional): Type an integer for revision.
-
Release date (optional): Select the date at which the document is released. Prior to this date, the WebCenter Content document is not visible to WebCenter Content users.
-
Expiration date (optional): The date when the document expires. After this date, the WebCenter Content document is no longer visible to Oracle WebCenter Content users.
-
-
Associate UCM document. Selecting this option opens another dialog box prompting you for the document identifier. You can search for it by clicking the spyglass icon and, after you have located it, clicking OK.
After you have selected the attachment type, click OK.
-
-
In the Task Details pane, from the Actions list, select Save as shown in Figure 2-6. The attachment is deleted from the task.
Note:
If the attachment is stored in a content server such as WebCenter Content, then it is not deleted from the content server. If the attachment is stored in the SOA workflow repository, then you can access it by viewing the task snapshot from the task history.Figure 2-6 Saving an Attachment to a Task

Description of "Figure 2-6 Saving an Attachment to a Task"

To delete an attachment from a task:
-
In the Tasks page, from the worklist pane, select the task from which you want to delete an attachment. The details for that task appear in the Task Details pane.
-
In the Task Details pane, in the Attachments section, select the attachment you want to delete and click Delete. The Delete Attachment dialog box prompts you to confirm the deletion from UCM.
-
Confirm the deletion and click OK.
2.5 Requesting Information in Process Workspace
-
From the Task Details page, from the Actions list, select Request Information, as shown in Figure 2-7.
-
Request information from a task participant or from another user, as shown in Figure 2-8.
Figure 2-8 Requesting Information from Past Approvers or Another User, or Pushing the Task Back

Description of "Figure 2-8 Requesting Information from Past Approvers or Another User, or Pushing the Task Back"
If you use the Search icon to find a user name, the Identity Browser appears, as shown in Figure 2-9.
In Figure 2-9, in the ID column, the identifier, jstein, is a link. Clicking this link displays a details window with more information about this user.
Note:
If you are in a multi-tenancy environment, search for a user simply by the user identifier and not by the tenant identifier. For example, if the user identifier is jstein and the tenant identifier is company_name.jstein, you would search by using jstein. -
Add your comment.
-
Choose one of the following:
-
Route directly back to me
-
Require subsequent participants to retake action (Previous approvers must reapprove the task after the user submits the information)
-
-
Click OK.


2.6 Setting Rules, Vacation Periods, and Notification Preferences in Process Workspace
Rules act on tasks, either a specific task type or all the tasks assigned to a user or group. To set rules, from the Process Workspace toolbar, select Preferences. The Preferences window appears as shown in Figure 2-10.
Figure 2-10 Configuration Areas: My Rules Page

Description of "Figure 2-10 Configuration Areas: My Rules Page"
A rule cannot always apply to all circumstances in which it is used. For example, if a rule applies to multiple task types, it may not be possible to set the outcome for all tasks, because different tasks can have different outcomes.
Rules are executed in the order in which they are listed.
If a rule meets its filter conditions, then it is executed and no other rules are evaluated. For your rule to execute, you must be the only user assigned to that task. If the task is assigned to multiple users (including you), the rule does not execute.
You cannot specify business rules for ToDo tasks.
This section contains these topics:
-
Section 2.6.1, "How to Create User Rules in Process Workspace"
-
Section 2.6.2, "How to Create Group Rules in Process Workspace"
-
Section 2.6.3, "How to Enable a Vacation Period in Process Workspace"
2.6.1 How to Create User Rules in Process Workspace
Note:
The task type browser does not support a search using NLS strings for task name and category.-
From the Process Workspace toolbar, select Preferences. The User Preferences pane is displayed.
-
In the User Preferences area, click Rules. The My Rules and Other Rules pages appear in the right pane. The My Rules page is selected by default.
-
In the My Rules page, in the Rules section, select My Rules, then click Add New Rule. The My Rule screen appears in the right pane.
-
Provide a name for the rule.
-
If the rule is a vacation rule, select Use as a vacation rule. The start and end dates of the rule are automatically synchronized with the vacation period.
For instructions about setting a vacation period that is synchronized with the vacation rule, see Section 2.6.3, "How to Enable a Vacation Period in Process Workspace."
-
From the Tasks list, select either All Tasks or Tasks matching these conditions.
If you select All Tasks, then no conditions need to be specified. If you select Tasks matching these conditions, then specify the conditions by clicking Add Condition. The conditions are described in Table 1-9. You cannot search by translated text.
These conditions further define the rule, such as specifying that a rule acts on priority 1 tasks only, or that a rule acts on tasks created by a specific user. The conditions can be based on standard task attributes and any mapped attributes that were mapped for the specific tasks. See Section 9.4.1, "How to Specify Mapped Attributes" for more information.
-
Select Execute rule only between these dates and provide rule execution dates.
-
In the ACTION area, select actions to be taken. User rules do the following actions:
-
Reassign to—You can reassign tasks to subordinates or groups you manage. If you were granted the BPMWorkflowReassign role, then you can reassign tasks to any user or group.
-
Delegate to—You can delegate to any user or group. Any access rights or privileges for completing the task are determined according to the original user who delegated the task. (Any subsequent delegations or reassignments do not change this from the original delegating user.)
-
Set outcome to—You can specify an automatic outcome if the workflow task was designed for those outcomes, for example, accepting or rejecting the task. The rule must be for a specific task type. If a rule is for all task types, then this option is not displayed.
-
Take no action—Use this action to prevent other more general rules from applying. For example, to reassign all your tasks to another user while you are on vacation, except for loan requests, for which you want no action taken, then create two rules. The first rule specifies that no action is taken for loan requests; the second rule specifies that all tasks are reassigned to another user. The first rule prevents reassignment for loan requests.
-
-
Click Save.
The new rule appears under the My Rules node.
2.6.2 How to Create Group Rules in Process Workspace
Note:
The task type browser does not support a search using NLS strings for task name and category.Creating a group rule is similar to creating a user rule, with the addition of a list of the groups that you (as the logged-in user) manage. Examples of group rules include:
-
Assigning tasks from a particular customer to a member of the group
-
Ensuring an even distribution of task assignments to members of a group by using round-robin assignment
-
Ensuring that high-priority tasks are routed to the least busy member of a group
Group rules do the following actions:
-
Assign to member via—You can specify a criterion to determine which member of the group gets the assignment. This dynamic assignment criterion can include round-robin assignment, assignment to the least busy group member, or assignment to the most productive group member. You can also add your custom functions for allocating tasks to users in a group.
-
Assign to—As with user rules, you can assign tasks to subordinates or groups you directly manage. If you have been granted the BPMWorkflowReassign role, then you can reassign tasks to any user or group (outside your management hierarchy).
-
Take no action—As with user rules, you can create a rule with a condition that prevents a more generic rule from being executed.
-
From the Process Workspace toolbar, select Preferences. The Preferences window is displayed.
-
In the User Preferences area, click Rules. The My Rules and Other Rules pages appear in the right pane. The My Rules page is selected.
-
Click the Other Rules tab.
-
Select My Group from the list.
-
Enter a group name, or click the Search icon to browse for a group.
The Identity Browser dialog box opens for you to find and select a group.
-
Select the group name under the Group Rules node and click Add New Rule, as shown in Figure 2-11.
-
Select Execute rule only between these dates and provide rule execution dates.
-
From the Tasks list, select either All Tasks or Tasks matching these conditions.
If you select All Tasks, then no conditions need to be specified. If you select Tasks matching these conditions, then specify the conditions by clicking Add condition. The conditions are described in Table 1-9.
These conditions further define the rule, such as specifying that a rule acts on priority 1 tasks only, or that a rule acts on tasks created by a specific user. The conditions can be based on standard task attributes and any mapped attributes that were mapped for the specific tasks. See Section 9.4.1, "How to Specify Mapped Attributes" for more information.
-
In the ACTION area, select actions to be taken. User rules do the following actions:
-
Reassign to—You can reassign tasks to subordinates or groups you manage. If you were granted the BPMWorkflowReassign role, then you can reassign tasks to any user or group.
-
Delegate to—You can delegate to any user or group. Any access rights or privileges for completing the task are determined according to the original user who delegated the task. (Any subsequent delegations or reassignments do not change this from the original delegating user.)
-
Set outcome to—You can specify an automatic outcome if the workflow task was designed for those outcomes, for example, accepting or rejecting the task. The rule must be for a specific task type. If a rule is for all task types, then this option is not displayed.
-
Take no action—Use this action to prevent other more general rules from applying. For example, to reassign all your tasks to another user while you are on vacation, except for loan requests, for which you want no action taken, then create two rules. The first rule specifies that no action is taken for loan requests; the second rule specifies that all tasks are reassigned to another user. The first rule prevents reassignment for loan requests.
-
-
Click Save.

2.6.3 How to Enable a Vacation Period in Process Workspace
You can set a vacation period so that you are removed from automatic task assignment during the dates you specify.
Vacation rules are not executed for ToDo tasks.
For instructions on setting a vacation rule that is synchronized with the vacation period, see Section 2.6.1, "How to Create User Rules in Process Workspace".
-
Click the Preferences link. The Preferences page appears.
-
In the User Preferences panel, click Rules. The middle pane displays the Rules panel with the My Rules page selected. Adjacent and to the right of the My Rules page, the Vacation Period panel appears as shown in Figure 2-12.
-
Select Enable vacation period.
-
Provide start and end dates.
-
Select either Reassign to: or Delegate to:. If you use the search icon to find a user the Identity Browser windows appears, as shown in Figure 2-13.
Search for and select a user and click OK.
-
Click Save. The vacation period is enabled.


2.6.4 Specifying Notification Settings
You can configure the notification settings to control how, when, and where you receive messages in cases when you have access to multiple communication channels (delivery types). Specifically, you can define messaging filters (delivery preferences) that specify the channel to which a message should be delivered, and under what circumstances.
For example, you might want to create filters for messages received from customers with different Service Level Agreements (SLA), specifying to be notified through business phone and SMS channels for customers with a premium SLA and by EMAIL for customers with a nonpremium SLA.
2.6.4.1 Messaging Filter Rules
A messaging filter rule consists of rule conditions and rule actions. A rule condition consists of a rule attribute, an operator, and an associated value. A rule action is the action to be taken if the specified conditions in a rule are true.
2.6.4.1.1 Data Types
Table 2-1 lists data types supported by messaging filters. Each attribute has an associated data type, and each data type has a set of predefined comparison operators.
Table 2-1 Data Types Supported by Messaging Filters
| Data Type | Comparison Operators |
|---|---|
|
Date |
isEqual, isNotEqual, isGreaterThan, isGreaterThanOrEqual, isLessThan, isLessThanOrEqual, Between, isWeekday, isWeekend |
|
Time |
isEqual, isNotEqual, Between |
|
Number |
isEqual, isNotEqual, Between, isGreaterThan, isGreaterThanOrEqual, isLessThan, isLessThanOrEqual |
|
String |
isEqual, isNotEqual, Contains, NotContains |
Note:
The String data type does not support regular expressions.2.6.4.1.2 Attributes
Table 2-2 lists the predefined attributes for messaging filters.
Table 2-2 Predefined Attributes for Messaging Filters
| Attribute | Data Type |
|---|---|
|
Total Cost |
Number |
|
From |
String |
|
Expense Type |
String |
|
To |
String |
|
Application Type |
String |
|
Duration |
Number |
|
Application |
String |
|
Process Type |
String |
|
Status |
String |
|
Subject |
String |
|
Customer Type |
String |
|
Time |
Time |
|
Group Name |
String |
|
Processing Time |
Number |
|
Date |
Date |
|
Due Date |
Date |
|
User |
String |
|
Source |
String |
|
Amount |
Number |
|
Role |
String |
|
Priority |
String |
|
Customer Name |
String |
|
Expiration Date |
Date |
|
Order Type |
String |
|
Organization |
String |
|
Classification |
String |
|
Service Request Type |
String |
2.6.4.2 Rule Actions
For a given rule, a messaging filter can define the following actions:
-
Send No Messages: Do not send a message to any channel.
-
Send Messages to All Selected Channels: Send a message to all specified channels in the address list.
-
Send to the First Available Channel: Send a message serially to channels in the address list until one successful message is sent. This entails performing a send to the next channel when the current channel returns a failure status. This filter action is not supported for messages sent from the human workflow layer.
2.6.4.3 Managing Messaging Channels
In Oracle BPM Worklist, messaging channels represent both physical channels, such as business mobile phones, and also email client applications running on desktops. Specifically, Oracle BPM Worklist supports the following messaging channels:
-
EMAIL
-
IM
-
MOBILE
-
SMS
-
VOICE
-
WORKLIST
Note the following about message channels:
-
Addresses for messaging channels are fetched from the configured identity store.
-
SMS and MOBILE notifications are sent to the mobile phone number.
-
VOICE notifications are sent to the business phone number.
-
No special notification is sent when the messaging channel preference is WORKLIST. Instead, log in to Oracle BPM Worklist to view tasks.
-
EMAIL is the default messaging channel preference when a preferred channel has not been selected.
You can use the Messaging Channels tab to view, create, edit, and delete messaging channels.
2.6.4.3.1 Viewing Your Messaging Channels
You can display your existing messaging channels.
-
Click the Preferences link.
-
Click Notification Preferences.
-
Select the Messaging Channels tab.
The My Messaging Channels list appears (Figure 2-14) and displays the following information:
-
Name: The name of the messaging channel.
-
Type: The type of messaging channel, such as EMAIL or SMS.
-
Address: The address for the channel, such as a phone number or email address.
-
Default: Specifies whether this channel is the default messaging channel.
-
-
Click View > Columns and select the columns to display or hide.
You can also click View > Reorder Columns to display a dialog to reorder the displayed columns.
Messaging channel names and addresses are retrieved from the underlying identity store, such as Oracle Internet Directory.

2.6.4.3.2 Creating, Editing, and Deleting a Messaging Channel
Oracle BPM Worklist uses an underlying identity store, such as Oracle Internet Directory, to manage messaging channels and addresses. Therefore, you cannot directly create, modify, or delete messaging channels using Oracle BPM Worklist.
To perform these actions, contact the system administrator responsible for managing your organization's identity store.
2.6.4.4 Managing Messaging Filters
You can use the Messaging Filters tab to define filters that specify the types of notifications you want to receive along with the channels through which to receive these notifications. You can do this through a combination of comparison operators (such as is equal to, is not equal to), attributes that describe the notification type, content, or source, and notification actions, which send the notifications to the first available messaging channels, all messaging channels, or to no channels (effectively blocking the notification).
For example, you can create a messaging filter called Messages from Lise, that retrieves all messages addressed to you from your boss, Lise. Notifications that match all of the filter conditions might first be directed to your business mobile phone, for instance, and then to your business email if the first messaging channel is unavailable.
2.6.4.4.1 Viewing Messaging Filters
You can display your existing messaging filters.
To view your messaging filters:
-
Click the Notification tab.
-
Click the Messaging Filters tab.
The My Messaging Filters list appears (Figure 2-15) and displays the following information:
-
Filter Name: The name of the messaging filter
-
Description: An optional description of the messaging filter
-
-
Click View > Columns and select the columns to display or hide.
You can also click View > Reorder Columns to display a dialog to reorder the displayed columns.

2.6.4.4.2 Creating Messaging Filters
-
Click Create.
The Messaging Filters page appears, as shown in Figure 2-16.
-
Specify the following information:
-
Filter Name: The name of the messaging filter.
-
Description: An optional description for the messaging filter.
-
-
Define the filter conditions using the lists and fields in the Condition section, as follows:
-
Select whether notifications must meet all of the conditions or any of the conditions by selecting either the All of the following conditions or the Any of the following conditions options.
-
Select the attribute from the list.
-
Select the operator, such as isEqual, from the list.
-
Type the value of the condition in the text box.
-
Click Add to add the condition to the list.
-
Repeat these steps to add more filter conditions. To remove a filter condition, click Delete.
-
-
Select from the following messaging options in the Action section:
-
Send No Messages: Do not send a message to any channel.
-
Send Messages to All Selected Channels: Send a message to all specified channels in the address list.
-
Send to the First Available Channel: Send a message serially to channels in the address list until one successful message is sent. This entails performing a send to the next channel when the current channel returns a failure status.
-
-
To set the delivery channel, select a channel from the Add Notification Channel list and click Add. To remove a channel, click Delete.
-
Use the up and down arrows to prioritize channels. If available, the top-most channel receives messages meeting the filter criteria if you select Send to the First Available Channel.
-
Click OK.
The messaging filter appears on the My Messaging Filters page. The My Messaging Filters page enables you to edit or delete the channel. Click Cancel to dismiss the dialog without creating the filter.

2.7 Creating ToDo Tasks in Process Workspace
Use the Create ToDo Task dialog, shown in Figure 2-17, to create a top-level ToDo task for yourself or others. This task is not associated with a business task.

To-Do tasks appear in the assignee's Inbox.
To-Do tasks can be reassigned, escalated, and so on, and deleted (logical delete) and purged (physical delete). Reassignment, escalation, and so on of the task does not affect the assignment of any child ToDo tasks. The completion percentage of a ToDo task can be reset to less than 100% after it is completed.
Assignment rules (such as vacation rules) are not applied to ToDo tasks. You cannot specify business rules for ToDo tasks.
-
From the Actions list, select Create To-Do Task, as shown in the example in Figure 2-18.
-
Provide details in the Create ToDo Task dialog, shown in Figure 2-17, and click OK.
-
Task Title: Enter anything that is meaningful to you.
-
Category: Enter anything that is meaningful to you.
-
Priority: Select from 1 (highest) to 5 (lowest)
-
Percentage Complete: This attribute indicates how much of the task is completed. 100% sets the attribute as completed.
-
StartDate: The task start date.
-
Due Date: The due date does not trigger an expiration. You can also see overdue tasks. The start date need not be the current date.
-
Assignee: You can assign yourself or someone else.
-
-
Click OK.

2.8 Creating Subtasks in Tasks in Process Workspace
A subtask is a child of a task, either a To-Do task or a business task. Creating a subtask can be helpful, for example, when a purchase order contains several line items and you need a separate approval process for one of them.
2.8.1 What You May Need to Know About Creating Subtasks
Here are some things to keep in mind when creating subtasks:
-
A ToDo task can only have ToDo subtasks. When all ToDo subtasks are 100% complete, the ToDo task is also marked as complete. If the ToDo task is completed, then ToDo subtasks are at 100% within the workflow system.
If the task is a business task and that task is completed, then the subtasks of that task are withdrawn. You can only create a business tasks for other business tasks.
-
If you explicitly set a ToDo task to 100%, there is no aggregation on the task.
-
If you are using a release of Oracle BPM that is prior to 11g Release 1 (11.1.1.7.0), then, when you create a subtask from the Actions menu of the task list, that subtask will appear in the task list of the assignee for that subtask. However, to enable subtask creation from the Actions menu of the task details page and display of subtask section in the task details page, you must re-generate the form by using 11g Release 1 (11.1.1.7.0).
You may continue to use processes that were deployed in earlier releases even if you do not re-create the task form.
-
Sub Tasks created in Process Workspace are not included as composite audit trail in Oracle Enterprise Manager Cloud Control Console.
-
Parallel tasks are created when a parallel flow pattern is specified for scenarios such as voting. In this pattern, the parallel tasks have a common task. You can create sub tasks using different pattern lines: Single approver, Sequential approver and Parallel approver.
The sub tasks are included in the Tasks Details page of the task. To view the sub tasks for a task, select the task from the Task List to display the Task Details page. The sub tasks are displayed under the Sub Tasks section.
2.8.2 How to Create a SubTask
This section includes the following topics:
2.8.2.1 Creating SubTasks from the Actions List
-
In the Task List, select the task for which you want to create a subtask.
-
From the Actions list, select Create Sub Task as shown in Figure 2-19.
Figure 2-19 Selecting to Create a Sub Task

Description of "Figure 2-19 Selecting to Create a Sub Task"
The Create Subtask dialog box appears as shown in Figure 2-20.
Figure 2-20 Create Subtask Dialog Box - Task List

Description of "Figure 2-20 Create Subtask Dialog Box - Task List"
-
In the Create Subtask dialog box, define the subtask and provide the following details, if required:
-
Task Title: Enter anything that is meaningful to you (required field).
-
Category: enter anything that is meaningful to you.
-
Priority: Select from 1 (highest) to 5 (lowest).
-
Percentage Complete: This attribute indicates how much of the task is completed. 100% sets the attribute as completed.
-
Start Date: The task start date.
-
Due Date: The due date does not trigger an expiration. You can also see overdue tasks. The start date need not be the current date.
-
Assignee: You can assign yourself, someone else or more than one participant (separating each ID with a comma).
-
-
When you have finished specifying the subtask, in the Create Subtask dialog box, click OK. This refreshes the task list. When you select the task, the Task Details page now includes a Subtasks section displaying the details about the subtask you created for that task.
Note:
-
If you specified more than one participant for the subtask, then the Subtask region displays a separate item for each participant.
-
If a participant completes a subtask, then you must manually refresh the task to show the details for that completed subtask.
-
If you create a sub task, the assignee becomes the creator.
-
2.8.2.2 Creating SubTasks from an Existing Task
-
In the Task List, select the task for which you want to create a subtask.
-
From the Task Details page, go to the Actions list, select Create Sub Task as shown in Figure 2-21.
The Create Subtask dialog box appears as shown in Figure 2-22.
-
In the Create Subtask dialog box, define the subtask and provide the following details, if required:
-
Title: Enter anything that is meaningful to you (required field).
-
Priority: Select from 1 (highest) to 5 (lowest).
-
Comments: Enter anything that is meaningful to you.
-
Routing Type: Select Single Approver, Group Vote or Chain of Single Approvers. For more information on these options, see Section 2.11, "Routing Tasks in Process Workspace".
-
Provide or search for user or group names and select the approvers by clicking the check box next to the user or group name.
-
-
When you have finished specifying the subtask, in the Create Subtask dialog box, click OK. This refreshes the task list. When you select the task, the Task Details page now includes a Subtasks section displaying the details about the subtask you created for that task.
Note:
-
If you specified more than one participant for the subtask, then the Subtask region displays a separate item for each participant.
-
If a participant completes a subtask, then you must manually refresh the task to show the details for that completed subtask.
-
If you create a sub task, the assignee becomes the creator.
-


2.9 Acting on Tasks that Require Passwords in Process Workspace
If a human task was set up to require a password, then when you act on it (approve or reject the human task), you must provide the password when prompted, as shown in Figure 2-23.
Figure 2-23 Acting on a Task That Requires a Password

Description of "Figure 2-23 Acting on a Task That Requires a Password"
2.10 Acting on a Task that Requires a Digital Signature in Process Workspace
Oracle Business Process Management Workspace supports the signature policy created in the human task:
-
No signature required — Participants can send and act on tasks without providing a signature.
-
Password required — Participants must specify their login passwords.
-
Digital certificate (signature) required —Participants must possess a digital certificate before being able to send and act on tasks. A digital certificate contains the digital signature of the certificate-issuing authority so that anyone can verify that the certificate is real. A digital certificate establishes the participant's credentials. It is issued by a certification authority (CA). It contains your name, a serial number, expiration dates, a copy of the certificate holder's public key (used for encrypting messages and digital signatures), and the digital signature of the certificate-issuing authority so that a recipient can verify that the certificate is real.
The evidence store service is used for digital signature storage and non-repudiation of digitally-signed human workflows.
For more information about digital signatures and the evidence store service, see Section 2.12, "Evidence Store Service and Digital Signatures".
When you act on a task that has a signature policy, the Sign button appears, as shown in Figure 2-24.
Figure 2-24 Digital Signature Task Details

Description of "Figure 2-24 Digital Signature Task Details"
To use a certificate for digitally signing tasks, you must first upload the certificate as described in Section 1.5, "Providing a Digital Certificate in Process Workspace".
2.11 Routing Tasks in Process Workspace
If the human task was designed to permit ad hoc routing, the task can be routed in an ad-hoc fashion in the worklist. For such tasks, a Route button appears on the task details page. From the Route page, you can look up one or more users for routing. When you specify multiple assignees, you can select whether the list of assignees is for simple (group assignment to all users), sequential, or parallel assignment.
If you are a developer and want more information about designing tasks to permit ad hoc routing, see Oracle Fusion Middleware Developer's Guide for Oracle SOA Suite.
-
From the Actions list, select Adhoc Route, as shown in Figure 2-25.
-
Select an action and a routing option, as shown in Figure 2-26.
-
Single Approver: Use this option for a single user to act on a task. If the task is assigned to a role or group with multiple users, then one member must claim the task and act on it.
-
Group Vote: Use this option when multiple users, working in parallel, must act, such as in a hiring situation when multiple users vote to hire or reject an applicant. You specify the voting percentage that is needed for the outcome to take effect, such as a majority vote or a unanimous vote, as shown in Figure 2-27.
Figure 2-27 Providing Consensus Information

Description of "Figure 2-27 Providing Consensus Information"
-
Chain of Single Approvers: Use this option for a sequential list of approvers. The list can comprise any users or groups. (Users are not required to be part of an organization hierarchy.)
-
-
Add optional comments for the next participant on the route.
-
Provide or search for user or group names; then move the names to the Selected area.
-
Click OK.


2.12 Evidence Store Service and Digital Signatures
The evidence store service is used for digital signature storage and non-repudiation of digitally-signed human workflows. A digital signature is an electronic signature that authenticates the identity of a message sender or document signer. This ensures that the original content of the message or document sent is unchanged. Digital signatures are transportable, cannot be imitated by others, and are automatically time-stamped. The ability to ensure that the original signed message arrived means that the sender cannot repudiate it later. Digital signatures ensure that a human workflow document:
-
Is authentic
-
Has not been forged by another entity
-
Has not been altered
-
Cannot be repudiated by the sender
A cryptographically-based digital signature is created when a public key algorithm signs a sender's message with a sender's private key.
During design time, signatures are enabled for the task. During runtime in Process Workspace, when a user approves or rejects the task, the web browser:
-
Asks the user to choose the private key to use for signing.
-
Generates a digital signature using the private key and task content provided by Oracle BPM Worklist.
Notes:
-
The certificate refers to a Personal Information Exchange Syntax Standard (PFX) file that includes a certificate and a private key, and is protected by a simple text password. PFX specifies a portable format for storing or transporting a user's private keys, certificates, miscellaneous secrets, and so on.
-
The possession of a private key that corresponds to the public key of a certificate is sufficient to sign the data, because the signature is verifiable through the public key in the certificate. However, no attempt is made to correlate the name of a user of a certificate with the person updating it. For example, user
jsteincan sign using the private key of usercdickensifjsteinhas that private key.
The following digital signature features are supported:
-
PKCS7 signatures based on X.509 certificates
-
Browser-based, digitally-signed content without attachments
You can search the evidence store, as shown in Figure 2-28.

2.13 Creating Worklist Reports
Table 2-3 lists the worklist reports available for task analysis.
Table 2-3 Worklist Report Types
| Report Name | Description | Input Parameters |
|---|---|---|
|
Unattended Tasks |
Provides an analysis of tasks assigned to users' groups or reportees' groups that have not yet been acquired (the "unattended" tasks). |
|
|
Tasks Priority |
Provides an analysis of the number of tasks assigned to a user, reportees, or their groups, broken down by priority. |
|
|
Tasks Cycle Time |
Provides an analysis of the time taken to complete tasks from assignment to completion based on users' groups or reportees' groups. |
|
|
Tasks Productivity |
Provides an analysis of assigned tasks and completed tasks in a given time period for a user, reportees, or their groups. |
|
|
Tasks Time Distribution |
Provides the time an assignee takes to perform a task. |
|
2.13.1 How To Create Reports
Reports are available from the Reports link. Report results cannot be saved.
-
From the toolbar at the top center of the Home page, select More, then the Reports link as shown in Figure 2-29.
-
Click the type of report you want to create.
Figure 2-30 shows the report types available.
-
Define the search parameters of the report.
Figure 2-31 shows an example of the Unattended Tasks Report input page. The other reports are similar. See Table 2-3 for information about input parameters for all the report types.
Figure 2-31 Unattended Tasks Report—Input Page for Task Analysis

Description of "Figure 2-31 Unattended Tasks Report—Input Page for Task Analysis"
-
Click Run.


2.13.2 What Happens When You Create Reports
As shown in Figure 2-32, report results (for all report types) are displayed in both a table format and a bar chart format. The input parameters used to run the report are displayed under Report Inputs, in the lower-left corner (may require scrolling to view).
Figure 2-32 Report Display—Table Format, Bar Chart Format, and Report Inputs

Description of "Figure 2-32 Report Display—Table Format, Bar Chart Format, and Report Inputs"
2.13.2.1 Unattended Tasks Report
Figure 2-33 shows an example of an Unattended Tasks report.

The report shows that the California group has 15 unattended tasks, the Supervisor group has 7 unattended tasks, and the LoanAgentGroup has 11 unattended tasks. The unattended (unclaimed) tasks in this report are all DocumentReview tasks. If multiple types of unattended task exists when a report is run, all task types are included in the report, and the various task types are differentiated by color.
2.13.2.2 Tasks Priority Report
Figure 2-34 shows an example of a Tasks Priority report.

The report shows that the California group, the Supervisor group, and the LoanAgentGroup each have 16 tasks of normal priority. The users rsteven and jcooper have 5 and 22 tasks, respectively, all normal priority. Priorities (highest, high, normal, low, lowest) are distinguished by different colors in the bar chart.
2.13.2.3 Tasks Cycle Time Report
Figure 2-35 shows an example of a Tasks Cycle Time Report.

The report shows that it takes 1 hour and 6 minutes on average to complete DocumentReview tasks, and 1 hour and 28 minutes on average to complete VacationApproval tasks. The bar chart shows the average cycle time in milliseconds.
2.13.2.4 Tasks Productivity Report
Figure 2-36 shows an example of a Tasks Productivity Report.

The report shows the number of tasks assigned to the California, LoanAgentGroup, and Supervisor groups. For individual users, the report shows that jcooper has 22 assigned tasks. In addition to his assigned tasks, jcooper has completed 2 tasks. The report shows that mtwain and rsteven have completed 6 and 11 tasks respectively. In the bar chart, the two task states—assigned and completed—are differentiated by color.
Note:
The Me & My Group and Reportees options have been removed from the Productivity Report.