9.1 Creating a TCP Proxy
You can create TCP proxies by using either the administration console or the CLI.
Note:
-
When you create a TCP Proxy, you are, in effect, modifying a configuration. So for the new TCP Proxy settings to take effect in the Oracle Traffic Director instances, you should redeploy the configuration as described in Section 4.3, "Deploying a Configuration."
-
The CLI examples in this section are shown in shell mode (
tadm>). For information about invoking the CLI shell, see Section 2.3.1, "Accessing the Command-Line Interface."
Before you begin creating a TCP Proxy, decide the following:
-
A unique name for the proxy. Choose the name carefully; after creating a proxy, you cannot change its name.
-
A unique IP address (or host name) and port number combinations for the listener.
You can define multiple TCP listeners with the same IP address combined with different port numbers, or with a single port number combined with different IP addresses. So each of the following IP address and port number combinations would be considered a unique listener:
10.10.10.1:80
10.10.10.1:81
10.10.10.2:80
10.10.10.2:81
-
The name of the origin-server pool to which the TCP Proxy should forward requests. For information about creating origin-server pools, see Chapter 6, "Managing Origin-Server Pools."
Creating a TCP Proxy Using the Administration Console
To create a TCP Proxy by using the administration console, do the following:
-
Log in to the administration console, as described in Section 2.3.2, "Accessing the Administration Console."
-
Click the Configurations button that is situated at the upper left corner of the page.
A list of the available configurations is displayed.
-
Select the configuration for which you want to create a TCP Proxy.
-
In the Common Tasks pane, click New TCP Proxy.
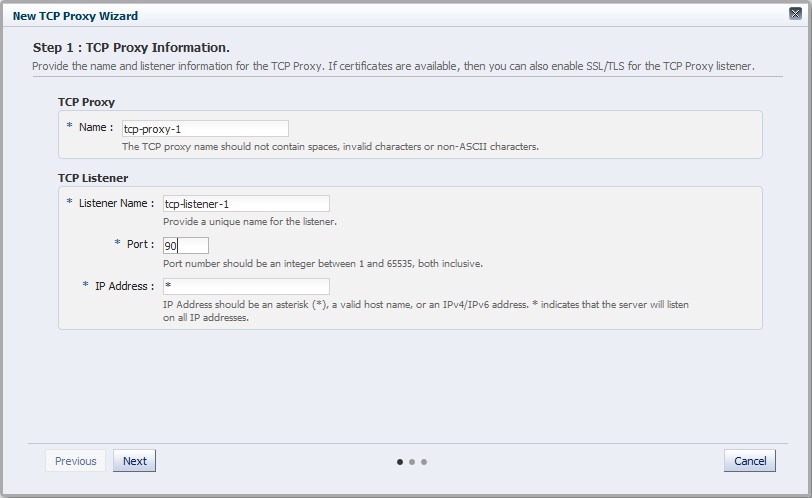
The New TCP Proxy wizard starts.
-
Follow the on-screen prompts to complete creation of the TCP Proxy by using the details—proxy name, listener name, IP address, port, and so on—that you decided earlier.
Note:
If the TCP traffic on the port is over SSL, for example T3S, then select the SSL/TLS check box on the first screen of the New TCP Proxy wizard and select the certificate to be used. For more information, see Section 11.2.2, "Configuring SSL/TLS for a Listener."After the proxy is created, the Results screen of the New TCP Proxy wizard displays a message confirming successful creation of the proxy.
-
Click Close on the Results screen.
-
The details of the TCP Proxies that you just created are displayed on the TCP proxies page.
-
In addition, the Deployment Pending message is displayed at the top of the main pane. You can either deploy the updated configuration immediately by clicking Deploy Changes, or you can do so later after making further changes, as described in Section 4.3, "Deploying a Configuration."
-
Creating a TCP Proxy Using the CLI
To create a TCP Proxy, run the create-tcp-proxy command.
For example, the following command creates a TCP Proxy named tcp_proxy1 for the configuration soa.example.com with the port as 1910 and the origin-server-pool as soa-pool.
tadm> create-tcp-proxy --config=soa.example.com --origin-server-pool=soa-pool --port=1910 tcp_proxy1
OTD-70201 Command 'create-tcp-proxy' ran successfully.
For the updated configuration to take effect, you should deploy it to the Oracle Traffic Director instances by using the deploy-config command.
For more information about create-tcp-proxy, see the Oracle Traffic Director Command-Line Reference or run the command with the --help option.