6 Log Information
This chapter provides information on how you view log information and update log settings on SharePoint and on WebCenter Content.
This chapter covers the following topics:
6.1 Modifying Log Settings in SharePoint
By default, SharePoint generates trace logs and event logs. You can modify the log settings and change logging levels. To modify log settings in SharePoint:
-
Log on to SharePoint Central Administration as an administrator.
-
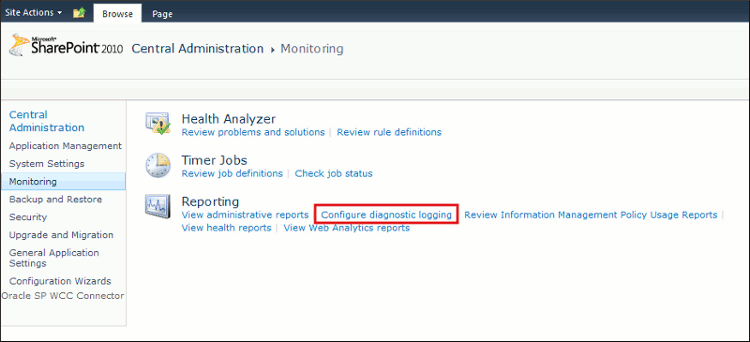
In the left navigation pane of the SharePoint Central Administration, click Monitoring. The Monitoring page appears.
-
Under Reporting, click Configure Diagnostic Logging. The Diagnostic Logging page appears.
-
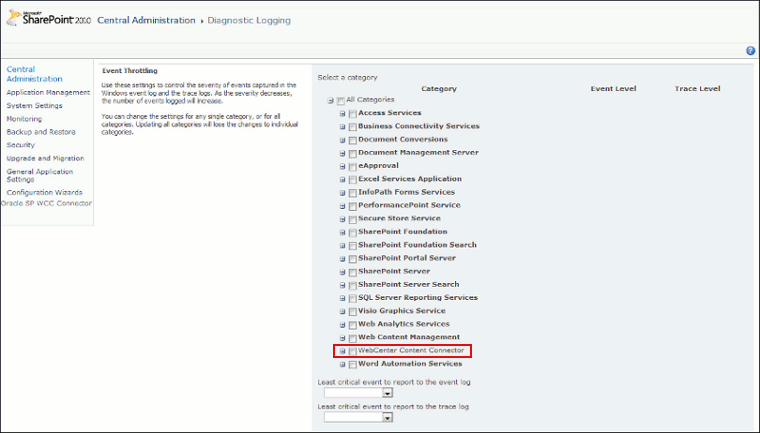
From the Category list, select WebCenter Content Connector, and then select the WebCenter Content Connector areas for which you want to modify the log settings.
Figure 6-3 WebCenter Content Connector Categories
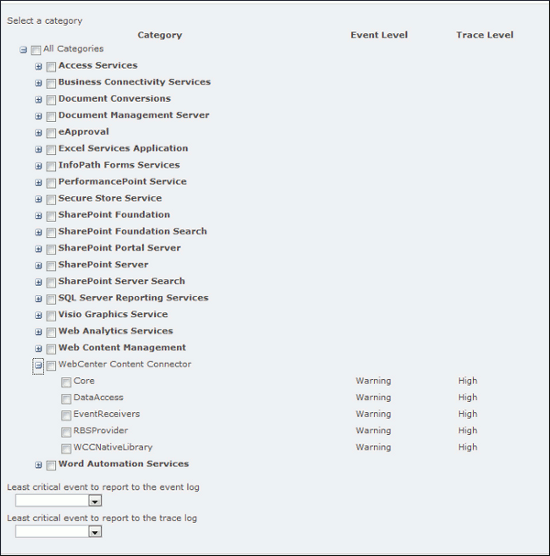
Description of "Figure 6-3 WebCenter Content Connector Categories"
-
From the Least critical event to report to the event log drop-down list, select a level for event logs.
Note:
Event logs are Windows logs. By default, SharePoint generates warning and above level event logs.
-
From the Least critical event to report to the trace log drop-down list, select a level for trace logs.
Note:
Trace logs are SharePoint logs. By default, SharePoint generates high and above level trace logs.
The following table describes the log levels.
Log Level Description Critical and Unexpected
When a critical error occurs during a function and the connector fails to handle the error, SharePoint generates critical and unexpected logs.
Warning and High
When a critical error occurs during execution, the connector continues with the functionality and Windows generates warning and high logs.
Verbose
These are informative messages and logs.
6.2 Viewing Logs in SharePoint
You can view the logs that the system generated at the levels you configured.
To view event logs:
-
On the Windows system, click Start.
-
In the Search programs and files field, enter Event Viewer, and press Enter. The Event Viewer page appears and displays the event logs.
To view trace logs, navigate to the following path:
C:\Program Files\Common Files\Microsoft Shared\Web Server Extensions\14\LOGS
6.3 Modifying Log Settings in WebCenter Content
By default, WebCenter Content generates logs for all levels except the information level. You can modify settings and enable verbose logs.
To modify log settings in WebCenter Content:
-
Log on to WebCenter Content as an administrator.
-
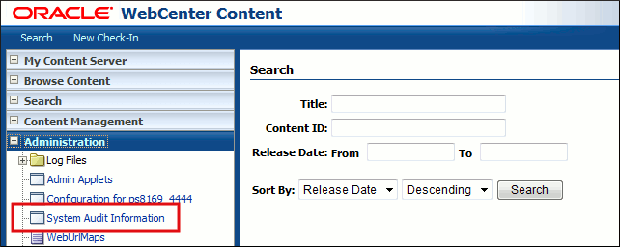
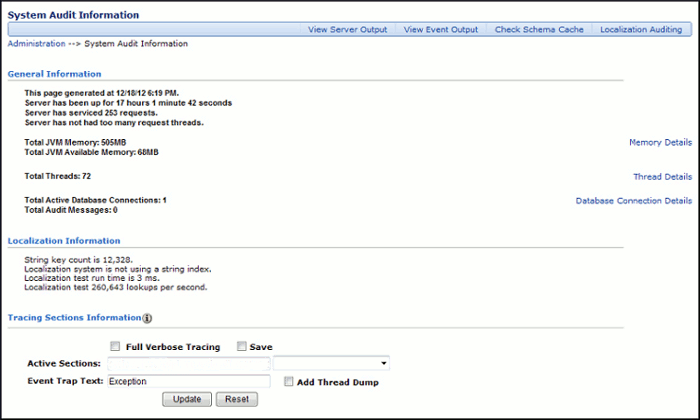
In the Content Server portal, choose Administration, then System Audit Information. The System Audit Information page appears.
-
(Optional) To enable verbose level logs, in the Tracing Sections Information region, select Full Verbose Tracing.
-
In the Active Sections field, enter SharePointConnector, and then click Update. The modified log settings are saved.
See Oracle Fusion Middleware Administering Oracle WebCenter Content for more information on log settings.
6.4 Viewing Event Logs in WebCenter Content
To view event logs in WebCenter Content:
-
Log on to WebCenter Content as an administrator.
-
In the Content Server portal, choose Administration, select Log Files and then click System Audit Information. The System Audit Information page appears.
-
In the top navigation pane, click View Server Output. The logs appear.
