3 Reviewing and editing documents
Whether you are working with documents at a production or small batch level, most likely you will need to review and adjust them in the document pane. This chapter describes how to review and update documents before releasing them for indexing, further processing, or writing to a content repository.
This chapter covers the following main topics:
3.1 Reviewing documents and pages
This section covers the following topics:
3.1.1 Automatically reviewing and indexing documents after capturing them
After you scan or import a batch, its properties are displayed by default in the right pane. You can set a preference so that the document pane is automatically displayed instead, with the first page in the first document of the batch selected.
-
Click the Preferences link in the upper right side of the client window.
-
Select the Auto Review/Index Batch after scanning field.
3.1.2 Zooming in and out of the selected page
Use the Zoom In, Zoom Out, Fit to Height, Fit to Width, and Fit to Window buttons to enlarge or reduce the image in the viewer to examine image quality. These settings are not saved with the batch. When you open a batch, its images are always displayed in the Fit to Window size.
-
In the document pane, click the Zoom In button to enlarge the image. Click the Zoom Out button to reduce the image.
-
Another way to zoom is to click and drag a rectangular area on the image using the left mouse button (rubberband zooming).
-
Click the Fit to Height button to change the page display so that the entire height fits in the window.
-
Click the Fit to Width button to change the page display so that the entire width fits in the window.
-
At any point, click the Fit to Window button to display the entire image in the viewer.
3.1.3 Resizing or repositioning the thumbnail display
You can display the scrollable thumbnail bar either vertically (default) or horizontally. To resize the panes, click and drag the pane separator (Section 1.5.1).
After you resize or reposition the thumbnail display, Capture saves the new settings for subsequent sessions.
-
In the document pane, click the Thumbnail Size button in the toolbar.
-
Select Small, Medium, or Large, and the thumbnail size changes to reflect your new selection.
-
Click the View thumbnails horizontally/vertically button to switch the display to horizontal or vertical thumbnails, if desired.
3.1.4 Printing a page
To print a scanned or imported page:
-
In the document pane, select the page to be printed by selecting its thumbnail.
-
Click the Print Page button. In the Print window, select the printer and configure settings as needed. The page is printed.
3.2 Editing documents and pages
This section covers the following topics:
3.2.1 Increasing an image's quality
Many scanners have capabilities to improve black/white image quality using features such as noise removal and dynamic thresholding. Review your scanner's documentation to optimize image quality when scanning in black/white.
Follow these steps to increase image quality:
-
Make sure the scanner is operating optimally as described in its documentation (for example, ensure that the glass is clean).
-
In the Batch pane, click the left side of the Capture Settings/Source button and adjust the available scanner settings (for example, adjust brightness and contrast for scanning). Note that a client profile may restrict you from changing some scanner settings such as DPI resolution and color.
-
If needed, contact your Capture workspace manager to request that scanner settings such as DPI or brightness and contrast be adjusted for the client profile.
3.2.2 Moving a page to another document
To move a page within a document or to another document, drag and drop the page's thumbnail to the new location.
Note: If you drag the only remaining page in a document to another document, the document is automatically removed.
3.2.3 Rotating or flipping a page
To rotate or flip pages:
-
In the Document pane, select the thumbnails of one or more pages to rotate or flip.
Hold down the Ctrl key to select multiple thumbnails. If you scanned an entire batch upside down, press Ctrl+A to select all pages before selecting the Flip option described in the next step.
-
Click one of the rotate buttons. Rotating or flipping a page saves it that way within the batch.
-
Click Rotate Left to rotate images 90 degrees counterclockwise.
-
Click Rotate Right to rotate images 90 degrees clockwise.
-
Click Flip to rotate images by 180 degrees.
-
3.3 Creating and removing documents
This section covers the following topics:
3.3.1 Splitting a document and creating a new document
For example, suppose you realize that certain pages belong to another customer and need to be in a separate document.
-
Select the page at which to create a new document.
-
From the document pane toolbar, click the Create New Document button.
A new document that starts with the current page and includes all pages below it until the next document is created.
3.3.2 Removing a document separation
Follow these steps to remove a document separation, which appends the selected document's pages to the previous document. To delete a document and its pages instead, see Section 3.3.3.
-
Select the document to merge with its previous document.
If you select the first document in a batch, you are prompted to delete the document because it has no previous document.
-
Click the Remove/Delete Documents button.
Figure 3-1 Deleting a Document or Removing a Document Separation
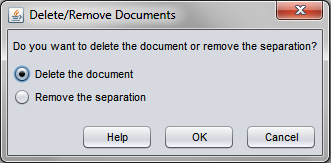
Description of "Figure 3-1 Deleting a Document or Removing a Document Separation"
-
When prompted, select the option to remove the separation and click OK. The document is merged with its previous document.
3.3.3 Deleting a document and its pages
Follow these steps to delete a document and its pages.
-
Select the document to delete.
You can select the document in the batch pane or select one of its thumbnails in the document pane.
-
Click the Remove/Delete Documents button in the document pane's toolbar.
-
When prompted, select the option to delete the document and click OK.
3.4 Adding, replacing, and deleting pages
This section covers the following topics:
Note that you can edit individual pages in image documents only. When editing non-image documents, toolbar options for editing individual pages are disabled.
3.4.1 Inserting pages before a selected page
You can add to an image document by scanning pages or importing files. To insert:
-
If needed, press Ctrl+Alt+S and set a capture source (Section 2.2.2). If scanning, place pages to insert in the scanner.
-
In the document pane, select the thumbnail page before which to insert pages.
-
From the document pane's toolbar, click the Insert Pages button. If importing, select one or more files to insert.
The pages or files are inserted before the selected thumbnail's page.
3.4.2 Appending pages to a document
You can append to a document by scanning pages or importing files. Note that you can append a document to a batch that contains non-image items, but you cannot append pages to a non-image document. To append:
-
If needed, press Ctrl+Alt+S and set a capture source (Section 2.2.2). If scanning, place pages to append in the scanner.
-
In the batch or document pane, select the document to append to.
-
From the document pane's toolbar, click the Append Pages button.
-
In the Append Pages window, select an append option and click OK.
Figure 3-2 Appending Pages or Creating a New Document
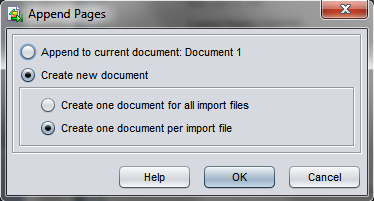
Description of "Figure 3-2 Appending Pages or Creating a New Document"
You can either:
-
Append the scanned pages or imported file to the end of the selected document.
-
Create a new document. If importing, specify whether to create one document for all import files or a document for each file, then select files to import when prompted.
Based on your selections, the pages or files are appended or added in one or more new documents.
-
3.4.3 Replacing a page
You might want to replace a page in an image document if a problem occurred while scanning and only half of the page was scanned. To replace a page:
-
If needed, press Ctrl+Alt+S and set a capture source (Section 2.2.2). If scanning, place the replacement page in the scanner.
-
In the document pane, select the thumbnail of the page to replace.
-
From the document pane's toolbar, click the Replace Page button.
-
Click Yes to confirm that you are deleting the selected page and replacing it with the page(s) you are scanning or importing. If importing, select one or more files to replace the selected page.
3.4.4 Deleting a page
To delete one or more pages in an image document:
-
In the Document pane, select the thumbnails of pages to delete. Hold down the Ctrl key to select multiple thumbnails.
-
Click the Delete Pages button and confirm the deletion.