4 Configuring Oracle Virtual Assembly Builder Deployer
This chapter describes how to run the Oracle WebLogic Server configuration wizard to create a new domain using the Oracle Virtual Assembly Builder Deployer domain extension template. This will create a new Oracle WebLogic Server domain and deploy the Oracle Virtual Assembly Builder Deployer Web application.
This chapter contains the following sections:
-
Section 4.2, "Setting Unique Coherence Settings Per Deployer"
-
Section 4.3, "Starting the Oracle Fusion Middleware Configuration Wizard"
4.1 Expanded or Compact Domain Templates
An expanded domain is the only recommended production configuration. You can create an expanded domain as described in this chapter, using the Oracle WebLogic Server configuration wizard.
To configure a compact domain template for non-production purposes, you can manually deploy the Deployer application to the Admin Server. No managed servers or a database are required. To create a compact domain, see Chapter 5, "Creating a Compact Domain".
4.1.1 Expanded Domain Template
The following are prerequisites for using the expanded domain template.
4.1.1.1 Deployment to a Managed Server
When deploying with the expanded domain template, the default deployment consists of one Admin Server and an Oracle WLS cluster of managed server(s). The Deployer application is deployed to all the Managed Server(s).
You must create at least one managed server, or a cluster of managed servers.
4.1.1.2 Repository Creation Utility
To use the expanded domain template, you must a database with Repository Creation Utility pre-configured is a prerequisite. For more information on using Repository Creation Utility to create schemas, see Creating Schemas with the Repository Creation Utility.
4.2 Setting Unique Coherence Settings Per Deployer
When two Deployers are started in the same subnet, set unique Coherence settings for each, to prevent the Deployers from communicating to each other through Coherence. In setDomainEnv.sh or setStartupEnv.sh, set a unique multicast address and port for -Dtangosol.coherence.clusteraddress and -Dtangosol.coherence.clusterport.
4.3 Starting the Oracle Fusion Middleware Configuration Wizard
The Configuration Wizard is launched automatically when you select the "Automatically Launch the Configuration Wizard to Create Deployer domain" option upon completing the Oracle Virtual Assembly Builder installation.
The Configuration Wizard is located in the common/bin directory in your WebLogic Server Oracle home.
cd ORACLE_HOME/common/bin
./config.sh
To create a new WebLogic domain, follow the instructions in Section 4.4, "Creating a New Domain with Deployer".
4.4 Creating a New Domain with Deployer
After you have started the Configuration Wizard (Section 4.3, "Starting the Oracle Fusion Middleware Configuration Wizard"), create a domain configured with Oracle Virtual Assembly Builder Deployer.
Select to create a new expanded domain. To create a domain configured with Oracle Virtual Assembly Builder Deployer, select the following on the Templates selection screen:
-
Oracle Virtual Assembly Builder Deployer - 12.1.2.0 [ovab]
-
Oracle JRF - 12.1.2.0 [oracle_common]
-
WebLogic Coherence Cluster Extension - 12.1.2.0 [wlserver]
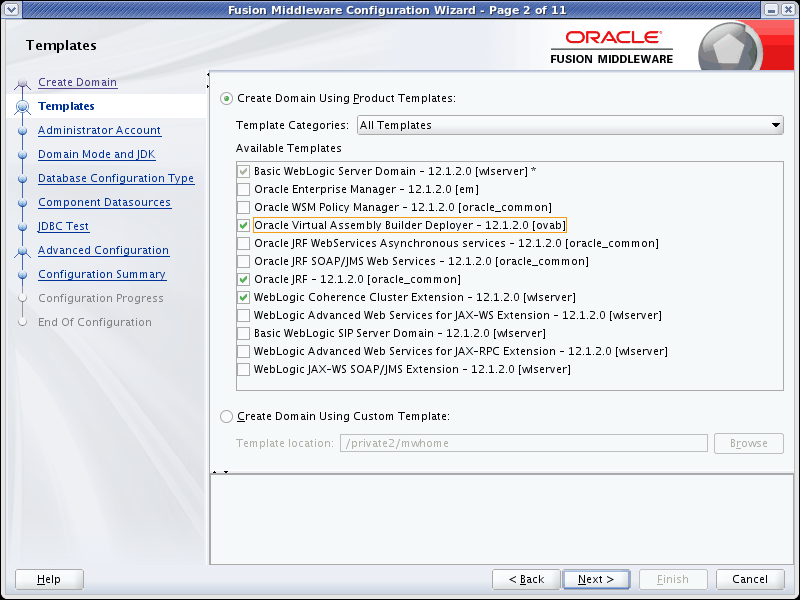
Description of the illustration fmwc2.gif
For more information about this screen, see "Templates" in Oracle Fusion Middleware Creating Domains Using the Configuration Wizard.
Enter the Oracle WebLogic administrator user name and password. The password must be at least 8 characters and contain at least one number or special character. Click Next.
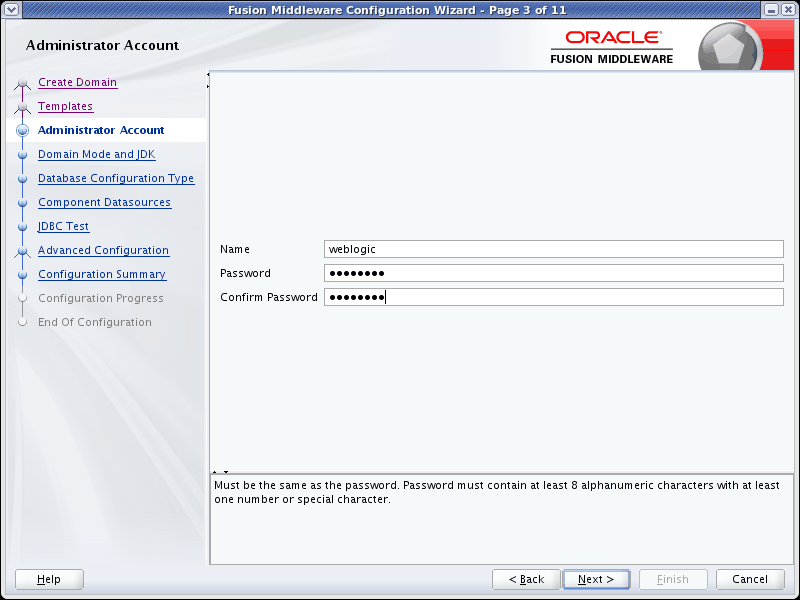
Description of the illustration fmwc3.gif
Enter the domain mode and JDK, and click Next.
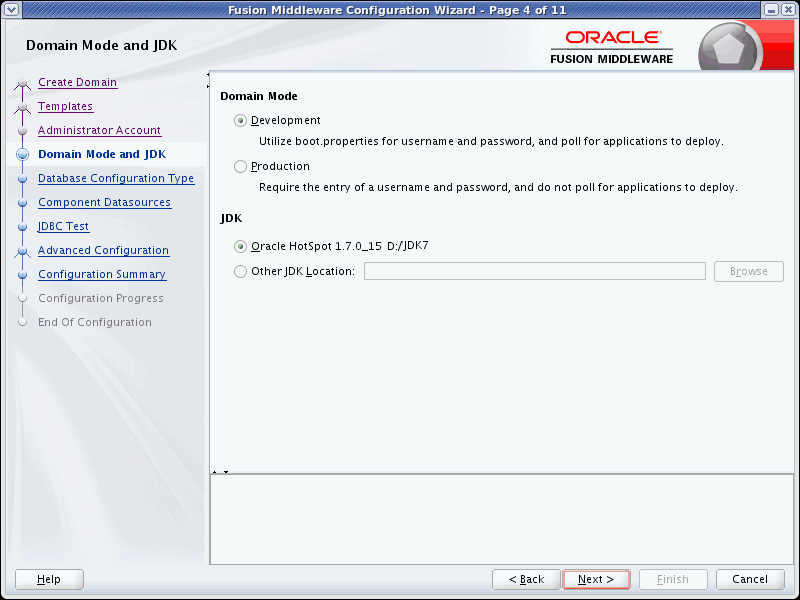
Description of the illustration fmwc4.gif
Select the database configuration options. Enter the database connection details using the Repository Creation Utility service table schema credentials, or perform a manual configuration. For more information on using Repository Creation Utility to create schemas, see Creating Schemas with the Repository Creation Utility. Click Next.
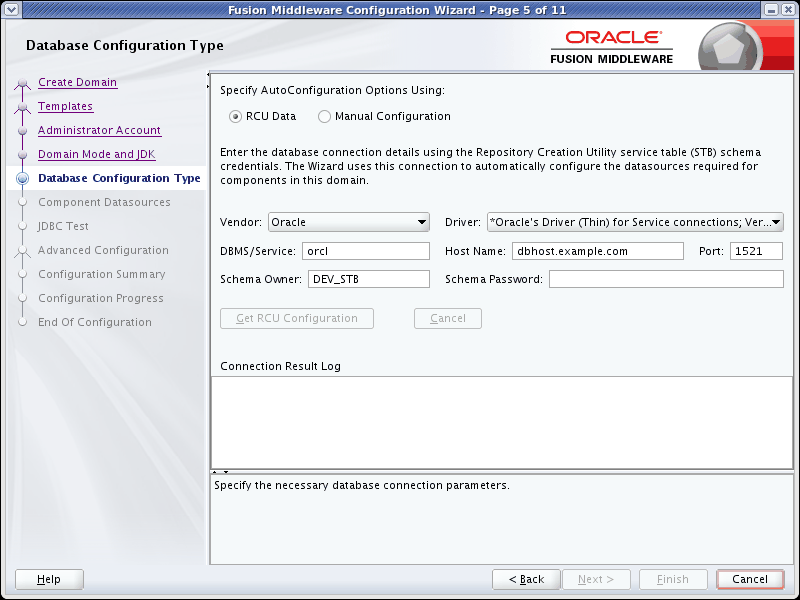
Description of the illustration fmwc5.gif
Update the JDBC component schema as required. Click Next.
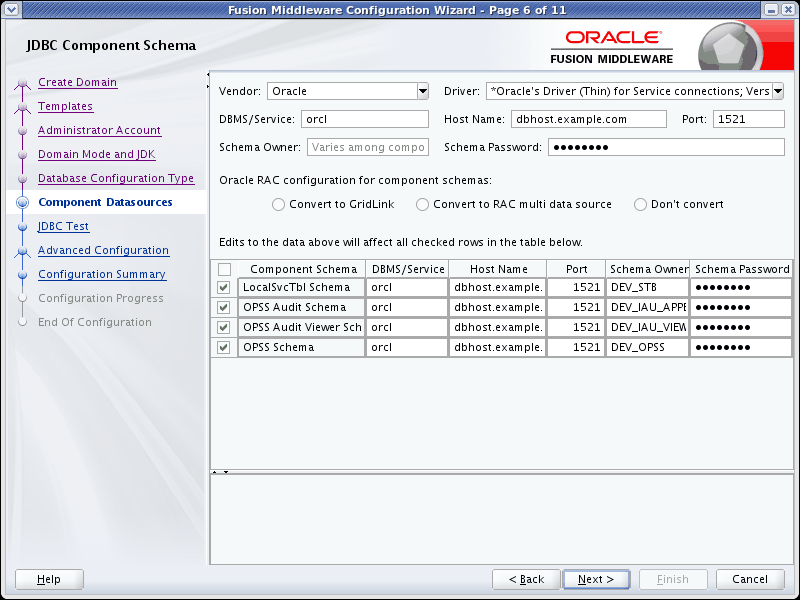
Description of the illustration fmwc6.gif
Click Test Selected Connections and verify that the JDBC test completes successfully for all components. Click Next.
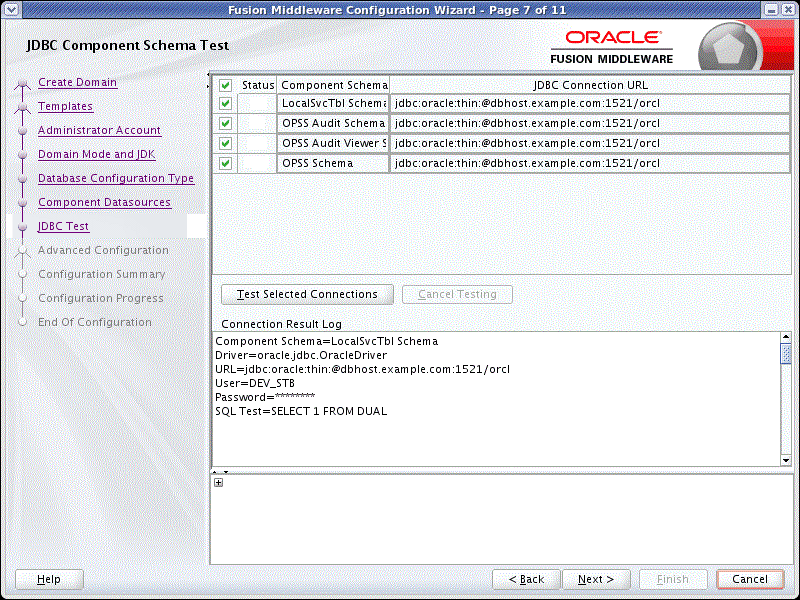
Description of the illustration fmwc7.gif
Optionally select configuration items that you wish to customize. Click Next.
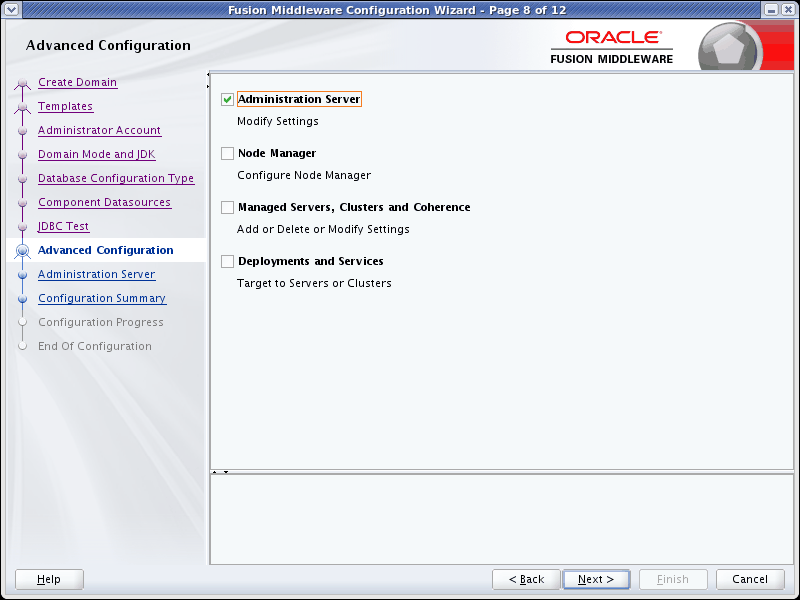
Description of the illustration fmwc8.gif
Configure the settings for the Administration Server.
For security purposes, you are recommended to select the Enable SSL check box to enable the SSL listen port. By default, SSL is disabled for all new servers. In SSL Listen Port, enter a valid value to be used for secure requests (through protocols such as HTTPS and T3S). The default value is 7002. If you leave this field blank, the default value is used. The valid listen port range is from 1 to 65535.
For more information, see "Configuring SSL" in Administering Security for Oracle WebLogic Server.
Click Next.
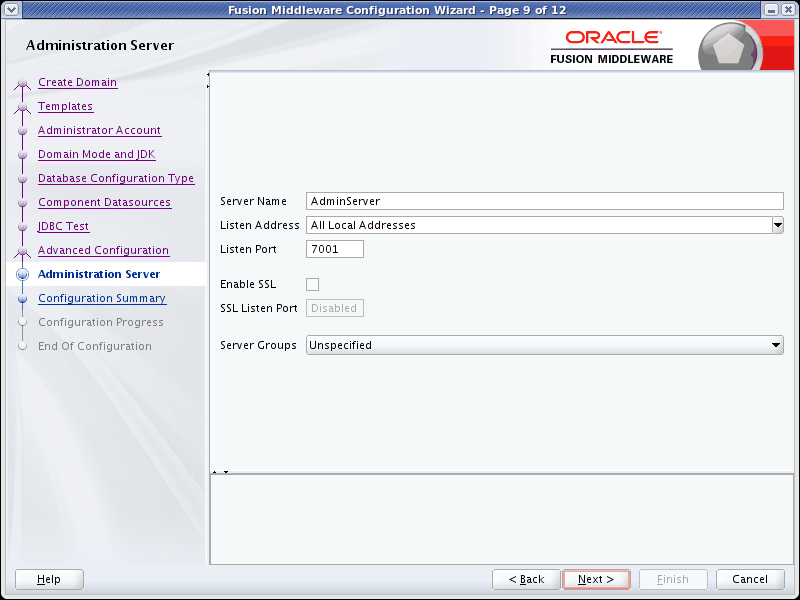
Description of the illustration fmwc9.gif
View the configuration summary. Click Create to accept the options and start creating a new domain. To change the configuration, go back to the relevant page using the navigation pane, or by using the Back button.
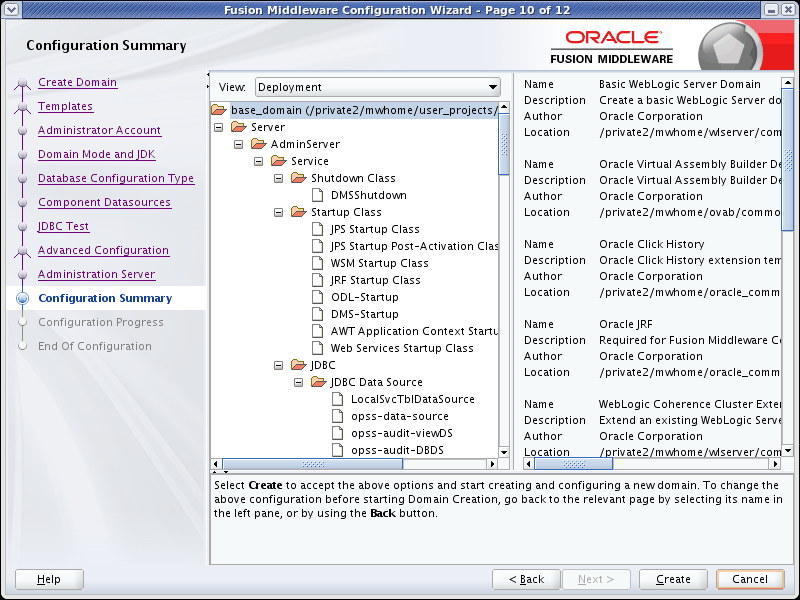
Description of the illustration fmwc10.gif
The domain is created, and the domain location and Administration Server URL are displayed. The Administration Server is created.
4.5 Create the ovab-config.properties File
Before starting up the domain, create the following properties file for each managed server:
-
Create the following directory under your deployer domain home:
config/fmwconfig/servers/ovab_server1/mbeans -
In the newly created dirctory create a file called
ovab-config.propertieswith these contents:ovab.directory=<expanded domain root>/ab_instanceovab.webserver.url=http\://<deployer domain host>\:<managed server listen port>
4.6 Configuring Security for the Deployer
Oracle Virtual Assembly Builder defines security roles and groups. The product installer sets up the necessary roles and groups for the embedded LDAP case. After the domain creation is complete you must create users and add them to the 'CloudAdmins' and 'ApplicationAdmins' groups through the Oracle WebLogic Server console. These are the users that should be specified when creating connections to the Deployer. All users added to the CloudAdmins group must also be added to the ApplicationAdmins group.
See Using Oracle Virtual Assembly Builder for information on understanding and enabling the security model employed by Oracle Virtual Assembly Builder Deployer.
To configure an external LDAP server, create roles and groups, and add users to the CloudAdmins and ApplicationAdmins groups:
-
Use the procedures in Oracle® Fusion Middleware Securing Oracle WebLogic Server to configure Oracle WebLogic Server for external LDAP.
-
Groups for "CloudAdmins" and "ApplicationAdmins" are automatically created during installation. See Using Oracle Virtual Assembly Builder.
-
Add the users defined in the LDAP server to these groups.
-
Place the groups into the security roles using the role expression
Grp(GroupName|GroupName|GroupName). -
Perform the procedures in Using Oracle Virtual Assembly Builder to define the connection to the Oracle VM backend endpoints, to provide credentials if required, and to add deployment targets in the backend.