7 Using the Oracle API Manager Portal
This chapter describes discovering and subscribing to APIs using Oracle API Manager. After APIs have been published to the Oracle API Manager Portal, users with the API Consumer role can use the portal to find and subscribe to APIs for use in their applications.
The following topics are covered:
7.1 Introducing the Oracle API Manager Portal
Oracle Service Bus proxy services exposed as APIs are published to the Oracle API Manager Portal. From the API Manager Portal, users with the API Consumer role can discover, research, subscribe to, and use APIs.
Users manage their subscriptions using the Subscriptions page and discover and research new APIs using the Catalog page.
Users also use the API Manager Portal to find the necessary information to use the APIs with their applications. APIs are consumed in the context of applications. Each application for which users intend to use published APIs must be represented in the API Manager Portal. This allows for the management of APIs and for the collection of subscription statistics for each application.
Users with the API Admin role can perform additional tasks on the API Manager Portal. See Administering Oracle API Manager for information about these tasks.
7.2 Accessing the API Manager Portal
This section describes signing in to and logging out of the API Manager Portal.
7.2.1 Signing in to the API Manager Portal
To sign in to the API Manager Portal:
- Navigate to the Oracle API Manager portal URL, for example:
http://example.com:7001/apimanager/ - Enter your user name and password into the fields, and then click Sign In.
7.3 Managing Applications
Each application with which users plan to use APIs must be represented in the API Manager Portal.
This section describes creating applications, subscribing APIs to an application, and removing applications that are no longer used from the API Manager Portal.
7.3.1 Creating an Application
Before you can subscribe APIs to an application, an application must be created in the API Manager Portal that corresponds to the application with which you plan to use the API.
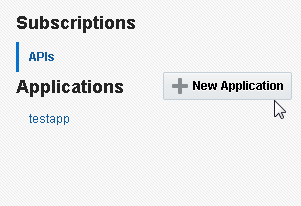
To create an application from the Subscriptions page:
Note:
You can also create an application from the Catalog page. See Subscribing to APIs from the Catalog Page, for more information.
7.3.2 Subscribing to APIs from the Subscriptions Page
After you have created an application, you can subscribe to APIs for use with the application from the Subscriptions page.
To subscribe APIs to an application from the Subscriptions Page:
7.3.3 Editing an Application Description
You can edit an application description to change its description in the API Manager Portal.
To edit an application description:
7.3.4 Removing Applications from the API Manager Portal
You can remove an application from the API Manager Portal if the application is no longer being used. The APIs will remain published in the API Manager Portal, but calls to managed APIs using the application's old entitlement key will be rejected.
To remove an application from the API Manager Portal:
7.4 Discovering APIs
Users with the API Consumer role can use the API Manager Portal to search for APIs and to review the metadata associated with APIs of interest to determine whether the API would be of use in their applications.
Users can subscribe to APIs that are not deprecated directly from the Catalog page.
7.4.1 Finding APIs Using the Catalog Page
You use the Catalog page of the API Manager Portal to search for APIs to use in your applications. From the Catalog page, you can view the details of each API to decide if you want to use it in your application.
To find APIs:
7.4.2 Viewing Details of an API
After you have discovered an API you are interested in, you can view its Details page to review its associated metadata.
To view an API details page:
7.4.3 Data Displayed on API Detail Pages
The API Detail page displays the following status for an API:
-
Managed Status: Indicates whether the API is managed or unmanaged.
-
Deprecation Status: Indicates whether the API is deprecated or undeprecated
The API Detail page displays the following analytics:
-
Current API Status: Indicates whether the API is up or down.
-
Error Count: Displays the number of errors received when invoking this API.
-
Message Count: Displays the number of messages received from the API.
-
Time Period: Displays the length of time for which the displayed data has been aggregated.
-
Average Response Time: Displays the average message response time (in milliseconds). See "Configuring Operational and Global Settings" in Administering Oracle Service Bus for more information about changing the aggregation interval.
The analytics displayed are determined by the option selected in the View Statistics list. Select Current Aggregation Interval to display analytics for only the current aggregation interval (the Time Period displayed on the detail page), or select Since Last Reset to display analytics statistics since the last reset.
The API Detail page also displays the following metadata:
| Element | Description |
|---|---|
|
API Profile |
Displays basic metadata associated with an API. |
|
API URL |
Links to the URL of the API. |
|
Version |
Displays version information for the API |
|
Description |
Contains a detailed description of the functionality of an API. |
|
Tags |
Lists tags associated with the API. |
|
Management |
Indicates whether the API is managed or unmanaged. |
|
SOAP |
Displays links for the associated WSDL file. Note: this region is displayed only for WSDL-based SOAP APIs. |
|
WSDL |
Displays a link to the WSDL file. |
|
OraWSDL |
Displays a link to the OraWSDL file, if applicable. |
|
REST |
Displays a link to the WADL file Note: This region is displayed only for REST APIs. |
|
References |
Displays external documentation references and other information sources for the API. |
|
API Details |
Displays additional details for the API. |
|
Security Overview |
Displays an overview of the Global security policies attached to this API. |
|
Security Policies |
Displays the security policies attached to this API. Hover over a policy and click its Details icon to display a policy's description. |
|
Deprecation |
Indicates whether the API is deprecated or not deprecated. |
|
Testing |
Displays the testing URL for the API. |
7.4.4 Subscribing to APIs from the Catalog Page
You can subscribe to APIs directly from the Catalog page.
To subscribe to APIs from the Catalog page:
-
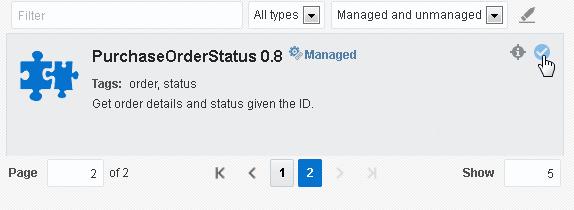
From the Catalog page, click the Select icon for each API to which you want to subscribe. You can select multiple APIs for subscription.
Note:
You cannot select deprecated APIs. They are not available for new subscriptions.
-
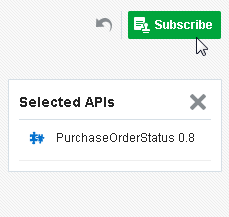
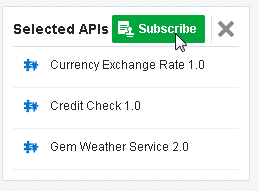
From the Selected APIs region, click the Subscribe button, as shown in the following figure.
Note:
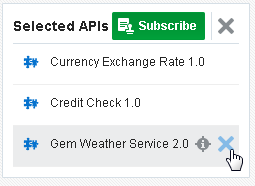
You can remove selected APIs by clicking the Unselect icon next to an API in the Selected APIs list. You can remove all selected APIs by clicking the Clear icon in the Selected APIs region. These icons are displayed in the following figure.
-
(Optional) If the application you want to use is not listed:
-
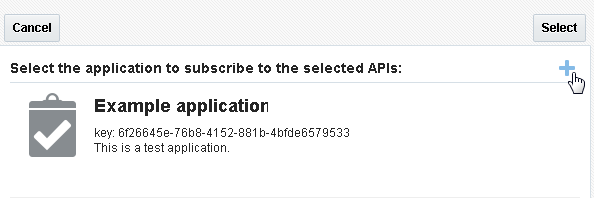
Click the Create icon, as shown in the following figure.
-
From the Create Application dialog, enter a name for the application into the Name field, and then enter a description into the Description field.
-
Click the Create button to create the application.
-
-
Click an application to select it, and then click the Select button. You are subscribed to the selected APIs.
7.5 Viewing Your Subscriptions
You can view the APIs you have subscribed to using two different views.
-
Use the APIs panel of the Subscriptions page to display a list of APIs to which you are subscribed. This is described in Viewing Your Subscribed APIs.
-
Use the Applications panel of the Subscriptions page to view the APIs to which a selected application is subscribed. This is described in Viewing APIs Subscribed to a Specific Application.
7.5.1 Viewing Your Subscribed APIs
To view your subscribed APIs, from the Subscriptions page, click APIs. Each API subscribed to appears in the list. The Name, Tags, Application, Key, and Description are displayed for each API.
Tip:
You can use the Order by list to sort APIs based on the following criteria:
-
API name, descending
-
API name, ascending
-
application name, descending
-
application name, ascending
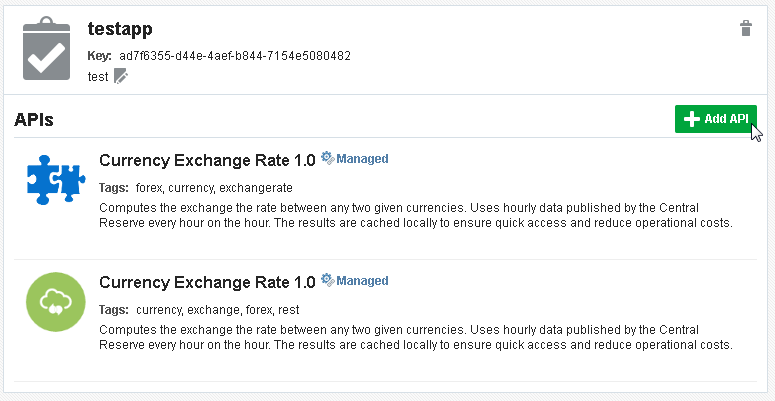
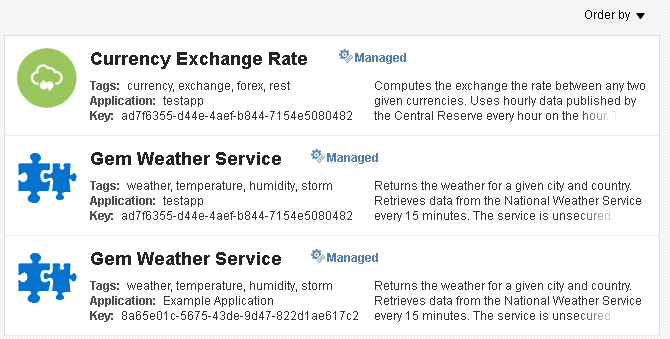
If multiple applications are subscribed to the same API, that API will be listed multiple times, once for each application that is subscribed to it, as shown in the following figure.
7.5.2 Viewing APIs Subscribed to a Specific Application
To view details for and APIs subscribed to an application, from the Subscriptions page, click the name of the application.
The Application region displays the Name, Key, and Description of the application.
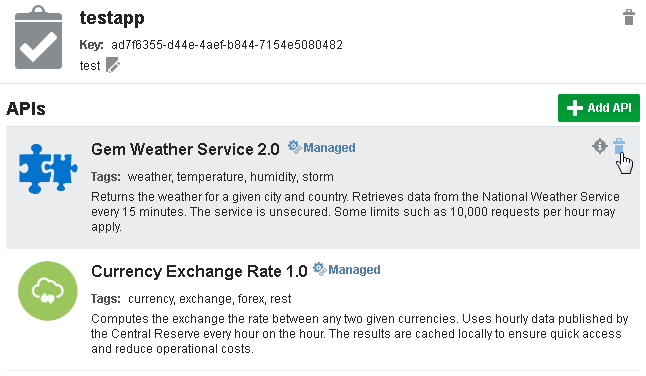
The APIs region lists the APIs to which the selected application is subscribed. The Tags and Description for each API is also displayed.
7.6 Using APIs in Your Applications
This section describes the difference between managed and unmanaged APIs, testing APIs, and using APIs in your applications.
7.6.1 Understanding the Difference Between Managed and Unmanaged APIs
Access to managed APIs is controlled at runtime using an application entitlement key. Calls to the API without this key fail. See Using Unmanaged APIs, for more information.
In order to successfully invoke a managed API, you first need to create an application and subscribe to a given managed API. The client must then invoke the API providing the API Key in the request header for the call to be successful.
Unmanaged APIs can be invoked without subscription and without passing an entitlement key at runtime.
Analytics are available for managed or unmanaged APIs. These details appear at the top of API detail pages, as described in Data Displayed on API Detail Pages.
7.6.2 Using Unmanaged APIs
There are no special actions you need to take to use an unmanaged API. You do not need to subscribe to unmanaged APIs nor do you need to pass an entitlement key at runtime. Invoke unmanaged APIs as you normally would in your application.
7.6.3 Using Managed APIs
You must first subscribe to a managed API before you can use it. See Subscribing to APIs from the Subscriptions Page, for details about subscribing to an API.
Each application in the API Manager Portal has a unique entitlement key that must be passed at runtime for each API that application is subscribed to. The entitlement key must be passed as an HTTP user header using the X-API-KEY attribute. For example, if an application's entitlement key is b4a4cd59-744c-4a08-a888-6287ce6431c0, the attribute X-API-KEY: b4a4cd59-744c-4a08-a888-6287ce6431c0 must be present in the request header for an invocation of a managed API for the call to be successful.
Finding an Application's Entitlement Key, describes how you find an application's entitlement key in the API Manager Portal.
7.6.4 Finding an Application's Entitlement Key
You find an application's entitlement key on that application's entry on the Subscriptions page.
To find an application's entitlement key, click Subscriptions. From the Applications panel, click the name of the application whose entitlement key you want to find. The application's entitlement key is displayed in the Application region, as shown in the following figure.
Note:
You must use this key as described in Using Managed APIs to invoke a managed API. Invoking a managed API without using the key results in a 403 Forbidden HTTP status code.
Tip:
Hover over an application's key to display a tool tip. You can copy the X-API-KEY attribute containing the application's key directly from this tool tip.
7.6.5 Testing APIs
API producers can choose to supply a URL for testing. If a test URL has been supplied, an if a user with the API Curator role has added that URL to API metadata (described in Editing the Metadata of an API), API Consumers can test and evaluate the functionality of an API before subscribing to it.
To test an API:
7.7 Unsubscribing from APIs
You can unsubscribe from an API if it is no longer being used. For example, you can unsubscribe from an API if it is deprecated in favor of a newer version or you decide that the API is not a good fit for your application.
After you unsubscribe from a managed API, any invocations to that API using the entitlement key for the application that used to subscribe to it will be rejected.
The two methods you use to unsubscribe to APIs are described in this section.
7.7.1 Unsubscribe from APIs Using the APIs Panel of the Subscriptions Page
To unsubscribe from an API using the APIs panel:
7.8 Next Steps
Next steps include administering API Manager.
See Administering Oracle API Manager for more information.

