9 Oracle MapViewer Template Builder
This chapter describes the Oracle MapViewer Template Builder, also referred to as the Template builder. The template builder lets you create and modify map templates, which are self-contained, self-sufficient sets of spatial data and mapping metadata that can conveniently provide an interactive full-featured mapping experience. (Map templates are described in Section 6.5.)
Template Builder User Interface
Creating or Editing a Map Template
Adding Vector Layers to a Map Template
Adding Styles to a Map Template
9.1 Template Builder User Interface
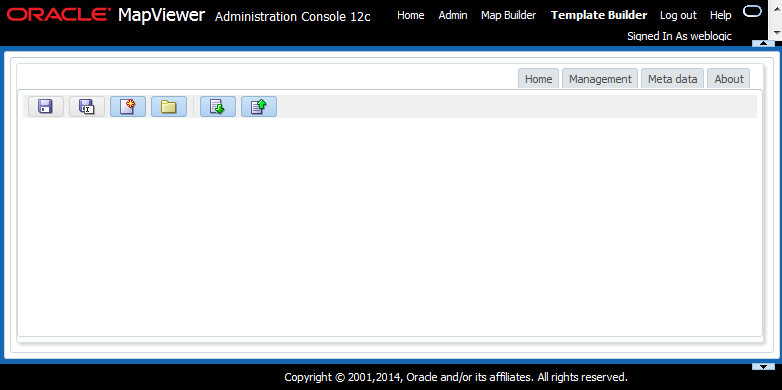
To display the Template Builder, go to the MapViewer administration console and click Template Builder in the upper-right area. (If you are asked to log in, log in using the MapViewer administrator account.) Figure 9-1 shows the Template Builder main window.
Figure 9-1 MapViewer Template Builder Main Window
Description of ''Figure 9-1 MapViewer Template Builder Main Window''
Icons in the upper-left area perform the following actions:
-
Save saves any changes to the currently open template.
-
Save As saves the currently open template to a specified name and location.
-
New Template creates a new template. You are asked to specify the information described in Section 9.2, "Creating or Editing a Map Template".
-
Open Template opens an existing template file, such a one that you previously saved.
-
Download Files lets you download files in the templates directory. The files are put in a .zip file.
-
Upload Files lets you upload files to the templates directory or any directory under it. The only files you can upload are those with these extensions: .json, .jpg, .jpeg, .png.
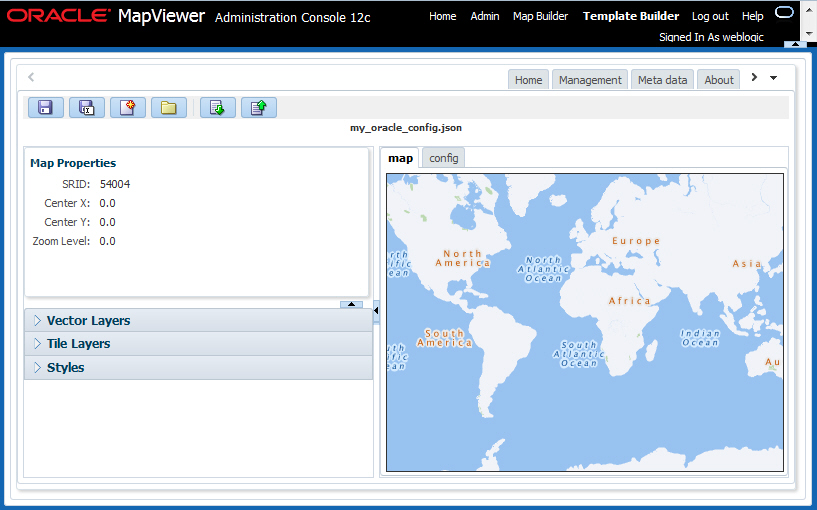
If you are creating or editing a template, the main displays the map properties; expandable panels for creating and editing Vector Layers, Tile Layers, and Styles; and a preview using the template. Figure 9-2 shows the main window when you are creating or editing a template.
Figure 9-2 Main Window when Creating or Editing a Template
Description of ''Figure 9-2 Main Window when Creating or Editing a Template''
The window shown in Figure 9-2 includes the following:
-
On the left side, map properties.
-
On the left side, expandable Vector Layers, Tile Layers, and Styles panels that you can use to create and edit objects of those types.
-
On the right, a Map tab that displays a preview of a map using this template.
-
On the right, a Config tab that displays the JSON coding that reflects the current template specifications.
9.2 Creating or Editing a Map Template
When you create or edit a template, you can specify the following information.
Name and Description:
Name: File name, including the .json extension, for the template file.
Location: Location for the template file. You can click to navigate to the desired directory.
Description: Optional description of the template.
Universe: The template can use a predefined tile layer for a specified map data provider, or the template can be created from your customized specifications. The information displayed depends on whether you enable or disable Use Tile Layer.
Use Tile Layer: If this option is enabled (checked), the template has a predefined tile layer for a specified map data provider; if this option is disabled (unchecked), you must provide the necessary information for your customized template.
If Use Tile Layer is enabled, you specify the vendor associated with the tile layer. Some vendors require a key or a secondary key, or both, and some have different map types, such as terrain or satellite.
-
Tile Layer: Select the value associated with the data provider for the tile layer:
oracle,google,bing, ornokia. -
Key (
bingornokiaonly): Key value. -
Secondary Key (
nokiaonly): Secondary key value. -
Map Types (
nokiaonly): Map type or types:All; or any combination ofnormal,terrain, andsatellite.
If Use Tile Layer is disabled, you define a custom universe.
-
Name: Name of the universe to be associated with the template.
-
SRID: Spatial reference system (coordinate system) ID associated with the map data (for example, 8307 for
WGS 84 longitude/latitude). (For information about coordinate systems, see Oracle Spatial and Graph Developer's Guide.) -
Zoom Levels: Number of zoom levels to be used with the tile layer.
-
minX, maxX, minY, maxY: The minimum and maximum values for the X dimension, and the minimum and maximum values for the Y dimension. For SRID 8307, these values must be
-180.0,180.0, -90.0, and90.0, respectively.
9.3 Creating Vector Layers
You can create a vector layer by expanding the Vector Layers panel and clicking the icon for Create Vector Layer from Data Source or Create Vector Layer. Specify the name and location for the GeoJSON file to be created, and other information as appropriate depending on whether you are creating the vector layer from a data source. Information for drop-down fields often comes from the MapViewer configuration file.
For a vector layer based on a data source, the following information may apply.
Dynamic: If you choose to use a dynamic theme, also specify the SQL Query (WHERE clause without the WHERE keyword) to be used.
Label Box: Determines whether a label box should be included with each polygon feature.
Simplify: Allows geometries to be simplified, and enables you to specify thresholds. For information about geometry simplification, see the information about the SDO_UTIL.SIMPLIFY and SDO_UTIL.SIMPLIFYVW functions in Oracle Spatial and Graph Developer's Guide.
Threshold: When the Simplify is enabled, determines the value of simplification to be used, in the range from 0 to 100, where 0 means no simplification at all, and 100, means the greatest possible simplification.
Key Column: Default is _id.
DADP: Indicates the precision of coordinates in terms of the number of digits after the decimal point.
After you click Finish, it might take some time for the JSON file to be created.
9.4 Adding Vector Layers to a Map Template
If there is an existing GeoJSON file, it can be added to the template by specifying the name and location of the template. (Note that there can be two vector layers with the same name.) The rest of the properties, including styles for the layer, are optional.
After you add the vector layer to be added, you can see a preview of the layer with that addition. The preview image does not show the actual styles and tile layers of the template; it is just to give you a general idea of the layer's appearance with a sample geometry. If you do not like the appearance, you can go back and edit properties or cancel the action.
9.5 Adding Styles to a Map Template
You can create a style to add to the map template by expanding the Styles panel and clicking the + (plus sign) icon for Create Style.
Specify the style name and type (such as Color or Marker). You cannot create more than one style with the same name and type.
Specify other style information as appropriate for the style type. For example, for a Color style, this information includes the fill color, stroke color, stroke thickness, and opacity levels for the fill and stroke colors.