3 Installing and Verifying the Oracle Enterprise Scheduler Installation
This chapter describes how to ensure that Oracle Enterprise Scheduler has been correctly installed.
This chapter includes the following sections:
Introduction to Verifying the Oracle Enterprise Scheduler Installation
How to Verify the Oracle Enterprise Scheduler Installation Using a Browser
How to Programmatically Verify the Oracle Enterprise Scheduler Installation
What Happens at Runtime: How the Oracle Enterprise Scheduler Installation is Verified
3.1 Installing Oracle Enterprise Scheduler
Oracle Enterprise Scheduler does not have its own installer, but is installed by the installer of the embedding product such as Oracle SOA Suite. Refer to the embedding product's installation documentation for details.
The IDE is installed by the Oracle SOA Quick Start for Developers which is described in Installing Oracle SOA Suite and Business Process Management for Developers. The installer installs the IDE and automatically configures it to Oracle JDeveloper. Before you run JDeveloper, make sure to set the variable MW_HOME to the middleware home location as required by the IDE.
The Oracle Enterprise Scheduler runtime component is installed by the design time or production installer of the embedding product (for example, Oracle SOA suite whose installation is described in Installing and Configuring Oracle SOA Suite and Business Process Management). The embedding product may automatically deploy Oracle Enterprise Scheduler, but if it does not, then it can be deployed using the “Oracle Enterprise Scheduler Service Basic" template to a server or cluster. The “Oracle Enterprise Manager Plugin for ESS" template can then be deployed for Oracle Enterprise Manager Fusion Middleware Control functionality.
3.1.1 Targeting Oracle Enterprise Scheduler During Domain Creation
When you extend SOA with Oracle Enterprise Scheduler, ess-server1 is created and by default the ESS-MGD-SVRS server group is targeted to ess_server1. You can use the following steps in the FMW Configuration Wizard to re-target Oracle Enterprise Scheduler to soa_server1:
Check ESS-MGD-SVRS for
soa_server1Uncheck ESS-MGD-SVRS for
ess_server1Delete
ess_server1
See Creating WebLogic Domains Using the Configuration Wizard for more information about the wizard.
3.1.2 OWSM-PM Targeting With Oracle Enterprise Scheduler
OWSM-PM is intended to be targeted to just one server in a domain. To facilitate this requirement, Oracle Enterprise Scheduler templates no longer target OWSM-PM. If another product in the domain automatically targets OWSM-PM, then there is nothing to do. However, if there are no managed servers in the domain except for Oracle Enterprise Scheduler, or none of these servers has OWSM-PM, then OWSM-PM must be targeted manually.
3.1.2.1 Targeting OWSM-PM Manually
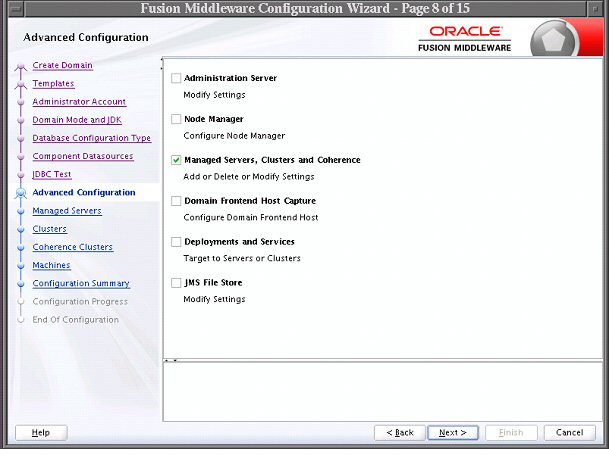
In the Fusion Middleware Configuration Wizard, select the Managed Servers, Clusters and Coherence check box as shown in Figure 3-1.
Figure 3-1 Fusion Middleware Configuration Wizard

Description of "Figure 3-1 Fusion Middleware Configuration Wizard"
On the Managed Server screen, for ess_server1, select the WSMPM-MAN-SVR server group. ESS-MGD-SVRS should already be selected.
3.2 Introduction to Verifying the Oracle Enterprise Scheduler Installation
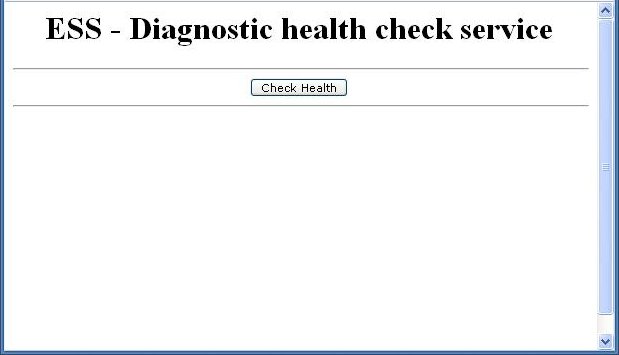
The Oracle Enterprise Scheduler health check enables verifying the Oracle Enterprise Scheduler installation using a web browser. The health check web page submits a simple scheduled job so as to verify that Oracle Enterprise Scheduler works as it should.
3.3 How to Verify the Oracle Enterprise Scheduler Installation Using a Browser
Access the Java health check servlet in a web browser. Access to the health check page is available only to users with administrator privileges.
To verify the Oracle Enterprise Scheduler installation:
3.4 How to Programmatically Verify the Oracle Enterprise Scheduler Installation
Programmatically access the health check servlet from your application. Access to the health check page is available only to users with administrator privileges.
To programmatically verify the Oracle Enterprise Scheduler installation:
3.5 What Happens at Runtime: How the Oracle Enterprise Scheduler Installation is Verified
The health check servlet schedules a trivial job with Oracle Enterprise Scheduler as part of an HTTP request. After a few seconds, the servlet calls RuntimeServiceBean.getRequestState() to check the status of the job and constructs a response message within the servlet code. The servlet then returns a response indicating the success or failure of the job.
The servlet waits for the job to either reach a terminal state, or run for 10 seconds, whichever occurs first.
If the job reaches a terminal state in less than 10 seconds, the job results in a state of success.
If the job's terminal state does not change within 10 seconds, the job results in a state of success. However, the job is listed as not having been executed. This is because the system may be overloaded such that executing the job may take some time.
If any problems occur when submitting or executing the job, the job results in a state of failure.
