4 Oracle JCA Adapter for Files/FTP
This chapter describes how to use the Oracle File and FTP Adapters, which work with Oracle BPEL Process Manager and Oracle Mediator and Oracle Mediator. Information on concepts, features, configuration and use cases for the Oracle File and FTP Adapters is also provided.
This chapter includes the following sections:
Note:
The term Oracle JCA Adapter for Files/FTP is used for the Oracle File and FTP Adapters, which are separate adapters with very similar functionality.
4.1 Introduction to Oracle File and FTP Adapters
Oracle BPEL PM and Mediator include the Oracle File and FTP Adapters. The Oracle File and FTP Adapters enable a BPEL process or a Mediator to exchange (read and write) files on local file systems and remote file systems (through use of the file transfer protocol (FTP)). The file contents can be both XML and non-XML data formats.
This section includes the following topics:
4.1.1 Oracle File and FTP Adapters Architecture
The Oracle File and FTP Adapters are based on JCA 1.5 architecture. JCA provides a standard architecture for integrating heterogeneous enterprise information systems (EIS). The JCA Binding Component of the Oracle File and FTP Adapters expose the underlying JCA interactions as services (WSDL with JCA binding) for Oracle BPEL PM integration. For details about Oracle JCA Adapter architecture, see Introduction to Oracle JCA Adapters.
4.1.2 Oracle File and FTP Adapters Integration with Oracle BPEL PM
The Oracle File and FTP Adapters are automatically integrated with Oracle BPEL PM. When you drag and drop File Adapter for FTP Adapter from the Components window of JDeveloper BPEL Designer, the Adapter Configuration Wizard starts with a Welcome page, as shown in Figure 4-1.
Figure 4-1 The Adapter Configuration Wizard - Welcome Page
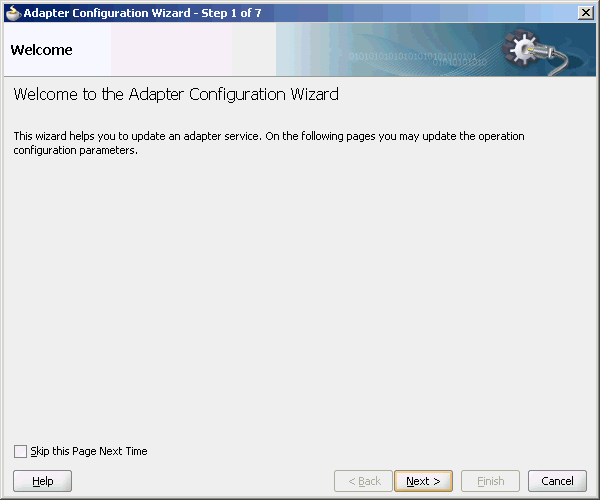
Description of "Figure 4-1 The Adapter Configuration Wizard - Welcome Page"
This wizard enables you to select and configure the Oracle File and FTP Adapters. The Adapter Configuration Wizard then prompts you to enter a service name, as shown in Figure 4-2.
Figure 4-2 The Adapter Configuration Wizard - Service Name Page
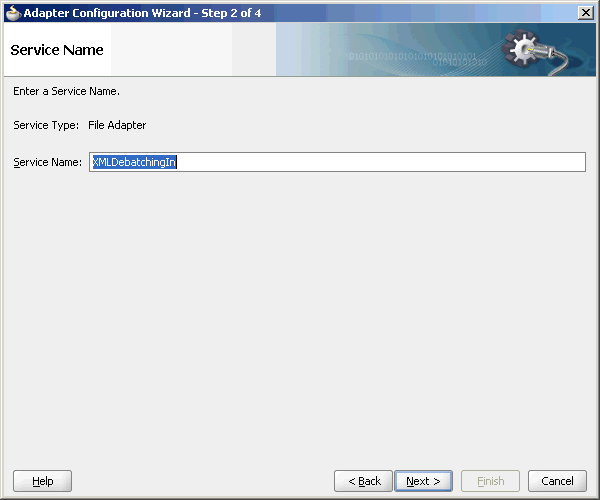
Description of "Figure 4-2 The Adapter Configuration Wizard - Service Name Page"
When configuration is complete, a WSDL and JCA file pair is created in the Application Navigator section of Oracle JDeveloper. (JDeveloper) This JCA file contains the configuration information you specify in the Adapter Configuration Wizard.
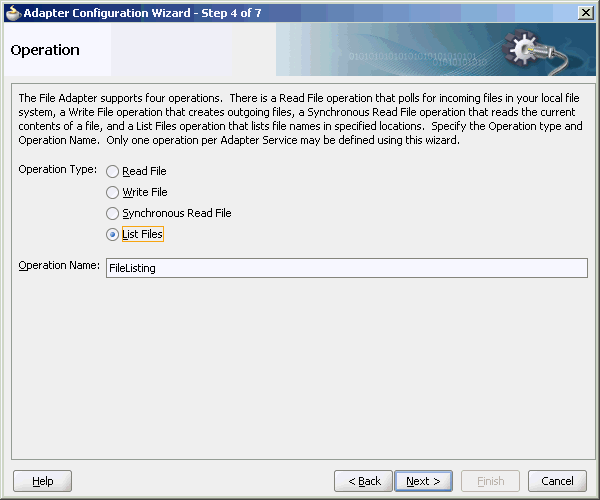
The Operation Type page of the Adapter Configuration Wizard prompts you to select an operation to perform. Based on your selection, different Adapter Configuration Wizard pages appear and prompt you for configuration information. Table 4-1 lists the available operations and provides references to sections that describe the configuration information you must provide.
Table 4-1 Supported Operations for Oracle BPEL Process Manager
| Operation | Section |
|---|---|
|
Oracle File Adapter |
- |
|
|
|
|
|
|
|
|
|
Oracle FTP Adapter |
- |
|
|
|
|
|
|
|
For more information about Oracle JCA Adapter integration with Oracle BPEL PM, see Introduction to Oracle JCA Adapters.
4.1.3 Oracle File and FTP Adapters Integration with Mediator
The Oracle File and FTP Adapters are automatically integrated with Mediator. When you create an Oracle File or FTP Adapter service in JDeveloper Designer, the Adapter Configuration Wizard is started.
This wizard enables you to select and configure the Oracle File and FTP Adapters. When configuration is complete, a WSDL, JCA file pair is created in the Application Navigator section of JDeveloper. This JCA file contains the configuration information you specify in the Adapter Configuration Wizard.
The Operation Type page of the Adapter Configuration Wizard prompts you to select an operation to perform. Based on your selection, different Adapter Configuration Wizard pages appear and prompt you for configuration information. Table 4-2 lists the available operations and provides references to sections that describe the configuration information you must provide. For more information about Adapters and Mediator, see Introduction to Oracle JCA Adapters.
Table 4-2 Supported Operations for Oracle Mediator
| Operation | Section |
|---|---|
|
Oracle File Adapter |
- |
|
|
|
|
|
|
|
|
|
Oracle FTP Adapter |
- |
|
|
|
|
|
|
|
4.1.4 Oracle File and FTP Adapters Integration with SOA Composite
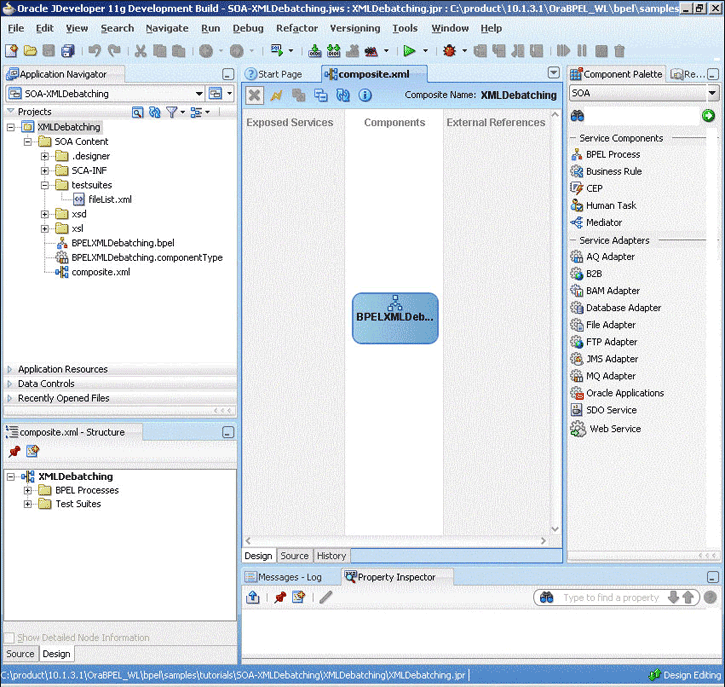
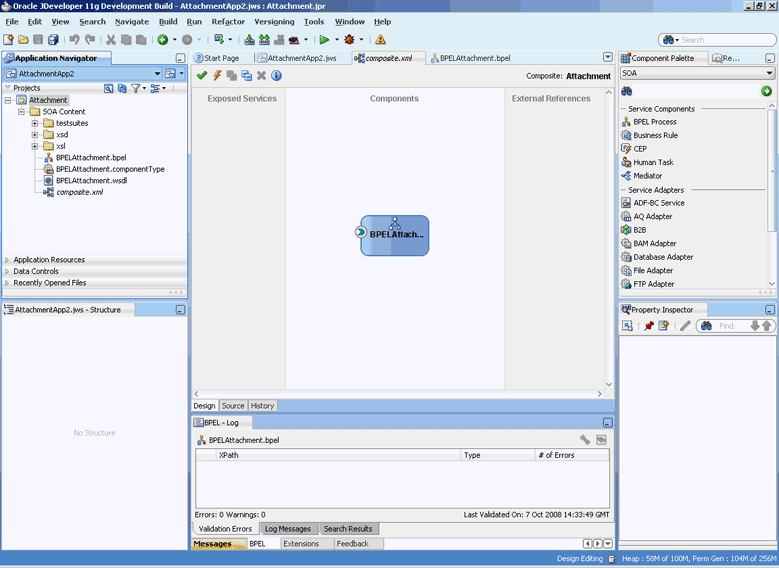
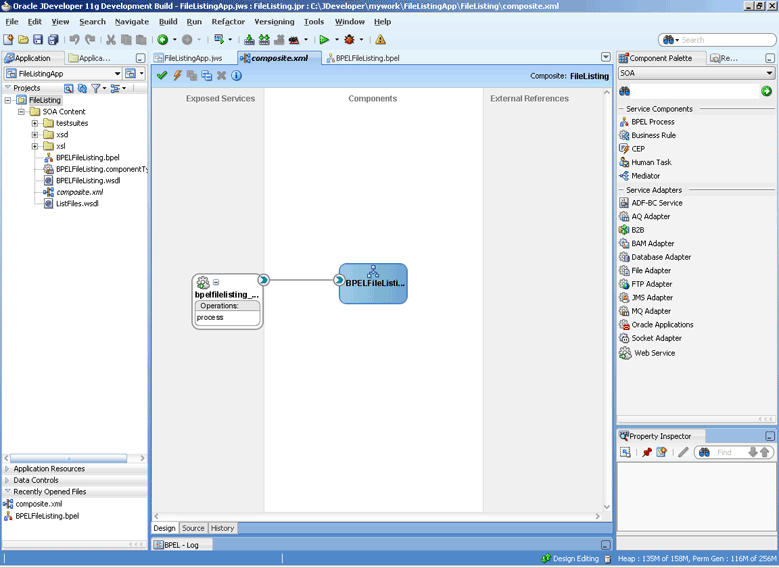
A composite is an assembly of services, service components (Oracle BPEL PM and Mediator), wires, and references designed and deployed in a single application. The composite processes the information described in the messages. The details of the composite are stored in the composite.xml file. For more information about integration of the Oracle File and FTP Adapters with SOA composite, see Oracle SOA Composite Integration with Adapters.
4.2 Oracle File and FTP Adapters Features
The Oracle File and FTP Adapters enable you to configure a BPEL process or a Mediator to interact with local and remote file system directories. This section explains the following features of the Oracle File and FTP Adapters:
Note:
For composites with Oracle File and FTP Adapters, which are designed to consume very large number of concurrent messages, you must set the number of open files parameter for your operating system to a larger value. For example, to set the number of open files parameter to 8192 for Linux, use the ulimit -n 8192 command.
4.2.1 File Formats
The Oracle File and FTP Adapters can read and write the following file formats and use the adapter translator component at runtime:
-
XML (both XSD- and DTD-based)
-
Delimited
-
Fixed positional
-
Binary data
-
COBOL Copybook data
The Oracle File and FTP Adapters can also treat file contents as an opaque object and pass the contents in their original format (without performing translation). The opaque option handles binary data such as Jpgs and GIFs, whose structure cannot be captured in an XSD or data you do not want to have translated.
Note that opaque representation base-64 encodes the payload and increase the size of the payload in-memory by a third. Opaque/base-64 representation is usually used for passing binary data within XML. See also Large Payload Support, for a description of attachment support.
The translator enables the Oracle File and FTP Adapters to convert native data in various formats to XML, and from XML to other formats. The native data can be simple (just a flat structure) or complex (with parent-child relationships). The translator can handle both XML and non-XML (native) formats of data.
4.2.2 FTP Servers
Oracle FTP Adapter supports most RFC 959 compliant FTP servers on all platforms. It also provides a pluggable mechanism that enables Oracle FTP Adapter to support additional FTP servers. In addition, Oracle FTP Adapter supports FTP over SSL (FTPS) on Solaris and Linux. Oracle FTP Adapter also supports SFTP (Secure FTP) using SSH transport.
Note:
Oracle FTP Adapter supports SFTP server version 3 or later.
4.2.3 Inbound and Outbound Interactions
The Oracle File and FTP Adapters exchange files in the inbound and outbound directions. Based on the direction, the Oracle File and FTP Adapters perform different sets of tasks.
For inbound files sent to Oracle BPEL PM or Mediator, the Oracle File and FTP Adapters perform the following operations:
-
Poll the file system looking for matches.
-
Read and translate the file content. Native data is translated based on the native schema (NXSD) defined at design time.
-
Publish the translated content as an XML message.
This functionality of the Oracle File and FTP Adapters is referred to as the file read operation.
For outbound files sent from Oracle BPEL PM or Mediator, the Oracle File and FTP Adapters perform the following operations:
-
Receive messages from BPEL or Mediator.
-
Format the XML contents as specified at design time.
-
Produce output files. The output files can be created based on the following criteria: time elapsed, file size, and number of messages. You can also specify a combination of these criteria for output files.
This functionality of the Oracle File and FTP Adapters is referred to as the file write operation. This operation is known as a JCA outbound interaction.
For the inbound and outbound directions, the Oracle File and FTP Adapters use a set of configuration parameters. For example:
-
The inbound Oracle File and FTP Adapters have parameters for the inbound directory where the input file appears and the frequency with which to poll the directory.
-
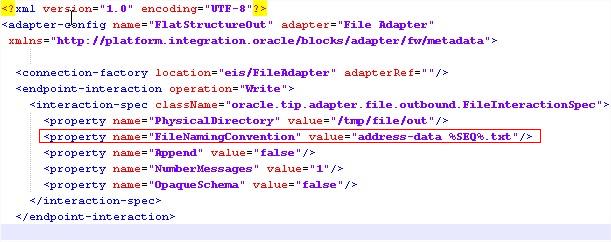
The outbound Oracle File and FTP Adapters have parameters for the outbound directory in which to write the file and the file naming convention to use.
Note:
You must use the Adapter Configuration Wizard to modify the configuration parameters, such as publish size, number of messages, and polling frequency.
You must not manually change the value of these parameters in JCA files.
The file reader supports polling conventions and offers several postprocessing options. You can specify to delete, move, or leave the file as it is after processing the file. The file reader can split the contents of a file and publish it in batches, instead of as a single message. You can use this feature for performance tuning of the Oracle File and FTP Adapters. The file reader guarantees once and once-only delivery.
following sections for details about the read and write functionality of the Oracle File and FTP Adapters:
4.2.4 File Debatching
You can define the batch size using the publishSize parameter in the .jca file.
This property specifies if the file contains multiple messages and how many messages to publish to the BPEL process at a time.
For example, if a certain file has 11 records and this parameter is set to 2, then the file processes 2 records at a time and the final record is processed in the sixth iteration.
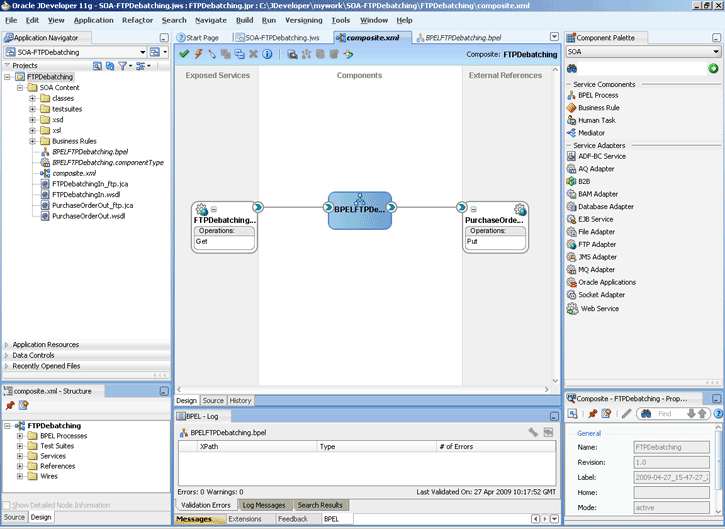
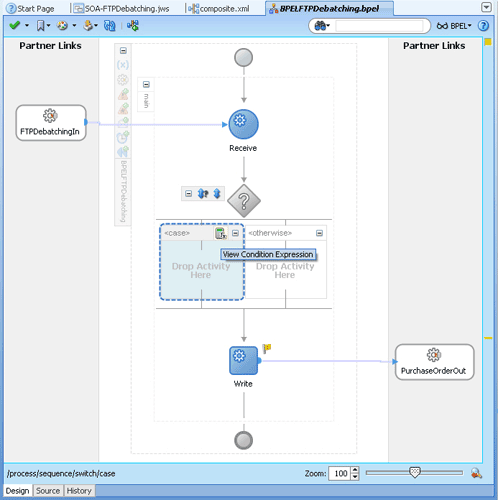
When a file contains multiple messages, you can choose to publish messages in a specific number of batches. This is referred to as debatching. During debatching, the file reader, on restart, proceeds from where it left off in the previous run, thereby avoiding duplicate messages. File debatching is supported for files in XML and native formats.
You can register a batch notification callback (Java class) which is invoked when the last batch is reached in a debatching scenario.
<service ...
  <binding.jca ...
    <property name="batchNotificationHandler">java://oracle.sample.SampleBatchCalloutHandler </property>
where the property value must be java://{custom_class} and where oracle.sample.SampleBatchCalloutHandler must implement
package oracle.tip.adapter.api.callout.batch;
public interface BatchNotificationCallout extends Callout
{
    public void onInitiateBatch(String rootId,
                                String metaData)
        throws ResourceException;
    public void onFailedBatch(String rootId,
                              String metaData,
                              long currentBatchSize,
                              Throwable reason)
        throws ResourceException;
    public void onCompletedBatch(String rootId,
                                String metaData,
                                                   long finalBatchSize)
        throws ResourceException;
4.2.5 File ChunkedRead
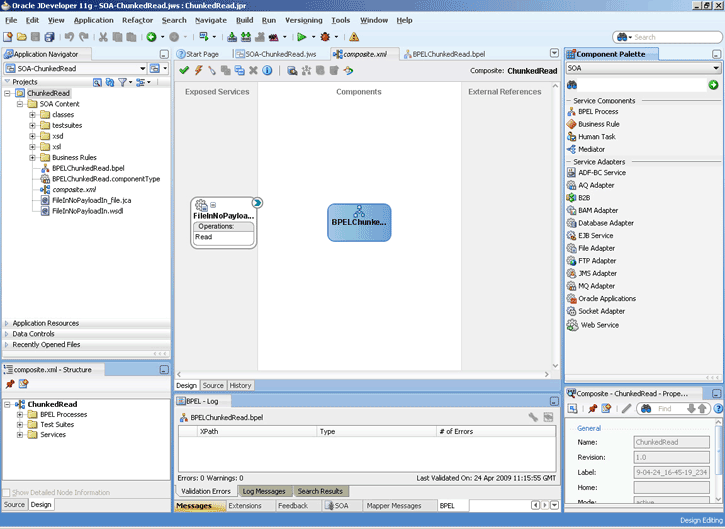
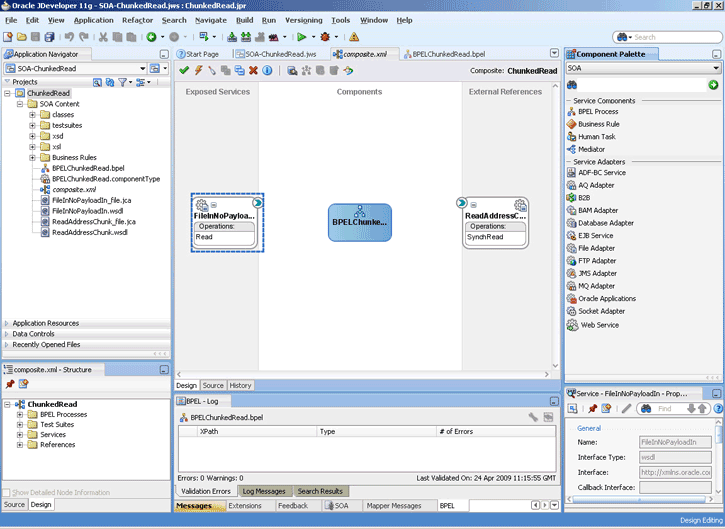
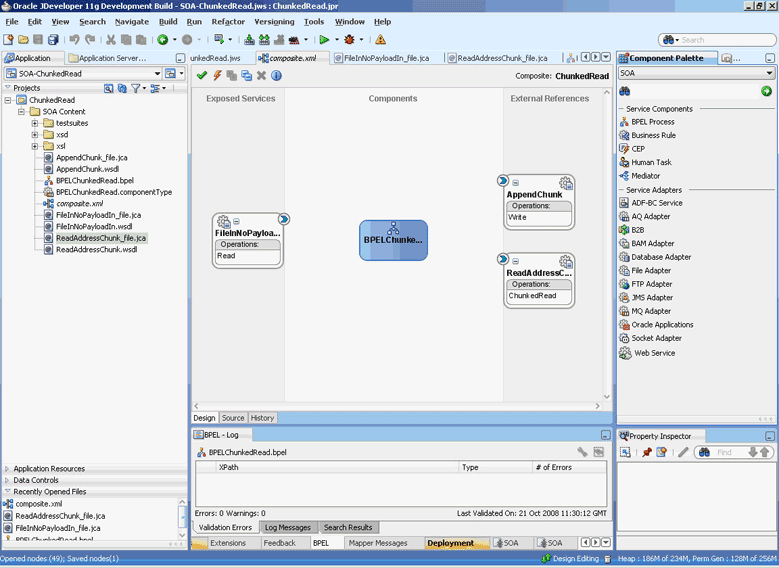
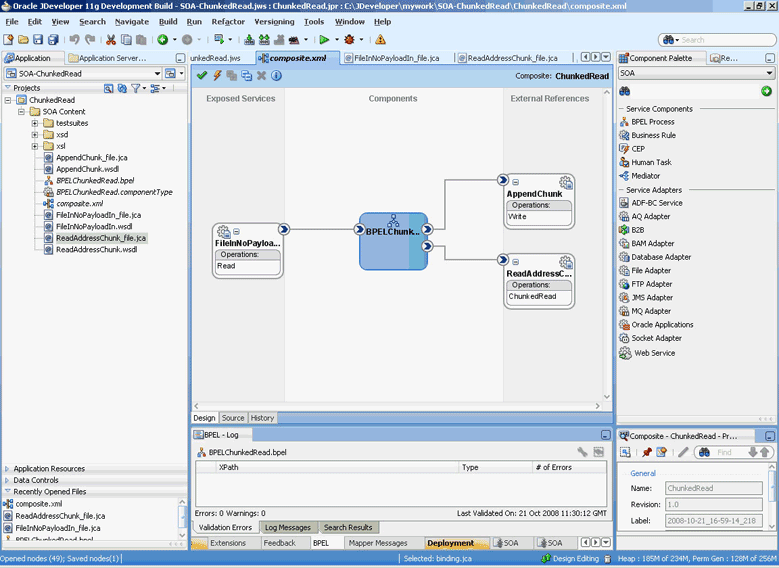
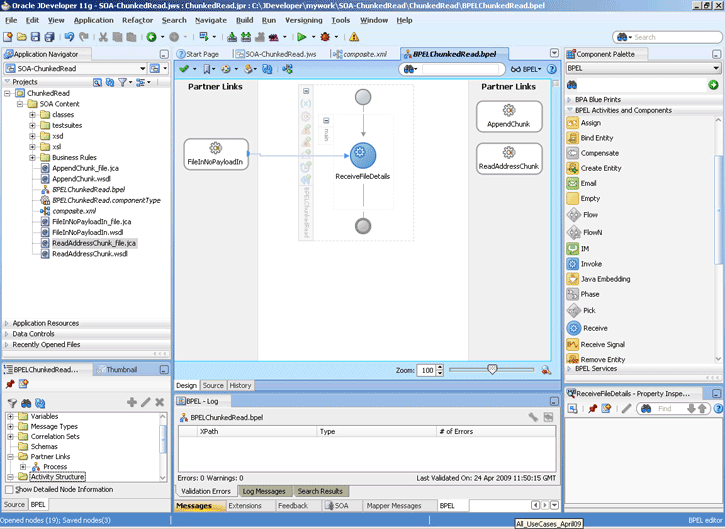
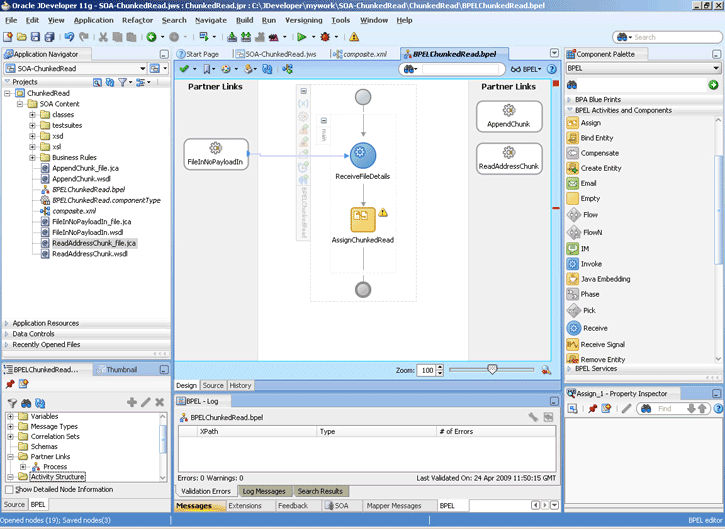
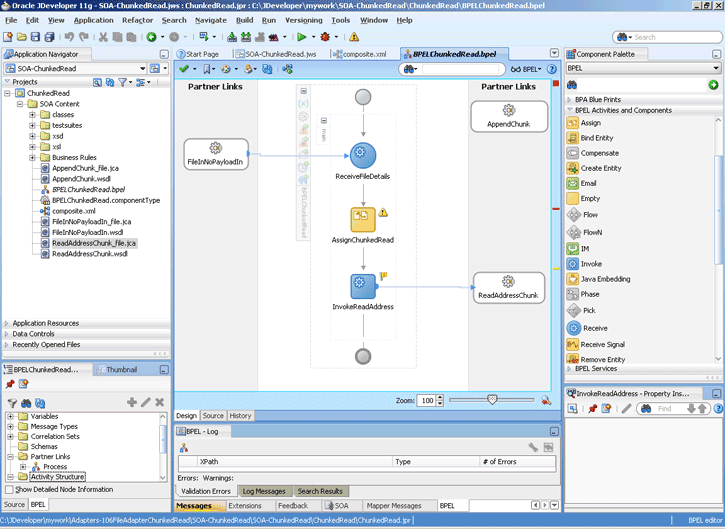
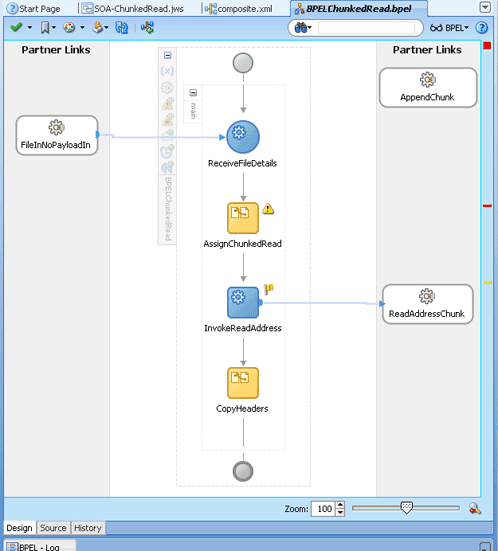
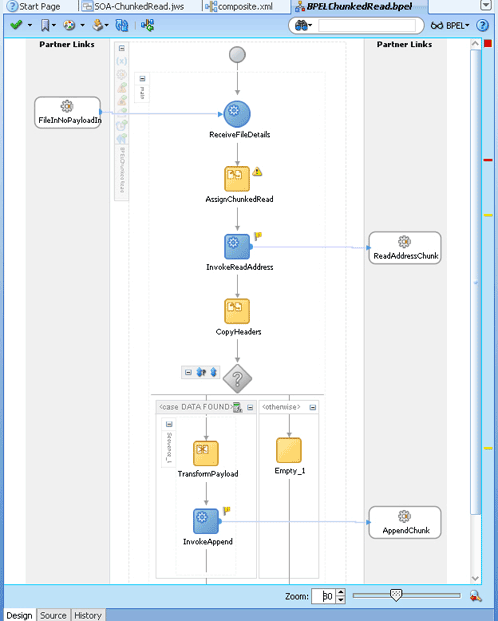
The File Chunked Read operation enables you to process large files and uses a BPEL Invoke activity within a while loop to process the target file.
Specifically, the FileAdapter allows the BPEL process modeler to use an Invoke activity to retrieve a logical chunk from a huge file, enabling the file to stay within memory constraints. The process calls the chunked-interaction in a loop in order to process the entire file, one logical chunk at a time. The intent is to achieve de-batchability on a file's outbound processing.
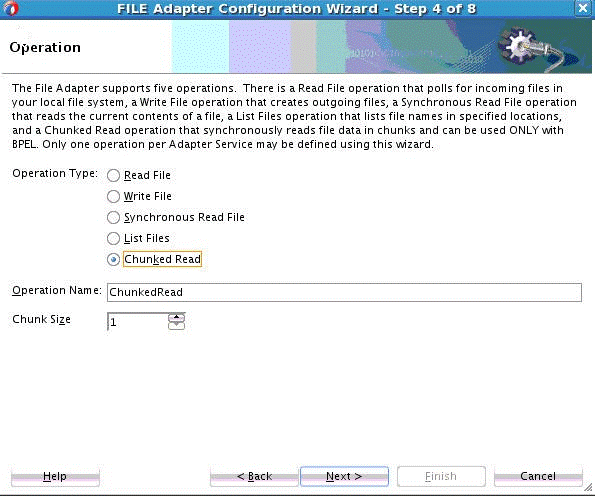
You use the File Adapter Configuration Wizard to define a chunked file .jca file and the WSDL file.
4.2.5.1 Chunked Interaction File Adapter Processing
The FileAdapter translates the native data for a Chunked Read operation to XML and returns it as a BPEL variable.
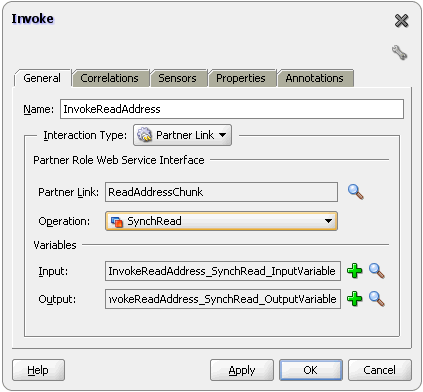
To perform a Chunked Read, you typically create an Invoke activity within BPEL.
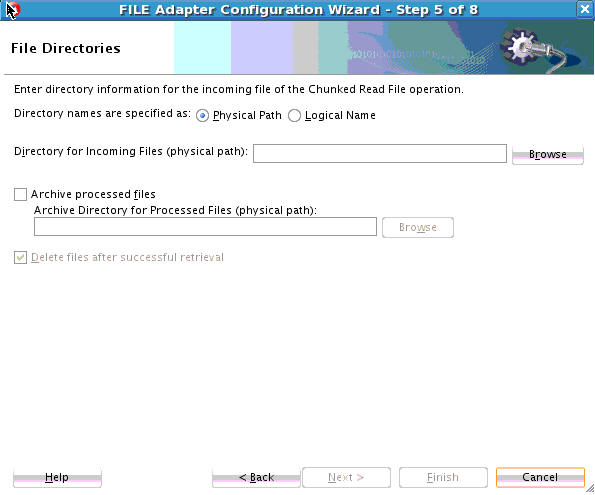
You also select Chunked Synchronous Read as the WSDL operation, using the File Adapter Configuration Wizard; you optionally use the Configuration Wizard to configure the file input directory and the filename which are placed in the ChunkedInteractionSpec.
Each call to the Invoke activity returns header values in addition to the payload.
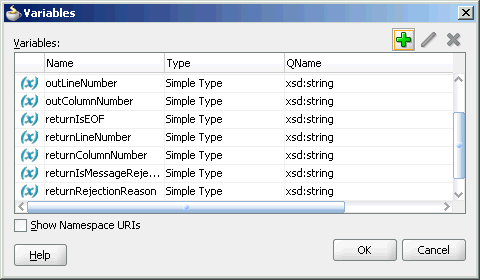
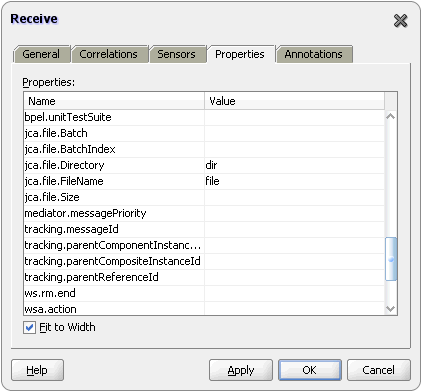
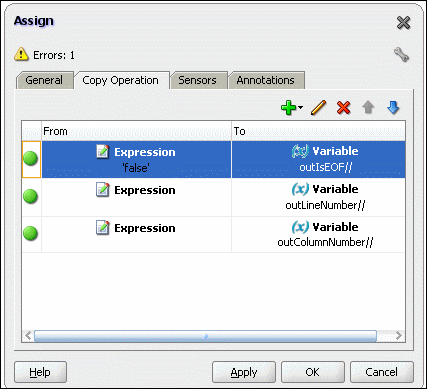
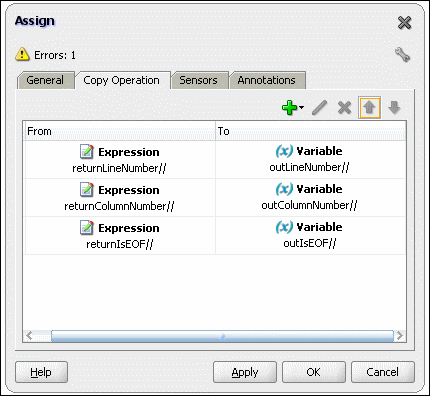
These header values include: line number, column number, and indicators that specify if the End of File has been reached. You must ensure to copy the line/column numbers from the return header to the outbound headers for the subsequent call to the File Adapter. You can also specify the input directory/filename as header values if you want to.
4.2.5.1.1 File Chunked Interaction BPEL Invocation
The FileAdapter chunked interaction is invoked from BPEL. For native data files, line number and column number are additionally passed as header values.
The first time that the chunked interaction is called within the loop, the values for LineNumber and ColumnNumber are blank; for subsequent calls, these values come from the return values from the Invoke minus one (that is, the prior Invoke).
The BPEL Invoke calls ChunkedInteraction with the parameters provided in Table 4-3.
Table 4-3 BPEL Invoke Parameters for Chunked Interaction
| Parameter | Where Obtained |
|---|---|
|
|
ChunkedInteractionSpec or from the BPEL header |
|
|
ChunkedInteractionSpec or from BPEL header |
|
|
ChunkedInteractionSpec, analogous to PublishSize in de-batching |
|
|
Header (optional) |
|
|
Header (optional) |
|
|
Header (optional) |
4.2.5.1.2 The ChunkSize Parameter
The ChunkSize parameter provides information related to the size of the file chunk for the Chunked Read operation; it defaults to 1 if you do not configure another value in ChunkedInteractionSpec (that is, using the File Adapter Configuration Wizard).
Specifically, the ChunkSize parameter governs the number of nodes or records (not lines) that are returned.
For example, if you have an address book as a native CSV file and you have specified a ChunkSize of 5, each call to the Invoke activity returns an XML file containing 5 address book nodes; that is, five rows of CSV records in XML format.
In that sense, the ChunkSize parameter is analogous to the PublishSize parameter used by the FileAdapter for an inbound transaction.
4.2.5.1.2.1 Example Rejection Handler Binding for Chunked Read
The following example shows how to configure a rejection handler for the chunked read reference binding.
Example - Rejection Handler Binding for Chunked Read
<reference name="ReadAddressChunk">
    <interface.wsdl
        interface="http://xmlns.oracle.com/pcbpel/adapter
          /file/ReadAddressChunk/
                #wsdl.interface(ChunkedRead_ptt)"/>
       <binding.jca config="ReadAddressChunk_file.jca">
         <property name="rejectedMessageHandlers" source=""
              type="xs:string" many="false" override="may"
                >file:///c:/temp</property>
       </binding.jca>
  </reference>
4.2.5.1.2.2 Using Line Number//Column Number or Record Number
After every Invoke, you must copy the return headers over to the outbound headers for the subsequent invoke. The LineNumber/ColumnNumber are used by the Adapter for book-keeping purposes only, and you must ensure that you copy these values from the return-headers back to the headers before the call to the chunked interaction.
RecordNumber, on the other hand, is used when the data is in XML format (as distinct from native data). In that sense, RecordNumber is mutually exclusive with LineNumber/ColumnNumber, which is used for native data book-keeping.
4.2.5.1.2.3 File Chunked Read Interaction Artifacts
See the below example for JCA file for Chunked Read.
Example - JCA File for Chunked Read
<interaction-spec className="oracle.tip.adapter.file.
                 outbound.ChunkedInteractionSpec">
      <property name="PhysicalDirectory"
                     value="/tmp/chunked/in"/>
      <property name="FileName" value="dummy.txt"/>
      <property name="ChunkSize" value="10"/>
    </interaction-spec>
The below example shows the generated Adapter WSDL file for the Chunked Read interaction:
Example - Chunked Read WSDL File
<?xml version = '1.0' encoding = 'UTF-8'?>
<definitions name="ReadAddressChunk"
   targetNamespace="http://xmlns.oracle.com/pcbpel
        /adapter/file/ReadAddressChunk/"
        xmlns="http://schemas.xmlsoap.org/wsdl/" xmlns:tns="http://xmlns.oracle.com/pcbpel/adapter/
               file/ReadAddressChunk/" xmlns:plt="http://schemas.xmlsoap.org/ws/2003/05/partner-link/" xmlns:imp1="http://xmlns.oracle.com/pcbpel/demoSchema/csv">
    <documentation>Returns a finite chunk from the target
      file based on the chunk size parameter</documentation>
    <types>
        <schema targetNamespace="http://xmlns.oracle.com/
                  pcbpel/adapter/
             file/ReadAddressChunk/"
             xmlns="http://www.w3.org/2001/XMLSchema">
            <import namespace="http://xmlns.oracle.com/pcbpel
             /demoSchema/csv"
               schemaLocation="xsd/address-csv.xsd"/>
              <element name="empty">
                <complexType/>
              </element>
        </schema>
    </types>
    <message name="Empty_msg">
        <part name="Empty" element="tns:empty"/>
    </message>
    <message name="Root-Element_msg">
        <part name=
         "Root-Element" element="imp1:Root-Element"/>
    </message>
    <portType name="ChunkedRead_ptt">
        <operation name="ChunkedRead">
            <input message="tns:Empty_msg"/>
            <output message="tns:Root-Element_msg"/>
        </operation>
    </portType>
    <plt:partnerLinkType name="ChunkedRead_plt">
        <plt:role name="ChunkedRead_role">
            <plt:portType
             name="tns:ChunkedRead_ptt"/>
        </plt:role>
    </plt:partnerLinkType>
</definitions>
4.2.5.2 Using the File Adapter Configuration Wizard to Perform Chunked Read Interaction Modelling
You use the File Adapter Configuration Wizard to model chunked red interaction.
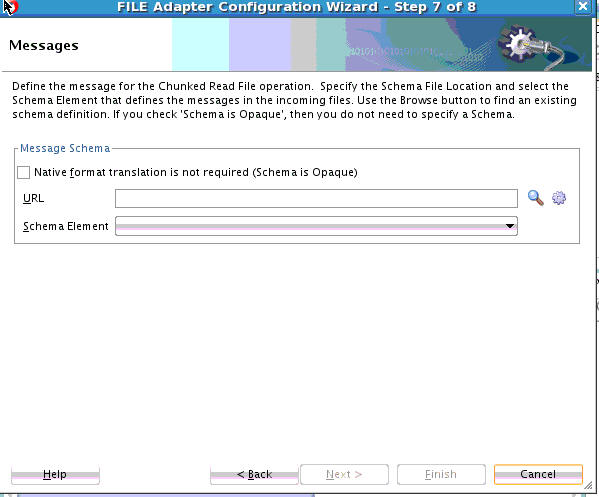
You can use the initial three screens of the File Adapter as you would to configure any other File Adapter operation.
4.2.5.2.1 Chunked Interaction Error Handling Summary
When a translation exception (that is, a bad record that violates the nXSD specification) is encountered, the return header is populated with the translation exception message that includes details such as the line/column where the error occurred.
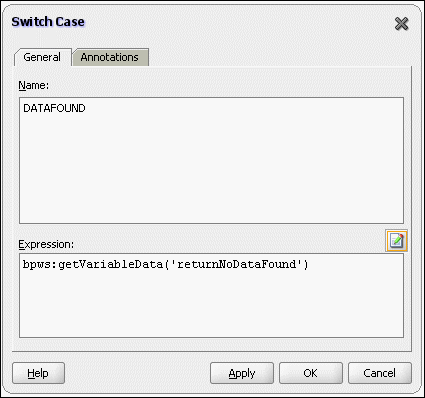
However, a specific translation error does not result in a fault. Instead, it becomes a value in the return header. You must check the jca.file.IsMessageRejected and the jca.file.RejectionReason header values to check if rejection did happen. Additionally, you can also check the jca.file.NoDataFound header value
4.2.5.2.2 Skipping Bad Records
Using the nxsd:uniqueMessageSeparator construct enables the Adapter to skip bad records and continue processing the next set of records. (For more information on uniqueMessageSeparator, see Native Format Builder Wizard .)
If you do not use the uniqueMessageSeparator, the Adapter returns EndOfFile and thus causes the while loop to terminate.
Thus, the uniqueMessageSeparator construct is required if you want processing to continue and not assume an End of File situation. The absence of the uniqueMessageSeparator construct causes the rest of the file to be rejected as a single chunk-to reject the entire file.
4.2.5.2.3 Examples of Chunked Interaction Header and Rejected Chunked Interaction Messages
See Figure 4-7 for an example of the return header appearance in a scenario that employs the nxsd:uniqueMessageSeparator construct.
This scenario shows a chunked interaction with a file that had six records (each of which was complex) and each alternate record was malformed. In the scenario, the ChunkSize used was five.
The returnHeader shows that the messages have been rejected (isMessageRejected=true) and the rejection reason is populated for the three malformed records: specifically, the records at line 17, 37, and 57 were malformed.
The NoDataFound parameter is set to false, which means that the data for the remaining three records is returned.
Figure 4-7 Return Outbound Header Appearance when nxsd:uniqueMessageSeparator is Used
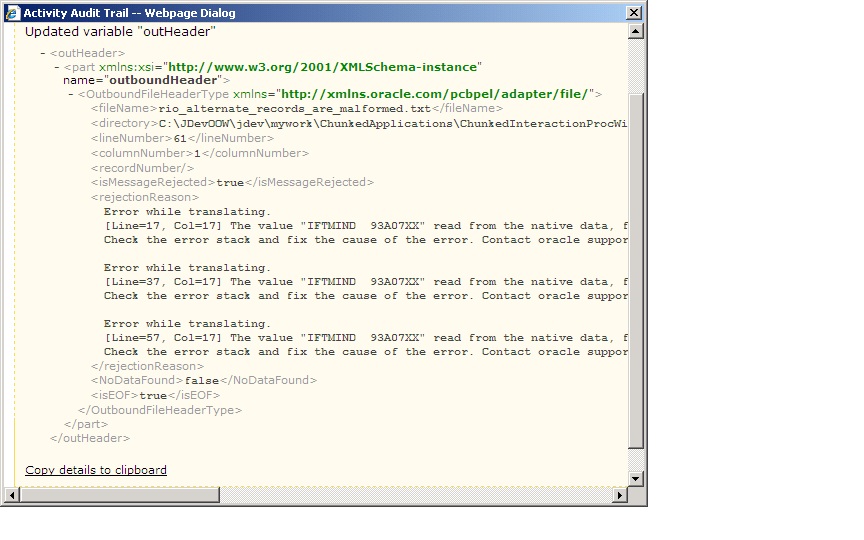
Description of "Figure 4-7 Return Outbound Header Appearance when nxsd:uniqueMessageSeparator is Used"
The same records are also rejected to the user-configured rejection folder (C:\foo in this case). See Figure 4-8.
Figure 4-8 Chunked Read Interaction Rejected Messages in Rejection Folder
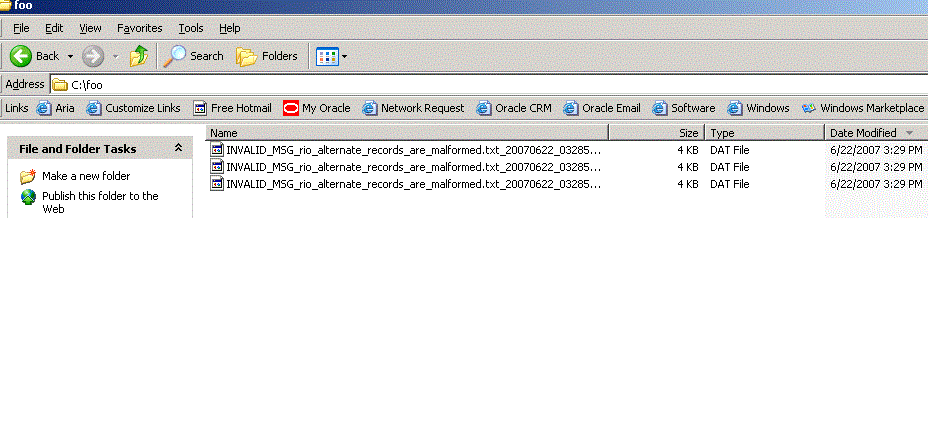
Description of "Figure 4-8 Chunked Read Interaction Rejected Messages in Rejection Folder "
4.2.6 File Sorting
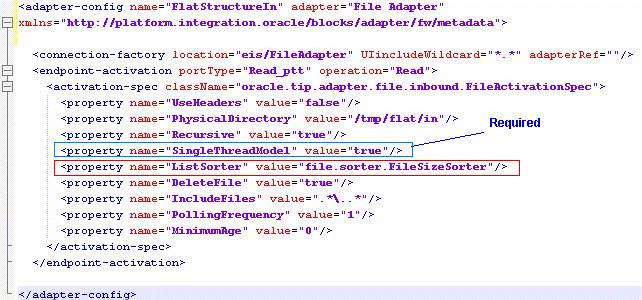
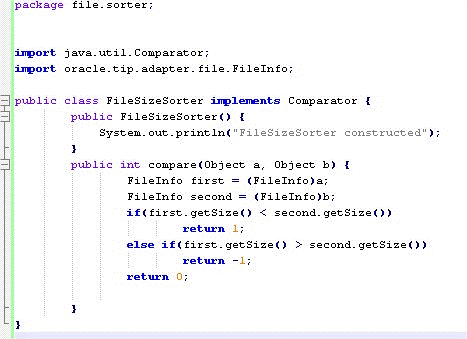
When files must be processed by Oracle File and FTP Adapters in a specific order, you can you use the File Sorting Functionality of the Adapter.. For example, you can configure the sorting parameters for Oracle File and FTP Adapters to process files in ascending or descending order by time stamps.
You must meet the following prerequisites for sorting scenarios of Oracle File and FTP Adapters:
-
Use a synchronous operation
-
Add the following property to the inbound JCA file:
<property name="ListSorter"
value="oracle.tip.adapter.file.inbound.listing.TimestampSorterAscending"/>
<property name="SingleThreadModel" value="true"/>
4.2.7 Dynamic Outbound Directory and File Name Specification
The Oracle File and FTP Adapters enable you to dynamically specify the logical or physical name of the outbound file or outbound directory. For information about how to specify dynamic outbound directory, see Outbound File Directory Creation.
4.2.8 Security
The Oracle FTP Adapter supports FTP over SSL (FTPS) and Secure FTP (SFTP) to enable secure file transfer over a network.
For more information, see Using Secure FTP with the and Using SFTP with .
4.2.9 Nontransactional
The Oracle File Adapter picks up a file from an inbound directory, processes the file, and sends the processed file to an output directory. However, during this process if a failover occurs in the Oracle RAC back end or in an SOA managed server, then the file is processed twice because of the nontransactional nature of Oracle File Adapter. As a result, there can be duplicate files in the output directory.
4.2.10 Proxy Support
You can use the proxy support feature of the Oracle FTP Adapter to transfer and retrieve data to and from the FTP servers that are located outside a firewall or can only be accessed through a proxy server. A proxy server enables the hosts in an intranet to indirectly connect to hosts on the Internet. Figure 4-9 shows how a proxy server creates connections to simulate a direct connection between the client and the remote FTP server.
Figure 4-9 Remote FTP Server Communication Through a Proxy Server
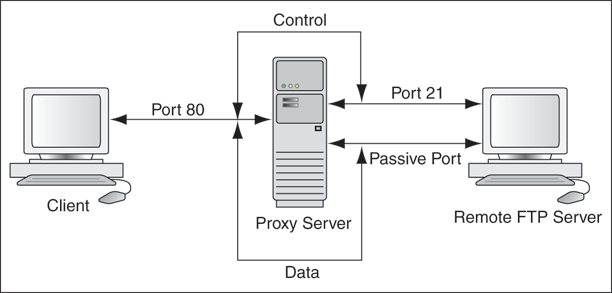
Description of "Figure 4-9 Remote FTP Server Communication Through a Proxy Server"
To use the HTTP proxy feature, your proxy server must support FTP traffic through HTTP Connection. In addition, only passive data connections are supported with this feature. For information about how to configure the Oracle FTP Adapter, see Configuring for HTTP Proxy.
4.2.11 No Payload Support
For Oracle BPEL PM and Mediator, the Oracle File and FTP Adapters provide support for publishing only file metadata such as file name, directory, file size, and last modified time to a BPEL process or Mediator and excludes the payload. The process can use this metadata for subsequent processing. For example, the process can call another reference and pass the file and directory name for further processing.You can use the Oracle File and FTP Adapters as a notification service to notify a process whenever a new file appears in the inbound directory. To use this feature, select the Do not read file content check box in the JDeveloper wizard while configuring the "Read operation."
4.2.12 Large Payload Support
For Oracle BPEL PM and Mediator, the Oracle File Adapter provides support for transferring large files as attachments. To use this feature, select the Read File As Attachment check box in the JDeveloper Configuration wizard while configuring the Read operation.
This option opaquely transfers a large amount of data from one place to another as attachments. For example, you can transfer large MS Word documents, images, and PDFs without processing their content within the composite application. For information about how to pass large payloads as attachments, see Read File As Attachments.
Additionally, the Oracle File Adapter provides you with the ability to write files as an attachment. When you write files as attachments, and also have a normal payload, it is the attached file that is written, and the payload is ignored.
Note:
You must not pass large payloads as opaque schemas.
4.2.13 File-Based Triggers
You can use the Oracle File and FTP Adapters, which provide support for file-based triggers, to control inbound adapter endpoint activation. For information about how to use file-based triggers, see File Polling.
4.2.14 Pre-Processing and Post-Processing of Files
The process modeler may encounter situations where files must be pre-processed before they are picked up for processing or post-processed before the files are written out to the destination folder. For example, the files that the Oracle File and FTP adapters receive may be compressed or encrypted and the adapter must decompress or decrypt the files before processing. In this case, you must use a custom code to decompress or decrypt the files before processing. The Oracle File and FTP Adapters supports the use of custom code that can be plugged in for pre-processing or post-processing of files.
The implementation of the pre-processing and post-processing of files is restricted to the following communication modes of the Oracle File and FTP Adapters:
-
Read File or Get File
-
Write File or Put File
-
Synchronous Read File
-
Chunked Read
This section contains the following topics:
4.2.14.1 Mechanism For Pre-Processing and Post-Processing of Files
The mechanism for pre-processing and post-processing of files is configured as pipelines and valves. This section describes the concept of pipelines and valves.
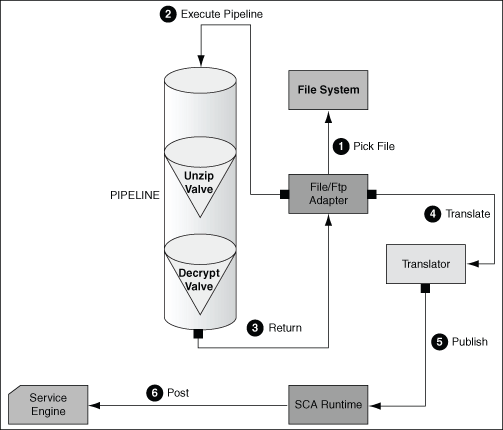
A pipeline consists of a series of custom-defined valves. A pipeline loads a stream from the file system, subjects the stream to processing by an ordered sequence of valves, and after the processing returns the modified stream to the adapter.
A valve is the primary component of execution in a processing pipeline. A valve processes the content it receives and forwards the processed content to the next valve. For example, in a scenario where the Oracle File and FTP Adapters receive files that are encrypted and zipped, you can configure a pipeline with an unzip valve followed by a decryption valve. The unzip valve extracts the file content before forwarding it to the decryption valve, which decrypts the content and the final content is made available to the Oracle File or FTP Adapter as shown in Figure 4-10.
Figure 4-10 A Sample Pre-Processing Pipeline
Description of "Figure 4-10 A Sample Pre-Processing Pipeline"
4.2.14.2 Configuring a Pipeline
Configuring the mechanism for pre-processing and post-processing of files requires defining a pipeline and configuring it in the corresponding JCA file.
To configure a pipeline, you must perform the following steps:
4.2.14.2.1 Implementing and Extending Valves
-
All valves must implement
ValveorStagedValveinterface.Tip:
You can extend either the
AbstractValveor theAbstractStagedValveclass based on business requirement rather than implementing a valve from the beginning.The below example is a sample valve interface.
Example - The Valve Interface
package oracle.tip.pc.services.pipeline;

import java.io.IOException;
/** <p>
 *  Valve component is resposible for processing the input stream
 *  and returning a modified input stream.
 *  The <code>execute()</code> method of the valve gets invoked
 *  by the caller (on behalf) of the pipeline. This method must
 *  return the input stream wrapped within an InputStreamContext.
 *  The Valve is also responsible for error handling specifically
 *
 *  The Valve can be marked as reentrant in which case the caller
 *  must call the <code>execute()</code> multiple times and each
 *  invocation must return a new input stream. This is useful, if
 *  you are writing an UnzipValve since each iteration of the valve
 *  must return the input stream for a different zipped entry.
 *  <b> You must note that only the first Valve in the pipeline can
 *  be reentrant </b>
 *
 *  The Valve has another flavor <code>StagedValve</code> and if
 *  the valve implements StagedValve, then the valve must store
 *  intermediate content in a staging file and return it whenever
 *  required.
 * </p>
 */
public interface Valve
{
    /**
     * Set the Pipeline instance. This parameter can be
     * used to get a reference to the PipelineContext instance.
     * @param pipeline
     */
    public void setPipeline(Pipeline pipeline);

    /** Returns the Pipeline instance.
       * @return
       */
      public Pipeline getPipeline();

      /** Returns true if the valve has more input streams to return
       *  For example, if the input stream is from a zipped file, then
       *  each invocation of <code>execute()</code> returns a different
       *  input stream once for each zipped entry. The caller calls
       *  <code>hasNext()</code> to check if more entries are available
       * @return true/false
       */
      public boolean hasNext();

      /** Set to true if the caller can call the valve
           multiple times
       *  e.g. in case of ZippedInputStreams
       * @param reentrant
       */
      public void setReentrant(boolean reentrant);

      /** Returns true if the valve is reentrant.
     * @return
     */
    public boolean isReentrant();

    /** The method is called by pipeline to
        return the modified input stream
     * @param in
     * @return InputStreamContext that wraps
     * the input stream along with required metadata
     * @throws PipelineException
     */
    public InputStreamContext execute(InputStreamContext
         in) throws
            PipelineException, IOException;

      /**
       * This method is called by the pipeline after the caller
       * publishes the
       * message to the SCA container.
       * In the case of a zipped file, this method
       * gets called repeatedly, once
       * for each entry in the zip file.
       * This should be used by the Valve to do
       * additional tasks such as
       * delete the staging file that has been processed
       * in a reentrant
       * scenario.
       * @param in The original InputStreamContext returned from
<code>execute()</code>
       */
      public void finalize(InputStreamContext in);

    /**Cleans up intermediate staging files, input streams
     * @throws PipelineException, IOException
     */
    public void cleanup() throws PipelineException, IOException;
 }
The
StagedValvestores intermediate content in staging files. The example below shows theStagedValveinterface extending theValveinterface.Example - The StagedValve Interface Extending the Valve Interface
package oracle.tip.pc.services.pipeline;

import java.io.File;

/**
 * A special valve that stages the modified
 * input stream in a staging file.
 * If such a <code>Valve</code> exists, then
 * it must return the staging file containing
 * the intermediate data.
 */
public interface StagedValve extends Valve {

      /**
       * @return staging file where the valve
       * stores its intermediate results
       */
      public File getStagingFile();
}
The below example is a sample of an
AbstractValveclass implementing theValveinterface.Example - The AbstractValve Class Implementing the Valve Interface
package oracle.tip.pc.services.pipeline;

import java.io.IOException;

/**
 * A bare bone implementation of Valve. The user should
 * extend from
 * AbstractValve rather than implementing a Valve from scratch
 *
 */
public abstract class AbstractValve implements Valve {

      /**
       * The pipeline instance is stored as a member
       */
      private Pipeline pipeline = null;

      /**
       * If reentrant is set to true, then the Valve must adhere to the
following:
       * i) It must the first valve in the pipeline ii)
       *  Must implement hasNext
       * method and return true if more input
       * streams are available A reentrant
       * valve will be called by the pipeline
       * more than once and each time the
       * valve must return a different input stream,
       * for example Zipped entries
       * within a zip file
       */
      private boolean reentrant = false;

      /*
       * Save the pipeline instance.
       *
       * @see
       * oracle.tip.pc.services.pipeline.Valve#setPipeline
       * (oracle.tip.pc.services.pipeline.Pipeline)
       */
      public void setPipeline(Pipeline pipeline) {
            this.pipeline = pipeline;
      }

      /*
       * Return the pipeline instance (non-Javadoc)
       *
       * @see oracle.tip.pc.services.pipeline.
       * Valve#getPipeline()
       */
      public Pipeline getPipeline() {
            return this.pipeline;
      }

      /*
       * Return true if the valve is reentrant (non-Javadoc)
       *
       * @see oracle.tip.pc.services.pipeline.
       * Valve#isReentrant()
       */
      public boolean isReentrant() {
            return this.reentrant;
      }

      /*
       * If set to true, the valve is reentrant (non-Javadoc)
       *
       * @see oracle.tip.pc.services.pipeline.
       * Valve#setReentrant(boolean)
       *
       */
      public void setReentrant(boolean reentrant) {
            this.reentrant = reentrant;
      }

      /*
       * By default, set to false For valves
       * that can return more than one
       * inputstreams to callers, this parameter
       *  must return true/false depending
       * on the availability of input streams (non-Javadoc)
       *
       * @see oracle.tip.pc.services.pipeline.Valve#hasNext()
       */
      public boolean hasNext() {
            return false;
      }

      /*
       * Implemented by concrete valve (non-Javadoc)
       *
       * @see oracle.tip.pc.services.pipeline.
       * Valve#execute(InputStreamContext)
       */
      public abstract InputStreamContext
             execute(InputStreamContext in)
                  throws PipelineException, IOException;

      /*
       * Implemented by concrete valve (non-Javadoc)
       *
       * @see
       *       oracle.tip.pc.services.pipeline.Valve#finalize
       *       (oracle.tip.pc.services.pipeline.In
       *                      putStreamContext)
       *        /
      public abstract void finalize(InputStreamContext in);

      /*
       * Implemented by concrete valve (non-Javadoc)
       *
       * @see oracle.tip.pc.services.pipeline.
       * Valve#cleanup()
       */
      public abstract void cleanup()
              throws PipelineException, IOException;

}
The below example shows the
AbstractStagedValveclass extending theAbstractValveclass.Example - The AbstractStagedValve Class Extending the AbstractValve Class
package oracle.tip.pc.services.pipeline;

import java.io.File;
import java.io.IOException;

public abstract class AbstractStagedValve
           extends AbstractValve implements
            StagedValve {

      public abstract File getStagingFile();

      public abstract void cleanup() throws IOException,
              PipelineException;

      public abstract InputStreamContext
                    execute(InputStreamContext in)
                  throws IOException, PipelineException;

}
For more information on valves, see Oracle JCA Adapter Valves.
4.2.14.2.2 Compiling the Valves
-
You must use the
bpm-infra.jarfile to compile the valves. Thebpm-infra.jarfile is located at$MW_HOME/AS11gR1SOA/soa/modules/oracle.soa.fabric_11.1.1/bpm-infra.jar.-
Reference the SOA project to the
bpm-infra.jarfile, by using the following procedure:-
In the Application Navigator, right-click the SOA project.
-
Select Project Properties. The Project Properties dialog is displayed.
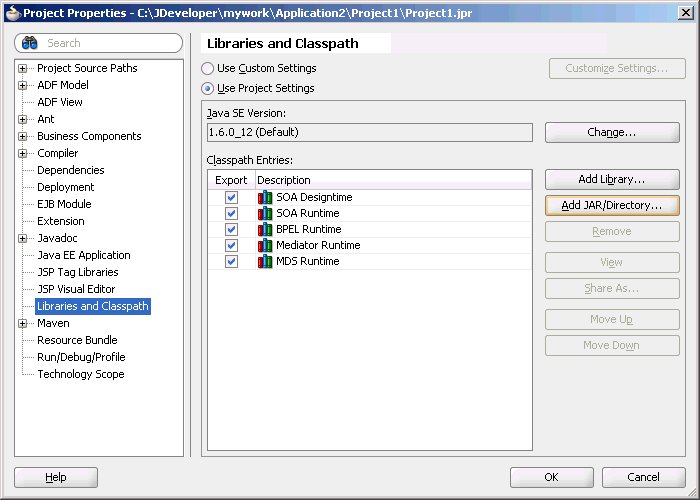
-
Click Libraries and Classpath. The Libraries and Classpath pane is displayed as shown in Figure 4-11.
Figure 4-11 The Project Properties Dialog
Description of "Figure 4-11 The Project Properties Dialog" -
Click Add Jar/Directory. The Add Archive or Directory dialog is displayed.
-
Browse to select the
bpm-infra.jarfile. TheBpm-infra.jarfile is located at$MW_HOME/AS11gR1SOA/soa/modules/oracle.soa.fabric_11.1.1/bpm-infra.jar. -
Click OK. The
bpm-infra.jarfile is listed under Classpath Entries.
-
-
Compile the valves using the
bpm-infra.jarfile. -
Make the
JARfile containing the compiled valves available to the Oracle WebLogic Server classpath by adding the jar file to thesoainfradomain classpath. For example,$MW_HOME/user_projects/domains/soainfra/lib.
Note:
Ensure that you compile
bpm-infra.jarwith JDK 6.0 to avoid compilation error such asclass file has wrong version 50.0, should be 49.0. -
4.2.14.2.3 Creating a Pipeline
-
To configure a pipeline, you must create an XML file that conforms to the following schema:
Example - XML for Pipeline Creation
<?xml version="1.0" encoding="UTF-8" ?>
<xs:schema xmlns:xs="http://www.w3.org/2001/XMLSchema" targetNamespace="http://www.oracle.com/adapter/pipeline/">
  <xs:element name="pipeline">
    <xs:complexType>
      <xs:sequence>
        <xs:element ref="valves">
          <xs:complexType>
            <xs:sequence>
              <xs:element ref="valve"
                       maxOccurs="unbounded">
                <xs:complexType mixed="true">
                <xs:attribute name="reentrant"
                   type="xs:NMTOKEN"
                         use="optional" />
                </xs:complexType>
              </xs:element>
            </xs:sequence>
          </xs:complexType>
        </xs:element>
      </xs:sequence>
    </xs:complexType>
    <xs:attribute name="useStaging"
              type="xs:NMTOKEN" use="optional" />
    <xs:attribute name="batchNotificationHandler"
            type="xs:NMTOKEN" use="
optional" />
  </xs:element>
</xs:schema
The following is a sample XML file configured for a pipeline with two valves,
SimpleUnzipValveandSimpleDecryptValve:Example - XML file configured for a Pipeline with two valves
<?xml version="1.0"?>
<pipeline xmlns=
          "http://www.oracle.com/adapter/pipeline/">
<valves>
        <valve>valves.SimpleUnzipValve</valve>
        <valve> valves.SimpleDecryptValve </valve>
</valves>
</pipeline>
4.2.14.2.4 Adding the Pipeline to the SOA Project Directory
-
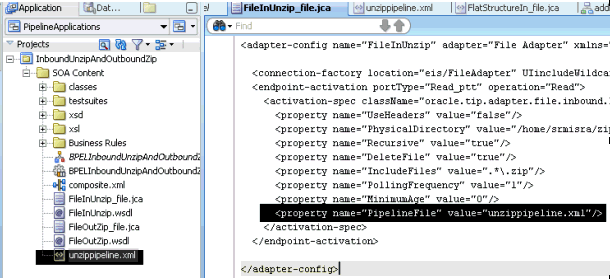
You must add the
pipeline.xmlfile to the SOA project directory. This step is required to integrate the pipeline with the Oracle File or FTP Adapter. Figure 4-12 shows a samplepipeline.xmlfile (unzippipeline.xml) added to theInboundUnzipAndOutboundZipproject.Figure 4-12 Project with unzippipeline.xml File
Description of "Figure 4-12 Project with unzippipeline.xml File"
4.2.14.2.5 Registering the Pipeline
-
The pipeline that is a part of the SOA project must be registered by modifying the inbound JCA file, by adding the following property:
<property name="PipelineFile" value="pipeline.xml"/>
For example, in the JCA file shown in Figure 4-12,
FileInUnzip_file.jca, the following property has been added to register anUnzippipeline with an Oracle File Adapter:<property name="PipelineFile" value="unzippipeline.xml"/>
There may be scenarios involving simple valves. A simple valve is one that does not require additional metadata such as re-entrancy, and
batchNotificationHandlers. If the scenario involves simple valves, then the pipeline can be configured as anActivationSpecor anInteractionSpecproperty as shown in the following sample:Example - Pipeline Configuration with Simple Valves
<?xml version="1.0" encoding="UTF-8"?>
<adapter-config name="FlatStructureIn"
                 adapter="File Adapter"
xmlns="http://platform.integration.
              oracle/blocks/adapter/fw/metadata">

  <connection-factory location="eis/FileAdapter"
               UIincludeWildcard="*.txt"
adapterRef=""/>
  <endpoint-activation operation="Read">
    <activation-spec
className="oracle.tip.adapter.file.
                     inbound.FileActivationSpec">
      <property name="UseHeaders" value="false"/>
      <property name=
              "LogicalDirectory" value="InputFileDir"/>
      <property name="Recursive" value="true"/>
      <property name="DeleteFile" value="true"/>
      <property name="IncludeFiles" value=".*\.txt"/>
      <property name="PollingFrequency" value="10"/>
      <property name="MinimumAge" value="0"/>
      <property name="OpaqueSchema" value="false"/>
    </activation-spec>
  </endpoint-activation>

</adapter-config>
Note:
There is no space after the comma (
,) in thePipelineValvespropertyvalue.Note:
If you configure a pipeline using the
PipelineValveproperty, then you cannot configure additional metadata such as Re-entrant Valve and Batch Notification Handler. Additional metadata can be configured only withPipelineFilethat is used for the XML-based approach.
4.2.14.3 Using a Re-Entrant Valve For Processing Zip Files
The re-entrant valve enables you to process individual entries within a zip file. In a scenario that involves processing all entries within a zip file, wherein each entry is encrypted using the Data Encryption Standard (DES), you can configure the valve by adding the reentrant="true" attribute to the unzip valve as follows:
Example - Configuring the reentrant=true Attribute
<?xml version="1.0"?>
<pipeline xmlns="http://www.oracle.com/adapter/pipeline/">
<valves>
        <valve reentrant="true">valves.ReentrantUnzipValve</valve>
        <valve> valves.SimpleDecryptValve </valve>
</valves>
</pipeline>
In this example, the pipeline invokes the ReentrantUnzipValve and then the SimpleDecryptValve repeatedly in the same order until the entire zip file has been processed. In other words, the ReentrantUnzipValve is invoked first to return the data from the first zipped entry, which is then fed to the SimpleDecryptValve for decryption, and the final content is returned to the Adapter. The process repeats until all the entries within the zip file are processed.
Additionally, the valve must set the message key using the setMessageKey() API. For more information refer to An Unzip Valve for processing Multiple Files.
Error Handling For Zip Files
If there are translation errors for individual entries within the zip file, entries with the translation errors are rejected and the other entries are processed.
If there are errors during the publish operation, the publish operation is retried and the retry semantic holds. If the retry semantic does not hold, then the original file is rejected and the pipeline ends.
4.2.14.4 Configuring the Batch Notification Handler
The BatchNotificationHandler API is used with the Oracle File and FTP Adapter inbound de-batchability. In a de-batching scenario, each file contains multiple messages, and some sort of bookkeeping is required for crash-recovery. This is facilitated by the BatchNotificationHandler API, which lets you receive notification from the pipeline whenever a batch begins, occurs, or ends. The below example is the BatchNotificationHandler interface:
Example - BatchNotification Handler
package oracle.tip.pc.services.pipeline;

/*
 * Whenever the caller processes de-batchable files,
 * each file can
 * have multiple messages and this handler
 * allows the user to plug in
 * a notification mechanism into the pipeline.
 *
 * This is particularly useful in crash recovery
 * situations
 */
 public interface BatchNotificationHandler {

      /*
       * The Pipeline instance is set by the
       * PipelineFactory when the
       * BatchNotificationHandler instance is created
       */
      public void setPipeline(Pipeline pipeline);

      public Pipeline getPipeline();
      /*
       * Called when the BatchNotificationHandler
       * is instantiated
       */

      public void initialize();
      /*
       * Called by the adapter when a batch begins,
       * the implementation must
       * return
         * a BatchContext instance with the
         * following information:
         * i) batchId: a unique
         * id that will be returned
         * every time onBatch is
         * invoked by called
         * ii)line/col/record/offset:
         * for error recovery cases
       */
      public BatchContext onBatchBegin();

      /*
       * Called by the adapter
       * when a batch is submitted.
       * The parameter holds the
       * line/column/record/offset for the successful batch
       * that is published.
       * Here the implementation
       * must save these in
       * order to recover from
       * crashes
       */

      public void onBatch(BatchContext ctx);

      /*
       * Called by the adapter when a batch
       * completes.
      * This must be used to clean up
       */
      public void onBatchCompletion
           (boolean success);
}
To use a pipeline with de-batching, you must configure the pipeline with a BatchNotificationHandler instance. See the below example.
Example - Configuring the Pipeline with a BatchNotificationHandler Instance
<?xml version="1.0"?>
<pipeline xmlns="http://www.oracle.com
           /adapter/pipeline" batchNotificationHandler="oracle.tip.pc.services.                  pipeline.ConsoleBatchNotificationHandler">
<valves>
      <valve reentrant="true">valves.
                  SimpleUnzipValve</valve>
      <valve>valves.SimpleDecryptValve</valve>
</valves>
</pipeline>
4.2.15 Error Handling
The Oracle File Adapter and Oracle FTP Adapter provide inbound error handling capabilities, such as the uniqueMessageSeparator property.
In the case of debatching (multiple messages in a single file), messages from the first bad message to the end of the file are rejected. If each message has a unique separator and that separator is not part of any data, then rejection can be more fine-grained. In these cases, you can define a uniqueMessageSeparator property in the schema element of the native schema to have the value of this unique message separator. This property controls how the adapter translator works when parsing through multiple records in one file (debatching). This property enables recovery even when detecting bad messages inside a large batch file. When a bad record is detected, the adapter translator skips to the next unique message separator boundary and continues from there. If you do not set this property, then all records that follow the record with errors are also rejected.
The below example provides an example of using the uniqueMessageSeparator property:
Example - Schema File Showing Use of uniqueMessageSeparator Property
<?xml version="1.0" ?>
<xsd:schema xmlns:xsd="http://www.w3.org/
2001/XMLSchema"
xmlns:nxsd="http://xmlns.oracle.com/
pcbpel/nxsd"
targetNamespace=
"http://TargetNamespace.com/Reader"
xmlns:tns=
"http://TargetNamespace.com/Reader"
elementFormDefault="qualified"
attributeFormDefault="unqualified"
nxsd:encoding="US-ASCII" nxsd:stream="chars"
nxsd:version="NXSD"
nxsd:uniqueMessageSeparator="${eol}">
<xsd:element name="emp-listing">
<xsd:complexType>
<xsd:sequence>
<xsd:element name="emp" minOccurs="1"
maxOccurs="unbounded">
<xsd:complexType>
<xsd:sequence>
<xsd:element name="GUID"
type="xsd:string"
nxsd:style="terminated"
nxsd:terminatedBy=","
nxsd:quotedBy=""">
</xsd:element>
<xsd:element name="Designation"
type="xsd:string"
nxsd:style="terminated"
nxsd:terminatedBy=","
nxsd:quotedBy=""">
</xsd:element>
<xsd:element name="Car" type="xsd:string"
nxsd:style="terminated"
nxsd:terminatedBy=","
nxsd:quotedBy=""">
</xsd:element>
<xsd:element name="Labtop" type="xsd:string"
nxsd:style="terminated"
nxsd:terminatedBy=","
nxsd:quotedBy=""">
</xsd:element>
<xsd:element name="Location"
type="xsd:string"
nxsd:style="terminated"
nxsd:terminatedBy=","
nxsd:quotedBy=""">
</xsd:element>
</xsd:sequence>
</xsd:complexType>
</xsd:element>
</xsd:sequence>
</xsd:complexType>
</xsd:element>
</xsd:schema>
<!--NXSDWIZ:D:\work\jDevProjects\Temp_BPEL_process
\Sample2\note.txt:-->
<!--USE-HEADER:false:-->
For information about handling rejected messages, connection errors, and message errors, see Handling Rejected Messages .
4.2.15.1 Sending a Malformed XML File to a Local File System Folder
During an Inbound Read operation, if a malformed XML file is read, the malformed file results in an error. The errored file is by default sent to the remote file system for archival.
The errored file can be archived at a local file system by specifying the useRemoteErrorArchive property in the jca file and setting that property to false.
The default value for this property is true.
4.2.16 Threading Model
This section describes the threading models that Oracle File and FTP Adapters support. An understanding of the threading models is required to throttle or de-throttle the Oracle File and FTP Adapters. The Oracle File and FTP Adapters use the following threading models:
4.2.16.1 Default Threading Model
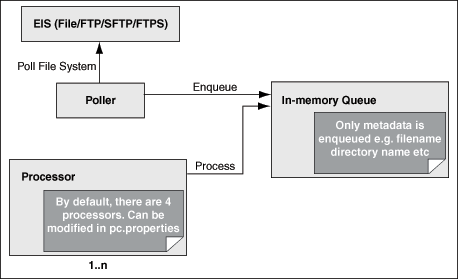
In the default threading model, a poller is created for each inbound Oracle File or FTP Adapter endpoint. The poller enqueues file metadata into an in-memory queue, which is processed by a global pool of processor threads. Figure 4-13 shows a default threading model.
The following steps highlight the functioning of the default threading model:
-
The poller periodically looks for files in the input directory. The interval at which the poller looks for files is specified using the
PollingFrequencyparameter in the inboundJCAfile. -
For each new file that the poller detects in the configured inbound directory, the poller enqueues information such as file name, file directory, modified time, and file size into an internal in-memory queue.
Note:
New files are ones that are not being processed.
-
A global pool of processor worker threads wait to process from the in-memory queue.
-
Processor worker threads pick up files from the internal queue, and perform the following actions:
-
Stream the file content to an appropriate translator (for example, a translator for reading text, binary, XML, or opaque data.)
-
Publish the XML result from the translator to the SCA infrastructure.
-
Perform the required postprocessing, such as deletion or archival after the file is processed.
-
4.2.16.2 Modified Threading Model
You can modify the default threading behavior of Oracle File and FTP Adapters. Modifying the threading model results in a modified throttling behavior of the Oracle File and FTP Adapters. The following sections describe the modified threading behavior of the Oracle File and FTP Adapters:
4.2.16.2.1 Single Threaded Model
The single threaded model is a modified threaded model that enables the poller to assume the role of a processor. The poller thread processes the files in the same thread. The global pool of processor threads is not used in this model. You can define the property for a single threaded model in the inbound JCA file as follows:
Example - Defining the Property for a Single-Threaded Model
<activation-spec className="oracle.tip.adapter.file.
   inbound.FileActivationSpec">
   <property../>
   <property name="SingleThreadModel" value="true"/>
   <property../>
</activation-spec>
4.2.16.2.2 Partitioned Threaded Model
The partitioned threaded model is a modified threaded model in which the in-memory queue is partitioned and each composite application receives its own in-memory queue. The Oracle File and FTP Adapters are enabled to create their own processor threads rather than depend on the global pool of processor worker threads for processing the enqueued files. You can define the property for a partitioned model in the inbound JCA file. See the example below.
Example - Defining the Property for a Partitioned Model in the Inbound JCA File
<activation-spec
className="oracle.tip.adapter.file.inbound.
   FileActivationSpec">
  <property../>
  <property name="ThreadCount" value="4"/>
  <property../>
</activation-spec>
In the preceding example for defining the property for a partitioned model:
-
If the
ThreadCountproperty is set to0, the threading behavior is like that of the single threaded model. -
If the
ThreadCountproperty is set to-1, the global thread pool is used, as in the default threading model. -
The maximum value for the
ThreadCountproperty is40.
4.2.17 Performance Tuning
The Oracle File and FTP Adapters support the performance tuning feature by providing knobs to throttle the inbound and outbound operations. The Oracle File and FTP Adapters also provide parameters that you can use to tune the performance of outbound operations.
For more information about performance tuning, see Oracle JCA Adapter Tuning Guide in this document.
4.2.18 High Availability
The Oracle File and FTP Adapters support the high availability feature for the active-active topology with Oracle BPEL Process Manager and Mediator service engines. They support this feature for both inbound and outbound operations.
4.2.19 Multiple Directories
The Oracle File and FTP Adapters support polling multiple directories within a single activation. You can specify multiple directories in JDeveloper as distinct from a single directory. This is applicable to both physical and logical directories.
Note:
If the inbound Oracle File Adapter is configured for polling multiple directories for incoming files, then all the top-level directories (inbound directories where the input files appear) must exist before the file reader starts polling these directories.
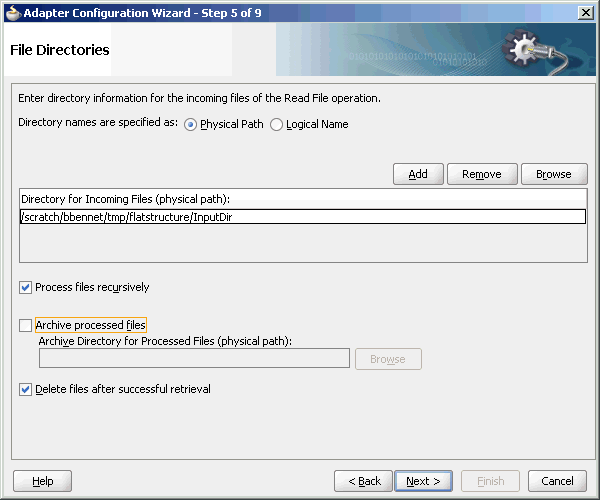
After selecting the inbound directory or directories, you can also specify whether the subdirectories must be processed recursively. If you check the Process Files Recursively option, then the directories would be processed recursively. By default, this option is selected, in the File Directories page, as shown in Figure 4-14.
When you choose multiple directories, the generated JCA files use semicolon(;) as the separator for these directories. However, you can change the separator to something else. If you do so, manually add DirectorySeparator="chosen separator" in the generated JCA file. For example, to use comma (,) as the separator, you must first change the separator to "," in the Physical directory and then add <property name="DirectorySeparator" value=","/>, in the JCA file.
Additionally, if you choose to process directories recursively and one or more subdirectories do not have the appropriate permissions, the inbound adapter throws an exception during processing. To ignore this exception, you must define a binding property with the name ignoreListingErrors in your composite.xml as shown in the example below.
Example - Defining a Binding Property with the name ignoreLIstingErrors
<service name="FlatStructureIn">
<interface.wsdl
interface="http://xmlns.oracle.com/
       pcbpel/adapter/file/
       FlatStructureIn/#wsdl.inte
rface(Read_ptt)"/>
<binding.jca config="FlatStructureIn_file.jca">
<property name="ignoreListingErrors"
                    type="xs:string"
many="false">true</property>
</binding.jca>
</service>
Figure 4-14 The Adapter Configuration Wizard - File Directories Page
Description of "Figure 4-14 The Adapter Configuration Wizard - File Directories Page"
4.2.20 Append Mode
The Oracle File and FTP Adapters enable you to configure outbound interactions that append to an existing file. The Append to Existing File option enables the outbound invoke to write to the same file. There are two ways in which you can append to a file name:
-
Statically — in the JCA file for the outbound Oracle File Adapter.
-
Dynamically — using the header mechanism.
Note:
The append mode is not supported for SFTP scenarios, where instead of appending to the existing file, the file is overwritten.
When you select the Append to existing file option in the File Configuration page, the batching options such as Number of Messages Equals, Elapsed Time Exceeds, File Size Exceeds options are disabled. Figure 4-15 displays the Append to existing file option.
Figure 4-15 The Adapter Configuration Wizard - File Configuration Page
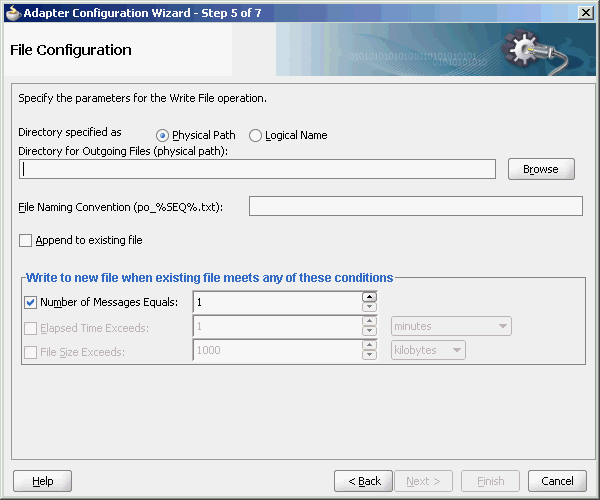
Description of "Figure 4-15 The Adapter Configuration Wizard - File Configuration Page"
Batching option is disabled if "Append" is chosen in the wizard. In addition, the following error message is displayed if the user specifies a dynamic file naming convention as opposed to a static file naming convention:
You cannot choose to Append Files and use a dynamic file naming convention at the same time
If you are using the "Append" functionality in Oracle FTP Adapter, ensure that your FTP server supports the "APPE" command.
4.2.21 Recursive Processing of Files Within Directories in Oracle FTP Adapter
In earlier versions of the Oracle SOA Suite, the inbound Oracle FTP Adapter used the NLST (Name List) FTP command to read a list of file names from the FTP server. However, the NLST command does not return directory names and therefore does not allow recursive processing within directories. Currently, the Oracle FTP Adapter uses the LIST command, instead.
However, the response from the LIST command is different for different FTP servers. To incorporate the subtle differences in results from the LIST command in a standard manner, the following parameters are added to the deployment descriptor for Oracle FTP Adapter:
-
defaultDateFormat: This parameter specifies the default date format value. On the FTP server, this is the value for files that are older. The default value for this parameter isMMM d yyyyas most UNIX-type FTP servers return the last modified time stamp for older files in theMMM d yyyyformat. For example,Jan 31 2006.You can find the default date format for your FTP server by using the
ls -lcommand by using a FTP command-line client. For example,ls -lon a vsftpd server running on Linux returns the following:-rw-r--r-- 1 500 500 377 Jan 22 2005 test.txt
For Microsoft Windows NT FTP servers, the
defaultDateFormatisMM-dd-yy hh:mma, for example,03-24-09 08:06AM <DIR> oracle. -
recentDateFormat: This parameter specifies the recent date format value. On the FTP server, this is the value for files that were recently created.The default value for this parameter is
MMM d HH:mmas most UNIX-type FTP servers return the last modified date for recently created files inMMM d HH:mmformat, for example,Jan 31 21:32.You can find the default date format for your FTP server by using the
ls -lcommand from an FTP command-line client. For example,ls -lon a vsftpd server running on Linux returns the following:150 Here comes the directory listing. -rw-r--r-- 1 500 500 377 Jan 30 21:32 address.txt -rw-r--r-- 1 500 500 580 Jan 3121:32 container.txt .....................................................................................
For Microsoft Windows NT FTP servers, the
recentDateFormatparameter is in theMM-dd-yy hh:mma, format, for example,03-24-09 08:06AM <DIR> oracle. -
serverTimeZone: The server time zone, for example, America/Los_Angeles. If this parameter is set to blank, then the default time zone of the server running the Oracle FTP Adapter is used. -
listParserKey:Directs the Oracle FTP Adapter on how it should parse the response from theLISTcommand. The default value is UNIX, in which case the Oracle FTP Adapter uses a generic parser for UNIX-like FTP servers. Apart fromUNIX, the other supported values areWINandWINDOWS, which are specific to the Microsoft Windows NT FTP server.Note:
The locale language for the FTP server can be different from the locale language for the operating system. Do not assume that the locale for the FTP server is the same locale for the operating system it is running on. You must set the
serverLocaleLanguage,serverLocaleCountry, andserverLocaleVariantparameters in such cases. -
serverLocaleLanguage: This parameter specifies the locale construct for language. -
serverLocaleCountry: This parameter specifies the locale construct for country. -
serverLocaleVariant: This parameter specifies the locale construct for variant.
4.2.21.1 Configure the Parameters in the Deployment Descriptor
The standard date formats of an FTP server are usually configured when the FTP server is installed. If your FTP server uses a format "MMM d yyyy" for defaultDateFormat and "MMM d HH:mm" for recentDateFormat, then your Oracle FTP Adapter must use the same formats in its corresponding deployment descriptor.
If you enter "ls -l" from a command-line FTP, then you can see the following:
200 PORT command successful. Consider using PASV.
150 Here comes the directory listing.
-rw-r--r--    1 500      500           377 Jan 22 21:32 1.txt
-rw-r--r--    1 500      500           580 Jan 22 21:32 2.txt
.................................................................................
This is the recentDateFormat parameter for your FTP server, for example MMM d HH:mm (Jan 22 21:32). Similarly, if your server has an old file, the server does not show the hour and minute part and it shows the following:
-rw-r--r-- 1 500 500 377 Jan 22 2005 test.txt
This is the default date format, for example MMM d yyyy (Jan 22 2005).
Additionally, the serverTimeZone parameter is used to by the Oracle FTP Adapter to parse time stamps for FTP server running in a specific time zone. The value for this is either an abbreviation such as "PST" or a full name such as "America/Los_Angeles".
Additionally, the FTP server might be running on a different locale. The serverLocaleLanguage, serverLocaleCountry, and serverLocaleVariant parameters are used to construct a locale from language, country, variant where
-
language is a lowercase two-letter ISO-639 code, for example, en,
-
country is an uppercase two-letter ISO-3166 code, for example, US.
-
variant is a vendor and browser-specific code.
If these locale parameters are absent, then the Oracle FTP Adapter uses the system locale to parse the time stamp.
Additionally, if the FTP server is running on a different system than the SOA suite, then you must handle the time zone differences between them. You must convert the time difference between the FTP server and the system running the Oracle FTP Adapter to milliseconds and add the value as a binding property: timestampOffset in the composite.xml.
For example, if the FTP server is six hours ahead of your local time, you must add the following endpoint property to your service or reference. See the example below.
Example - Endpoint Property to Add if FTP Server is Ahead of Local
<service name="FTPDebatchingIn">
    <interface.wsdl
interface="http://xmlns.oracle.com/pcbpel
             /adapter/ftp/FTPDebatchingIn/#wsdl.
interface(Get_ptt)"/>
    <binding.jca config="DebatchingIn_ftp.jca">
<property name=" timestampOffset"
               type="xs:string"
                        many="false" source=""
override="may"> 21600000</property>
    </binding.jca>
  </service>
Some FTP servers do not work well with the LIST command. In such cases, use the NLST command for listing, but you cannot process directories recursively with NLST.
To use the NLST command, then you must add the following property to the JCA file. See the example below.
Example - Adding the NLST Property
<?xml version="1.0" encoding="UTF-8"?>
<adapter-config name="FTPDebatchingIn"
                   adapter="Ftp Adapter"
 xmlns="http://platform.integration.oracle/
                  blocks/adapter/fw/metadata">
<connection-factory location="eis/Ftp/FtpAdapter"
                     UIincludeWildcard="*.txt"
 adapterRef=""/>
    <activation-spec
className="oracle.tip.adapter.ftp.
                  inbound.FTPActivationSpec">
       …………………………………………..
       …………………………………………..
      <property name="UseNlst" value="true"/>
    </activation-spec>
  </endpoint-activation>
</adapter-config>
4.2.22 Securing Enterprise Information System Credentials
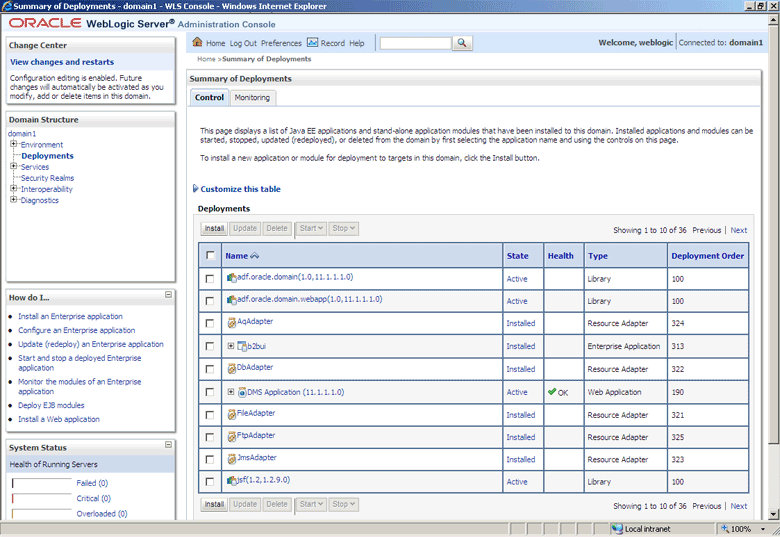
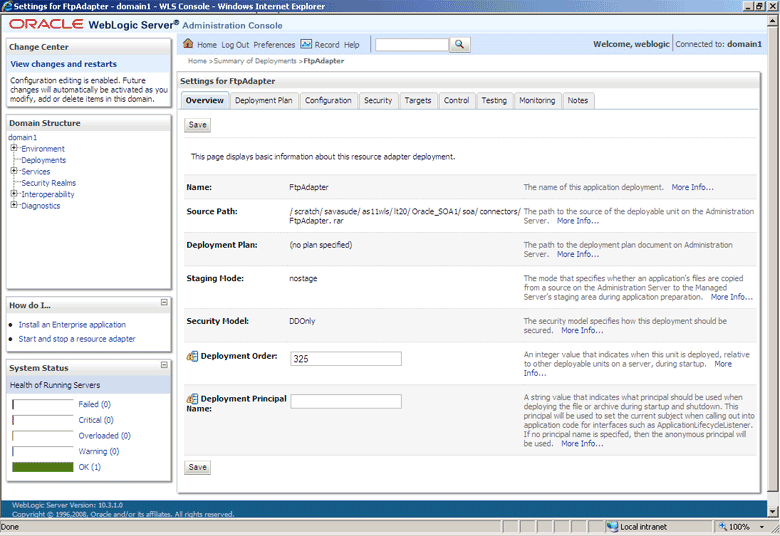
When a resource adapter makes an outbound connection with an Enterprise Information System (EIS), it must sign on with valid security credentials. In accordance with the J2CA 1.5 specification, Oracle WebLogic Server supports both container-managed and application-managed sign-on for outbound connections. At runtime, Oracle WebLogic Server determines the chosen sign-on mechanism, based on the information specified in either the invoking client component's deployment descriptor or the res-auth element of the resource adapter deployment descriptor. This section describes the procedure for securing the user name and password for Oracle JCA Adapters by using Oracle WebLogic Server container-managed sign-on.
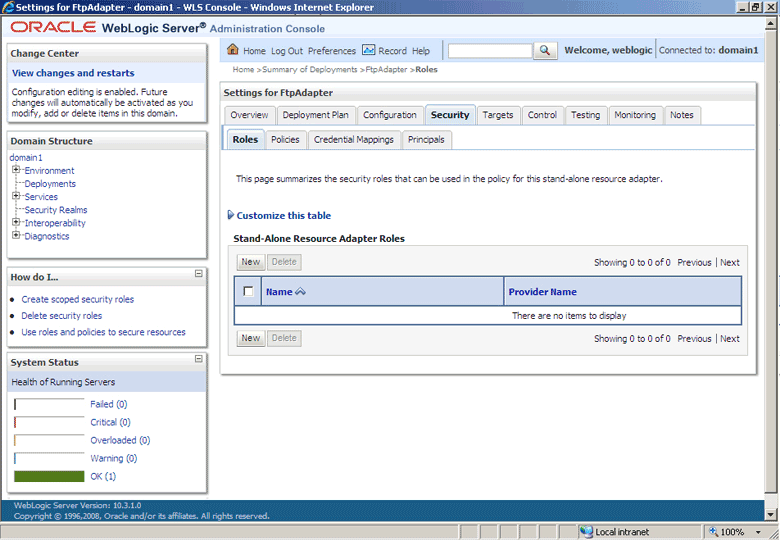
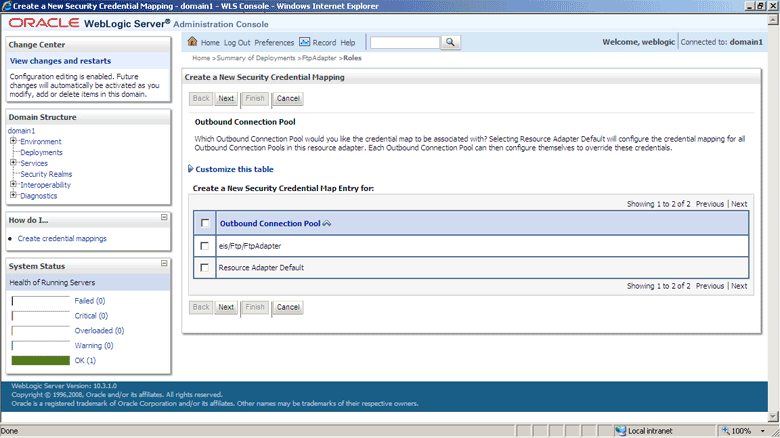
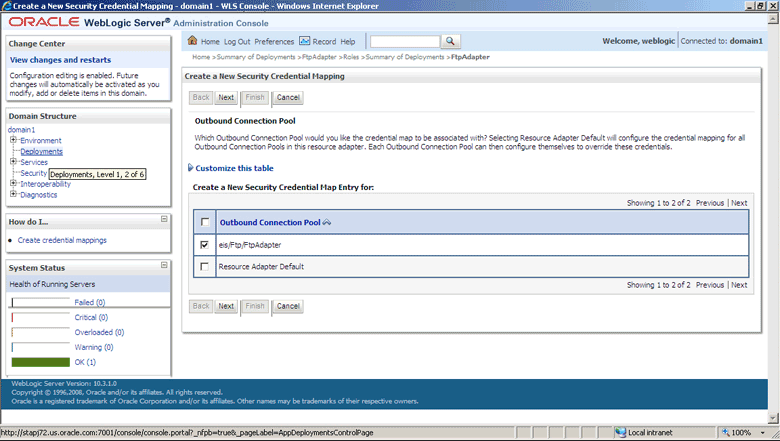
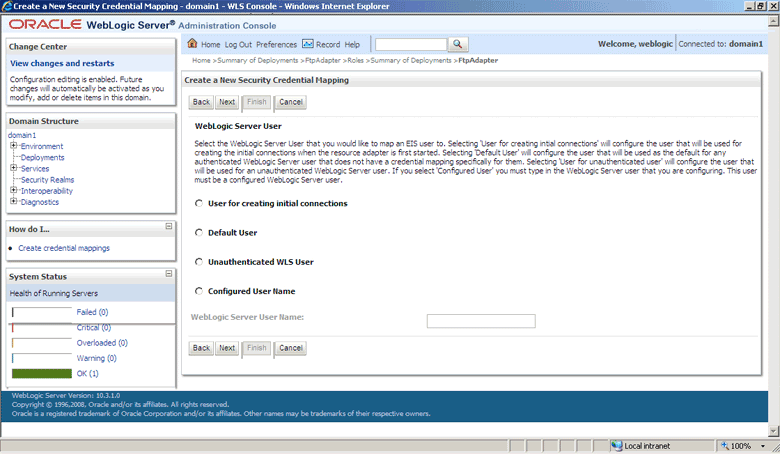
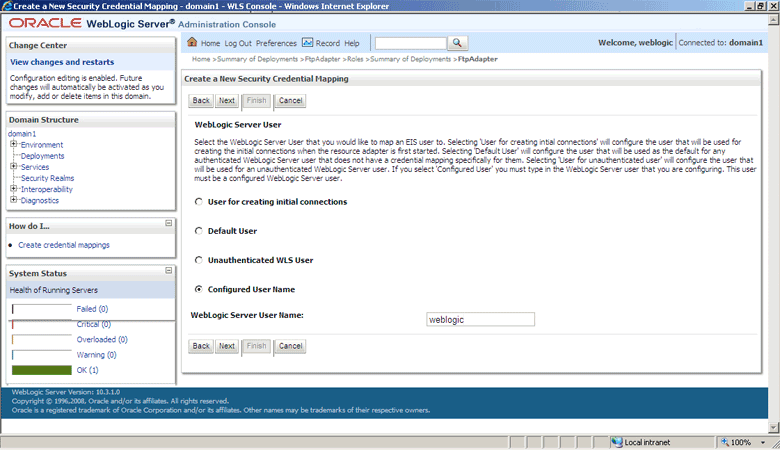
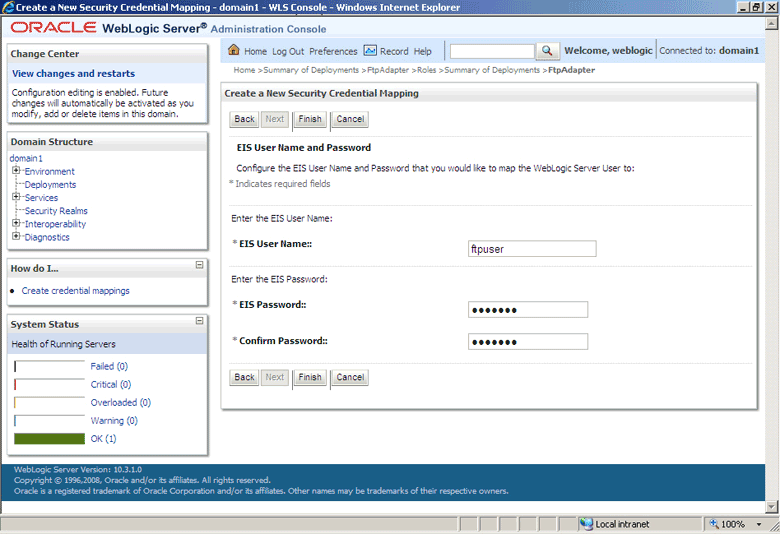
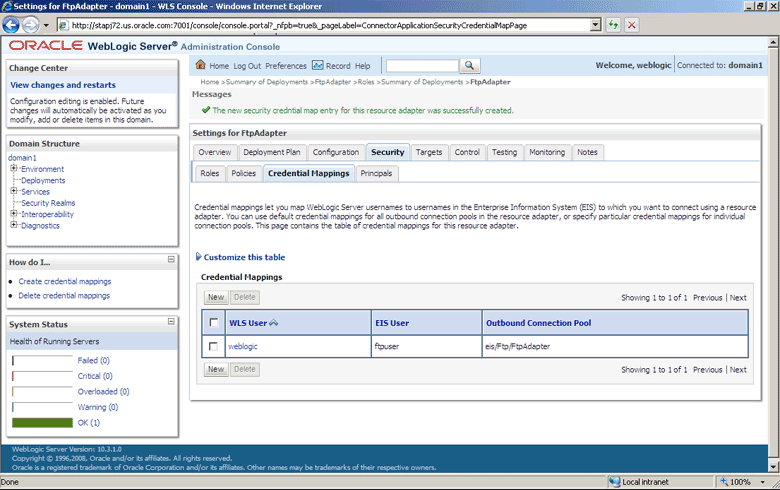
Both Oracle WebLogic Server and EIS maintain independent security realms. A container-managed sign-on enables you to sign on to Oracle WebLogic Server and also be able to use applications that access EIS through a resource adapter without having to sign on separately to the EIS. Container-managed sign-on in Oracle WebLogic Server uses credential mappings. The credentials (user name/password pairs or security tokens) of Oracle WebLogic security principals (authenticated individual users or client applications) are mapped to the corresponding credentials required to access EIS. You can configure credential mappings for applicable security principals for any deployed resource adapter.
To use container-managed sign-on first you must ensure that the connection pool you use supports container-managed sign-on. You can follow these steps to turn on container-managed sign-on for an existing connection pool or create a new pool which supports container-managed sign-on.
4.3 Oracle File and FTP Adapter Concepts
The Oracle File and FTP Adapters concepts are discussed in the following sections:
4.3.1 Oracle File Adapter Read File Concepts
In the inbound direction, the Oracle File Adapter polls and reads files from a file system for processing. This section provides an overview of the inbound file reading capabilities of the Oracle File Adapter. You use the Adapter Configuration Wizard to configure the Oracle File Adapter for use with a BPEL process or a Mediator. Configuring the Oracle File Adapter creates an inbound WSDL and JCA file pair.
The following sections describe the Oracle File Adapter read file concepts:
4.3.1.1 Inbound Operation
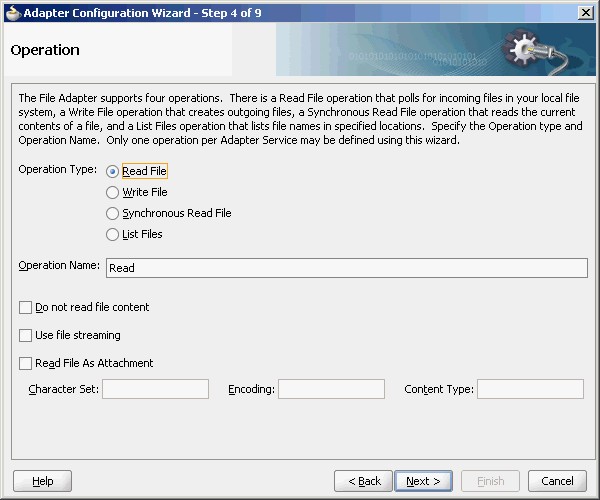
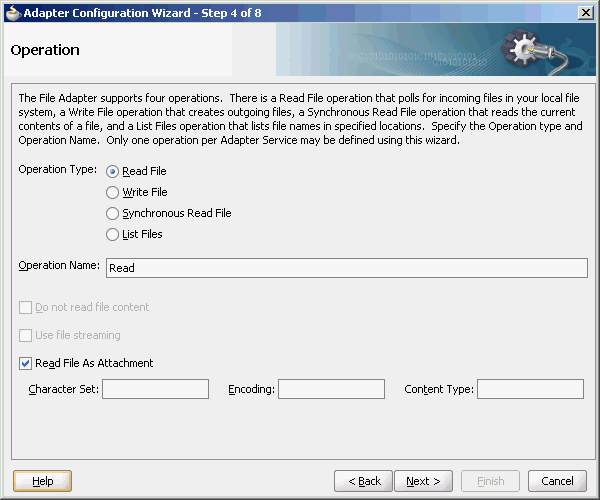
For inbound operations with the Oracle File Adapter, select the Read File operation, as shown in Figure 4-25.
Figure 4-25 Selecting the Read File Operation
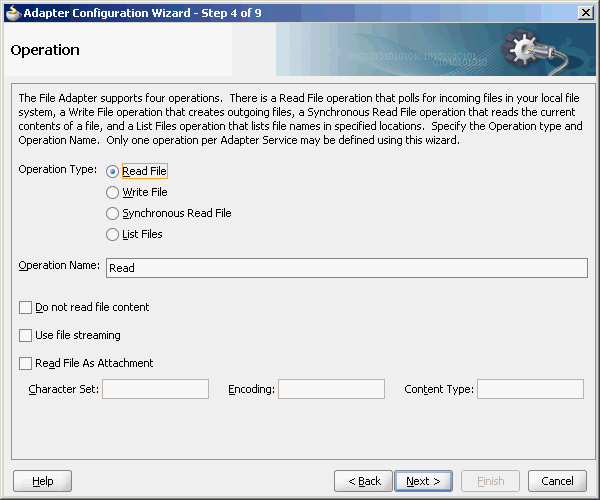
Description of "Figure 4-25 Selecting the Read File Operation"
4.3.1.2 Inbound File Directory Specifications
The File Directories page of the Adapter Configuration Wizard shown in Figure 4-26 enables you to specify information about the directory to use for reading inbound files and the directories in which to place successfully processed files. You can choose to process files recursively within directories. You can also specify multiple directories.
Figure 4-26 The Adapter Configuration Wizard - Specifying Incoming Files
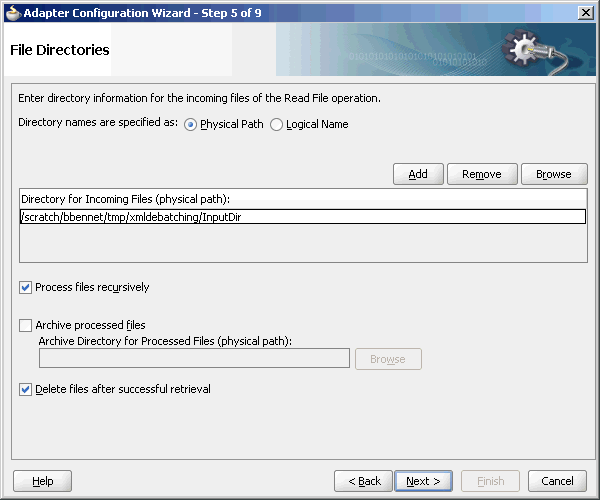
Description of "Figure 4-26 The Adapter Configuration Wizard - Specifying Incoming Files"
The following sections describe the file directory information to specify:
4.3.1.2.1 Specifying Inbound Physical or Logical Directory Paths in SOA Composite
You can specify inbound directory names as physical or logical paths in the composite involving Oracle BPEL PM and Mediator. Physical paths are values such as c:\inputDir.
Note:
If the inbound Oracle File Adapter is configured for polling multiple directories for incoming files, then all the top-level directories (inbound directories where the input file appears) must exist before the file reader starts polling these directories.
In the composite, logical properties are specified in the inbound JCA file and their logical-physical mapping is resolved by using binding properties. You specify the logical parameters once at design time, and you can later modify the physical directory name as required.
For example, the generated inbound JCA file looks as follows for the logical input directory name InputFileDir.
Example - Generated Inbound .jca File
<?xml version="1.0" encoding="UTF-8"?>
<adapter-config name="FlatStructureIn"
                 adapter="File Adapter"
xmlns="http://platform.integration.oracle/
             blocks/adapter/fw/metadata">

  <connection-factory location="eis/FileAdapter"
           UIincludeWildcard="*.txt"
adapterRef=""/>
  <endpoint-activation operation="Read">
    <activation-spec
className="oracle.tip.adapter.file.
                     inbound.FileActivationSpec">
      <property name="UseHeaders" value="false"/>
      <property name="LogicalDirectory"
                   value="InputFileDir"/>
      <property name="Recursive" value="true"/>
      <property name="DeleteFile" value="true"/>
      <property name="IncludeFiles" value=".*\.txt"/>
      <property name="PollingFrequency" value="10"/>
      <property name="MinimumAge" value="0"/>
      <property name="OpaqueSchema" value="false"/>
    </activation-spec>
  </endpoint-activation>

</adapter-config>
In the composite.xml file, you then provide the physical parameter values (in this case, the directory path) of the corresponding logical ActivationSpec or InteractionSpec. This resolves the mapping between the logical directory name and actual physical directory name. See the example below.
Example - Providing the Directory Path of the Corresponding ActivationSpec or InteractionSpec
<service name="FlatStructureIn">
    <interface.wsdl
     interface="http://xmlns.oracle.com/pcbpel/
               adapter/file/FlatStructureIn/#wsdl.
     interface(Read_ptt)"/>
    <binding.jca config="FlatStructureIn_file.jca">
<property name=" InputFileDir" type="xs:string"
                        many="false" source=""
      override="may"> /home/user/inputDir</property>

 </binding.jca>
</service>
4.3.1.2.2 Archiving Successfully Processed Files
This option enables you to specify a directory in which to place successfully processed files. You can also specify the archive directory as a logical name. In this case, you must follow the logical-to-physical mappings described in Specifying Inbound Physical or Logical Directory Paths in SOA Composite.
4.3.1.2.3 Deleting Files After Retrieval
This option enables you to specify whether to delete files after a successful retrieval. If this check box is not selected, processed files remain in the inbound directory but are ignored. Only files with modification dates more recent than the last processed file are retrieved. If you place another file in the inbound directory with the same name as a file that has been processed but the modification date remains the same, then that file is not retrieved.
4.3.1.3 File Matching and Batch Processing
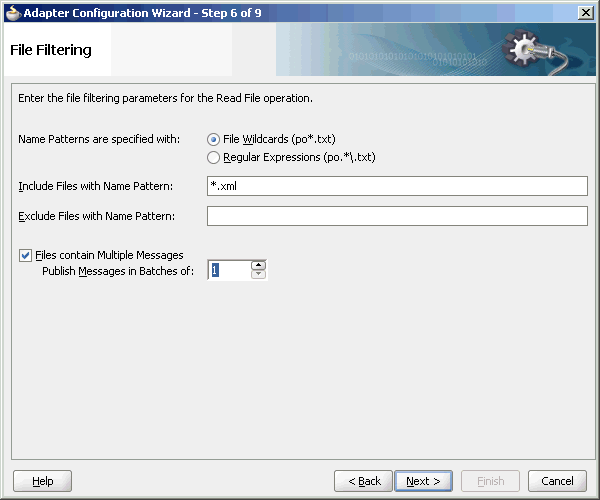
The File Filtering page of the Adapter Configuration Wizard shown in Figure 4-27 enables you to specify details about the files to retrieve or ignore.
The Oracle File Adapter acts as a file listener in the inbound direction. The Oracle File Adapter polls the specified directory on a local or remote file system and looks for files that match specified naming criteria.
Figure 4-27 The Adapter Configuration Wizard-File Filtering Page
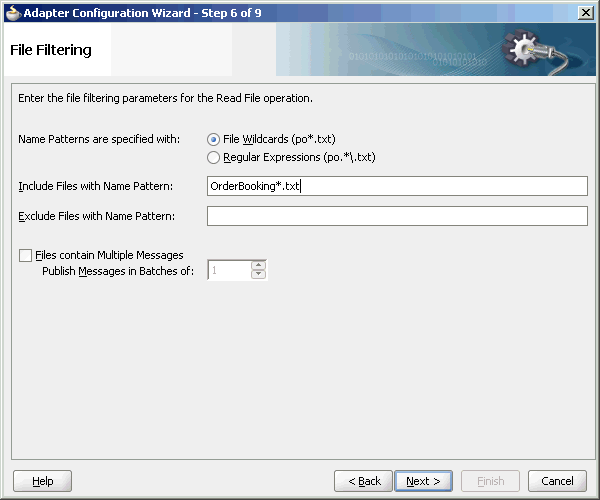
Description of "Figure 4-27 The Adapter Configuration Wizard-File Filtering Page"
The following sections describe the file filtering information to specify:
4.3.1.3.1 Specifying a Naming Pattern
Specify the naming convention that the Oracle File Adapter uses to poll for inbound files. You can also specify the naming convention for files you do not want to process. Two naming conventions are available for selection. The Oracle File Adapter matches the files that appear in the inbound directory.
-
File wildcards (
po*.txt)Retrieves all files that start with
poand end with.txt. This convention conforms to Windows operating system standards.
-
Regular expressions (
po.*\.txt)Retrieves all files that start with
poand end with.txt. This convention conforms to Java Development Kit (JDK) regular expression (regex) constructs.
Note:
-
If you later select a different naming pattern, ensure that you also change the naming conventions you specify in the Include Files and Exclude Files fields. The Adapter Configuration Wizard does not automatically make this change for you.
-
Do not specify *.* as the convention for retrieving files.
-
Be aware of any file length restrictions imposed by your operating system. For example, Windows operating system file names cannot be more than 256 characters in length (the file name, plus the complete directory path). Some operating systems also have restrictions on the use of specific characters in file names. For example, Windows operating systems do not allow characters such as
backslash(\), slash (/), colon (:), asterisk (*), left angle bracket (<), right angle bracket (>), or vertical bar(|).
4.3.1.3.2 Including and Excluding Files
If you use regular expressions, the values you specify in the Include Files and Exclude Files fields must conform to JDK regular expression (regex) constructs. For both fields, different regex patterns must be provided separately. The Include Files and Exclude Files fields correspond to the IncludeFiles and ExcludeFiles parameters, respectively, of the inbound WSDL file.
Note:
The regex pattern complies with the JDK regex pattern. According to the JDK regex pattern, the correct connotation for a pattern of any characters with any number of occurrences is a period followed by a plus sign (.+). An asterisk (*) in a JDK regex is not a placeholder for a string of any characters with any number of occurrences.
For the inbound Oracle File Adapter to pick up all file names that start with po and which have the extension txt, you must specify the Include Files field as po.*\.txt when the name pattern is a regular expression. In this regex pattern example:
-
A period (
.)indicates any character. -
An asterisk (
*) indicates any number of occurrences. -
A backslash followed by a period (\.) indicates the character period (.) as indicated with the backslash escape character.
The Exclude Files field is constructed similarly.
If you have Include Files field and Exclude Files field expressions that have an overlap, then the exclude files expression takes precedence. For example, if Include Files is set to abc*.txt and Exclude Files is set to abcd*.txt, then no abcd*.txt files are received.
Note:
You must enter a name pattern in the Include Files with Name Pattern field and not leave it empty. Otherwise, the inbound adapter service reads all the files present in the inbound directory, resulting in incorrect results.
Table 4-4 lists details of Java regex constructs.
Note:
Do not begin JDK regex pattern names with the following characters: plus sign (+), question mark (?), or asterisk (*).
Table 4-4 Java Regular Expression Constructs
| Matches | Construct |
|---|---|
|
Characters |
- |
|
The character |
|
|
The backslash character |
|
|
The character with octal value |
|
|
The character with octal value |
|
|
The character with octal value |
|
|
The character with hexadecimal value |
|
|
The character with hexadecimal value |
|
|
The tab character |
|
|
The new line (line feed) character |
|
|
The carriage-return character |
|
|
The form-feed character |
|
|
The alert (bell) character |
|
|
The escape character |
|
|
The control character corresponding to |
|
|
- |
- |
|
Character classes |
- |
|
|
|
|
Any character except |
|
|
|
|
|
|
|
|
|
|
|
|
|
|
|
|
|
- |
- |
|
Predefined character classes |
- |
|
Any character (may or may not match line terminators) |
- |
|
A digit: |
|
|
A nondigit: |
|
|
A white space character: |
|
|
A nonwhitespace character: |
|
|
A word character: |
|
|
A nonword character: |
|
|
Greedy quantifiers |
- |
|
|
|
|
|
|
|
|
|
|
|
|
|
|
|
|
|
|
For details about Java regex constructs, see
4.3.1.3.3 File Include and Exclude
The FileList operation does not expose the java.file.IncludeFiles property. This property is configured while designing the adapter interaction and cannot be overridden through headers, as shown in the example tomorrow.
Example - Overriding the FileList Operation
<adapter-config name="ListFiles" adapter="File Adapter"    xmlns="http://platform.integration.oracle
                   /blocks/adapter/fw/metadata">
   <connection-factory location="eis/FileAdapter"
                    UIincludeWildcard="*.txt"
                        adapterRef=""/>
    <endpoint-interaction portType="FileListing_ptt"
                               operation="FileListing">
    <interaction-spec className=
                    "oracle.tip.adapter.file.outbound.
                     FileListInteractionSpec">
        <property name="PhysicalDirectory"
                             value="%INP_DIR%"/>
        <property name="PhysicalDirectory"
                           value="%INP_DIR%"/>
        <property name="Recursive" value="true"/>
             <property name="Recursive"
                            value="true"/>
             <property name="IncludeFiles"
                        value=".*\.txt"/>
   </interaction-spec>
   </endpoint-interaction>
</adapter-config>
In this example, after you set the IncludeFiles, they cannot be changed.
4.3.1.3.4 Debatching Messages
You can select whether incoming files have multiple messages, and specify the number of messages in one batch file to publish. When the file contains message with repeating elements, you can choose to publish the message in a specific number of batches. Refer to Figure 4-27.
When a file contains multiple messages and this check box is selected, this is referred to as debatching. Nondebatching is applied when the file contains only a single message and the check box is not selected. Debatching is supported for native and XML files.
4.3.1.4 File Polling
The File Polling page of the Adapter Configuration Wizard shown in Figure 4-28 enables you to specify the following inbound polling parameters:
-
The frequency with which to poll the inbound directory for new files to retrieve.
-
The minimum file age of files to retrieve. For example, this polling parameter enables a large file to be completely copied into the directory before it is retrieved for processing. The age is determined by the last modified time stamp. For example, if you know that it takes three to four minutes for a file to be written, then set the minimum age to five minutes. If a file is detected in the input directory and its modification time is less than five minutes older than the current time, then the file is not retrieved because it is still potentially being written to.
Figure 4-28 The Adapter Configuration Wizard-File Polling Page
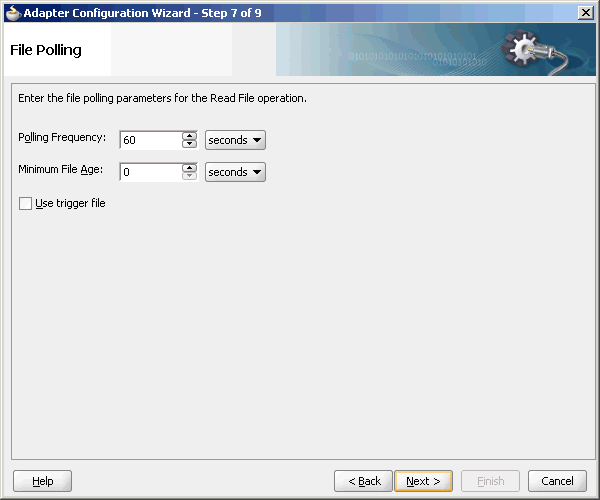
Description of "Figure 4-28 The Adapter Configuration Wizard-File Polling Page"
Note:
You must not manually change the value of polling parameters in JCA files. You must use the Adapter Configuration Wizard to modify this parameter.
4.3.1.4.1 Using Trigger Files
By default, polling by inbound Oracle File and FTP Adapters start as soon as the endpoint is activated. However, to obtain more control over polling, you can use a file-based trigger. Once the Oracle File or FTP Adapter finds the specified trigger file in a local or remote directory, it starts polling for the files in the inbound directory.
For example, a BPEL process is writing files to a directory and a second BPEL process is polling the same directory for files. To have the second process start polling the directory only after the first process has written all the files, you can use a trigger file. You can configure the first process to create a trigger file at the end. The second process starts polling the inbound directory after it finds the trigger file.
Note:
The lifecycle of the trigger file is not managed by the adapter. The trigger file must be managed externally. For example, un-trigger the endpoint, delete the trigger file using the external application, and either specify TriggerFileStrategy as EndpointActivation or EveryTime.The trigger file directory can be the same as the inbound polling directory or different from the inbound polling directory. However, if your trigger file directory and the inbound polling directory are the same, then you should ensure that the name of the trigger file is not similar to the file filter specified in the Adapter Configuration page shown in Figure 4-27.
The content of a trigger file is never read and therefore should not be used as payload for an inbound receive activity.
Table 4-5 lists the parameters that you must specify in the inbound service JCA file:
Table 4-5 Trigger File Parameters
| Parameter | Description | Example |
|---|---|---|
|
or
|
The physical or logical name of the directory in which the Oracle File and FTP Adapters look for the trigger file. The |
|
|
|
The name of the trigger file. |
|
|
|
Strategy that is used as the triggering mechanism. The value can be: EndpointActivation: The adapter looks for the trigger file every time the composite is activated. Note: The composite gets activated every time you start the container or redeploy the application, or retire or activate the composite application from Fusion Middleware Control. Every time you restart the container, the composite application is not triggered until it sees the trigger file in the specified directory. OnceOnly: The adapter looks for the trigger file only once in its lifetime. After it finds the trigger file, it remember that across restarts and redeployments. EveryTime: The adapter looks for the trigger file on each polling cycle.The default value for |
|
The following is a sample JCA file for the inbound service:
Example - Sample .jca File for the Inbound Service
<?xml version="1.0" encoding="UTF-8"?>
<adapter-config name="FlatStructureIn" adapter="File Adapter"
  xmlns="http://platform.integration.oracle/
                  blocks/adapter/fw/metadata">

  <connection-factory
                 location="eis/FileAdapter"
    UIincludeWildcard="*.txt"
adapterRef=""/>
  <endpoint-activation operation="Read">
    <activation-spec className=
                 "oracle.tip.adapter.file.
       inbound.FileActivationSpec">
       <property.../>
       <property name=
                "TriggerFilePhysicalDirectory"
             value="/tmp/flat/ArchiveDir"/>
    </activation-spec>
</endpoint-activation>

</adapter-config>
4.3.1.5 Postprocessing
The Oracle File Adapter supports several postprocessing options. After processing the file, files are deleted if specified in the File Polling page shown in Figure 4-28. Files can also be moved to a completion (archive) directory if specified in the File Directories page shown in Figure 4-26.
4.3.1.6 Native Data Translation
The next Adapter Configuration Wizard page that appears is the Messages page shown in Figure 4-29. This page enables you to select the XSD schema file for translation.
Figure 4-29 Specifying the Schema - Messages Page
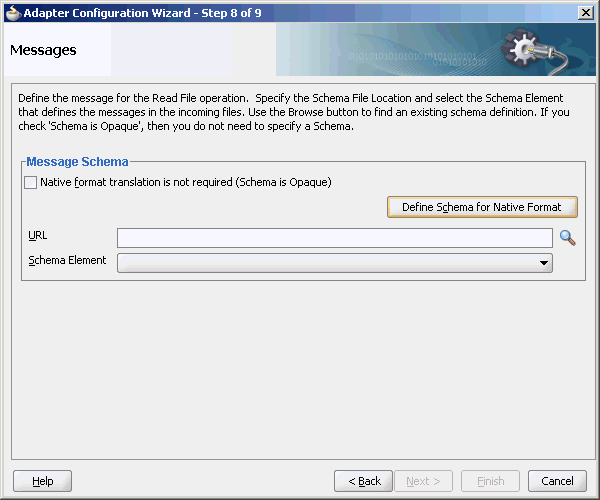
Description of "Figure 4-29 Specifying the Schema - Messages Page"
If native format translation is not required (for example, a JPG or GIF image is being processed), then select the Native format translation is not required check box. The file is passed through in base-64 encoding.
XSD files are required for translation. To define a new schema or convert an existing data type definition (DTD) or COBOL Copybook, then select Define Schema for Native Format. This starts the Native Format Builder wizard. This wizard guides you through the creation of a native schema file from file formats such as comma-delimited value (CSV), fixed-length, DTD, and COBOL Copybook. After the native schema file is created, the Messages page is displayed, with the Schema File URL and Schema Element fields filled in. For more information, see Supported File Formats.
Note:
Ensure that the schema you specify includes a namespace. If your schema does not have a namespace, then an error message is displayed.
4.3.1.7 Inbound Service
When you finish configuring the Oracle File Adapter, a JCA file is generated for the inbound service. The file is named after the service name you specified on the Service Name page of the Adapter Configuration Wizard. You can rerun the wizard later to change your operation definitions.
The ActivationSpec parameter holds the inbound configuration information. The ActivationSpec and a set of inbound Oracle File Adapter properties are part of the inbound JCA file.
Table 4-6 lists the properties of a sample inbound JCA file.
Table 4-6 Sample JCA Properties for Inbound Service
| Property | Sample Value |
|---|---|
|
|
|
|
|
|
|
|
|
|
|
|
|
|
|
|
|
|
|
|
|
The ActivationSpec property values are specified in the Adapter Configuration Wizard during design time and, as shown in Table 4-6. The inbound Oracle File Adapter uses the following configuration properties:
-
PollingFrequency -
MinimumAge -
PhysicalDirectory -
LogicalDirectory -
PublishSize -
PhysicalArchiveDirectory -
LogicalArchiveDirectory -
IncludeFiles -
ExcludeFiles -
UseHeaders -
ListSorter -
ThreadCount -
Recursive -
MaxRaiseSize
For a description of these configuration properties, see Appendix A of this book.
4.3.1.8 Inbound Headers
Apart from the payload, Oracle File Adapter publishes the following header metadata, from the inbound service, as shown in Figure 4-30:
-
jca.file.FileName: file name -
jca.file.Directory: directory name -
jca.file.Batch: a unique name for a batch in case of debatching -
jca.file.BatchIndex: the batch index for each message within the batch for debatching -
jca.file.Size: the file size -
jca.file.LastModifiedTime: the last modified time for the file
4.3.2 Oracle File Adapter Write File Concepts
In the outbound direction, the Oracle File Adapter receives messages from the service engine and writes the messages to a file in a file system. This section provides an overview of the outbound file writing capabilities of the Oracle File Adapter. You use the Adapter Configuration Wizard to configure the Oracle File Adapter for use with a BPEL process or a Mediator Service. This creates an outbound WSDL and a JCA file pair.
This section includes the following topics:
4.3.2.1 Outbound Operation
For outbound operations with the Oracle File Adapter, select the Write File operation, as shown in Figure 4-31.
Figure 4-31 Selecting the Write File Operation
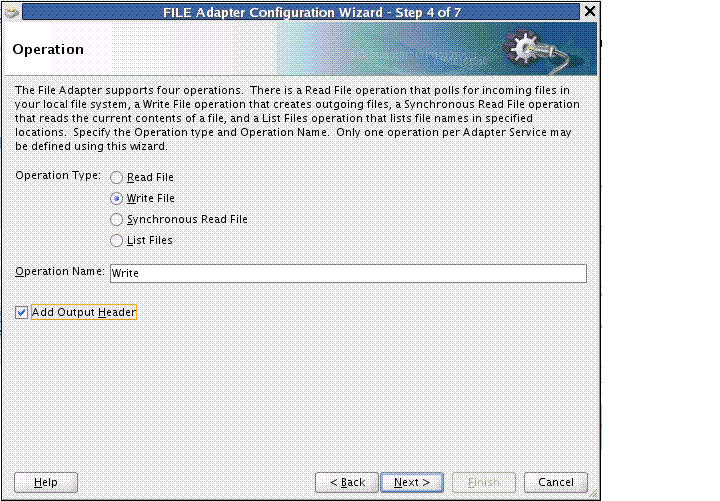
Description of "Figure 4-31 Selecting the Write File Operation"
The Add Output Header check box is visible when you select File Write. When you select this check box, the adapter WSDL has an output message pointing to a header schema, shown by the bold highlight.
Example - Adapter WSDL with Output Message Pointing to the Schema
 <wsdl:definitions name="fileout3"
  targetNamespace="http://xmlns.oracle.com/pcbpel
           /adapter/file/SOAApp1/NewJCAFmwk/
                   fileout3"
    xmlns:jca="http://xmlns.
                   oracle.com/pcbpel/wsdl/jca/"
xmlns:FILEAPP="http://xmlns.oracle.com
                    /pcbpel/adapter/file/"
    xmlns:wsdl="http://schemas.xmlsoap.org/wsdl/"
    xmlns:tns="http://xmlns.oracle.com/pcbpel
             /adapter/file/SOAApp1/NewJCAFmwk/
                 fileout3"
xmlns:plt="http://schemas.xmlsoap.org/ws
              /2003/05/partner-link/">"
xmlns:opaque=
    "http://xmlns.oracle.com/
    pcbpel/adapter/opaque/"
<plt:role name="Write_role" >
  <plt:portType name="tns:Write_ptt" />
  </plt:role>
</plt:partnerLinkType>"
<wsdl:types>
<schema TargetNamespace=
         "http://xlmns.oracle.com/pcbpel/
              adapter/opaque/"
   xmlns:opaque="http://xmlns.oracle.com
                       /pcbpel/adapter/opaque/"
      xmlns="http://www.w3.org/2001/XMLSchema" >
   <element name="opaqueElement"
                    type="base64Binary" />
</schema>
<schema targetNamespace=
        "http://xmlns.oracle.com/pcbpel/
          adapter/file/"
xmlns="http://www.w3.org/2001/XMLSchema"
  attributeFormDefault="qualified"
  <element name="OutboundFileHeaderType" >
   <complexType>
    <sequence>
     <element name="filename" type="string" />
     <element name="directory" type="string" />
   </sequence>
   </complexType>
   </element>
</schema>
</wsdl:types>
   <wsdl:message name="Write_msg">
   <wsdl:part name="opaque" element=
         "opaque:opaqueElement"/>
</wsdl:message>
   <wsdl:message name="Output_msg">
   <wsdl:part name="body"
             element=
       "FILEAPP:OutboundFileHeaderType"/>
</wsdl:message>
   <wsdl:portType name="Write_ptt">
   <wsdl:operation name="Write">
     <wsdl:input message="tns:Write_msg"/>
     <wsdl:output message="tns:Output_msg"/>
       </wsdl:operation>
     </wsdl:portType>
</wsdl:definitions>
You can select the Update Output Header checkbox in edit mode, and the output message/header schema is removed from the adapter WSDL.
4.3.2.2 Outbound File Directory Creation
For the outbound operation, you can specify the outbound directory, outbound file naming convention to use, and, if necessary, the batch file conventions to use.
The File Configuration page of the Adapter Configuration Wizard shown in Figure 4-32 enables you to specify the directory for outgoing files and the outbound file naming convention.
Figure 4-32 The Adapter Configuration Wizard-Parameters for Outgoing Files
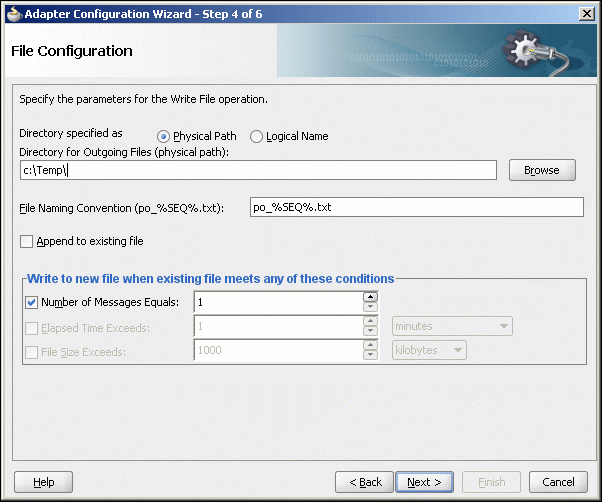
Description of "Figure 4-32 The Adapter Configuration Wizard-Parameters for Outgoing Files"
The following sections describe the file configuration information to specify:
4.3.2.2.1 Specifying Outbound Physical or Logical Directory Paths in Oracle BPEL PM
You can specify outbound directory names as physical or logical paths. Physical paths are values such as c:\outputDir.
If you specify logical parameters, then the generated JCA file looks as follows for the logical outbound directory name OutputFileDir. See the example below.
Example - Generated JCA File for Sample Logical Outbound Directory
<?xml version="1.0" encoding="UTF-8"?>
<adapter-config name="FlatStructureOut"
          adapter="File Adapter"
  xmlns="http://platform.integration.
                oracle/blocks/
    adapter/fw/metadata">
  <connection-factory location="eis/FileAdapter"
                       adapterRef=""/>
  <endpoint-interaction operation="Write">
    <interaction-spec
className="oracle.tip.adapter.file.outbound.
                       FileInteractionSpec">
      <property name="LogicalDirectory"
                     value="OutputFileDir"/>
      <property name="FileNamingConvention"
              value="%yyMMddHHmmssSS%_%SEQ%_
                       %yyyyMMdd%_%SEQ%.out.%SEQ%"/>
      <property name="Append" value="false"/>
      <property name="NumberMessages" value="1"/>
      <property name="OpaqueSchema" value="false"/>
    </interaction-spec>
  </endpoint-interaction>

</adapter-config>
Select the outbound adapter in the External References swim lane in JDeveloper wizard (it is present in the composite.xml tab). Create a Binding Property in the Property Inspector for the outbound adapter (you must scroll down to find it). Once the Create Property box appears, enter OutputFileDir in the Name field and the actual output directory name, example, C:\outputDir in the Value field. The composite.xml file appears. See the example below.
Example - Creating a Property with An Outbound Directory Specified
<reference name="FlatStructureOut">
    <interface.wsdl
interface="http://xmlns.oracle.com/pcbpel/adapter
           /file/FlatStructureOut/
                 #wsdl.interface(Write_ptt)"/>
    <binding.jca config="FlatStructureOut_file.jca">
      <property name="OutputFileDir"
             type="xs:string" many="false"
                override="may">C:\outputDir
                        </property>
    </binding.jca>
  </reference>
Note:
Ensure that you limit the length of outbound file names (the file name, plus the complete directory path) to 200 characters. This is not an exact limit but rather a recommendation. When an outbound file name is long (for example, 215 characters), a blank file with that name is created in the outbound directory.
4.3.2.2.2 Specifying Outbound Physical or Logical Directory Paths in Mediator
You can specify outbound directory names as physical or logical paths in Mediator. Physical paths are values such as c:\inputDir.
You can specify the logical names at design time in the File Directories page shown in Figure 4-26 and then provide logical-physical mapping by using the Endpoint properties. For example, WriteFile is an outbound adapter service. You have specified OutDir as the logical directory name during design time.
4.3.2.2.3 Specifying a Dynamic Outbound Directory Name
For outbound operation, you can specify a dynamic outbound directory name. You can set variables to specify dynamic outbound directory names.
Example - Setting Variables to Specify Dynamic Outbound Directory Names
<?xml version="1.0" encoding="UTF-8"?>
<adapter-config name="ReadAddressChunk"
                  adapter="File Adapter"
xmlns="http://platform.integration.oracle
                     /blocks/adapter/fw/metadata">
  <connection-factory location="eis/FileAdapter"
                     adapterRef=""/>
  <endpoint-interaction operation="ChunkedRead">
    <interaction-spec
              className=
                 "oracle.tip.adapter.file.outbound.
                   ChunkedInteractionSpec">
      <property name=
              "PhysicalDirectory" value="C:\foo"/>
      <property name="FileName" value="dummy.txt"/>
      <property name="ChunkSize" value="1"/>
    </interaction-spec>
  </endpoint-interaction>
</adapter-config>
In the preceding example, in the JCA file, the physical directory is set to "C:\foo" but during runtime it is dynamically changed to the assigned value. In this example, the physical directory is dynamically changed to "C:\out".
You must perform the following steps to specify the dynamic outbound directory name:
Note:
When using dynamic directories, ensure that parameters such as NumberMessages, ElapsedTime, and FileSize are not defined in the outbound adapter service WSDL file. These parameters are not supported with dynamic directories.
4.3.2.2.4 Specifying the Outbound File Naming Convention
Specify the naming convention to use for outgoing files. You cannot enter completely static names such as po.txt. This is to ensure the uniqueness in names of outgoing files, which prevents files from being inadvertently overwritten. Instead, outgoing file names must be a combination of static and dynamic portions.
The prefix and suffix portions of the file example shown in Figure 4-32 are static (for example, po_ and .xml). The %SEQ% variable of the name is dynamic and can be a sequence number or a time stamp (for example, po_%yyMMddHHmmss%.xml to create a file with a time stamp).
If you choose a name starting with po_, followed by a sequence number and the extension txt as the naming convention of the outgoing files, then you must specify po_%SEQ%.txt.
If you choose a name starting with po_, followed by a time stamp with the pattern yyyy.MM.dd and the extension txt as the naming convention of the outgoing file, then you must specify po_%yyyy.MM.dd%.txt. For example, the outgoing file name can be po_2004.11.29.txt.
Additionally, you can combine file naming conventions. For example, you can specify the file naming convention as po_%SEQ%_%yyyy.MM.dd%_%SEQ%.txt.
Note:
When you use the time stamp pattern, the same time stamp may be generated on subsequent calls and you may lose messages. The workaround is to combine the time-stamp pattern with a sequence pattern. Alternatively, you can use a time-stamp pattern closest to a millisecond, in which case the adapter handles the uniqueness of the file names.
You cannot use a regular expression for outbound synchronous reads. In these cases, the exact file name must be known.
A time stamp is specified by date and time pattern strings. Within date and time pattern strings, unquoted letters from 'A' to 'Z' and from 'a' to 'z' are interpreted as pattern letters representing the components of a date or time string. Text can be quoted using single quotation marks (') to avoid interpretation. The characters "''" represent single quotation marks. All other characters are not interpreted.
The Java pattern letters are defined in Table 4-7.
Table 4-7 Java Pattern Letters
| Letter | Date or Time Component | Presentation | Examples |
|---|---|---|---|
|
|
Era designator |
Text |
|
|
|
Year |
Year |
|
|
|
Month in year |
Month |
|
|
|
Week in year |
Number |
|
|
|
Week in month |
Number |
|
|
|
Day in year |
Number |
|
|
|
Day in month |
Number |
|
|
|
Day of week in month |
Number |
|
|
|
Day in week |
Text |
|
|
|
AM/PM marker |
Text |
|
|
|
Hour in day (0-23) |
Number |
|
|
|
Hour in day (1-24) |
Number |
|
|
|
Hour in AM/PM (0-11) |
Number |
|
|
|
Hour in AM/PM (1-12) |
Number |
|
|
|
Minute in hour |
Number |
|
|
|
Second in minute |
Number |
|
|
|
Millisecond |
Number |
|
|
|
Time zone |
General Time Zone |
|
|
|
Time zone |
RFC 822 Time Zone |
|
Different presentations in the pattern are as follows:
-
Text
For formatting, if the number of pattern letters is four or more, then the full form is used; otherwise, a short or abbreviated form is used if available. For parsing, both forms are accepted, independent of the number of pattern letters.
-
Number
For formatting, the number of pattern letters is the minimum number of digits, and shorter numbers are zero-padded to this number. For parsing, the number of pattern letters is ignored unless it is required to separate two adjacent fields.
-
Year
For formatting, if the number of pattern letters is two, then the year is truncated to two digits; otherwise, it is interpreted as a number.
For parsing, if the number of pattern letters is more than two, then the year is interpreted literally, regardless of the number of digits. Using the pattern MM/dd/yyyy, 01/11/12 parses to Jan 11, 12 A.D.
For parsing with the abbreviated year pattern (y or yy), the abbreviated year is interpreted relative to some century. The date is adjusted to be within 80 years before and 20 years after the time instance is created. For example, using a pattern of MM/dd/yy and Jan 1, 1997 is created; the string 01/11/12 is interpreted as Jan 11, 2012, while the string 05/04/64 is interpreted as May 4, 1964. During parsing, only strings consisting of exactly two digits are parsed into the default century. Any other numeric string, such as a one-digit string, a three-or-more-digit string, or a two-digit string that is not all digits (for example, -1), is interpreted literally. So, 01/02/3 or 01/02/003 is parsed using the same pattern as Jan 2, 3 AD. Likewise, 01/02/-3 is parsed as Jan 2, 4 BC.
-
Month
If the number of pattern letters is
3or more, then the month is interpreted as text; otherwise, it is interpreted as a number. -
General time zone
Time zones are interpreted as text if they have names. For time zones representing a
GMToffset value, the following syntax is used:
GMTOffsetTimeZone:
GMT Sign Hours : Minutes
Sign: one of
+ -
Hours:
Digit
Digit Digit
Minutes:
Digit Digit
Digit: one of
0 1 2 3 4 5 6 7 8 9
Hours must be between 0 and 23, and Minutes must be between 00 and 59. The format is locale-independent and digits must be taken from the Basic Latin block of the Unicode standard.
For parsing, RFC 822 time zones are also accepted.
For formatting, the RFC 822 4-digit time zone format is used:
RFC822TimeZone:
Sign TwoDigitHours Minutes
TwoDigitHours:
Digit Digit
TwoDigitHours must be between 00 and 23. Other definitions are the same as for general time zones.
For parsing, general time zones are also accepted.
4.3.2.2.5 Specifying a Dynamic Outbound File Name
For outbound operation, you can specify a dynamic outbound file name. You can set variables to specify dynamic outbound file names.
Example - Setting Variables to Specify Dynamic Outbound File Names
<?xml version="1.0" encoding="UTF-8"?>
<adapter-config name="ReadAddressChunk"
              adapter="File Adapter"
xmlns="http://platform.integration.oracle/blocks
          /adapter/fw/metadata">
  <connection-factory location=
                     "eis/FileAdapter"
          adapterRef=""/>
  <endpoint-interaction operation
                   ="ChunkedRead">
    <interaction-spec
className="oracle.tip.adapter.file.outbound.
          ChunkedInteractionSpec">
      <property name="PhysicalDirectory"
                          value="C:\foo"/>
      <property name="FileName"
                      value="dummy.txt"/>
      <property name="ChunkSize" value="1"/>
    </interaction-spec>
  </endpoint-interaction>
</adapter-config>
In the preceding example, in the JCA file, the physical directory is set to "C:\foo" but during runtime it is dynamically changed to the assigned value. In this example, the physical directory is dynamically changed to "C:\out". You must perform the following steps to specify the dynamic outbound directory name:
Note:
When using dynamic files, ensure that parameters such as NumberMessages, ElapsedTime, and FileSize are not defined in the outbound adapter service WSDL file. These parameters are not supported with dynamic files.
4.3.2.2.6 Batching Multiple Outbound Messages
In the simplest scenario, you specify writing a single file to a single message. You can also specify the outbound method for batch file writing. This method enables you to specify the number of messages to publish in one batch file. The following batch file settings are provided in the File Configuration page shown in Figure 4-32:
-
Number of Messages Equals
Specify a value which, when equaled, causes a new outgoing file to be created.
-
Elapsed Time Exceeds
Specify a time which, when exceeded, causes a new outgoing file to be created.
Note:
The Elapsed Time Exceeds batching criteria is evaluated and a new outgoing file is created, only when an invocation happens.
For example, if you specify that elapsed time exceeds 15 seconds, then the first message that is received is not written out, even after 15 seconds, as batching conditions are not valid. If a second message is received, then batching conditions become valid for the first one, and an output file is created when the elapsed time exceeds 15 seconds.
-
File Size Exceeds
Specify a file size which, when equaled, causes an outgoing file to be created. For example, assume that you specify a value of
3for the number of messages received and a value of 1 MB for the file size. When you receive two messages that when combined equal or exceed 1 MB, or three messages that are less than 1 MB, an output file is created.
Note:
You must not manually change the file configurations specified in the preceding list in the JCA files. You must use the Adapter Configuration Wizard to modify these configurations.
If the Oracle File Adapter encounters a problem during batching, it starts batching at the point at which it left off on recovery.
4.3.2.3 Native Data Translation
The next Adapter Configuration Wizard page that appears is the Messages page shown in Figure 4-37. This page enables you to select the XSD schema file for translation.
As with specifying the schema for the inbound direction, you can perform the following tasks in this page:
-
Specify whether native format translation is not required.
-
Select the XSD schema file for translation.
-
Start the Native Format Builder wizard to create an XSD file from file formats such as CSV, fixed-length, DTD, and COBOL Copybook.
For more information about Messages page, see Native Data Translation.
4.3.2.4 Outbound Service Files
When you complete configuration of the Oracle File Adapter with the Adapter Configuration Wizard, a WSDL and a JCA file pair is generated for the outbound operation. The files are named after the service name you specified on the Service Name page of the Adapter Configuration Wizard shown in Figure 2-8. You can rerun the wizard later to change your operation definitions.
A sample outbound JCA file includes the information listed in Table 4-8:
Table 4-8 Sample JCA Properties for Outbound Service
| Property | Sample Value |
|---|---|
|
|
|
|
|
|
|
|
|
|
|
|
|
|
|
|
|
|
The outbound Oracle File Adapter uses the following configuration parameters:
-
PhysicalDirectory -
LogicalDirectory -
NumberMessages -
ElapsedTime -
FileSize -
FileNamingConvention -
Append
For a description of these configuration properties, see Oracle JCA Adapter Properties.
4.3.3 Oracle File Adapter Synchronous Read Concepts
In the outbound direction, the Oracle File or FTP Adapter can read the content of a single file. This section provides an overview of the outbound synchronous file reading capabilities of the Oracle File Adapter. For reading a file synchronously, you select Synchronous Read File operation, as shown in Figure 4-38.
Figure 4-38 Synchronous Read Operation Page
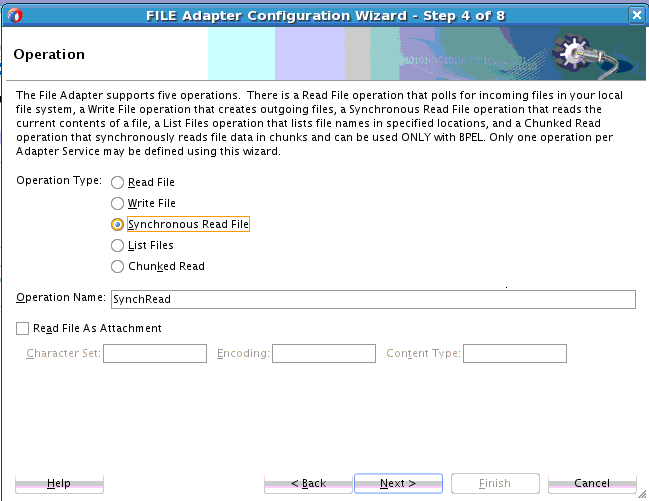
Description of "Figure 4-38 Synchronous Read Operation Page"
In the outbound direction, the Oracle File/FTP Adapter enables you to read the content of a single file using the Synchronous File Read Operation. This operation now enables you to read the file as an attachment. Select the checkbox to read the file as an attachment,. The rest of the options are optional for attachments and are useful in cases where the information is required by the service engine.
Many of the pages of the Adapter Configuration Wizard are similar to the Read File operation except the File Name page. You can specify the name of the file to be read in the File Name field, as shown in Figure 4-39.
4.3.4 Oracle File Adapter File Listing Concepts
This feature of the Oracle File Adapter lets you use a BPEL activity to retrieve a list of files from a target directory. This list of files is returned as an XML document and contains information such as file name, directory name, file size, and last modified time. This section provides an overview of the file listing capabilities of the Oracle File Adapter. You use the Adapter Configuration Wizard to configure the Oracle File Adapter for use with a BPEL process or a Mediator service. This creates an outbound WSDL and JCA file pair.
Note:
The file creation time property, creationTime, is not supported because the standard Java APIs do not provide a mechanism to retrieve the creation time. The value of the creationTime property is always displayed as 0.
For example,
<creationTime xmlns="http://xmlns.oracle.com
/pcbpel/adapter/file/FAListFiles/FAListFilesTest/ReadS/">
0</creationTime>
This section includes the following topics:
4.3.4.1 Listing Operation
For listing files, you must select the List Files operation, as shown in Figure 4-40.
4.3.4.2 File Directory Specifications
The File Directories page of the Adapter Configuration Wizard shown in Figure 4-41 enables you to specify information about the directory to use for reading files names for the list operation. You can choose to list files recursively within directories.
Figure 4-41 The Adapter Configuration Wizard-Specifying Incoming Files
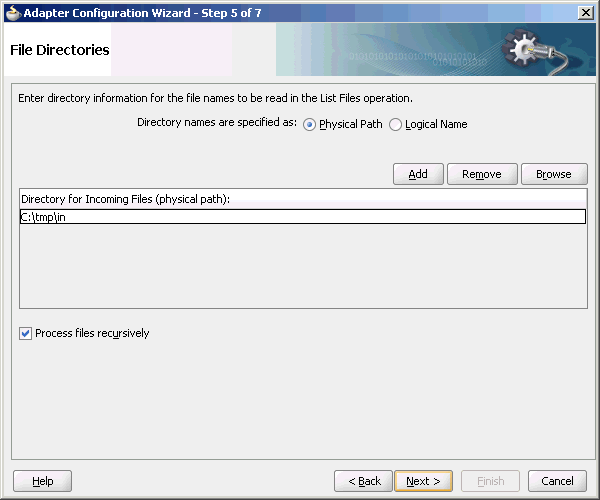
Description of "Figure 4-41 The Adapter Configuration Wizard-Specifying Incoming Files"
The following section describes the file directory information to specify:
4.3.4.2.1 Specifying Inbound Physical or Logical Directory Paths in SOA Composite
You can specify directory names as physical or logical paths for composites involving Oracle BPEL PM and Mediator. Physical paths are values such as C:\inputDir.
In the composite, logical properties are specified in the JCA file, and their logical-physical mapping is resolved by using binding properties. You specify the required directory once at design time, and you can later modify the directory name as required.
For example, the generated JCA file looks as follows for the logical input directory name C:\inputDir:
Example - Generated .jca file for Logical Input Directory
<adapter-config name="ListFiles"
       adapter="File Adapter"
   xmlns="http://platform.integration.oracle
   /blocks/adapter/fw/metadata">

  <connection-factory location="eis/FileAdapter"
          UIincludeWildcard="*.txt"
adapterRef=""/>
  <endpoint-interaction portType="FileListing_ptt"
          operation="FileListing">
    <interaction-spec
className="oracle.tip.adapter.file.
          outbound.FileListInteractionSpec">
      <property name="PhysicalDirectory"
           value="C:\inputDir"/>
      <property name="Recursive" value="true"/>
      <property name="IncludeFiles" value=".*\.txt"/>
    </interaction-spec>
  </endpoint-interaction>

</adapter-config>
4.3.4.3 File Matching
The File Filtering page of the Adapter Configuration Wizard shown in Figure 4-42 enables you to specify details about the files to retrieve or ignore.
The Oracle File Adapter acts as a file listener and polls the specified directory on a local or remote file system and looks for files that match specified naming criteria.
Figure 4-42 The Adapter Configuration Wizard - File Filtering
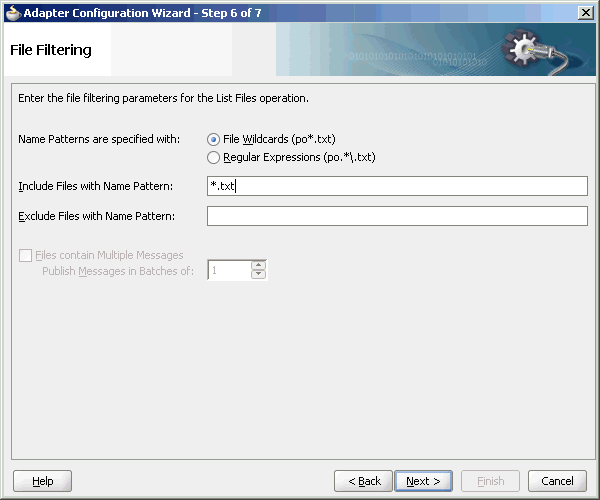
Description of "Figure 4-42 The Adapter Configuration Wizard - File Filtering"
The following sections describe the file filtering information to specify:
4.3.4.3.1 Specifying a Naming Pattern
Specify the naming convention that the Oracle File Adapter uses to poll for inbound files. You can also specify the naming convention for files you do not want to process. Two naming conventions are available for selection. The Oracle File Adapter matches the files that appear in the inbound directory.
-
File wildcards (
po*.txt)Retrieve all files that start with
poand end with.txt. This convention conforms to operating system standards.
-
Regular expressions (
po.*\.txt)Retrieve all files that start with
poand end with.txt. This convention conforms to Java Development Kit (JDK) regular expression (regex) constructs.
Note:
-
If you later select a different naming pattern, ensure that you also change the naming conventions you specify in the Include Files and Exclude Files fields. The Adapter Configuration Wizard does not automatically make this change for you.
-
Do not specify *.* as the convention for retrieving files.
-
Be aware of any file length restrictions imposed by your operating system. For example, Windows operating system file names cannot be more than 256 characters in length (the file name, plus the complete directory path). Some operating systems also have restrictions on the use of specific characters in file names. For example, Windows operating systems do not allow characters such as
backslash(\), slash (/), colon (:), asterisk (*), left angle bracket (<), right angle bracket (>), or vertical bar(|).
4.3.4.3.2 Including and Excluding Files
If you use regular expressions, the values you specify in the Include Files and Exclude Files fields must conform to JDK regular expression (regex) constructs. For both fields, different regex patterns must be provided separately. The Include Files and Exclude Files fields correspond to the IncludeFiles and ExcludeFiles parameters, respectively, of the inbound WSDL file.
Note:
The regex pattern complies with the JDK regex pattern. According to the JDK regex pattern, the correct connotation for a pattern of any characters with any number of occurrences is a period followed by a plus sign (.+). An asterisk (*) in a JDK regex is not a placeholder for a string of any characters with any number of occurrences.
To have the inbound Oracle File Adapter to pick up all file names that start with po and which have the extension txt, you must specify the Include Files field as po.*\.txt when the name pattern is a regular expression. In this regex pattern example:
-
A period (
.)indicates any character. -
An asterisk (
*) indicates any number of occurrences. -
A backslash followed by a period (\.) indicates the character period (.) as indicated with the backslash escape character.
The Exclude Files field is constructed similarly.
If you have Include Files field and Exclude Files field expressions that have an overlap, then the exclude files expression takes precedence. For example, if Include Files is set to abc*.txt and Exclude Files is set to abcd*.txt, then you receive any files prefixed with abcd*.
Note:
Do not begin JDK regex pattern names with the following characters: plus sign (+), question mark (?), or asterisk (*).
For details about Java regex constructs, go to
http://java.sun.com/j2se/1.5.0/docs/api
Note:
Files are not read and therefore there is no native data translation.
4.3.5 Oracle FTP Adapter Get File Concepts
In the inbound direction, the Oracle FTP Adapter works the same way as the Read File operations of the Oracle File Adapter in that it polls and gets files from a file system for processing. The major difference is that the Oracle FTP Adapter is used for remote file exchanges. To configure the FTP adapter for remote file exchanges, the Adapter Configuration Wizard asks for connection information to an FTP server to be used later, as shown in Figure 4-43.
Figure 4-43 Specifying FTP Server Connection Information
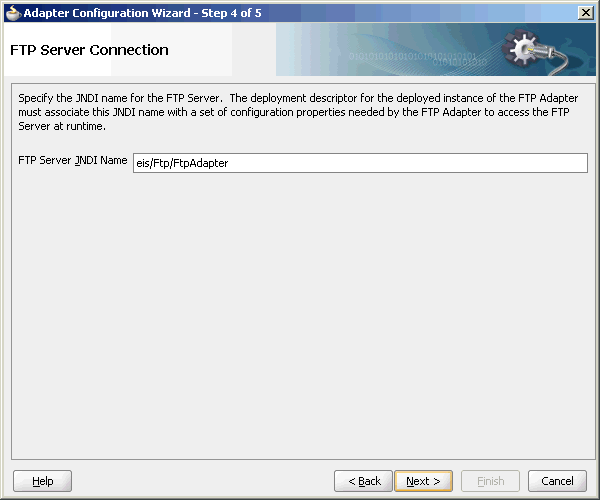
Description of "Figure 4-43 Specifying FTP Server Connection Information"
The default adapter instance JNDI name is eis/Ftp/FtpAdapter, or use a custom name. This name connects to the FTP server during runtime.
Note:
The Oracle FTP Adapter does not support the FTP commands RESTART and RECOVERY during the transfer of large files.
After logging in, you select the Get File (read) operation and the type of file to deliver. Figure 4-44 shows this selection.
Figure 4-44 Selecting the Get File Operation
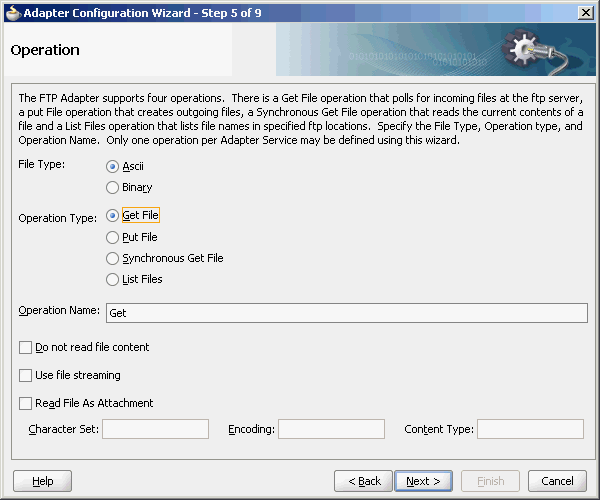
Description of "Figure 4-44 Selecting the Get File Operation"
The serverType property in the deployment descriptor is used to determine line separators when you transfer data. You can specify unix, win, or mac as property values. These values represent the operating system on which the FTP server is running. By default, the serverType property contains unix.
When you specify mac as the value, \r is used as line separator. For unix, \n is used and for win, \r\n is used. You must note that this property is used by the NXSD translator component to write the line separator during an outbound operation.
From this point onwards, pages of the Adapter Configuration Wizard for the Get File operation are the same as those for the Read File operation of the file. Table 4-9 lists the pages that are displayed and provides references to sections that describe their functionality.
Table 4-9 Adapter Configuration Wizard Windows for Get File Operation
| Page | See Section... |
|---|---|
|
File Directories (Figure 4-26) |
|
|
File Filtering (Figure 4-27) |
|
|
File Polling (Figure 4-28) |
|
|
Messages (Figure 4-29) |
An additional Adapter Configuration Wizard page is also available for advanced users. This page is shown in Figure 4-45 and appears only after you make either or both of the following selections on the File Polling page shown in Figure 4-28:
-
Do not select the Delete Files After Successful Retrieval check box.
-
Set the value of the Minimum File Age field to a value greater than 0.
This page enables you to specify a method for obtaining the modification time of files on the remote FTP server:
Note:
The Oracle FTP Adapter uses the LIST command as opposed to NLST for listing and retrieves the time stamps because of which you must not specify the time formats. However, you must specify the time formats as shown if you do any of the following:
-
If you specify
NLSTas the listing command (either through the mapping file or theUseNlst="true"parameter in the inboundJCAfile) -
To use the File Name Substring option
This note is not applicable if your case does not fall under neither of these categories.
-
File System
This option enables you to obtain the date/time format of the file modification time with the file system listing command. However, this option is rarely used and is not supported by all FTP servers. See your FTP server documentation to determine whether your server supports the file system listing command, which command-line syntax to use, and how to interpret the output.
For example, if the file system listing command
quote mdtmfilenameis supported and returns the following information:213 20050602102633
specify the start index, end index, and date/time format of the file modification time in the Data/Time Format field as a single value separated by commas (for example, 4,18,yyyyMMddHHmmss).
Where:
-
4 is the start index of the file modification time.
-
18 is the end index of the file modification time.
-
yyyyMMddHHmmss is the data/time format of the file modification time obtained with the
quote mdtmfilenamecommand.
The resulting JCA file includes the following parameters and values:
<property name=" FileModificationTime " value=" FileSystem "/>
<property name=" ModificationTimeFormat" value=" 4,18,yyyyMMddHHmmss "/>
To handle the time zone issue, you must also be aware of the time stamp difference. The time zone of the FTP server is determined by using the Windows date/time properties (for example, by double-clicking the time being displayed in the Windows task bar). You must then convert the time difference between the FTP server and the system on which the Oracle FTP Adapter is running to milliseconds and add the value as a binding property in the
composite.xmlfile:<binding.jca config="FlatStructureIn_file.jca"> <property name="timestampOffset" source="" type="xs:string" many="false" override="may">238488888</property--> </binding.jca>
-
-
Directory Listing
This option enables you to obtain the date/time format from the file modification time with the FTP directory listing command. For example, if the directory listing command (
ls -l) returns the following information:12-27-04 07:44AM 2829 NativeData2.txt
specify the start index, end index, and date/time format of the file modification time as a single value separated by commas in either the Old File Date/Time Format field or the Recent File Date/Time Format field (for example,
0,17,MM-dd-yy hh:mma).Where:
-
0is the start index of the file modification time. -
17is the end index of the file modification time. -
MM-dd-yy hh:mma is the date/time format of the file modification time obtained with the
ls -lcommand. For this example, the value is entered in the Recent File Date/Time Format field. This field indicates that the format is obtained from the most recent file adhering to the naming convention, whereas the Old File Date/Time Format field obtains the format from the oldest file.
The resulting JCA file includes the following parameters and values:
<property name=" FileModificationTime " value=" DirListing"/>
<property name=" ModificationTimeFormat" value="0,17, MM-dd-yy hh:mma "/>
To handle the time zone issue, you must also be aware of the time stamp difference. The time zone of the FTP server is determined by using the Windows date/time properties (for example, by double-clicking the time being displayed in the Windows task bar). You must then convert the time difference between the FTP server and the system on which the Oracle FTP Adapter is running to milliseconds and add the value as a binding property in the
composite.xmlfile:<binding.jca config="FlatStructureIn_file.jca"> <property name="timestampOffset" source="" type="xs:string" many="false" override="may">238488888</property--> </binding.jca>
-
-
File Name Substring
This option enables you to obtain the modification time from the file name. For example, if the name of the file is
fixedLength_20050324.txt, you can specify the following values:-
The start index in the Substring Begin Index field (for example,
12) -
The end index in the End Index field (for example,
20) -
The date and time format in the Date/Time Format field conforming to the Java
SimpleDateFormatto indicate the file modification time in the file name (for example,yyyyMMdd)
The resulting JCA file includes the following parameters and values:
<property name=" FileModificationTime " value=" Filename"/>
<property name=" FileNameSubstringBegin " value="12 "/>
<property name=" FileNameSubstringEnd " value="20"/>
<property name=" ModificationTimeFormat " value=" yyyyMMdd "/>
-
After the completion of the Adapter Configuration Wizard, configuration files are created in the Applications section of JDeveloper.
See Figure 2-28 for more information about error handling.
You must also add the DefaultDateFormat and the RecentDateFormat parameters to the deployment descriptor for Oracle FTP Adapter, as shown in the following sample:
<non-managed-connection
managedConnectionFactoryClassName=
          "oracle.tip.adapter.ftp.
             FTPManagedConnectionFactory">
   <property name="host" value="localhost"/>
   <property name="port" value="21"/>
   <property name="username" value="****"/>
   <property name="password" value="****"/>
    <property name="listParserKey" value="UNIX"/>
    <property name="defaultDateFormat"
                   value="MMM d yyyy"/>
    <property name="recentDateFormat"
                   value="MMM d HH:mm"/>
</non-managed-connection>
For more information on the DefaultDateFormat and the RecentDateFormat parameters, refer to Recursive Processing of Files Within Directories in Oracle File and FTP Adapters.
4.3.6 Oracle FTP Adapter Put File Concepts
In the outbound direction, the Oracle FTP Adapter works the same as the Write File operations of the Oracle File Adapter. The Oracle FTP Adapter receives messages from a BPEL process or a Mediator service and writes the messages in a file to a file system (in this case, remote). Because the messages must be written to a remote system, the Adapter Configuration Wizard prompts you to connect to the FTP server with the adapter instance JNDI name, as shown in Figure 4-43.
After logging in, you select the Put File (write) operation and the type of file to deliver. Figure 4-46 shows this selection.
Figure 4-46 Selecting the Put File Operation
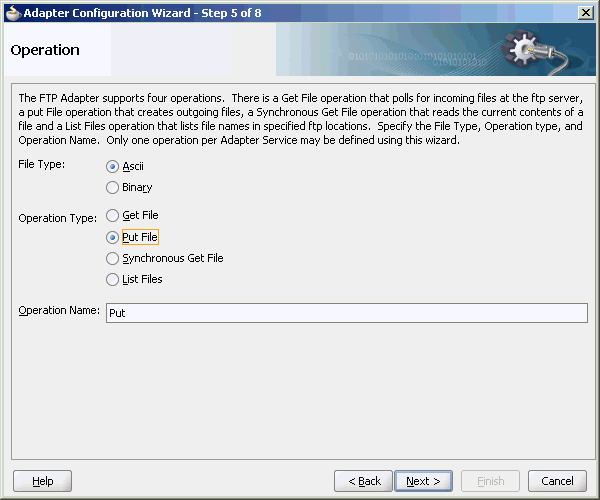
Description of "Figure 4-46 Selecting the Put File Operation"
From this point onwards, pages of the Adapter Configuration Wizard for the Put File operation are the same as those for the Write File operation of the Oracle File Adapter. Table 4-10 lists the pages that display and provide references to sections that describe their functionality.
Table 4-10 The Adapter Configuration Wizard Pages for Put File Operation
| Page | See Section... |
|---|---|
|
File Configuration (Figure 4-32) |
|
|
Messages (Figure 4-37) |
After the completion of the Adapter Configuration Wizard, configuration files are created in the Applications section of JDeveloper.
4.3.7 Oracle FTP Adapter Synchronous Get File Concepts
In the outbound direction, the Oracle FTP Adapter works the same way as the Synchronous Read File operations of the Oracle File Adapter in that it polls and gets files from a file system and reads the current contents of the file. The major difference is that the Oracle FTP Adapter is used for remote file exchanges. Because of this polling, the Adapter Configuration Wizard asks for connection information to an FTP server to be used later. For reading a file synchronously, you select Synchronous Get File operation, as shown in Figure 4-47.
Figure 4-47 Selecting the Synchronous Get File Operation
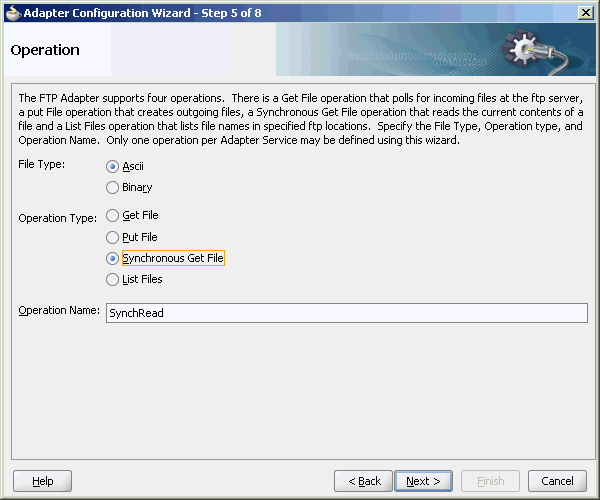
Description of "Figure 4-47 Selecting the Synchronous Get File Operation"
4.3.8 Oracle FTP Adapter File Listing Concepts
The Oracle FTP Adapter file listing concepts are similar to the Oracle File Adapter file listing concepts discussed in File Listing Concepts. The Oracle FTP Adapter polls for files in a target directory and lists files from the target directory to specified FTP locations. The contents of the files are not read. This feature of the Oracle FTP Adapter lets you use an invoke activity to retrieve a list of files from a target directory. This list of files is returned as an XML document and contains information such as file name, directory name, file size, and last modified time.
Note:
The file creation time property, creationTime, is not supported for FTP because the standard Java APIs do not provide a mechanism to retrieve the creation time. The value of the creationTime property is always displayed as 0.
The creationTime property is supported for SFTP only.
You use the Adapter Configuration Wizard to configure the Oracle FTP Adapter for use with a BPEL process or a Mediator service. This creates an outbound WSDL and JCA file pair.
For listing files, you must select the List Files operation from the Operation Type page of the Adapter Configuration Wizard. In the File Directories page of the Adapter Configuration Wizard, you must specify information about the directory to use for reading file names for the list operation. You can choose to list files recursively within directories. The File Filtering page of the Adapter Configuration Wizard enables you to specify details of the files to retrieve or ignore.
The Oracle FTP Adapter acts as a listener and polls the specified directory on a local or remote file system and looks for files that match specified naming criteria.
4.3.9 File and FTP Adapter Extensions
There are four File/FTP Adapter Extensions:
-
FTP Adapter extension to the login() operation in the default FTPClient implementation.
FTP Adapter extension to support MLSD command.
-
FTP Adapter extension to extend the Listing operation to send the MLSD command instead of the LIST command.
-
FTP Adapter extension to the FTP Store operation to send additional proprietary FTP commands to an FTP server running on an MVS platform.
Each of these extensions is discussed in detail in the File and FTP Adapter use cases.
4.4 Configuring Oracle File and FTP Adapters
Various configuration tasks for Oracle File and FTP Adapters are discussed in the following sections:
-
Configuring the Credentials for Accessing a Remote FTP Server
-
Configuring Oracle File and FTP Adapters for High Availability
-
Configuring Oracle File and FTP Adapters for High Availability
Note:
You can use the ftpAbsolutePathBegin parameter to indicate to the adapter whether a directory name used in any FTP command issued by the FTP adapter is an absolute directory or relative directory. If the directory name starts with the ftpAbsolutePathBegin, it is an absolute directory, otherwise it is treated as a relative directory.
4.4.1 Configuring the Credentials for Accessing a Remote FTP Server
To access a remote FTP server, you must configure the following credentials:
-
User name: the user name to use on the remote FTP server.
-
Password: the password to use on the remote FTP server.
-
Port: 21
-
Host: the IP address of the remote FTP server.
You must configure these credentials by modifying the weblogic-ra.xml file using the Oracle WebLogic Server console.
To do so, in the Oracle WebLogic Server Admin Console:
- Select Deployments from the Navigation pane on the left.
- Select FtpAdapter from the table of Deployments shown on the right.
- Select the Configuration subtab for the FtpAdapter and then Outbound Connection Pools.
- Expand
javax.resource.cci.ConnectionFactoryand then select the instance that you are modifying. (For example, choose theeis/Ftp/FtpAdapterinstance for the non-High Availability use case.)
4.4.2 Configuring Oracle File and FTP Adapters for High Availability
The requirements and procedure to configure the Oracle File and FTP Adapters for high availability for an active-active topology are discussed in the following sections:
4.4.2.1 Prerequisites for High Availability
Before you configure the Oracle File or FTP Adapter for high availability, you must ensure that the following prerequisites are met:
-
Clustered processes must use the same physical directory.
-
Connection-factories must specify the same shared directory as the control directory, and their names must match. For example, if the deployment descriptor for one connection factory has
/shared/control_diras the value forcontrolDir, then the other deployment descriptor must also have the same value. -
Fault-policies and fault-bindings must be created for remote faults to ensure that the adapter acts correctly. For more information on fault-policies and fault-bindings, see Error Handling.
-
The
MaxRaiseSizeproperty must be set in the inbound JCA file.
Note:
For large payloads, you must increase the transaction time out for the SOADataSource by adding the following:
<xa-set-transaction-timeout>true</xa-set-transaction-timeout>
<xa-transaction-timeout>1000</xa-transaction-timeout>
Note:
For Windows platforms, you must ensure that the input and output directories are made canonical. For example, you must use C:\bpel\input instead of c:\bpel\input. Note the use of capitalized drive letter C: instead of c:.
Note:
On all platforms, you must not end input or output directory names with the Java system property file.separator value. For example, /tmp/file/in/ is invalid but /tmp/file/in is valid as in the former the file separator slash is at the end.
4.4.2.2 High Availability in Inbound Operations
The Oracle File and FTP Adapters must ensure that only one node processes a particular file in a distributed topology. You can use the database table as a coordinator to ensure that Oracle File and FTP Adapters are highly available for inbound operations.
4.4.2.2.1 Using Database Table as a Coordinator
You must use the following procedure to make an inbound Oracle File or FTP Adapter service highly available by using database table as a coordinator:
Note:
You must increase global transaction timeouts if you use database as a coordinator.
-
Create Database Tables
You are not required to perform this step because the database schemas are pre-created as a part of soainfra.
-
Modify Deployment Descriptor for Oracle File Adapter
Modify Oracle File Adapter deployment descriptor for the connection-instance corresponding to
eis/HAFileAdapterfrom the Oracle WebLogic Server Administration Console:-
Log in to your Oracle WebLogic Server Administration Console. To access the console, navigate to
http://servername:portnumber/console. -
Click Deployments in the left pane for Domain Structure.
-
Click FileAdapter under Summary of Deployments on the right pane.
-
Click the Configuration tab.
-
Click the Outbound Connection Pools tab, and expand javax.resource.cci.ConnectionFactory to see the configured connection factories, as shown in Figure 4-48:
Figure 4-48 Oracle WebLogic Server Administration Console - Settings for FileAdapter Page
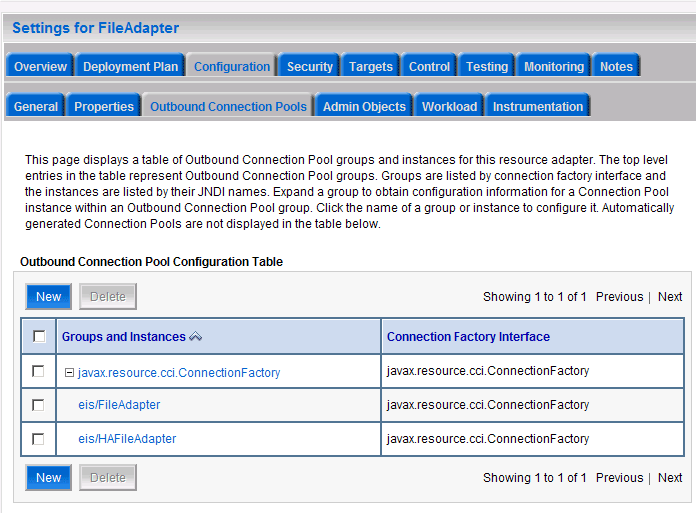
Description of "Figure 4-48 Oracle WebLogic Server Administration Console - Settings for FileAdapter Page" -
Click eis/HAFileAdapter. The Outbound Connection Properties for the connection factory corresponding to high availability is displayed.
-
Update the connection factory properties, as shown in Figure 4-49.
Figure 4-49 Oracle WebLogic Server Administration Console - Settings for javax.resource.cci.ConnectionFactory Page
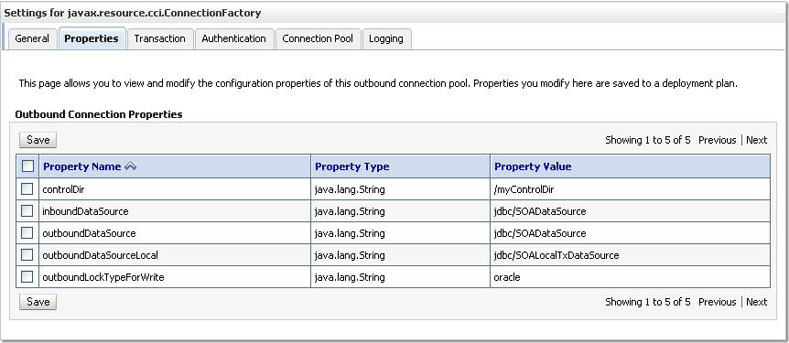
Description of "Figure 4-49 Oracle WebLogic Server Administration Console - Settings for javax.resource.cci.ConnectionFactory Page"The new parameters in connection factory for Oracle File and FTP Adapters are as follows:
controlDir- Set it to the directory structure where you want the control files to be stored. You must set it to a shared location if multiple WebLogic Server instances run in a cluster.inboundDataSource- Set the value tojdbc/SOADataSource. This is the data source, where the schemas corresponding to high availability are pre-created. The pre-created schema file can be found under$BEA_HOME/AS11gR1SOA/rcu/integration/soainfra/sql/adapter/createschema_adapter_oracle.sql. To create the schemas elsewhere, use this script. You must set the inboundDataSource property accordingly if you choose a different schema. -
Configure BPEL Process or Mediator Scenario to use the connection factory, as shown in the following example:
<adapter-config name="FlatStructureIn"
                     adapter="File Adapter"
xmlns="http://platform.integration.                oracle/blocks/adapter/fw/metadata">
  <connection-factory location=
                      "eis/HAFileAdapter"
UIincludeWildcard="*.txt" adapterRef=""/>
  <endpoint-activation portType="Read_ptt"
                           operation="Read">
    <activation-spec
className="oracle.tip.adapter.                   file.inbound.FileActivationSpec"../>
      <property../>
      <property../>
    </activation-spec>
  </endpoint-activation>
</adapter-config>
Note:
The location attribute is set to
eis/HAFileAdapterfor the connection factory.
-
4.4.2.3 High Availability in Outbound Operations
The Oracle File and FTP Adapters must ensure that if multiple references write to the same directory, then these do not overwrite each other. The following locking capabilities you can use to make Oracle File and FTP Adapters highly available for outbound operations:
-
Database mutex
-
User-defined mutex
4.4.2.3.1 Using a Database Mutex
You must use the following procedure to make an outbound Oracle File or FTP Adapter service highly available by using database table as a coordinator:
Note:
You must increase global transaction timeouts if you use the database as a coordinator.
-
Create Database Tables
You are not required to perform this step as the database schemas are precreated as a part of soainfra.
-
Modify Deployment Descriptor for Oracle File Adapter
Modify Oracle File Adapter deployment descriptor for the connection-instance corresponding to
eis/HAFileAdapterfrom the Oracle WebLogic Server Administration Console:-
Log in to your Oracle WebLogic Server Administration Console. To access the console, navigate to
http://servername:portnumber/console. -
Click Deployments in the left pane for Domain Structure.
-
Click FileAdapter under Summary of Deployments on the right pane.
-
Click the Configuration tab.
-
Click the Outbound Connection Pools tab, and expand javax.resource.cci.ConnectionFactory to see the configured connection factories, as shown in Figure 4-48.
-
Click eis/HAFileAdapter. The Outbound Connection Properties page is displayed with the connection factory corresponding to high availability.
-
Update the connection factory properties, as shown in Figure 4-50.
Figure 4-50 Oracle WebLogic Server Administration Console - Settings for javax.resource.cci.Connectionfactory Page

Description of "Figure 4-50 Oracle WebLogic Server Administration Console - Settings for javax.resource.cci.Connectionfactory Page"The new parameters in connection factory for Oracle File and FTP Adapters are as follows:
controlDir- Set it to the directory structure where you want the control files to be stored. You must set it to a shared location if multiple WebLogic Server instances run in a cluster.inboundDataSource- Set the value tojdbc/SOADataSource. This is the data source, where the schemas corresponding to high availability are precreated. The precreated schemas can be found under$BEA_HOME/AS11gR1SOA/rcu/integration/soainfra/sql/adapter/createschema_adapter_oracle.sql. To create the schemas elsewhere, use this script. You must set the inboundDataSource property accordingly if you choose a different schema.outboundDataSource- Set the value tojdbc/SOADataSource. This is the data source where the schemas corresponding to high availability are precreated. The precreated schemas can be found under$BEA_HOME/AS11gR1SOA/rcu/integration/soainfra/sql/adapter/createschema_adapter_oracle.sql. To create the schemas elsewhere, use this script. You must set theoutboundDataSourceproperty if you choose to do so.outboundLockTypeForWrite- Set the value tooracleif you are using Oracle Database. By default the Oracle File and FTP Adapters use an in-memory mutex to lock outbound write operations. You must choose from the following values for synchronizing write operations:memory- The Oracle File and FTP Adapters use an in-memory mutex to synchronize access to the file system.oracle - The adapter uses the Oracle Database sequence.
db- The adapter uses a precreated database table (FILEADAPTER_MUTEX) as the locking mechanism. You must use this option only if you are using a schema other than the Oracle Database schema.user-defined- The adapter uses a user-defined mutex. To configure the user-defined mutex, you must implement the mutex interfaceoracle.tip.adapter.file.Mutexand then configure a new binding-property with the nameoracle.tip.adapter.file.mutexand value as the fully qualified class name for the mutex for the outbound reference. -
Configure BPEL Process or Mediator Scenario to use the connection factory, as shown in the following example:
<adapter-config name="FlatStructureOut" adapter="File Adapter" xmlns="http://platform.integration.                        oracle/blocks/adapter/fw/metadata">
  <connection-factory                    location="eis/HAFileAdapter" adapterRef=""/>
  <endpoint-interaction portType="Write_ptt" operation="Write">
<interaction-spec
className="oracle.tip.adapter.file.outbound                             .FileInteractionSpec">
      <property../>
      <property../>
    </interaction-spec>
  </endpoint-interaction>
</adapter-config>
Note:
The location attribute is set to
eis/HAFileAdapterfor the connection factory.You can change the connection-factory location dynamically using jca header properties in both BPEL as well as Mediator service engines. To dynamically set FTP JCA connection factory parameters, either remove the location (jndi) or give an invalid value (non existing jndi). This happens because, in non-managed connection factory when
location=<jndi>is specified, the parameters defined in the outbound connections jndi get higher precedence. That means, the values that are specified in .jca will not take effect.
-
4.4.3 Using Secure FTP with the Oracle FTP Adapter
The Oracle FTP Adapter supports the use of the secure FTP feature on Windows, Solaris, and Linux. For Windows, this feature is certified on FileZilla FTP server with OpenSSL. This section provides an overview of secure FTP functionality and describes how to install and configure this feature.
This section includes the following topics:
4.4.3.1 Secure FTP Overview
In environments in which sensitive data is transferred to remote servers (for example, sending credit card information to HTTP servers), the issue of security is very important. Security in these cases primarily refers to two requirements:
-
Trust in the remote server with which you are exchanging data
-
Protection from third parties trying to intercept the data
Secure socket layer (SSL) certificates and encryption focus on satisfying these two security requirements. When SSL is used for FTP, the resulting security mechanism is known as FTPS (or FTP over SSL).
To gain the trust of clients in SSL environments, servers obtain certificates (typically, X.509 certificates) from recognized certificate authorities. When you set up the FTP server, you use openSSL to create a certificate for the server. Every client trusts a few parties, to begin with. If the server is one of these trusted parties, or if the server's certificate was issued by one of these parties, then you have established trust, even indirectly. For example, if the server's certificate was issued by authority A, which has a certificate issued by authority B, and the client trusts B, that is good enough. For the setup shown in Figure 4-51, the server's certificate is directly imported into the client's certificate store as a trusted certificate.
You make the data being transferred immune to spying by encrypting it before sending it and decrypting it after receiving it. Symmetric encryption (using the same key to encrypt and decrypt data) is much faster for large amounts of data than the public key and private key approach. Symmetric encryption is the approach used by FTPS. However, before the client and server can use the same key to encrypt and decrypt data, they must agree on a common key. This client typically does this by performing the following tasks:
-
Generating a session key (to be used to encrypt and decrypt data)
-
Encrypting this session key using the server's public key that is part of the server's certificate
-
Sending the key to the server
The server decrypts this session key by using its private key and subsequently uses it to encrypt file data before sending it to the client.
4.4.3.2 Installing and Configuring FTP Over SSL on Solaris and Linux
The following subsections describe how to install and configure secure FTP for Solaris and Linux:
4.4.3.2.1 Installing and Configuring OpenSSL
OpenSSL is an open source implementation of the SSL protocol. OpenSSL implements basic cryptographic functions and provides utility functions. Install and configure OpenSSL on the Solaris or Linux host to be used as the FTP server.
4.4.3.2.2 Installing and Configuring vsftpd
The vsftpd server is a secure and fast FTP server for UNIX systems. Install and configure vsftpd on the Solaris or Linux host to be used as the FTP server.
4.4.3.3 Installing and Configuring FTP Over SSL on Windows
The FTPS feature is certified on FileZilla FTP server with OpenSSL. You must follow the procedure in the following subsections for installing and configuring OpenSSL for FileZilla on Windows:
4.4.3.3.1 Installing OpenSSL
OpenSSL is an open source implementation of the SSL protocol. OpenSSL implements basic cryptographic functions and provides utility functions. Perform the following steps to install and configure OpenSSL on the Windows host to be used as the FTP server.
4.4.3.3.2 Generating OpenSSL Server Key and Certificate
(Note that you can use FileZilla utility to generate a private key and a certificate by clicking the Generate new certificate... button in FileZilla and skip the steps in this section. Make sure the Common Name you enter is the fully qualified host name or IP of the machine on which the FileZilla FTP server is running. You still need to perform the steps in Converting the Server Key From PEM to PKCS12 Format However, you will use the FileZilla generated private key and certificate files.)
To create the server key and certificate files, you must perform the following steps:
4.4.3.3.3 Importing the Server Key and Certificate Into FileZilla Server
To import the server key and certificate into FileZilla, you must perform the following steps:
4.4.3.3.4 Converting the Server Key From PEM to PKCS12 Format
You must convert the server key and the server certificate from the PEM format to the PKCS#12 format as the Oracle FTP Adapter does not recognize the PEM format. To convert the server key and certificate to the PKCS#12 format, you must perform the following steps:
4.4.4 Using SFTP with Oracle FTP Adapter
SSH file transfer protocol (SFTP) is a network protocol that enables secure file transfer over a network. Oracle FTP Adapter supports the use of the SFTP feature on Windows and Linux. This section provides an overview of the SFTP functionality and describes how to install and configure this feature.
This section includes the following tasks:
4.4.4.1 SFTP Overview
FTP is the network protocol that enables clients to securely transfer files over the underlying SSH transport. SFTP is not similar to FTP over SSH or File Transfer Protocol (FTP). Figure 4-53 displays the communication process between an SSH client and an SSH server. SFTP is supported in Windows and Linux.
SFTP has the following features:
4.4.4.1.1 Encryption
The SSH protocol uses public key cryptography for encryption. This section explains how data is encrypted:
- The SSH subsystem uses symmetric key ciphers such as Data Encryption Standard (DES) or Blowfish to generate a session key. The SSH protocol currently uses the Diffie-Hellman Key Exchange Algorithm to derive the symmetric key for the session.
- The data is encrypted using the session key.
- The session key is encrypted by using the recipient's public key. Because the recipient has the private key, it can decrypt the message by using its preferred PKI algorithm such as Rivest-Shamir-Adleman (RSA) or Digital Signature Algorithm (DSA).
4.4.4.1.2 Authentication
The SSH protocol inherently supports password authentication by encrypting passwords or session keys as they are transferred over the network. In addition, the SSH protocol uses a mechanism known as 'known hosts' to prevent threats such as IP spoofing. When this mechanism is used, both the client and the server have to prove their identity to each other before any kind of communication exchange.
4.4.4.1.3 Integrity
The SSH protocol uses widely trusted bulk hashing algorithms such as Message Digest Algorithm 5 (MD5) or Secure Hash Algorithm (SHA-1) to prevent insertion attacks. Implementation of data integrity checksum by using the algorithms mentioned in Encryption prevents deliberate tampering of data during transmission.
4.4.4.2 Install and Configure OpenSSH for Windows
OpenSSH for Windows is the free implementation of the SSH protocol on Windows. Perform the following steps to install and configure OpenSSH on Windows XP:
-
Log in as a user with Administrator privileges.
-
Download
setup.exefrom the following location:http://www.cygwin.com
-
Run
setup.exe. The Cygwin Net Release Setup window is displayed. -
Click Next. The Choose Installation type window is displayed.
-
Select Install from Internet as the download source and click Next. The Choose Installation Directory window is displayed.
-
Leave the root directory as
C:\cygwin. Also, keep the default options for the Install For and the Default Text File Type fields. -
Click Next. The Select Local Package Directory window is displayed.
-
Click Browse and select
C:\cygwinas the local package directory. -
Click Next. The Select Connection Type window is displayed.
-
Select a setting for Internet connection and click Next. The Choose Download Site(s) window is displayed.
-
Select a site from the Available Download Sites list and click Next. The Select Packages window is displayed.
-
Click View to see the complete list of packages available for installation.
-
Select openssh if it is not the default value.
-
Select the Binaries box for openssh.
-
Click Next to start the installation.
-
On Windows XP desktop, right -click My Computer and select Properties.
-
Click the Advanced tab and click Environment Variables.
-
Click New and enter
CYGWINin the Variable Name field andntsecin the Variable Value field. -
Add
C:\cygwin\binto the system path. -
Open the cygwin window.
-
Type
ssh-host-config. -
You are prompted with the following questions:
-
Shall privilege separation be used? (yes/no)Enter
yes. -
Shall this script create a local user 'sshd' on this machine?Enter
yes. -
Do you want to install sshd as service?(Say "no" if it's already installed as service) (yes/no)Enter
yes. -
Which value should the environment variable CYGWIN have when sshd starts? It's recommended to set at least "ntsec" to be able to change user context without password. Default is "binmode ntsec tty".Enter
ntsec.
-
-
Type
net start sshdto start the sshd service. -
Run the following command in the cygwin window to replicate the Windows local user accounts to cygwin:
mkpasswd --local > /etc/passwd
mkgroup --local > /etc/group
-
To test the setup, type
ssh localhostin the cygwin window.
4.4.4.3 Set Up Oracle FTP Adapter for SFTP
To use the SFTP functionality, you must modify the deployment descriptor for Oracle FTP Adapter.
Table 4-12 lists the properties for which you must specify a value in the deployment descriptor. The values of these properties depend on the type of authentication and the location of OpenSSH.
Table 4-12 SFTP Properties
| Property | Description |
|---|---|
|
|
Specify Mandatory: Yes Default value: |
|
|
Specify For password-based authentication, the user name and password specified in the For public key authentication, the Mandatory: Yes |
|
|
Specify This is an optional parameter where the user can select the default key exchange protocol for negotiating the session key for encrypting the message. Mandatory: No Default value: |
|
|
Specify This parameter enables the user to choose whether in-flight data should be compressed or not. Mandatory: No |
|
|
Specify This parameter enables the user to select the bulk-hashing algorithm for data integrity checks. Mandatory: No Default value: |
|
|
Specify This parameter enables the user to configure the asymmetric cipher for the communication. Mandatory: No Default value: |
|
|
Specify the path to the private key file. This is required if the Mandatory: No |
|
|
Specify a cipher from the following list:
Mandatory: No Default value: blowfish-cbc |
|
|
Specify Specify If you select HTTP, then you must provide values for the following parameters:
Mandatory: Yes |
4.4.4.3.1 Configuring Oracle FTP Adapter for Password Authentication
To set up the Oracle FTP Adapter for password authentication, the deployment descriptor for Oracle FTP Adapter must specify the values of the properties listed in Table 4-12. Ensure that the authenticationType property is set to password.
Specify the following properties and values listed in Table 4-13:
Table 4-13 Sample SFTP Properties and Values
| Property | Value |
|---|---|
|
|
|
|
|
|
|
|
|
|
|
|
|
|
|
|
|
|
|
|
- |
|
|
|
|
|
|
4.4.4.3.2 Configuring Oracle FTP Adapter for Public Key Authentication
For public key authentication, you must first configure OpenSSH and then set up the Oracle FTP Adapter.
The Oracle FTP Adapter setup depends if the OpenSSH is running inside a firewall or outside a firewall.
If OpenSSH is running inside the firewall, then see the following sections:
If OpenSSH is running outside the firewall, then see the following sections:
4.4.4.3.4 Configuring Oracle FTP Adapter for Public Key Authentication with OpenSSH Running Inside a Firewall
To set up the Oracle FTP Adapter for public key authentication, you must specify the values of the parameters listed in Table 4-12 in the deployment descriptor. Ensure that the authenticationType parameter is set to publickey and the transportProvider parameter is set to socket. The privateKeyFile parameters should contain the location of the private key file.
A sample list of public key authentication properties and their values is shown in Table 4-14.
Table 4-14 Sample SFTP Properties and Values
| Property | Value |
|---|---|
|
|
|
|
|
|
|
|
|
|
|
|
|
|
|
|
|
|
|
|
|
|
|
|
|
|
|
4.4.4.3.5 Configuring Oracle FTP Adapter for Public Key Authentication with OpenSSH Running Outside a Firewall
Perform the following steps to set up the Oracle FTP Adapter for public key authentication when OpenSSH is running outside the firewall:
A sample list with public key authentication properties and proxy properties is shown in Table 4-15.
Table 4-15 Sample SFTP Properties and Values
| Property | Value |
|---|---|
|
|
|
|
|
|
|
|
|
|
|
|
|
|
|
|
|
|
|
|
|
|
|
|
|
|
|
|
|
|
|
|
|
|
|
|
|
|
|
|
|
|
4.4.5 Enabling FIPS Compliance in Oracle File and FTP Adapters
This section describes how to enable FIPS compliance while configuring Connection Factory for SFTP.
FTP Adapter supports the use of FIPS-140 validated cryptography wherever cryptography is used to implement a security function or enforce a security policy. For example encryption, decryption, signing, hashing, verification and so on.
Enable FIPS compliance while configuring Connection Factory for SFTP. If you opt for FIPS compliance, system enables FIPS mode in Maverick client and uses the preferred key exchange algorithm and public key algorithm configured to connect to SFTP server. SFTPClient is updated to accommodate these changes.
When you enable the EnableFIPSMode connection factory property, the adapter uses enableFIPS() on Maverick. To enable change the value to true as shown in the following example:
<wls:property>
        <wls:name>EnableFIPSModewls:name>EnableFIPSMode>
        <wls:value>truewls:value>true>
</wls:property>
In SftpAdapter_FIPS connection factory which is located at eis/Ftp/SftpAdapter_FIPS the property is already set to true.
-
J2SSH Maverick library is updated under
<MW_HOME>/soa/soa/modules/maverick-all.jar -
Java Cryptography Extension (JCE) Unlimited Strength Jurisdiction Policy Files are placed under <jre>/lib/security
-
KeyStoreProviderName = com.rsa.jsse.JsseProvider
-
KeyStoreType = PKCS12
-
KeystoreAlgorithm = X509
-
PkiProvider =
-
JsseProvider = RsaJsse
-
TrustManager = oracle.tip.adapter.ftp.ServerTrustManager
-
EnableFIPSMode = true
When you enable FIPS mode, select the Preferred Cipher from the list of FIPS compliant ciphers.
Table 4-16 Preferred key exchange algorithm and Public Key Algorithm with FIPS Mode Enabled and Disabled
| Feature | FIPS Mode Disabled | FIPS Mode Enabled |
|---|---|---|
|
Key Exchange |
diffie-hellman-group14-sha1 |
diffie-hellman-group14-sha1 (default) |
|
Key Exchange |
diffie-hellman-group1-sha1(default) |
diffie-hellman-group14-sha1 (default) |
|
Key Exchange |
diffie-hellman-group-exchange-sha1 |
diffie-hellman-group14-sha1 (default) |
|
Key Exchange |
diffie-hellman-group-exchange-sha256 |
diffie-hellman-group14-sha1 (default) |
|
Public Key Algorithm |
ssh-rsa (default) |
ssh-rsa (default) |
|
Public Key Algorithm |
ssh-dss |
ssh-rsa (default) |
|
Public Key Algorithm |
x509v3-sign-rsa |
ssh-rsa (default) |
|
Public Key Algorithm |
x509v3-sign-dss |
ssh-rsa (default) |
|
Public Key Algorithm |
x509v3-sign-rsa-sha1 |
ssh-rsa (default) |
For more information, see FIPS 140 Support in Oracle Fusion Middleware in Oracle® Fusion Middleware Administering Oracle Fusion Middleware.
4.4.6 Configuring Oracle FTP Adapter for HTTP Proxy
The Oracle FTP Adapter provides proxy support for HTTP proxy only. The HTTP proxy support is available in the following two modes, plain FTP mode and SFTP mode. This section explains how to configure the Oracle FTP Adapter for running in plain FTP mode and SFTP mode. It contains following sections:
4.4.6.1 Configuring for Plain FTP Mode
For running the Oracle FTP Adapter in plain FTP mode, you must specify the value of certain parameters in the Oracle FTP Adapter deployment descriptor. Table 4-17 lists the properties that you must modify.
Table 4-17 Plain FTP Mode Properties
| Property | Description |
|---|---|
|
|
The remote FTP server name. |
|
|
The FTP control port number. |
|
|
The FTP user name. |
|
|
The FTP password. |
|
|
The proxy host name. |
|
|
The proxy port number. |
|
|
The proxy user name. |
|
|
The proxy password. |
|
|
The proxy type. Only HTTP proxy type is supported. |
|
|
The absolute path of the proxy definition file. This parameter is not mandatary. See Proxy Definition File for more information. |
|
|
Specify |
A sample list of Oracle FTP Adapter descriptor properties and their values is shown in Table 4-18.
Table 4-18 Sample Plain FTP Mode Properties and Values
| Property | Value |
|---|---|
|
|
|
|
|
|
|
|
|
|
|
|
|
|
|
|
|
|
|
|
|
|
|
|
|
|
|
|
|
|
|
|
|
4.4.6.1.1 Proxy Definition File
You can specify all proxy-specific information in a proxy definition file and configure the adapter to use this file with the proxyDefinitionFile property of the Oracle FTP Adapter deployment descriptor file. A proxy definition file is written in XML format and is based on XML schema. The XML schema for the proxy definition file is shown in example below. Your proxy definition file must be based on this XML schema.
Example - Proxy Definition File XML Schema
<?xml version = \"1.0\" encoding = \"UTF-8\"?>
<schema targetNamespace = "http://ns.oracle.com/ip
                  /af/ftp/proxy" xmlns =
"http://www.w3.org/2001/XMLSchema"
xmlns:proxy="http://ns.oracle.com/ip/af/ftp/proxy">

         <element name="ProxyDefinitions" type="proxy:
                      ProxyDefinitionsType"/>
              <complexType name="ProxyDefinitionsType">
                      <sequence>
                           <element name="Proxy"
                                  type="proxy:ProxyDefinition"
                            minOccurs="0"
                                maxOccurs="unbounded"/>
                      </sequence>
              </complexType>

              <complexType name="ProxyDefinition">
                      <sequence>
                           <element name="Step"
                                       type="proxy:StepType"
                            minOccurs="1"
                                maxOccurs="unbounded"/>
                      </sequence>
                      <attribute name="key" type="ID"
                                        use="required"/>
                      <attribute name="description"
                                        type="string"
                       use="required"/>
                      <attribute name="type"
                           type="proxy:Protocol"
                       use="optional"/>
              </complexType>

              <complexType name="StepType">
                  <simpleContent>
                     <extension base="string">
                         <attribute name="command"
                                 type="string"
                                     use="required"/>
                         <attribute name="args" type="string"
                                     use="required"/>
                     </extension>
                  </simpleContent>
              </complexType>

               <simpleType name="Protocol">
                    <restriction base="string">
                          <enumeration value="ftp" />
                          <enumeration value="http" />
                    </restriction>
               </simpleType>
</schema>
A sample proxy definition file, based on the XML schema in Example - Proxy Definition File XML Schema, would look as shown in the example below.
Example - Proxy Definition File
<?xml version = '1.0' standalone = 'yes'?>
<proxy:ProxyDefinitions xmlns:proxy=
              "http://ns.oracle.com/ip/af/ftp/proxy">
<Proxy key="http" description="http" type="http">
<Step command="USER" args="remote_username" />
<Step command="PASS" args="remote_password" />
</Proxy>
</proxy:ProxyDefinitions>
When you use the file in Example - Proxy Definition File, the Oracle FTP Adapter sends the following sequence of commands to log in:
-
USER remote_username
-
PASS remote_password
You can also direct the proxy definition file to pick values from the deployment descriptor for Oracle FTP Adapter. You can use the following expressions for this:
-
$proxy.user: This corresponds to the value of theproxyUsernameparameter in the Oracle FTP Adapter deployment descriptor. -
$proxy.pass: This corresponds to the value of theproxyPasswordparameter in the Oracle FTP Adapter deployment descriptor. -
$remote.user: This corresponds to the value of theusernameparameter in the Oracle FTP Adapter deployment descriptor. -
$remote.pass: This corresponds to the value of thepasswordparameter in the Oracle FTP Adapter deployment descriptor. -
$remote.host: This corresponds to the value of thehostparameter in the Oracle FTP Adapter deployment descriptor. -
$remote.port: This corresponds to the value of theportparameter in the Oracle FTP Adapter deployment descriptor.
A sample proxy definition file based on the XML schema in Example - Proxy Definition File and taking values from the weblogic-ra.xml file is shown in the example below.
Example - Proxy Definition File Taking Values from the Deployment Descriptor
<?xml version = '1.0' standalone = 'yes'?>
<proxy:ProxyDefinitions xmlns:proxy=
            "http://ns.oracle.com/ip/af/ftp/proxy">
<Proxy key="http" description="http" type="http">
<Step command="USER" args="$remote.user" />
<Step command="PASS" args="$remote.pass" />
</Proxy>
</proxy:ProxyDefinitions>
4.4.6.2 Configuring for SFTP Mode
For running the Oracle FTP Adapter in SFTP mode, you must specify the value of certain properties in the Oracle FTP Adapter deployment descriptor. Table 4-19 lists the properties that you must modify.
Table 4-19 SFTP Mode Properties
| Property | Description |
|---|---|
|
|
The remote FTP server name. |
|
|
The FTP control port number. |
|
|
The SFTP user name. |
|
|
The SFTP password. |
|
|
The proxy server host name. |
|
|
The proxy port number. |
|
|
The proxy user name. |
|
|
The proxy password. |
|
|
Specify |
|
|
Specify either See Set Up for SFTP |
|
|
Specify |
A sample list of deployment descriptor properties is shown in Table 4-20.
Table 4-20 Sample SFTP Mode Properties and Values
| Property | Value |
|---|---|
|
|
|
|
|
|
|
|
|
|
|
|
|
|
|
|
|
|
|
|
|
|
|
|
|
|
|
|
|
|
|
|
|
4.4.7 Configuring File and FTP Adapters for High Availability
You can configure the File and FTP Adapters for high availability within the active-active topology for both SOA and OSB. You can configure high availability for both inbound and outbound operations.
4.4.7.1 Inbound Operations
Oracle File and FTP Adapters ensure that only one node processes a specific file in a distributed topology. To enable HA, the File or FTP adapter can either use database table or coherence cache as a coordinator to ensure that Oracle File and FTP Adapters are highly available for inbound operation.
To enable High Availability using a database table, you must indicate eis/HAFIleAdapter in your .jca file. This indicates use of an Oracle table for high availability or one of the other variants such as eis/HAFileAdapterMQSSQL or eis/HAFileAdapterDB2 for SQL Server and DB2 tables respectively.
In addition to the database-based coordinator, the File and FTP adapters support Coherence for HA capabilities. To do so, you can indicate eis/CoherenceHAFileAdapter or eis/Ftp/CoherenceHAFtpAdapter for File and FTP adapters respectively.
In the following .jca file for a File Adapter, the connection factory has been specified as CoherenceHAFileAdapter:
Example - .jca File for File Adapter with CoherenceHAFileAdapter Specified as Connection Factory
<adapter-config name="FileHACoherenceIn"
                   adapter="File Adapter"
    wsdlLocation="FileHACoherenceIn.wsdl"
    xmlns="http://platform.integration.
           oracle/blocks/adapter/fw/metadata">
  <connection-factory location=
                  "eis/CoherenceHAFileAdapter"
   UIincludeWildcard="*.zip" adapterRef=""/>
  <endpoint-activation portType="Read_ptt"
                   operation="Read">
    <activation-spec className=
                     "oracle.tip.adapter.file.
                                      inbound.
                     FileActivationSpec">
      <[..]>
      <[..]>
    </activation-spec>
  </endpoint-activation>

</adapter-config>
4.4.7.2 Outbound Operations
The Oracle File and FTP Adapters ensure that if multiple references write to the same directory, they do not overwrite each other.
The adapter uses a database table for serializing access to concurrent writes to the same file in the folder. The procedure is similar to inbound; you must select eis/HAFileAdapter which uses an Oracle table or one of the other variants such as eis/HAFileAdapterMQSSQL, or eis/HAFileAdapterDB2 for SQL Server and DB2 respectively.
As with inbound File and FTP Adapter high availability operations, the File and FTP adapters performing outbound support Coherence for High Availability capabilities. From a design experience, you must indicate eis/CoherenceHAFileAdapter or eis/Ftp/CoherenceHAFtpAdapter in your .jca file for File and FTP adapters respectively.
4.4.7.3 Additional Considerations
The File/FTP Adapter supports High Availability for both inbound as well as outbound using Coherence as a locking mechanism.
4.4.7.3.1 Inbound Operations
For inbound processing, the File/FTP Adapter must lock the file before an attempt to process the file (for example, to perform file translation and publish to the fabric). If the lock is already held for the same file by another node, the adapter ignores that file and continues with the next file.
To ensure that one particular node does not monopolize the distribution of files by acquiring locks on all the files, you must configure MaxRaiseSize to some finite value for inbound processing. See the example below.
Example - .jca File with MaxRaiseSize Configured to a Finite Value
<adapter-config name="FileHACoherenceIn" adapter="File Adapter" wsdlLocation="FileHACoherenceIn.wsdl" xmlns="http://platform.integration.oracle/blocks/
            adapter/fw/metadata">

  <connection-factory location="eis/CoherenceHAFileAdapter" UIincludeWildcard="*.zip" adapterRef=""/>
  <endpoint-activation portType="Read_ptt" operation="Read">
    <activation-spec className="oracle.tip.adapter.file.inbound.FileActivationSpec">
      <property name="MaxRaiseSize" value="100"/>
      <[..]>
      <[..]>
    </activation-spec>
  </endpoint-activation>

</adapter-config>
Additionally, if you have configured DeleteFile = "false"(for example, for Readonly polling) or when using de-batching, you must configure a valid shared location so that all the nodes in the cluster see exactly the same path. This is required since in both these cases, the File/FTP Adapter stores some control information in the shared control directory and if one node goes down during processing, the second node sees exactly the same control information.
To indicate your own Coherence Cache, use one of the following parameters:
-
CoherenceCacheConfig- the Relative path of the Coherence Cache Configuration -
InboundCoherenceCacheName- the Coherence NamedCache used for the inbound File/FTP Adapter -
OutboundCoherenceCacheName- Coherence NamedCache used for the outbound File/FTP Adapter.
If you want to create your own cache configuration, you must bundle the cache configuration in a jar file and add it to the server classpath (one quick way is to copy the jar file containing the cache configuration into the $DOMAIN_HOME/lib directory and then refer to the configuration in the connection factory). The default values are provided.
Example - Indicating Your Own Coherence Cache
<wls:properties>
             <wls:property>
                  <wls:name>CoherenceCacheConfig</wls:name>
                  <wls:value>config/
                      fileadapter-cache-config.xml</wls:value>
             </wls:property>
             <wls:property>
                  <wls:name>InboundCoherenceCacheName</wls:name>
                  <wls:value>FileAdapter-inbound</wls:value>
             </wls:property>
             <wls:property>
                  <wls:name>OutboundCoherenceCacheName</wls:name>
                  <wls:value>FileAdapter-outbound</wls:value>
             </wls:property>
             <wls:property../>
             <wls:property../>
         <wls:properties>
4.4.7.3.2 Outbound Operations
If you are appending to same file in the cluster, the adapter must obtain an explicit lock on the Named Cache for the filename begin appended to.
Additionally, if you are using batching, you would require the control directory to store batched content before the batching criteria evaluates to force a write to the outbound folder.
In order to fulfill HA on the outbound, the adapter would require a control directory on a shared file system (which is similar to inbound functioning).
4.5 Oracle File and FTP Adapters Use Cases
This section includes the following Oracle File and FTP Adapters use cases:
4.5.1 Oracle File Adapter XML Debatching
This is an Oracle File Adapter feature that debatches large XML documents into smaller individual XML fragments.
In this use case, the Debatching XML process uses the Oracle File Adapter to debatch an XML file containing a batch of employees occurring in the XML file as repeating nodes. The Adapter then processes the nodes and writes separate output files to every individual node.
This use case includes the following sections:
4.5.1.1 Prerequisites
To perform debatching, you require the following files from the artifacts.zip file contained in the Adapters-102FileAdapterXMLDebatching sample:
-
artifacts/input/emps.xml -
artifacts/schemas/employees.xsd
You can obtain the Adapters-102FileAdapterXMLDebatching sample by accessing the Oracle SOA Sample Code site.
4.5.1.2 Splitting Input XML Document that Contains Repeating Element
This section describes the process for splitting an input XML document with repeating elements into smaller documents. This is helpful if you want to use XML debatching with the File or FTP Adapter.
nxsd:elementDepth is a schema level annotation that facilitates XML debatching in cases when the repeating element maxOccurs=’unbounded of the XML structure is not an immediate descendant of the root element. The value of the nxsd:elementDepth should comply to the XML structure defined in the XSD.Example of XML Document with Repeating Elements
<root>
<ElementList>
        <element1>
                <element11>11</element11>
                <element12>12</element12>
        </element1>
        <element1>
                <element11>21</element11>
                <element12>22</element12>
        </element1>
        <element1>
                <element11>31</element11>
                <element12>32</element12>
        </element1>
</ElementList>
</root>
Procedure for splitting XML Document with Repeating Elements
Note:
Apply the correct value during design time; the correct value is the number of levels starting below the root element. Incorrect values cause unpredictable results and invalid XML documents. For example, in the following schema, to get the desired output,nxsd:elementDepth must be set to 2 as the repeating element <element1> is located 2 levels beneath the root element <root>.To produce the required output, modify the XML Schema by adding xmlns:nxsd="http://xmlns.oracle.com/pcbpel/nxsd" nxsd:elementDepth="2"
<xsd:schema xmlns:xsd="http://www.w3.org/2001/XMLSchema"
xmlns="http://www.examplefileIn.org"
xmlns:nxsd="http://xmlns.oracle.com/pcbpel/nxsd" nxsd:elementDepth="2"
targetNamespace="http://www.examplefileIn.org"
elementFormDefault="qualified">
<xsd:element name="root">
<xsd:complexType>
<xsd:sequence>
<xsd:element name="ElementList">
<xsd:complexType>
<xsd:sequence>
<xsd:element name="element1" maxOccurs="unbounded">
<xsd:complexType>
<xsd:sequence>
<xsd:element name="element11" type="xsd:string"/>
<xsd:element name="element12" type="xsd:string"/>
</xsd:sequence>
</xsd:complexType>
</xsd:element>
</xsd:sequence>
</xsd:complexType>
</xsd:element>
</xsd:sequence>
</xsd:complexType>
</xsd:element>
</xsd:schema>
4.5.1.3 Designing the SOA Composite
You must create a JDeveloper application to contain the SOA composite. To create an application and a project for the use case, perform the following:
4.5.1.4 Creating the Inbound Oracle File Adapter Service
Perform the following steps to create an inbound Oracle File Adapter service to read the file from a local directory:
4.5.1.5 Creating the Outbound File Adapter Service
Perform the following steps to create an outbound file adapter service to write the file from a local directory to the FTP server:
4.5.1.6 Wiring Services and Activities
You have to assemble or wire the three components that you have created: Inbound adapter service, BPEL process, Outbound adapter reference. Perform the following steps to wire the components:
4.5.1.6.1 Splitting Input XML Document that Contains Repeating Element
This section describes the process for splitting an input XML document with repeating elements into smaller documents. This is helpful if you want to use XML debatching with the File or FTP Adapter.
nxsd:elementDepth is a schema level annotation that facilitates XML debatching in cases when the repeating element maxOccurs=’unbounded of the XML structure is not an immediate descendant of the root element. The value of the nxsd:elementDepth should comply to the XML structure defined in the XSD.Example of XML Document with Repeating Elements
<root>
<ElementList>
        <element1>
                <element11>11</element11>
                <element12>12</element12>
        </element1>
        <element1>
                <element11>21</element11>
                <element12>22</element12>
        </element1>
        <element1>
                <element11>31</element11>
                <element12>32</element12>
        </element1>
</ElementList>
</root>
Procedure for splitting XML Document with Repeating Elements
Note:
Apply the correct value during design time; the correct value is the number of levels starting below the root element. Incorrect values cause unpredictable results and invalid XML documents. For example, in the following schema, to get the desired output,nxsd:elementDepth must be set to 2 as the repeating element <element1> is located 2 levels beneath the root element <root>.To produce the required output, modify the XML Schema by adding xmlns:nxsd="http://xmlns.oracle.com/pcbpel/nxsd" nxsd:elementDepth="2"
<xsd:schema xmlns:xsd="http://www.w3.org/2001/XMLSchema"
xmlns="http://www.examplefileIn.org"
xmlns:nxsd="http://xmlns.oracle.com/pcbpel/nxsd" nxsd:elementDepth="2"
targetNamespace="http://www.examplefileIn.org"
elementFormDefault="qualified">
<xsd:element name="root">
<xsd:complexType>
<xsd:sequence>
<xsd:element name="ElementList">
<xsd:complexType>
<xsd:sequence>
<xsd:element name="element1" maxOccurs="unbounded">
<xsd:complexType>
<xsd:sequence>
<xsd:element name="element11" type="xsd:string"/>
<xsd:element name="element12" type="xsd:string"/>
</xsd:sequence>
</xsd:complexType>
</xsd:element>
</xsd:sequence>
</xsd:complexType>
</xsd:element>
</xsd:sequence>
</xsd:complexType>
</xsd:element>
</xsd:schema>
4.5.1.7 Deploying with JDeveloper
You must deploy the application profile for the SOA project and the application you created in the preceding steps. To deploy the application profile using JDeveloper, perform the following steps:
- Create an application server connection. For more information, see Creating an Application Server Connection for Oracle JCA Adapters.
- Deploy the application. For more information, see Deploying Oracle JCA Adapter Applications from
4.5.2 Flat Structure for Oracle BPEL PM
This use case demonstrates how a flat structure business process uses the Oracle File Adapter to process address book entries from a Comma Separated Value (CSV) file. This is then transformed and written to another file in a Fixed Length format.
This use case includes the following sections:
4.5.2.1 Prerequisites
To perform the flat structure business process, you require the following files from the artifacts.zip file contained in the Adapters-101FileAdapterFlatStructure sample:
-
artifacts/input/address-csv.txt -
artifacts/schemas/address-csv.xsd -
artifacts/schemas/address-fixedLength.xsd -
artifacts/xsl/addr1Toaddr2.xsl
You can obtain the Adapters-101FileAdapterFlatStructure sample by accessing the Oracle SOA Sample Code site.
4.5.2.2 Designing the SOA Composite
You must create a JDeveloper application to contain the SOA composite. To create an application and a project for the use case, perform the following:
4.5.2.3 Creating the Inbound Oracle File Adapter Service
Perform the following steps to create an inbound Oracle File Adapter service to read the file from a local directory:
4.5.2.4 Creating the Outbound Oracle File Adapter Service
Perform the following steps to create an outbound Oracle File Adapter service to write the file from a local directory to the FTP server:
4.5.2.5 Wiring Services and Activities
You have to assemble or wire the three components that you have created: Inbound adapter service, BPEL process, Outbound adapter reference. Perform the following steps to wire the components:
4.5.2.6 Deploying with JDeveloper
You must deploy the application profile for the SOA project and the application you created in the preceding steps. To deploy the application profile using JDeveloper, perform the following steps:
- Create an application server connection. For more information, see Creating an Application Server Connection for Oracle JCA Adapters.
- Deploy the application. For more information, see Deploying Oracle JCA Adapter Applications from .
4.5.3 Flat Structure for Mediator
In this use case, Mediator receives the customer data from a file system as a text file, through an inbound Oracle File Adapter service named ReadFile. The ReadFile adapter service sends the message to a routing service named ReadFile_RS. The ReadFile_RS sends the message to the outbound adapter service WriteFTP. The WriteFTP service delivers the message to its associated external application.
This use case includes the following sections:
4.5.3.1 Prerequisites
This example assumes that you are familiar with basic Mediator constructs, such as services, routing service, and JDeveloper environment for creating and deploying Mediator services.
To perform the flat structure for Mediator business process, you require the following files from the artifacts.zip file contained in the Adapters-101FileAdapterFlatStructure sample:
-
artifacts/schemas/address-csv.xsd
You can see the Adapters-101FileAdapterFlatStructure sample by accessing the Oracle SOA Sample Code site.
4.5.3.2 Creating a Mediator Application and Project
To create an application and a project for the use case, follow these steps:
- In the Application Navigator of JDeveloper, click New Application. The Create Generic Application - Name your application page is displayed.
- Enter
FileFTP_RWin the Application Name field and click Next. The Create Generic Application - Name your project page is displayed. - Enter
FileRead_FTPWritein the Project Name field. - In the Available list in the Project Technologies tab, double-click SOA to move it to the Selected list.
- Click Next. The Create Generic Application - Configure SOA settings page is displayed.
- Select Composite With Mediator in the Composite Template box.
- Click Finish. The Create Mediator - Mediator Component page is displayed.
- Enter
FileRead_RSin the Name field. - Select Define Interface Later in the Template list, and then click OK. The
FileFTP_RWapplication and theFileRead_FTPWriteproject appear in the design area.
4.5.3.3 Importing the Schema Definition (.XSD) Files
Perform the following steps to import the XSD files that define the structure of the messages:
-
Create a
Schemadirectory and copy theaddress-csv.xsdfile to this directory (see Prerequisites for the location of this file). -
In the Application Navigator, select FileRead_FTPWrite.
-
From the File menu, select Import. The Import dialog is displayed.
-
From the Select What You Want to Import list, select Web Source, and then click OK. The Web Source dialog is displayed.
-
To the right of the Copy From field, click Browse. The Choose Directory dialog is displayed.
-
Navigate to the Schema directory and click Select. The Web Source dialog with the directory is displayed.
-
Click OK.
4.5.3.4 Creating the Inbound Oracle File Adapter Service
Perform the following steps to create an inbound Oracle File Adapter service to read the file from a local directory
- Drag a File Adapter service from the Components to the design area. The Adapter Configuration Wizard Welcome page is displayed.
- Click Next. The Service Name page is displayed.
- Enter
ReadFilein the Service Name field. - Click Next. The Adapter Interface page is displayed.
- Click Next. The Operation page is displayed.
- Select Read File and click Next. The File Directories page is displayed.
- Select Physical Path option, and click Browse and select a polling directory.
- Click Next. The File Filtering page is displayed.
- Enter
*.txtin the Include Files with Name Pattern field and click Next. The File Polling page is displayed. - Click Next. The Messages page is displayed.
- Click the Browse For Schema File button at the end of the URL field. The Type Chooser dialog is displayed.
- Select Project Schema Files, address-csv.xsd, and then Root-Element.
- Click OK.
- Click Next in the Messages page. The Finish page is displayed.
- Click Finish. A ReadFile adapter service is created.
4.5.3.5 Creating the Outbound Oracle FTP Adapter Service
Perform the following steps to create an outbound Oracle FTP Adapter service to write the file to an FTP server:
- Drag an FTP Adapter service from Components to the design area. The Adapter Configuration Wizard Welcome page is displayed.
- Click Next. The Service Name page is displayed.
- Enter
WriteFTPin the Service Name field. - Click Next. The Adapter Interface page is displayed.
- Select Define from operation and schema (specified later), and click Next. The FTP Server Connection page is displayed.
- Specify the JNDI Name of the FTP Server in the FTP Server JNDI Name field and click Next. The Operation page is displayed.
- Select Ascii option as File Type.
- Select Put File option as the Operation Type and click Next. The File Configuration page is displayed.
- Specify the directory to which file must be written in the Directory for Outgoing Files (physical path) field.
- Specify the naming convention for the output file name in the File Naming Convention field. For example,
po_%SEQ%.txt. - Click Next. The Messages page is displayed.
- Click the Browse For Schema File button at the end of the URL field. The Type Chooser dialog is displayed.
- Select Project Schema Files, address-csv.xsd, and then Root-Element.
- Click OK.
- Click Next in the Messages page. The Finish page is displayed.
- Click Finish. A WriteFTP adapter service is created.
4.5.3.6 Wiring Services
You have to assemble or wire the three components that you have created: Inbound Oracle File Adapter service, Mediator component, Outbound Oracle FTP Adapter reference. Perform the following steps to wire the components:
4.5.3.8 Deploying with JDeveloper
You must deploy the application profile for the SOA project and the application you created in the preceding steps. To deploy the application profile using JDeveloper, perform the following steps:
- Create an application server connection. For more information, see Creating an Application Server Connection for Oracle JCA Adapters.
- Deploy the application. For more information, see Deploying Oracle JCA Adapter Applications from .
4.5.4 Oracle File Adapter Scalable DOM
This use case demonstrates how a scalable DOM process uses the streaming feature to copy/move huge files from one directory to another.
The streaming option is not supported with DB2 hydration store.
This use case includes the following sections:
4.5.4.1 Prerequisites
To perform the streaming large payload process, you require the following files from the artifacts.zip file contained in the Adapters-103FileAdapterScalableDOM sample:
-
artifacts/schemas/address-csv.xsd -
artifacts/input/address-csv-large.txt
You can obtain the Adapters-103FileAdapterScalableDOM sample by accessing the Oracle SOA Sample Code site.
4.5.4.2 Designing the SOA Composite
You must create a JDeveloper application to contain the SOA composite. To create an application and a project for the use case, perform the following:
- In the Application Navigator of JDeveloper, click New Application. The Create Generic Application - Name your application page is displayed.
- Enter
SOA-ScalableDOMin the Application Name field, and click Next. The Create Generic Application - Name your project page is displayed. - Enter
ScalableDOMin the Project Name field. - In the Available list under the Project Technologies tab, double-click SOA to move it to the Selected list.
- Click Next. The Configure SOA settings dialog appears.
- Select Composite With BPEL in the Composite Template box, and click Finish. The SOA-ScalableDOM application and ScalableDOM project appears in the Application Navigator and the Create BPEL Process - BPEL Process page is displayed.
- Enter
BPELScalableDOMin the Name field, select Define Service Later from the Template box. - Click OK. The SOA-ScalableDOM application and the ScalableDOM project appears in the design area.
- Copy the address-csv.xsd file to the xsd directory in your project (see Prerequisites for the location of this file).
4.5.4.3 Creating the Inbound Oracle File Adapter Service
Perform the following steps to create an inbound Oracle File Adapter service to read the file from a local directory:
4.5.4.4 Creating the Outbound Oracle File Adapter Service
Perform the following steps to create an outbound Oracle File Adapter service to write the file from a local directory to the FTP server:
4.5.4.5 Wiring Services and Activities
You have to assemble or wire the three components that you have created: Inbound adapter service, BPEL process, Outbound adapter reference. Perform the following steps to wire the components:
4.5.4.6 Deploying with JDeveloper
You must deploy the application profile for the SOA project and the application you created in the preceding steps. To deploy the application profile using JDeveloper, perform the following steps:
- Create an application server connection. For more information, see Creating an Application Server Connection for Oracle JCA Adapters.
- Deploy the application. For more information, see Deploying Oracle JCA Adapter Applications from .
4.5.5 Oracle File Adapter Chunked Read
Chunked Read is an Oracle File Adapter feature that uses an invoke activity within a while loop to process the target file. This feature enables you to process arbitrarily large files.
This use case includes the following sections:
4.5.5.1 Prerequisites
To perform the Oracle File Adapter ChunkRead operation, you require the following files from the artifacts.zip file contained in the Adapters-106FileAdapterChunkedRead sample:
-
artifacts/schemas/address-csv.xsd -
artifacts/schemas/address-fixedLength.xsd -
artifacts/xsl/addr1Toaddr2.xsl -
artifacts/input/address-csv.txt
You can obtain the Adapters-106FileAdapterChunkedRead sample by accessing the Oracle SOA Sample Code site.
4.5.5.2 Designing the SOA Composite
You must create a JDeveloper application to contain the SOA composite application. To create an application and a project for the use case, perform the following:
4.5.5.3 Creating the Inbound Oracle File Adapter Service
Perform the following steps to create an inbound Oracle File Adapter service to read the file from a local directory:
4.5.5.4 Creating the Outbound Oracle File Adapter Service
Perform the following steps to create an outbound Oracle File Adapter service to write the file from a local directory to the FTP server:
4.5.5.5 Wiring Services and Activities
You must assemble or wire the three components that you have created: Inbound adapter service, BPEL process, two Outbound adapter reference. Perform the following steps to wire the components:
4.5.5.6 Deploying with JDeveloper
You must deploy the application profile for the SOA project and the application you created in the preceding steps. To deploy the application profile using JDeveloper, perform the following steps:
- Create an application server connection. For more information, see Creating an Application Server Connection for Oracle JCA Adapters.
- Deploy the application. For more information, see Deploying Oracle JCA Adapter Applications from .
4.5.6 Oracle File Adapter Read File As Attachments
This is an Oracle File Adapter feature to opaquely copy or move large amount of data, from a source directory on your file system to a destination directory, as attachments. For example, you can transfer large MS Word documents, images, and PDFs without processing their content within the composite application. The read file as attachment feature is available only when the Read File option is chosen.
This use case demonstrates the ability of the Oracle File Adapter to process a large *.doc file as an attachment. This feature of reading files as attachments is very similar to Opaque translation. However, attachments can be of the order of gigabytes depending on database limitations.
4.5.6.1 Prerequisites
To use the Oracle File Adapter read file as attachments feature, you require a large MS Word document (*.doc file).
4.5.6.2 Designing the SOA Composite
You must create a JDeveloper application to contain the SOA composite. To create an application and a project for the use case, perform the following:
4.5.6.3 Creating the Inbound Oracle File Adapter Service
Perform the following steps to create an inbound Oracle File Adapter service to read a large file from a local directory:
4.5.6.4 Creating the Outbound Oracle File Adapter Service
Perform the following steps to create an outbound Oracle File Adapter service to write the file from a local directory to the FTP server:
4.5.6.5 Wiring Services and Activities
You have to assemble or wire the three components that you have created: Inbound adapter service, BPEL process, Outbound adapter reference. Perform the following steps to wire the components:
4.5.6.6 Deploying with JDeveloper
You must deploy the application profile for the SOA project and the application you created in the preceding steps. To deploy the application profile using JDeveloper, perform the following steps:
- Create an application server connection. For more information, see Creating an Application Server Connection for Oracle JCA Adapters.
- Deploy the application. For more information, see Deploying Oracle JCA Adapter Applications from .
4.5.7 Oracle File Adapter File Listing
This is an Oracle File Adapter feature that lets you use an invoke activity to retrieve a list of files from a target directory. This list of files is returned as an XML document and contains information such as file name, directory name, file size, and last modified time.
This use case includes the following sections:
4.5.7.1 Prerequisites
To perform Oracle File Adapter Listing, you require *.txt files. You must create and save the *.txt files in the target directory.
4.5.7.2 Designing the SOA Composite
You must create a JDeveloper application to contain the SOA composite. To create an application and a project for the use case, perform the following:
4.5.7.3 Creating the Outbound Oracle File Adapter Service
Perform the following steps to create an outbound Oracle File Adapter service to list the file from a target directory:
4.5.7.4 Wiring Services and Activities
You have to assemble or wire the two components that you have created: BPEL process, and the Outbound adapter reference. Perform the following steps to wire the components:
4.5.7.5 Deploying with JDeveloper
You must deploy the application profile for the SOA project and the application you created in the preceding steps. To deploy the application profile using JDeveloper, perform the following steps:
- Create an application server connection. For more information, see Creating an Application Server Connection for Oracle JCA Adapters.
- Deploy the application. For more information, see Deploying Oracle JCA Adapter Applications from .
4.5.8 Oracle File Adapter Complex Structure
This use case demonstrates the ability of the Oracle File Adapter to process native data defined in a custom format. In this sample, the custom format represents an invoice defined in invoice-nxsd.xsd. The Oracle File Adapter processes the invoice.txt file and publishes this to the ComplexStructure BPEL process. This is then transformed to a PurchaseOrder and written out as an xml file.
This use case includes the following sections:
4.5.8.1 Prerequisites
To perform the complex structure business process, you require the following files from the artifacts.zip file contained in the Adapters-104FileAdapterComplexStructure sample:
-
artifacts/schemas/invoice-nxsd.xsd -
artifacts/schemas/po.xsd -
artifacts/xsl/InvToPo.xsl -
artifacts/input/invoice.txt
You can obtain the Adapters-104FileAdapterComplexStructure sample by accessing the Oracle SOA Sample Code site.
4.5.8.2 Designing the SOA Composite
You must create a JDeveloper application to contain the SOA composite. To create an application and a project for the use case, perform the following:
4.5.8.3 Creating the Inbound Oracle File Adapter Service
Perform the following steps to create an inbound Oracle File Adapter service to read the file from a local directory:
4.5.8.4 Creating the Outbound Oracle File Adapter Service
Perform the following steps to create an outbound Oracle File Adapter service to write the file from a local directory to the FTP server:
4.5.8.5 Wiring Services and Activities
You have to assemble or wire the three components that you have created: Inbound adapter service, BPEL process, Outbound adapter reference. Perform the following steps to wire the components:
4.5.8.5.1 Add a Receive Activity
- Double-click BPELComplexStructure. The BPELComplexStructure.bpel page is displayed.
- Drag and drop a Receive activity from the Components window to the design area.
- Double-click the Receive activity. The Receive dialog is displayed.
- Enter
ReceiveInvoicein the Name field. - Click Browse Partner Links at the end of the Partner Link field. The Partner Link Chooser dialog is displayed.
- Select ComplexStructureIn, and click OK.
- Click the Auto-Create Variable icon to the right of the Variable field in the Receive dialog. The Create Variable dialog is displayed.
- Select the default variable name and click OK. The Variable field is populated with the default variable name.
- Check Create Instance, and click OK. The JDeveloper BPELComplexStructure.bpel page appears.
4.5.8.5.2 Add an Invoke Activity
- Drag and drop an Invoke activity from the Components window to the design area.
- Double-click the Invoke activity. The Invoke dialog is displayed.
- Enter
InvokeWritein the Name field. - Click Browse Partner Links at the end of the Partner Link field. The Partner Link Chooser dialog is displayed.
- Select ComplexStructureOut, and click OK.
- Click the Automatically Create Input Variable icon to the right of the Input variable field in the Invoke dialog. The Create Variable dialog is displayed.
- Enter
InvokeWrite_Write_OutputVariablein the variable name field and click OK. The Invoke dialog is displayed. - Click OK. The JDeveloper BPELComplexStructure.bpel page appears.
4.5.8.6 Deploying with JDeveloper
You must deploy the application profile for the SOA project and the application you created in the preceding steps. To deploy the application profile using JDeveloper, perform the following steps:
- Create an application server connection. For more information, see Creating an Application Server Connection for Oracle JCA Adapters.
- Deploy the application. For more information, see Deploying Oracle JCA Adapter Applications from .
4.5.9 Oracle FTP Adapter Debatching
This is an Oracle FTP Adapter feature that debatches a large XML document into smaller individual XML fragments. This use case demonstrates how the debatching business process sample uses the Oracle FTP Adapter to process a file containing a batch of business records such as one or more invoice and purchase orders. The PurchaseOrders (POs) are then debatched and written to separate output files.
This use case includes the following sections:
4.5.9.1 Prerequisites
To perform the complex structure business process, you require the following files from the artifacts.zip file contained in the Adapters-101FTPAdapterDebatching sample:
-
artifacts/schemas/container.xsd -
artifacts/schemas/po.xsd -
artifacts/xsl/InvToPo.xsl -
artifacts/xsl/PoToPo.xsl -
artifacts/input/container.txt
You can obtain the Adapters-101FTPAdapterDebatching sample by accessing the Oracle SOA Sample Code site.
4.5.9.2 Designing the SOA Composite
You must create a JDeveloper application to contain the SOA composite. To create an application and a project for the use case, perform the following:
4.5.9.3 Creating the Inbound Oracle FTP Adapter Service
Perform the following steps to create an inbound Oracle FTP Adapter service to read the file from a local directory:
4.5.9.4 Creating the Outbound Oracle FTP Adapter Service
Perform the following steps to create an outbound Oracle FTP Adapter service to write the file from a local directory to the FTP server:
4.5.9.5 Wiring Services and Activities
You have to assemble or wire the three components that you have created: Inbound adapter service, BPEL process, Outbound adapter reference. Perform the following steps to wire the components:
4.5.9.5.1 Add a Receive Activity
- Double-click BPELFTPDebatching. The
BPELFTPDebatching.bpelpage is displayed. - Drag and drop a Receive activity from the Components window to the design area.
- Double-click the Receive activity. The Receive dialog is displayed.
- Enter
Receivein the Name field. - Click Browse Partner Links at the end of the Partner Link field. The Partner Link Chooser dialog is displayed.
- Select FTPDebatchingIn, and click OK.
- Click the Auto-Create Variable icon to the right of the Variable field in the Receive dialog. The Create Variable dialog is displayed.
- Select the default variable name and click OK. The Variable field is populated with the default variable name.
- Check Create Instance, and click OK. The JDeveloper
BPELFTPDebatching.bpelpage appears with the Receive activity added.
4.5.9.5.2 Add an Invoke Activity
- Drag and drop an Invoke activity from the Components window to the design area.
- Double-click the Invoke activity. The Invoke dialog is displayed.
- Enter
Writein the Name field. - Click Browse Partner Links at the end of the Partner Link field. The Partner Link Chooser dialog is displayed.
- Select PurchaseOrderOut, and click OK.
- Click the Automatically Create Input Variable icon to the right of the Input variable field in the Receive dialog. The Create Variable dialog is displayed.
- Enter
Write_Put_OutputVariablein the Variable field and click OK. The Invoke dialog is displayed. - Click OK. The JDeveloper
BPELFTPDebatching.bpelpage appears with the invoke activity added.
4.5.9.5.3 Add a Switch Activity
-
Drag and drop a Switch activity from the Components window in between the Receive and Invoke activities in the design area.
-
Expand the Switch activity. This displays a screen to enter the values for <case> and <otherwise>.
-
In the
<case>section, click the View Condition Expression icon, as shown in Figure 4-163. The Condition Expression pop-up window is displayed. -
Click the Xpath Expression Builder icon in the pop-up window. The Expression Builder dialog is displayed.
-
Enter
starts-with(local-name(ora:getNodes('receive_Get_InputVariable','body','/ns3:container/child::*[position()=1]')),'invoice')as the expression, as shown in Figure 4-164, and click OK. The screen returns to the Condition Expression pop-up window.Figure 4-164 The Expression Builder Dialog
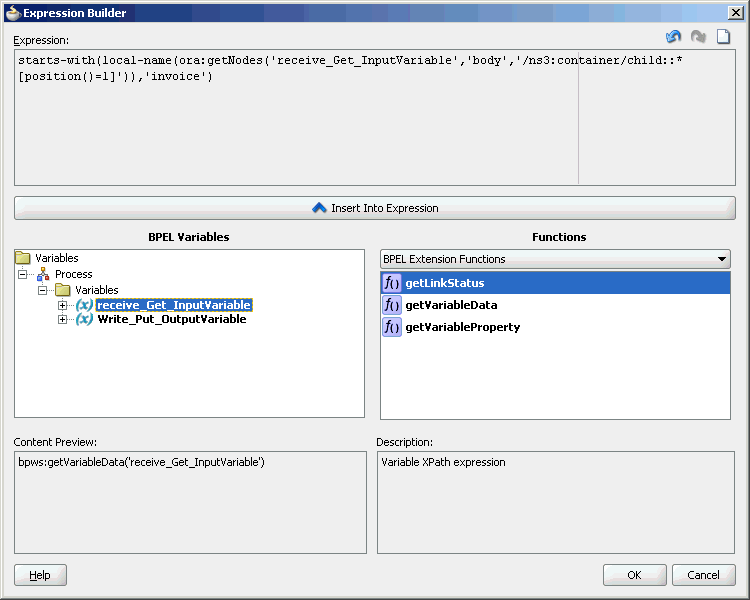
Description of "Figure 4-164 The Expression Builder Dialog" -
Add two transformation activities, one each for <case> and <otherwise> sections.
-
Drag and drop a Transform activity in the <case> section.
-
Double-click the Transform activity.
-
Enter
InvToPoin the Name field. -
Click the Transformation tab.
-
Click the Create... icon. The Source Variable dialog is displayed.
-
Accept the defaults and click OK.
-
Select Write_Put_OutputVariable in the Target Variable list.
-
Click the Browse Mappings icon at the end of the Mapper File field, and select the InvToPo.xsl file.
-
Click OK.
-
Repeat the same process for the second transformation. Select
PoToPo.xslas the Mapper File for this transform activity.
The BPELFTPDebatching.bpel page is displayed, as shown in Figure 4-165.
Figure 4-165 The BPELFTPDebatching.bpel Page
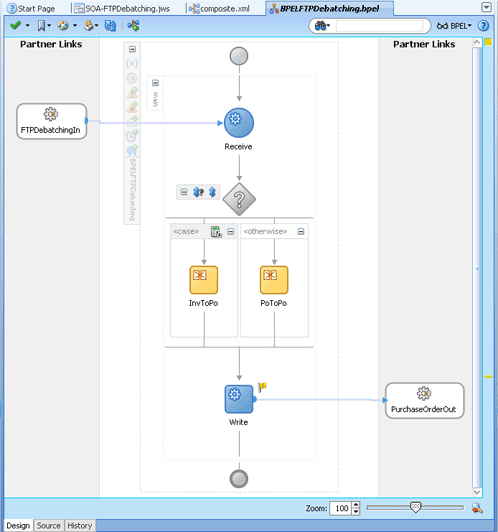
Description of "Figure 4-165 The BPELFTPDebatching.bpel Page" -
-
Click File, Save All.
4.5.9.6 Deploying with JDeveloper
You must deploy the application profile for the SOA project and the application you created in the preceding steps. To deploy the application profile using JDeveloper, perform the following steps:
- Create an application server connection. For more information, see Creating an Application Server Connection for Oracle JCA Adapters.
- Deploy the application. For more information, see Deploying Oracle JCA Adapter Applications from .
4.5.10 Oracle FTP Adapter Dynamic Synchronous Read
This use case demonstrates the ability of the Oracle FTP Adapter to perform a mid-process synchronous read operation using an Invoke activity. This use case illustrates the following adapter functionality:
-
Oracle File Adapter (Read Operation)
-
Oracle FTP Adapter (Synchronous Read operation)
Ability to specify the file name to be read during runtime
-
Oracle File Adapter (Write Operation)
The process is initiated by the presence of a file appearing in a local directory monitored by the inbound Oracle File Adapter. The trigger file contains the name of the file to be read by the synchronous read operation. This file name is passed through headers to the adapter. This can be done using the Properties tab for the Invoke activity. This synchronous read file operation is performed against a remote directory on a FTP server. The result of the read is then transformed and written out to a local directory through the outbound Oracle File Adapter. This section includes the following topics:
4.5.10.1 Prerequisites
To perform FTP Dynamic Synchronous Read, you require the following files from the artifacts.zip file contained in the Adapters-102FTPAdapterDynamicSynchronousRead sample:
-
artifacts/schemas/address-csv.xsd -
artifacts/schemas/address-fixedLength.xsd -
artifacts/schemas/trigger.xsd -
artifacts/xsl/addr1Toaddr2.xsl -
artifacts/input/address_csv.txt -
artifacts/input/trigger.trg
You can obtain the Adapters-102FTPAdapterDynamicSynchronousRead sample by accessing the Oracle SOA Sample Code site, and selecting the Adapters tab.
4.5.10.2 Designing the SOA Composite
You must create a JDeveloper application to contain the SOA composite. To create an application and a project for the use case, perform the following:
4.5.10.3 Creating the Inbound Oracle File Adapter Service
Perform the following steps to create an inbound Oracle File Adapter service to read the file from a local directory:
4.5.10.4 Creating the Outbound Oracle FTP Adapter Service
Perform the following steps to create an outbound Oracle FTP Adapter service to write the file from a local directory to the FTP server:
4.5.10.5 Wiring Services and Activities
You have to assemble or wire the four components that you have created: Inbound adapter service, BPEL process, two Outbound adapter references. Perform the following steps to wire the components:
4.5.10.5.1 Add a Receive Activity
- Double-click BPELDynamicSynchronousRead. The BPELDynamicSynchronousRead.bpel page is displayed.
- Drag and drop a Receive activity from the Components window to the design area.
- Double-click the Receive activity. The Receive dialog is displayed.
- Enter
ReceiveTriggerin the Name field. - Click Browse Partner Links at the end of the Partner Link field. The Partner Link Chooser dialog is displayed.
- Select ReadTrigger, and click OK.
- Click the Auto-Create Variable icon to the right of the Variable field in the Receive dialog. The Create Variable dialog is displayed.
- Select the default variable name and click OK. The Variable field is populated with the default variable name.
- Check Create Instance, and click OK. The JDeveloper BPELDynamicSynchronousRead.bpel page appears.
4.5.10.6 Deploying with JDeveloper
You must deploy the application profile for the SOA project and the application you created in the preceding steps. To deploy the application profile using JDeveloper, perform the following steps:
- Create an application server connection. For more information, see Creating an Application Server Connection for Oracle JCA Adapters.
- Deploy the application. For more information, see Deploying Oracle JCA Adapter Applications from .
4.5.11 Copying, Moving, and Deleting Files
The Oracle File and FTP Adapters let you copy or move a file from one location to another, or delete a file from the target directory. Additionally, the Oracle FTP Adapter lets you move or copy files from a local file system to a remote file system and from a remote file system to a local file system. This feature is implemented as a interaction specification for outbound services. So, this feature can be accessed either by using a BPEL invoke activity or a Mediator routing rule.
At a high level, you must create an outbound service and configure this service with the source and target directories and file names.
The following use cases demonstrate the new functionality supported by Oracle File and FTP Adapters that allow you to copy, move, and delete files by using an outbound service:
-
Moving a File from a Local Directory on the File System to Another Local Directory
-
Copying a File from a Local Directory on the File System to Another Local Directory
-
Moving a File from One Remote Directory to Another Remote Directory on the Same FTP Server
-
Moving a File from a Local Directory on the File System to a Remote Directory on the FTP Server
-
Moving a File from a Remote Directory on the FTP Server to a Local Directory on the File System
4.5.11.1 Moving a File from a Local Directory on the File System to Another Local Directory
You can model only a part of this procedure by using the wizard because the corresponding Adapter Configuration Wizard is not available. You must complete the remaining procedure by manually configuring the generated JCA file.
You must perform the following steps to move a file from a local directory on the file system to another local directory:
-
Create an empty BPEL process.
-
Drag and drop File Adapter from the Components window to the External References swim lane. The Adapter Configuration Wizard Welcome page is displayed.
-
Click Next. The Service Name page is displayed.
-
Enter a service name in the Service Name field.
-
Click Next. The Adapter Interface page is displayed.
-
Select Define from operation and schema (specified later), and click Next. The Operation page is displayed.
-
Select Synchronous Read File, enter
FileMovein the Operation Name field, and then click Next. The File Directories page is displayed.Note:
You have selected Synchronous Read File as the operation because the
WSDLfile that is generated because this operation is similar to the one required for the file I/O operation. -
Enter a dummy physical path for the directory for incoming files, and then click Next. The File name page is displayed.
Note:
The dummy directory is not used. You must manually change the directory in a later step.
-
Enter a dummy file name, and then click Next. The Messages page is displayed.
Note:
The dummy file name you enter is not used. You must manually change the file name in a later step.
-
Select Native format translation is not required (Schema is opaque), and then click Next. The Finish page is displayed.
-
Click Finish. The outbound Oracle File Adapter is now configured.
-
Drag the small triangle in the BPEL process in the Components area to the drop zone that appears as a green triangle in
FileMovein the External References area. The BPEL component is connected to the Oracle File Adapter outbound service. -
Create an invoke activity for the
FileMoveservice that you just created by selecting the default settings.The next step is to modify the generated
WSDLfile forMoveFileServiceservice and configure it with the new interaction specification for the move operation. -
Open the
FileMove_file.jcafile and modify the endpoint interaction, as shown in the following example.You must configure the JCA file with the source and target directory and file details. You can either hardcode the source and target directory and file details in the JCA file or use header variables to populate them. In this example, header variables are used.
Example - Configuring the JCA File with Source and Target Directory and File Details
<adapter-config name="FileMove" adapter="File Adapter" xmlns="http://platform.integration.oracle/blocks/adapter/fw/metadata">
  <connection-factory location="eis/FileAdapter" adapterRef=""/>
  <endpoint-interaction portType="FileMove_ptt" operation="FileMove">
    <interaction-spec
className="oracle.tip.adapter.file.outbound.FileIoInteractionSpec">
      <property name="SourcePhysicalDirectory" value="foo1"/>
      <property name="SourceFileName" value="bar1"/>
      <property name="TargetPhysicalDirectory" value="foo2"/>
      <property name="TargetFileName" value="bar2"/>
      <property name="Type" value="MOVE"/>
    </interaction-spec>
  </endpoint-interaction>
</adapter-config>
Note:
You have modified the
classNameattribute, and addedSourcePhysicalDirectory,SourceFileName,TargetPhysicalDirectory,TargetFileNameandType. Currently, the values for the source and target details are dummy. You must populate them at runtime. You can also hardcode them to specific directories or file names.The
Typeattributes des the type of operation. Apart fromMOVE, the other acceptable values for theTypeattribute areCOPYandDELETE. -
Map the actual directory and file names to the source and target file parameters by performing the following procedure:
-
Create 4 string variables with appropriate names. You must populate these variables with the source and target directory details. The BPEL source view shows you this:
<variables> <variable name="InvokeMoveOperation_FileMove_InputVariable" messageType="ns1:Empty_msg"/> <variable name="InvokeMoveOperation_FileMove_OutputVariable" messageType="ns1:FileMove_msg"/> <variable name="sourceDirectory" type="xsd:string"/> <variable name="sourceFileName" type="xsd:string"/> <variable name="targetDirectory" type="xsd:string"/> <variable name="targetFileName" type="xsd:string"/> </variables> -
Create an assign activity to assign values to
sourceDirectory,sourceFileName,targetDirectory, andtargetFileNamevariables. The assign operation appears in the BPEL source view as in the following example:Example - Creating an Assign Activity to Assign Values
<assign name="AssignFileDetails">
      <copy>
        <from expression="'/home/alex'"/>
        <to variable="sourceDirectory"/>
      </copy>
      <copy>
        <from expression="'input.txt'"/>
        <to variable="sourceFileName"/>
      </copy>
      <copy>
        <from expression="'/home/alex'"/>
        <to variable="targetDirectory"/>
      </copy>
      <copy>
        <from expression="'output.txt'"/>
        <to variable="targetFileName"/>
      </copy>
    </assign>
In the preceding example,
input.txtis moved from/home/alextooutput.txtin/home/alex.Note:
The source and target details are hard-coded in the preceding example. You can also provide these details as runtime parameters.
-
Pass these parameters as headers to the Invoke operation. The values in these variables override the parameters in the JCA file.
Example - Passing Parameters as Headers to the Invoke Operation
<invoke name="InvokeMoveOperation"
            inputVariable="InvokeMoveOperation_FileMove_InputVariable"
            outputVariable="InvokeMoveOperation_FileMove_OutputVariable"
            partnerLink="FileMove" portType="ns1:FileMove_ptt"
            operation="FileMove">
      <bpelx:inputProperty name="jca.file.SourceDirectory"
variable="sourceDirectory"/>
      <bpelx:inputProperty name="jca.file.SourceFileName"
variable="sourceFileName"/>
      <bpelx:inputProperty name="jca.file.TargetDirectory"
variable="targetDirectory"/>
      <bpelx:inputProperty name="jca.file.TargetFileName"
variable="targetFileName"/>
    </invoke>
-
-
Finally, add an initial Receive or Pick activity.
You have completed moving a file from a local directory on the file system to another local directory.
4.5.11.2 Copying a File from a Local Directory on the File System to Another Local Directory
Perform the following procedure to copy a file from a local directory on the file system to another local directory:
4.5.11.3 Deleting a File from a Local File System Directory
To delete a file, you require TargetPhysicalDirectory and TargetFileName parameters.
Note:
You do not require SourcePhysicalDirectory and SourceFileName to delete a file from a local file system directory.
To delete a file, delete_me.txt, from /home/alex directory, you must perform the following:
4.5.11.4 Using a Large CSV Source File
Consider the following scenario, where you have a large CSV file of size 1 gigabyte coming on the source directory, and you must perform the following:
-
Translate the CSV into XML.
-
Transform the resulting XML using XSL.
-
Translate the result from the Transform operation into a fixed length file.
This use case is similar to the FlatStructure sample in the BPEL samples directory. The difference is that the three steps occur in a single File I/O interaction.
Note:
All the three steps occur in a single File I/O interaction. This works only if all the records in the data file are of the same type.
To use a large CSV file and perform the operations listed in the preceding scenario, you must perform the following steps:
4.5.11.5 Moving a File from One Remote Directory to Another Remote Directory on the Same FTP Server
The I/O use cases for the Oracle FTP Adapter are very similar to those for Oracle File Adapter. However, there are a few nuances that require attention.
In this use case you move a file within the same directory, which is similar to a rename operation on the same server. Most FTP servers support the RNFR/RNTO FTP commands that let you rename a file on the FTP server.
However, even if the RNFR/RNTO commands are not supported, moving a file within the same directory is still possible because of a binding property, UseNativeRenameOperation. By default, this property is set to TRUE, and in this case the Oracle FTP Adapter uses the native RNFR/RNTO commands. However, if this property is set to FALSE, then the Oracle FTP Adapter uses the Get and Put commands followed by a Delete command to emulate a move operation.
You can model only a part of this procedure by using the wizard because the corresponding Adapter Configuration Wizard is not available. You must complete the remaining procedure by manually configuring the generated JCA file.
You must perform the following steps to move a file from a remote directory to another remote directory on the same FTP server:
-
Create an empty BPEL process.
-
Drag and drop FTP Adapter from the Components window to the External References swim lane. The Adapter Configuration Wizard Welcome page is displayed.
-
Click Next. The Service Name page is displayed.
-
Enter a service name in the Service Name field.
-
Click Next. The Adapter Interface page is displayed.
-
Click Next. The FTP Server Connection page is displayed.
-
Enter the JNDI name for the FTP server, and click Next. The Operation page is displayed.
-
Select Synchronous Get File, enter FTPMove in the Operation Name field, and then click Next. The File Directories page is displayed.
Note:
You have selected Synchronous Get File as the operation because the
WSDLfile that is generated because this operation is similar to the one required for the file I/O operation. -
Enter a dummy physical path for the directory for incoming files, and then click Next. The File name page is displayed.
Note:
The dummy directory is not used. You must manually change the directory in a later step.
-
Enter a dummy file name, and then click Next. The File Name page is displayed.
Note:
The dummy file name you enter is not used. You must manually change the file name in a later step.
-
Click Next. The Messages page is displayed.
-
Select Native format translation is not required (Schema is opaque), and then click Next. The Finish page is displayed.
-
Click Finish. The outbound Oracle File Adapter is now configured.
-
Drag the small triangle in the BPEL process in the Components area to the drop zone that appears as a green triangle in
FTPMovein the External References area. The BPEL component is connected to the Oracle FTP Adapter outbound service. -
Click File, Save All.
-
Create an invoke activity for the
FTPMoveservice that you just created.The next step is to modify the generated
WSDLfile forFTPMoveservice and configure it with the new interaction specification for the move operation. -
Open the
FTPMove_ftp.jcafile and modify theinteraction-spec, as shown in the following example.You must configure the JCA file with the source and target directory and file details. You can either hard-code the source and target directory and file details in the JCA file or use header variables to populate them.
In this example, header variables are used.
Example - Modifying the interaction-spec Part of the jca File for the Move Operation
<adapter-config name="FTPMove" adapter="Ftp Adapter"
xmlns="http://platform.integration.oracle/blocks/adapter/fw/metadata">

  <connection-factory location="eis/Ftp/FtpAdapter" adapterRef=""/>
  <endpoint-interaction portType="FTPMove_ptt" operation="FTPMove">
    <interaction-spec
className="oracle.tip.adapter.ftp.outbound.FTPIoInteractionSpec">
      <property name="SourcePhysicalDirectory" value="foo1"/>
      <property name="SourceFileName" value="bar1"/>
      <property name="TargetPhysicalDirectory" value="foo2"/>
      <property name="TargetFileName" value="bar2"/>
      <property name="Type" value="MOVE"/>
    </interaction-spec>
  </endpoint-interaction>

</adapter-config>
Note:
You have modified the
classNameattribute, and addedSourcePhysicalDirectory,SourceFileName,TargetPhysicalDirectory,TargetFileName, andType. Currently, the values for the source and target details are dummy. You must populate them at runtime. You can also hardcode them to specific directories or file names.The
Typeattributes des the type of operation. Apart fromMOVE, the other acceptable values for theTypeattribute areCOPYandDELETE. -
Map the actual directory and file names to the source and target file parameters by performing the following procedure:
-
Create 4 string variables with appropriate names. You must populate these variables with the source and target directory details. The BPEL source view shows you this:
<variables> <variable name="InvokeMoveOperation_FileMove_InputVariable" messageType="ns1:Empty_msg"/> <variable name="InvokeMoveOperation_FileMove_OutputVariable" messageType="ns1:FileMove_msg"/> <variable name="sourceDirectory" type="xsd:string"/> <variable name="sourceFileName" type="xsd:string"/> <variable name="targetDirectory" type="xsd:string"/> <variable name="targetFileName" type="xsd:string"/> </variables> -
Create an assign activity to assign values to
sourceDirectory,sourceFileName,targetDirectory, andtargetFileNamevariables. The assign operation appears in the BPEL source view as shown in the example below.Example - Creating an Assign Activity
    <assign name="AssignFTPFileDetails">
      <copy>
        <from expression="'/home/ftp'"/>
        <to variable="sourceDirectory"/>
      </copy>
      <copy>
        <from expression="'input.txt'"/>
        <to variable="sourceFileName"/>
      </copy>
      <copy>
        <from expression="'/home/ftp/out'"/>
        <to variable="targetDirectory"/>
      </copy>
      <copy>
        <from expression="'output.txt'"/>
        <to variable="targetFileName"/>
      </copy>
    </assign>
In the preceding example,
input.txtis moved or renamed from/home/ftptooutput.txtin/home/ftp/out.Note:
The source and target details are hard coded in the preceding example. You can also provide these details as runtime parameters.
-
Pass these parameters as headers to the invoke operation. The values in these variables override the parameters in the JCA file.
Example - Passing Parameters as Headers to the Invoke Operation
<invoke name="InvokeRenameService"
inputVariable="InvokeRenameService_RenameFile_InputVariable"
partnerLink="RenameFTPFile" portType="ns2:RenameFile_ptt"
operation="RenameFile">
<bpelx:inputProperty name="jca.file.SourceDirectory"
variable="returnDirectory"/>
<bpelx:inputProperty name="jca.file.SourceFileName"
variable="returnFile"/>
<bpelx:inputProperty name="jca.file.TargetDirectory"
variable="returnDirectory"/>
<bpelx:inputProperty name="jca.file.TargetFileName"
variable="targetFile"/>
</invoke>
-
-
Finally, add an initial receive or pick activity.
You have completed moving or renaming a file from a remote directory to another remote directory on the same FTP server.
Note:
If the FTP server does not support the RNFR/RNTO FTP commands, then you must set UseNativeRenameOperation to FALSE and define the property in composite.xml, as shown in the following example:
<reference name="FTPMove" ui:wsdlLocation="FTPMove.wsdl">
  <interface.wsdl interface="http://xmlns.oracle.com/pcbpel
    /adapter/ftp/SOAFtpIO/SOAFtpIO/
          FTPMove/#wsdl.interface(FTPMove_ptt)"/>
    <binding.jca config="FTPMove_ftp.jca">
      <property name="UseNativeRenameOperation"
         type="xs:string" many="false" override="may">false</property>
    </binding.jca>
</reference>
4.5.11.6 Moving a File from a Local Directory on the File System to a Remote Directory on the FTP Server
The steps for this use case are the same as the steps for the use case in Moving a File from One Remote Directory to Another Remote Directory on the Same FTP Server except that you must configure the source directory as local and the target directory as remote.
Use the SourceIsRemote and TargetIsRemote properties to specify whether the source and target file are on the local or remote file system, as shown in the following example:
Example - Using the SourceIsRemote and TargetIsRemote Properties
<adapter-config name="FTPMove" adapter="Ftp Adapter"
xmlns="http://platform.integration.oracle/
                   blocks/adapter/fw/metadata">
  <connection-factory location="eis/Ftp/FtpAdapter"
                           adapterRef=""/>
  <endpoint-interaction portType="FTPMove_ptt"
                         operation="FTPMove">
    <interaction-spec
className="oracle.tip.adapter.ftp.outbound.FTPIoInteractionSpec">
      <property name="SourcePhysicalDirectory" value="foo1"/>
      <property name="SourceFileName" value="bar1"/>
      <property name="SourceIsRemote" value="false"/>
      <property name="TargetPhysicalDirectory" value="foo2"/>
      <property name="TargetFileName" value="bar2"/>
      <property name="Type" value="MOVE"/>
    </interaction-spec>
  </endpoint-interaction>

</adapter-config>
Note:
In this example, you have configured SourceIsRemote as false. In this case, the FTP input and output operation assumes that the source file comes from a local file system. Also, notice that you did not specify the parameter for target because TargetIsRemote is set to true by default.
4.5.11.7 Moving a File from a Remote Directory on the FTP Server to a Local Directory on the File System
The steps for this use case are the same as the steps for the use case in Moving a File from a Local Directory on the File System to a Remote Directory on the FTP Server except that you must configure the source directory as remote and the target directory as local, as shown in the following example:
Example - Configuring the Source Directory as Remote and the Target Directory as Local
<adapter-config name="FTPMove" adapter="Ftp Adapter"
xmlns="http://platform.integration.oracle
                 /blocks/adapter/fw/metadata">
  <connection-factory location="eis/Ftp/FtpAdapter"
                adapterRef=""/>
  <endpoint-interaction portType="FTPMove_ptt"
                      operation="FTPMove">
    <interaction-spec
className="oracle.tip.adapter.ftp.outbound.FTPIoInteractionSpec">
      <property name="SourcePhysicalDirectory" value="foo1"/>
      <property name="SourceFileName" value="bar1"/>
      <property name="TargetPhysicalDirectory" value="foo2"/>
      <property name="TargetFileName" value="bar2"/>
      <property name="TargetIsRemote" value="false"/>
      <property name="Type" value="MOVE"/>
    </interaction-spec>
  </endpoint-interaction>

</adapter-config>
Note:
In this example, you have configured TargetIsRemote as false. In this case, the FTP I/O assumes that the source file comes from a remote file system whereas the target is on a local file system. Also, notice that you did not specify the parameter for source because SourceIsRemote is set to true by default.
4.5.11.8 Moving a File from One FTP Server to another FTP Server
To move a file from one FTP server to another FTP server you must sequentially perform the use cases documented in the following sections:
-
Moving a File from a Remote Directory on the FTP Server to a Local Directory on the File System to upload the file from the local directory to another FTP server
-
Moving a File from a Local Directory on the File System to a Remote Directory on the FTP Server to download the file from the FTP server to a local directory
4.5.12 Creating a Synchronous BPEL Composite using File Adapter
By default, the JDeveloper Adapter Wizard generates asynchronous WSDLs when you use technology adapters. Typically, you follow these steps when creating an adapter scenario in 11g:
This is how most BPEL processes that use Adapters are modeled. The generated WSDL implies one-way directionally one way and that makes the BPEL process asynchronous:
In other words, the inbound File Adapter polls for files in the directory and for each file that it finds there, it translates the content into XML and publishes to BPEL.
However, because the BPEL process is asynchronous, the File Adapter returns immediately after the publish and performs the required post processing-for example. deletion/archival of data.
The disadvantage with such asynchronous BPEL processes is that it becomes difficult to throttle the inbound adapter. In other words, the inbound adapter would keep sending messages to BPEL without waiting for the downstream business processes to complete. This can lead to issues such as higher memory usage and CPU usage.
To mitigate the occurrence of these problems, you can manually change the WSDL and BPEL artifacts into synchronous processes. Once you have changed the synchronous to synchronous BPEL processes, the inbound File Adapter automatically throttles itself because the File Adapter is forced to wait for the downstream process to complete with a <reply> before processing the next file or message.
Refer to the altered WSDL shown in Figure 4-180. Here, you convert the one-way WSDL to a two-way WSDL-- thereby making the WSDL synchronous.
Figure 4-180 Asynchronous WSDL Altered to be Two-Way WSDL
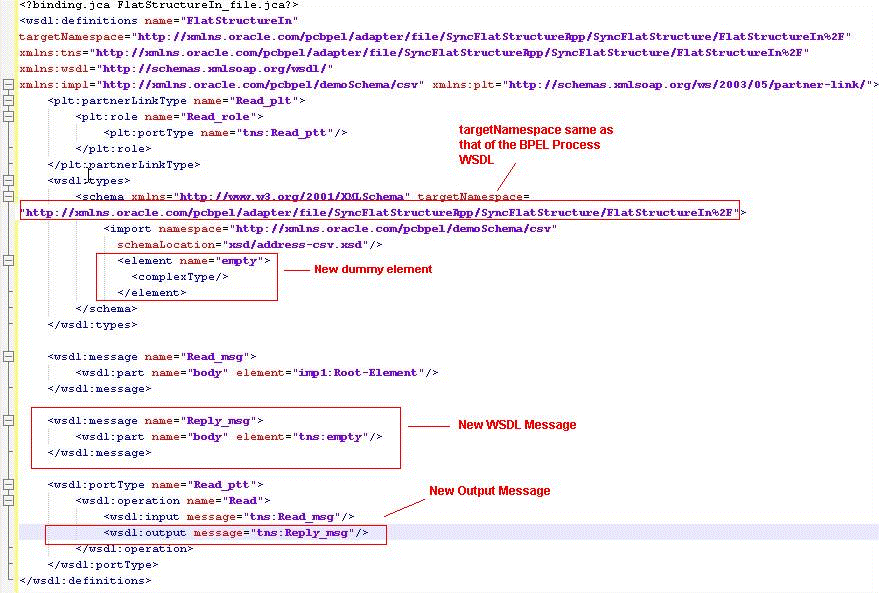
Description of "Figure 4-180 Asynchronous WSDL Altered to be Two-Way WSDL"
The next step is to add a <reply> activity to the inbound adapter Partner Link at the end of your BPEL process, for example:
Figure 4-181 Specifying a Reply to the Inbound Adapter
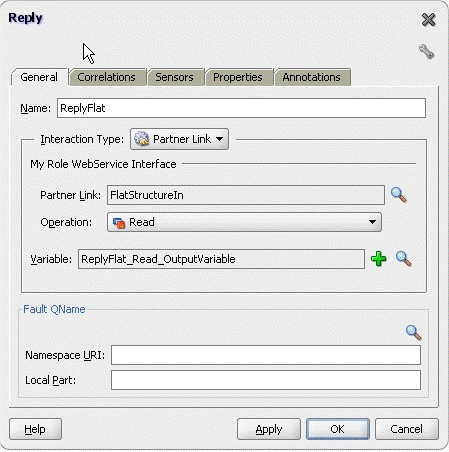
Description of "Figure 4-181 Specifying a Reply to the Inbound Adapter"
Finally, the process looks like Figure 4-182.
Figure 4-182 The Synchronous File Adapter Process with Receive and Reply BPEL Activities
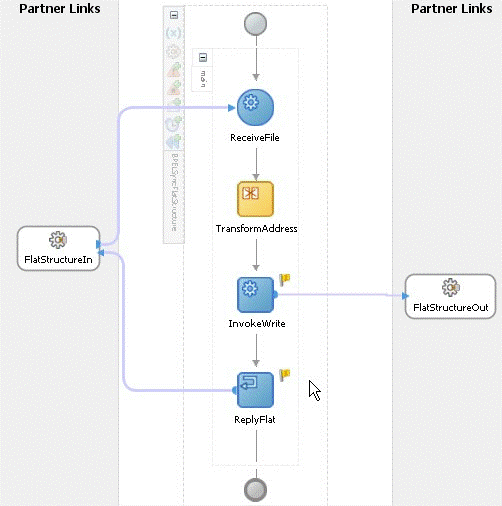
Description of "Figure 4-182 The Synchronous File Adapter Process with Receive and Reply BPEL Activities"
This type of exercise is not required for the Mediator because the Mediator routing rules are sequential by default. In other words, the Mediator uses the caller thread (inbound file adapter thread) for processing routing rules. This is the case even if the WSDL for mediator is one-way.
4.5.12.1 Changing the Connection Factory JNDI Dynamically in the FTP Adapter
Where there is a requirement to send the same file to five different FTP servers, you could create, for example, five FtpAdapter references, one for each connection-factory location. However, this is not the most optimal approach; instead, you can use the concept of Dynamic Partner Links.
If you're running the adapter in managed mode, it requires you to configure the connection factory JNDI in the WebLogic Server console for the FtpAdapter.
In the sample in Figure 4-183, the connection-factory JNDI location eis/Ftp/FtpAdapter has been mapped with the FTP server running on localhost.
Figure 4-183 Connection Factory JNDI Location Mapped with the FTP Server Running on Localhost - weblogic.ra Sample
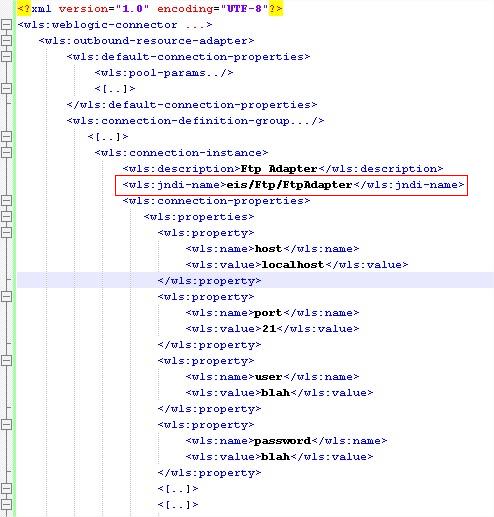
Description of "Figure 4-183 Connection Factory JNDI Location Mapped with the FTP Server Running on Localhost - weblogic.ra Sample"
Figure 4-184 Connection Factory Showing Mapping of FTP Adapter
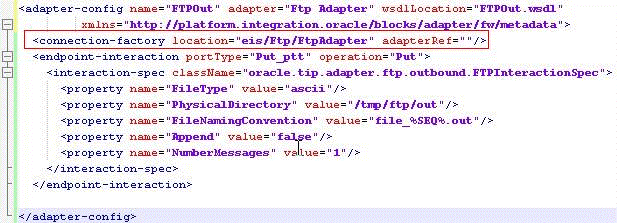
Description of "Figure 4-184 Connection Factory Showing Mapping of FTP Adapter"
After you have configured the connection factory on your application server, you must refer to the connection-factory JNDI in the jca artifact of your SCA process. In the example, the FTPOut reference in the .jca file uses the FTP server corresponding to eis/Ftp/FtpAdapter
You can change this connection-factory location dynamically using JCA header properties in both BPEL and Mediator service engines. To do so, the business scenario involving BPEL or Mediator is required to use a reserved JCA header property jca.jndi as shown in Figure 4-185.
Figure 4-185 Using the Reserved JCA Header Property jca.jndi
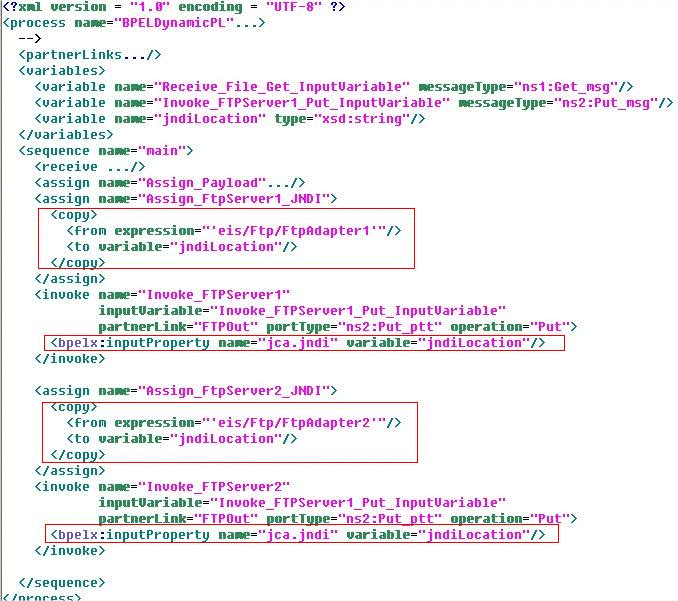
Description of "Figure 4-185 Using the Reserved JCA Header Property jca.jndi"
You must remember the following when using dynamic partner links:
-
You must preconfigure the connection factories on the SOA server. In the BPEL example, both
eis/Ftp/FtpAdater1andeis/Ftp/FtpAdater2must be configured in the WebLogic Server deployment descriptor for the FtpAdapter before your deployment of the scenario. -
Dynamic Partner Links are applicable to outbound invocations only
4.5.13 Changing the Sequencing Strategy for FILE/FTP Adapter
The File/FTP Adapter enables you to configure outbound writes to use a sequence number. For example, if you choose address-data_%SEQ%.txt as the FileNamingConvention, all files would be generated as address-data_1.txt, address-data_2.txt,...
See Figure 4-186.
The sequence number comes from the control directory for the particular adapter project(or scenario). For each project that use the File or Ftp Adapter, a unique directory is created for book-keeping purposes. Because this control directory must be unique, the adapter uses a digest to ensure that no two control directories are the same.
For example, for the FlatStructure sample in the example, the control information for my project would go under FMW_HOME/user_projects/domains/soainfra/fileftp/controlFiles/[DIGEST]/outbound where the value of DIGEST would differ from one project to another.
Within this directory, there is a file control_ob.properties where the sequence number is maintained. The sequence number is maintained in binary form and you might require a hexadecimal editor to view its content. There is another zero byte file, SEQ_nnn. This extra file is maintained as a backup.
One of the challenges faced by the Adapter runtime is to guard all writes to the control files so no two threads inadvertently attempt to update the control files at the same time. It does this guarding with the help of a mutex.
The mutex is of different types:
-
In-memory
-
Database-based
-
Coherence-based
-
User-defined
There might be scenarios, particularly when the Adapter is under heavy transactional load, where the mutex is a bottleneck. The Adapter, however, enables you to change the configuration so the adapter sequence value is derived from a database sequence or a stored procedure. In such a situation, the mutex is by-passed, and the process results in improved throughput.
The simplest way to achieve improved throughput is by switching your JNDI connection factory location for the outbound JCA file to use the eis/HAFileAdapter:
Figure 4-187 Switching the JNDI Connection Factory to Use the HAFileAdapter
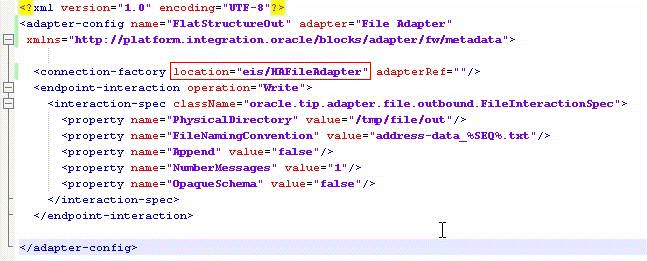
Description of "Figure 4-187 Switching the JNDI Connection Factory to Use the HAFileAdapter "
With this change, the Adapter runtime creates a sequence on the Oracle database. For example, if you do a select * from user_sequences in your soa-infra schema, you see a new sequence being created with name as SEQ_<GUID>__ (where the GUID differs by project).
However, to use your own sequence, you must add a new property to your JCA file called SequenceName. You must create this sequence on your soainfra schema before. See Figure 4-188.
Figure 4-188 Adding the SequenceName Property
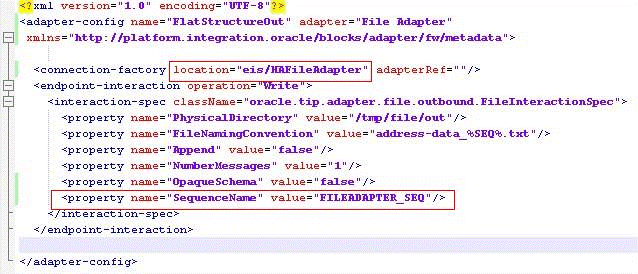
Description of "Figure 4-188 Adding the SequenceName Property"
The scenario when using a DB2 or MSSQL Server as the dehydration support is a bit different. DB2 supports sequences natively but MSSQL Server does not.
The Adapter runtime uses a natively generated sequence for DB2, but, for MSSQL server, the Adapter relies on a stored procedure that ships with the product.
To achieve the same result for a SOA Suite running DB2 as the dehydration store, change the connection factory JNDI name in the JCA file to eis/HAFileAdapterDB2.
To achieve the same result for MSSQL as the dehydration store, use eis/HAFileAdapterMSSQL.
To use a stored procedure other than the one that ships with the product, you must rely on binding properties to override the adapter behavior; specifically, you must instruct the adapter to use a stored procedure as in Figure 4-189.
Figure 4-189 Instructing the Adapter to Use a Stored Procedure
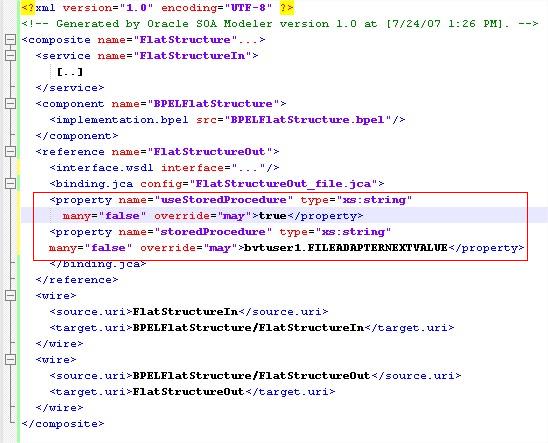
Description of "Figure 4-189 Instructing the Adapter to Use a Stored Procedure"
When the File/FTP Adapter is used in Append mode, the Adapter runtime degrades the mutex to use pessimistic locks to prevent writers from different nodes appending to the same file at the same time.
4.5.14 Controlling the Order in which Files Are Processed
The File/FTP Adapter enables you to control the order in which files get processed. For example, you might want the files to be processed in sequence of their modified times/ file sizes, or other determiners.
The File/FTP adapter enables you to achieve controlling the order in which files gets processed through a FileSorter attribute that you can define in the JCA file for your inbound File/FTP Adapter service. See Figure 4-190.
The File/FTP Adapter provides two predefined sorters that use the last modified times. For example:
However, there are times when you want to define the sort order yourself. To do so, you can implement a Java Comparator and register that with the File Adapter. Follow these steps to do so:
4.5.15 Extending FTP Adapter
The current FTP Adapter is compliant with RFC 959 that defines the standard FTP commands and valid return codes for each of the commands. However, some FTP servers use proprietary commands; for example, some FTP servers running on mainframes use "QUOTE SITE" commands to send the save format; for example, QUOTE SITE BLKSIZE=30000 (which sets the Block size for to 30000 bytes for the interaction).
Additionally, some FTP servers return non-standard FTP return codes for standard FTP commands that should be handled by the FTP Adapter as well. The FTP Adapter provides a layer of pluggability to handle these slight nuances in the functioning of FTP servers. In summary, there is a requirement to expose the internal of the FTP Adapter for the following reasons:
-
Some FTP servers respond to standard FTP commands in different manners.
-
Certain FTP servers require the use of proprietary FTP commands.
-
Some FTP servers return data in a slightly different format. For example, the LIST command in some FTP servers returns timestamp information as "Aug 29 2011" but it is returned as "29AUG-2011" in others.
The FTP Adapter uses a set of FTP commands in addition to their return codes. To support pluggability, this functionality is implemented by the FTP Adapter:
4.5.15.1 FTP and File Adapter Extension Use Cases
There are four sets of FTP and File Adapter Extension Use Cases:
4.5.15.2 FTP Adapter Extension of FTP Client Login
The FTP Adapter can be extended to override the login() operation in the default FTPClient implementation.
You can extend the default implementation because the user might be required to specify the Account name while logging into the FTP server. As a part of the authorization process, a typical FTP client normally begins each FTP connection with a USER command followed by the PASS command to the ftp server, for example:
USER <SP><user-name><CRLF>
PASS <SP> <password><CRLF>
Here, <SP> means space, and <CRLF> means carriage return followed by a Line Feed. However, in certain cases, the FTP server expects an Account name (ACCT command) passed after the PASS command, for example,
ACCT <SP><Account Name><CRLF>
The Account Name specifies the account name on the server for which the user is requesting authorization.
With this extension, the FTP Adapter is enabled to send the ACCT command during authorization immediately after the PASS command has been sent.
To achieve this behavior, you must override the login()method exposed by the FTPClient implementation (shipped with the FTP Adapter).
The client side of the FTP protocol in FTP Adapter is exposed using an interface IFTPClient and the default implementation is provided by FTPClient.
In the FTP Adapter, you can override the default FTPClient implementation and add support for ACCT in the login() method.
Once the FTPClient has been extended in this manner, the class name must be configured in the connection factory for FTP Adapter.
4.5.15.3 Configuring FTP Adapter to Handle Response from MLSD Command
The FTP Adapter sends the LIST command to return a list of files from the server. The FTP Adapter uses the response from the LIST command to retrieve a list of files that must be processed
However, the response to the LIST command differs slightly from one FTP server type to another (see Table 4-22).
To counter the differences in the structure of the response, the FTP Adapter employs FtpListResponseParser and FtpTimestampParser instances for parsing. The Ftp Adapter ships with pre-built implementations for the FtpListResponseParser and FtpTimestampParser for different FTP server types.
You can configure these implementations in the connection factory for the Web Logic deployment descriptor for the FTP Adapter by setting appropriate values for listParserKey and timeParserKey respectively.
See Table 4-22to understand the different responses to the LIST command from different FTP server types.
Table 4-22 Responses to the LIST Command from Different FTP Server Types
| FTP Server Type | Results from LIST Command |
|---|---|
|
UNIX |
-rwxr-xr-x 2 root root 1024 Apr 1 14:12 test.txt |
|
Windows |
09-13-11 12:10 23 test.txt |
|
MVS |
SAVE00 3390 2004/06/23 1 1 FB 128 6144 PS IN.TXT |
4.5.15.3.1 Extending MLSD
MLSD is a new FTP command that provides standardized directory listings regardless of the type of the FTP server.
You can extend the FTP Adapter to support the MLSD command.
Note that the response from the MLSD command differs from using the LIST command as the format of the MLSD response is defined by the examples shown:
type=file;modify=20110101010101;size=1024; address-csv.txt
type=dir;modify=20110101010101; my_files
type=file;size=1023;modify=20112011011001; index.htm
Currently MLSD is supported by some, but not all, FTP servers.
4.5.15.3.2 Configuring Plugin Implementations to Support the MLSD Command
You can use plugin implementations of FtpListResponseParser and FtpTimestampParser (see FtpTimestampParser Interface) to support MLSD command. To do so.
The implementation of the FtpTimestampParser exposes two different date-time-formats - defaultDateFormat and recentDateFormat, because most FTP servers show the modified time for recently created files in a slightly different format compared to older files.
For example, on UNIX systems older files are shown as Aug 29 2011, but newer files are shown as Mar 12 10:00 for files created on March 12th 2014.
When using MLSD, you must set the defaultDateFormat to yyyyMMddhhmmss and recentDateFormat to yyyyMMddhhmmss.SSS in the connection factory in weblogic-ra.xml
4.5.15.3.3 Extend the Listing Operation to Send MLSD Commands Rather than the LIST Commands
The FTP Adapter exposes the following operations. Each of these operations map to corresponding FTP commands.
Table 4-23 FTP Adapter Mapping to FTP Commands
| FTP Adapter Operation | Description | FTP Operation |
|---|---|---|
|
Listing |
Returns a list of files from the server. |
LIST/NLST/MLSD |
|
Store |
Stores a single file on the server as an outbound operation. |
STOR |
|
Retrieve |
Retrieves a single file on the server |
RETR |
|
Delete |
Deletes a single file on the server |
DELE |
You can extend these operations (Listing, Store, Delete, Retrieve) as you can configure the FTP Adapter scenario to send MLSD instead of LIST for Listing operation, STOU (FTP command for Store Unique) rather than STOR. You can similarly alter other commands.In this case, you extend the Listing operation to support MLSD, in addition to LIST/NLST commands which it already supports.
Earlier, you configured the FTP Adapter to parse responses coming from MLSD. This section provides information on ensuring that the FTP Adapter is going to send the MLSD command rather than the LIST/NLST command that it sends otherwise.To send the MLSD command, you create a mapping file (for example, my_mapping.xml) that corresponds to ftpmapping.xsd (refer to ftpmapping Schema) and which overrides the Listing operation. For example,
<ftpmapping xmlns="http://schemas.oracle.com
         /ftpadapter/mapping">
    <listing command="MLSD="${default}"
           success="$ftp.code = 150 or $ftp.code=125
                 or $ftp.code=226">
    </listing>
</ftpmapping>
In this example, the listing operation uses the MLSD FTP command rather than the vanilla LIST command so the listing is sorted at the FTP server.
You can use the success attribute to specify the success/error condition. If the control channel returns 125, 150 or 226, it is considered successful by the FTP Adapter, otherwise it results in an Adapter exception that propagates to the binding component pipeline that is making the inbound or outbound listing operation.
The mapping file MLSD argument can have these values:
-
${default}is replaced by the original directory path sent as a result of the request. Hence, if you have configured your composite with/home/foo1as yourPhysicalDirectoryin the outbound jca and used/home/foo2as the header value for thejca.ftp.Directoryparameter in the outbound header, this parameter is replaced with the/home/foo2.In most cases, you do not change the value of argument from
${default}to anything else -
A hard-coded value, for example,
argument="/home/bar"in the mapping file. If you use this, the hard-coded value is used. This overrides any jca parameter/header you might have configured in the composite configuration.
Once you have created the mapping file, you must copy it to the composite application. Add the mapping file to the same directory as the JCA file of your composite application. You must configure the mapping file as a part of JCA activation or interaction, for example,
Example - Configuring the Mapping as a Part of JCA Activation or Interaction
<?xml version="1.0" encoding="UTF-8"?>
<adapter-config name="FTPIn" adapter="Ftp Adapter" …>
   <connection-factory location="eis/Ftp/FtpAdapter" …/>
  <endpoint-activation operation="Get">
    <activation-spec className="oracle.tip.adapter.ftp.inbound.
         FTPActivationSpec">
             <[..]>
             <property name="FtpMappingFile"
                     value="my_mapping.xml"/>
            <[..]>
    </activation-spec>
  </endpoint-activation>
4.5.15.4 Extend the Store Operation to Send Additional Proprietary FTP Commands to FTP Server Running on the MVS Platform
Disk space (PRIMARY/SECONDARY), Logical Record Length (LRECL), Block Size (BLKSIZE) are characteristics of a dataset on MVS systems. FTP servers running on MVS systems are aware of these configurations.
Though each of these configurations have default values, there are times where you would want to override the defaults depending on the dataset that you wish to download/upload from the MVS system.
For example, you might want to upload a large dataset to the FTP Server of 50 MB. The requirements is then that additional space must be allocated before the STOR operation executes. You must configure BLKSIZE of, for example, 6192 with LRECL of 86. If these parameters are not set, the FTP transfer (STOR operation) fails.
Fortunately, for an FTP server, there is a way to send proprietary commands by using QUOTE SITE followed by the command to be sent.
Note that the return code from QUOTE SITE might differ from one proprietary command to another proprietary command. In that case, the following commands are sent prior to STOR command.
QUOTE<SP>SITE<SP>BLKSIZE=6192<CRLF>
QUOTE<SP>SITE<SP>LRECL=86<CRLF>
STOR<SP>SM.KAR.SARL<CRLF>
In this case, you extended the Store operation to send these additional QUOTE SITE commands to the FTP server.
Note that you can only send control commands to the FTP server. The control commands are those commands which do not require the client to read any data from the data channel. For example, commands such as CWD, PWD, MKD, QUOTE SITE, DELE are control commands.
However, commands such as RETR, STOR, STOU, LIST, NLST, MLSD are data commands.
When the data commands are issued, the client must read the response from a data channel. For control commands, however, the response is sent back on the control channel itself.To send a control command such as STOR to the FTP server, you must write a mapping file (for example my_mapping.xml) corresponding to ftpmapping.xsd (refer to ftpmapping Schema) which overrides the Store operation, as shown in the example:
<ftpmapping xmlns="http://schemas.oracle.com/ftpadapter/mapping">
     <store>
     <executecommandsbefore>
        <command value="QUOTE SITE" argument="BLKSIZE=6192"           success="$ftp.code >=   200 and $ftp.code <= 300">
       <command value="QUOTE SITE" argument="LRECL=86"            success="$ftp.code >= 200 and $ftp.code <= 300">
    </executecommandsbefore>
   </store>
</ftpmapping>
In this example, the executecommandsbefore statement precedes the STOR operation with additional QUOTE SITE commands that would be sent.
The same configuration can be expressed as shown in the example below.
Example - Mapping File Configuration
<ftpmapping xmlns="http://schemas.oracle.
              com/ftpadapter/mapping">
<globalcommandsconfiguration >
 <global-ftp-command id="BLKSIZE" command="QUOTE SIZE" argument="${jca.ftp.BlockSize}"
         success="$ftp.code >= 200 and $ftp.code <= 300"/>
        <global-ftp-command id="LRECL" command ="QUOTE SIZE" argument="${jca.ftp.LogicalRecordSize"
         success="$ftp.code >l= 200 and $ftp.code <= 300"/>
</globalcommandsconfiguration>
<store>
<executecommandsbefore>
<ftp-command commandref="BLKSIZE" >
<ftp-command commandref="LRECL" >
</executecommandsbefore>
</store>
</ftpmapping>
In the example, you have configured the commands globally and you are referencing them using the commandref attribute. Note that both the approaches of expressing the mapping metadata are identical and you can choose one based on your requirements.
jca.ftp.BlockSize and jca.ftp.RecordSize can be passed as normalized message properties, for example headers in the BPEL <invoke> activity, for example
Example - Passing BlockSize and RecordSize as Normalized Message Properties
    <assign name="AssignFtpMetadata">
      <copy>
        <from expression="'BLKSIZE=6192'"/>
        <to variable="blockSize"/>
      </copy>
      <copy>
        <from expression="LRECL=86"/>
        <to variable="logicalRecordSize"/>
      </copy>
    <invoke name="WriteWeatherData"
                  bpelx:invokeAsDetail="no"
            inputVariable=
                 "WriteWeatherData_Put_InputVariable"
            partnerLink="XmlOut"
                 portType="ns2:Put_ptt" operation="Put">
            <bpelx:inputProperty name="jca.ftp.BlockSize"
                 variable="blockSize"/>
              <bpelx:inputProperty name=
                      "jca.ftp.LogicalRecordSize"
                       variable="logicalRecordSize"/>
      </invoke>
You must copy the mapping file to the same directory as your .jca file for interaction spec. This mapping file, in turn, must be configured as a part of the JCA interaction spec as shown in the example below.
Example - Configuring the Mapping File as Part of the JCA Interaction Spec
<?xml version="1.0" encoding="UTF-8"?>
<adapter-config name="FTPOut" adapter="Ftp Adapter" …>
   <connection-factory location="eis/Ftp/FtpAdapter" …/>
  <endpoint- interaction operation="Get">
    <interaction-spec
       className="oracle.tip.adapter.
            ftp.outbound.FTPInteractionSpec">
            <[..]>
             <property name="FtpMappingFile"
               value="my_mapping.xml"/>
            <[..]>
    </interaction-spec>
  </endpoint-interaction>
</adapter-config>
4.5.15.5 Additional Configuration Parameters, Implementations, Interfaces and Schema
Following is a list of additional configuration parameters that you can use when extending the FTP Adapter.
-
FtpMappingFile
You can provide this in the jca file for either the inbound or the outbound interaction. It stores the path to the mapping file relative to the composite application. An example of the ftpmapping schema is provided in ftpmapping Schema.
Use the same mapping file for both the inbound and outbound operation.
As an example,
<property name="FtpMappingFile" value="xsd/ftp_mapping.xml"/>means the mapping file resides in the xsd folder of the composite application. -
ftpClientClass
You can provide this as a connection factory parameter in the deployment descriptor for the FTP Adapter. If you want to provide your own FTPClient implementation, this is where you place the fully qualified classname for the implementation.
-
listParserKey
You can provide this as a connection factory parameter in the deployment descriptor for the FTP Adapter. If want to provide your own
FtpListResponseParserimplementation, this is where you place the fully qualified classname for the implementation. -
timeParserKey
You can provide this as a connection factory parameter in the deployment descriptor for FTP Adapter.
If you want to provide your own
FtpTimestampParserimplementation, this is where you place the fully qualified classname for the implementation.
4.5.15.5.1 Sample FTPClient Implementation
See below for the sample FTPClient Implementation.
Example - Sample FTP Client Implementation
import oracle.tip.adapter.file.LoggerUtil;
import oracle.tip.adapter.file.FileResourceException;
import oracle.tip.adapter.ftp.IFtpDescriptor;
import oracle.tip.adapter.ftp.FTPReply;
import oracle.tip.adapter.ftp.FTPClient;
import oracle.tip.adapter.ftp.FTPCommand;
import oracle.tip.adapter.ftp.IFTPClient;

import javax.resource.ResourceException;
import java.io.IOException;
import oracle.tip.pc.infra.exception.
                        PCExceptionIndex;
import javax.resource.spi.security.
                        PasswordCredential;
import java.net.Socket;
import java.util.logging.Logger;
import java.util.logging.Level;

public class TestFTPClient extends FTPClient
                      implements
                        IFTPClient {

    private Logger _logger = Logger.getLogger
                   (TestFTPClient.class.getName());
    public TestFTPClient() {
        super();
Sample FTPClient Implementation

    }
    public void initialize(IFtpDescriptor ftpDescriptor) {
        super.initialize(ftpDescriptor);
    }

    public Logger getLogger() {
       return _logger;
    }

    public boolean login(Socket controlSocket,
                 PasswordCredential pc)
                          throws IOException,
                      ResourceException
    {
        intrc = 0;
        String replyStr = null;
        logDebug("TestFTPClient::login(...) invoked ");

        replyStr = user(controlSocket,
                    pc.getUserName());
        rc = getReplyCode(replyStr,
                    m_ftpDesc.getHost());

        logDebug("TestFTPClient::
                     command[USER] =>" + rc + "<=");

        if(FTPReply.isPositiveCompletion(rc)) {
            return true;
        }
        if(!FTPReply.isPositiveIntermediate(rc)) {
            // USER failed
            logError("Unable to login
                     to server '"
                         + m_ftpDesc.getHost() + "'; " +
                "FTP command USER returned
                     unexpected reply code : " + rc);

            FileResourceException frex = new FileResourceException(PCExceptionIndex.ERROR_LOGIN);
            frex.setEISErrorCode(String.valueOf(rc));
            frex.setEISErrorMessage(replyStr);
            throw frex;
        }
        replyStr = pass(controlSocket,
                          new String(pc.getPassword()));
        rc = getReplyCode(replyStr, m_ftpDesc.getHost());
        logDebug("TestFTPClient::
                          command[PASS] =>" + rc + "<=");
        if ( FTPReply.isPositiveCompletion(rc)) {
            return true;
        }
        if ( !FTPReply.isPositiveIntermediate(rc)) {
            // PASS failed
            logError("Unable to login to server '" +
                         m_ftpDesc.getHost() + "'; " +
                    "FTP command PASS returned
                                  unexpected
                           reply code : " + rc );

            FileResourceException frex = new FileResourceException(PCExceptionIndex.ERROR_LOGIN);
            frex.setEISErrorCode(String.valueOf(rc));
            frex.setEISErrorMessage(replyStr);
            throw frex;
        }
        //Check ACCT account
        String accountName = "hard-coded";
        replyStr = sendCommand(controlSocket,
                             FTPCommand.ACCT,
                                      accountName);
        rc = getReplyCode(replyStr,
                       m_ftpDesc.getHost());
        logDebug("TestFTPClient::
                      command[ACCT] =>" + rc + "<=");
        if ( !FTPReply.isPositiveCompletion(rc)) {
            // ACCT failed
            logError("Unable to login to
                      server '" + m_ftpDesc.getHost() + "'; " +
                    "FTP command ACCT returned unexpected
                      reply code : " + rc );

            FileResourceException frex = new FileResourceException(PCExceptionIndex.ERROR_LOGIN);
            frex.setEISErrorCode(String.valueOf(rc));
            frex.setEISErrorMessage(replyStr);
            throw frex;
        }
        return true;


    }

    private void logDebug(String logData){
         _logger.log(Level.FINE, logData);
    }

    private void logError(String logData){
        _logger.log(Level.SEVERE, logData);
    }
}
4.5.15.6 FtpListResponseParser Interface
The following is the FTPListResponseParser Interface, which defines the interface for parsing FTP file listings and converting that information into FileInfo instances.
Example - Sample FTPListResponseParser
package oracle.tip.adapter.ftp.parsers;
import …

/**
 * FtpListResponseParser defines the interface for
 * parsing FTP file listings
 * and converting that information into FileInfo instances.
 * It also uses a default
 * or a user supplied Timestamp parser instance to parse the
 * file modified time
 */
public interface FtpListResponseParser
{


  /**
   * This parameter can be used
   * to throttle the Ftp Adapter to
   * return the required
   * number of files from the call based on heuristics
   * such as memory available
   * @param pageSize The number of FileInfo
   * instances to be returned
   */
  public void setPageSize(int pageSize);

  /**
   * @return Returns the page size
   */
  public int getPageSize();

  /**
   * This method is used to configure
   * the parser instance
   * being returned.
   * @param ftpDescriptor
   */
  public void configure(IFtpDescriptor ftpDescriptor);

  /**
   * Parses an Ftp listing and returns an array
   * of FileInfo
   * @param directory The Ftp directory being listed
   * @param stream The data socket stream to read from
   * @param encoding Server encoding
   * @return The list of FileInfo instances
   * @exception Exception  Any exception in reading
   * the data socket stream.
   */

  public FileInfo[] parseListResponse(String directory,
           InputStream stream, String encoding)
                   throws IOException;

  /**
   * Parses an Ftp listing and returns an
   * array of FileInfo
   * using the default encoding
   * @param directory The Ftp directory being listed
   * @param stream The data socket stream to read from
   * @return The list of FileInfo instances
   * @exception Exception  Any exception in reading
   * the data socket stream.
   */
  public FileInfo[] parseListResponse(String directory,
            InputStream stream) throws IOException;

  /**
   * Returns a single FileInfo instance from a single line
   * @param line The line read from the data socket
   */
  public FileInfo parseLine(String line);

  /**
   * Reads and returns a single line from
   *  the data socket
   * @param reader The reader constructed
   * from the data socket stream
   * @return The line read from the socket stream
   * @exception Exception  Any exception in
   * reading the data socket stream.
   */
  public String nextLine(BufferedReader reader)
            throws IOException;

  /**
   * Preprocessing hook before the list
   * is returned to the client
   * @param originalList List of lines read
   */
  public List preProcess(List originalList);

  /**
   * Set the parser for parsing the File timestamps
   * returned from the call to listing
   * @param ftpTimestampParser The Timestamp
   * parser interface
   */
  public void setTimestampParser(FtpTimestampParser
                   ftpTimestampParser);

  /**
   * Parses the timestamp from listing
   * @exception Exception  Any exception
   * in parsing the time
   */
  public long parseTimestamp(String timestamp)
      throws Exception;
}
4.5.15.7 FtpTimestampParser Interface
FTPTimestampParser defines the interface for parsing timestamps from files on an FTP Server. See the example below.
Example - Sample FtpTimestampParser Interface
package oracle.tip.adapter.ftp.parsers;

import …;
/**
 * FtpTimestampParser defines
 * the interface for parsing timestamps from
 * files on Ftp Server.
 *
 */

public interface FtpTimestampParser
{
  /**
   * This parameter can be used to configure
   * the timestamp parser implementation
   * @param ftpDescriptor The IFtpDescriptor
   * instance used
   *to configure the timestamp parser
   */
    public void setFtpDescriptor(
                  IFtpDescriptor ftpDescriptor);
  /**
   * Returns the timestamp from the file
   * time in listing format
   * @param timestamp File time from the File listing
   * @return timestamp in long
   * @throws Exception
   */
    public long parseTimestamp(String timestamp)
                 throws Exception;
}
}
4.5.15.8 ftpmapping Schema
The FTP mapping schema, ftpmapping, is shown in the example below.
Example - FTPMapping Schema
<xsd:schema xmlns:xsd="http://www.w3.org/2001/XMLSchema"
            xmlns="http://schemas.oracle.
                         com/ftpadapter/mapping"
            xmlns:tns="http://schemas.oracle.com
                         /ftpadapter/mapping"
            targetNamespace="http://schemas.oracle.com/
                         ftpadapter/mapping"
            elementFormDefault="qualified"
                    attributeFormDefault=
                            "unqualified">

  <xsd:element name="ftpmapping">
    <xsd:complexType>
      <xsd:sequence>
       <xsd:element ref="globalcommandsconfiguration"
                       minOccurs="0" />
        <xsd:element name="listing" type="tns:ftp-operation-type"
                       minOccurs="0" />
        <xsd:element name="retrieve" type="tns:ftp-operation-type"
                       minOccurs="0"/>
        <xsd:element name="store" type="tns:ftp-operation-type"
                      minOccurs="0"/>
        <xsd:element name="delete"
                    type="tns:ftp-operation-type"
                      minOccurs="0"/>
      </xsd:sequence>
    </xsd:complexType>
  </xsd:element>
       </xsd:sequence>
    </xsd:complexType>
  </xsd:element>

</xsd:schema>

  <xsd:complexType name="ftp-operation-type">
    <xsd:sequence>
      <xsd:element ref="executecommandsbefore"
                   minOccurs="0"/>
      <xsd:element ref="executecommandsafter"
                    minOccurs="0"/>
    </xsd:sequence>
    <xsd:attribute name="command" type="xsd:string"
             use="optional" />
    <xsd:attribute name="argument"
                              type="xsd:string"
             use="optional" />
    <xsd:attribute name="success" type="xsd:string"
             use="optional" />
    <xsd:attribute name="desc" type="xsd:string"
             use="optional" />
    <xsd:attribute name="commandref"
                   type="xsd:string"
             use="optional" />
  </xsd:complexType>

  <xsd:element name="executecommandsafter">
    <xsd:complexType>
      <xsd:sequence>
        <xsd:element ref="ftp-command"
               minOccurs="0" maxOccurs="unbounded"/>
      </xsd:sequence>
    </xsd:complexType>
  </xsd:element>
 <xsd:element name="executecommandsbefore">
    <xsd:complexType>
      <xsd:sequence>
        <xsd:element ref="ftp-command"
                minOccurs="0" maxOccurs="unbounded"/>
      </xsd:sequence>
    </xsd:complexType>
  </xsd:element>

 <xsd:element name="ftp-command">
    <xsd:complexType>
      <xsd:attribute name="argument"
                       type="xsd:string"
                    use="optional" />
      <xsd:attribute name="success"
                     type="xsd:string"
                    use="optional" />
      <xsd:attribute name="desc"
                     type="xsd:string"
                    use="optional" />
      <xsd:attribute name="command"
                         type="xsd:string"
                    use="optional" />
      <xsd:attribute name="commandref"
                           type="xsd:string"
                    use="optional" />
    </xsd:complexType>
  </xsd:element>

  <xsd:element name="global-ftp-command">
    <xsd:complexType>
      <xsd:attribute name="argument"
           type="xsd:string"
                    use="optional" />
      <xsd:attribute name="success" type="xsd:string"
                    use="required" />
      <xsd:attribute name="desc" type="xsd:string"
                    use="optional" />
      <xsd:attribute name="id" type="xsd:string"
                    use="required" />
      <xsd:attribute name="command" type="xsd:string"
                    use="required" />
    </xsd:complexType>
  </xsd:element>

  <xsd:element name="globalcommandsconfiguration">
    <xsd:complexType>
      <xsd:sequence>
        <xsd:element ref="global-ftp-command"
                        minOccurs="0"
                           maxOccurs="unbounded" />
4.5.15.8.1 Using a Manifest.MF file to Generate a fileftp.jar for Compilation
Create a MANIFEST.MF file with the contents as shown.Be sure to include the Class-path directive. Ensure that each entry in the Class-path directive is separated by a blank space.
Manifest-Version: 1.0
Ant-Version: Apache Ant 1.7.1
Created-By: 20.4-b02 (Sun Microsystems Inc.)
Implementation-Vendor: Oracle
Implementation-Title: Ftp Adapter Extensibility
Implementation-Version: 11.1.1
Product-Name: Ftp Adapter Extensibility Manifest
Product-Version: 12.1.2.0.0
Specification-Version: 11.1.1
Class-Path: jca-binding-api.jar fileAdapter.jar ftpAdapter.jar ../../../../wlserver/modules/javax.resource_1.6.1.jar ../oracle.soa.fabric_11.1.1/bpm-infra.jar
To include this MANIFEST.MF, do the following:
4.5.15.8.2 Sample ListParser and TimeParser
The following example shows a sample ListParser and TimeParser.
Example - Sample ListParser and TimeParser
package oracle.tip.adapter.ftp.test;

import java.util.regex.Pattern;
import java.util.Map;
import java.util.HashMap;
import java.util.StringTokenizer;

import oracle.tip.adapter.file.FileInfo;
import oracle.tip.adapter.file.FileLogger;
import oracle.tip.adapter.file.LoggerUtil;
import oracle.tip.adapter.ftp.IFtpDescriptor;
import oracle.tip.adapter.ftp.parsers.
                      FtpTimestampParser;
import oracle.tip.adapter.ftp.parsers.
                      FtpListResponseParserImpl;
/**
 * Implementation of FtpListResponseParser
                       for MLSD responses
 * Responses are return as
          - type=file;modify=20110101010101;size=1024;
                                 filename
 */

public class MLSDListResponseParserImpl
  extends FtpListResponseParserImpl
{
  private static final String TYPE = "type";
  private static final String SIZE = "size";
  private static final String MODIFY = "modify";

  public MLSDListResponseParserImpl()
  {
  }
/**
   * Returns a FileInfo instance
   * for a single line.
   * @param line Line from list response
   * @return FileInfo instance
   */
  public FileInfo parseLine(String line)
       throws Exception
  {

    System.out.println
               ("MLSDListResponseParseImpl::parseLine
                called [" + line + "]");
    FileInfo fileInfo = new FileInfo();
    fileInfo.setRaw(line);

    //extract the file name

    String response[] = line.split(" ");
    if(response == null || response.length != 2){
       throw new Exception("Invalid response
                   from ftp server [" + line + "]");
    }

    fileInfo.setFileName(response[1]);
    StringTokenizer st = new
                  StringTokenizer(response[0], ";");
    Map<String, String> properties =
                  new HashMap<String, String>();
    String token = null;
    while(st.hasMoreElements()){
       token = st.nextToken().trim();
       int index = token.indexOf('=');
       if(index == -1){
           throw new Exception
          ("Invalid ftp line since token
                            [" + token + "]
                 does not contain '='");
       }
       String key = token.substring(0, index).trim();
       String value = token.substring(index+ 1,
                  token.length()).trim();
       if(key.length() ==0 || value.length() ==0){
           throw new Exception("Invalid ftp line since
             either key[" + key + "] or value [" + value + "]
                 is invalid");
       }
       properties.put(key, value);
    }
    String type = properties.get(TYPE);
    String modify = properties.get(MODIFY);
    String size = properties.get(SIZE);
    if("file".equals(type)){
        fileInfo.setFileType(FileInfo.IS_FILE);
    }
    else if("dir".equals(type)){
        fileInfo.setFileType(FileInfo.IS_DIR);
    }
    else {
        fileInfo.setFileType(FileInfo.IS_UNKNOWN);
    }
    try{
        fileInfo.setSize(Long.parseLong(size));
    }
    catch(NumberFormatException e){
    }

    long modifiedTime = 0;
    try{
        modifiedTime = parseTimestamp(modify);
        fileInfo.setTimestamp(modifiedTime);
    }
    catch(Exception e){
        FileLogger.logWarning
            ("Unable to parse timestamp[" + modify + "]",e);
    }
    System.out.println("FileInfo returned
                  [" + fileInfo + "]");
    return fileInfo;
  }
