7 Managing Workloads Among Users in Process Workspace
Supervisors can use Oracle Business Process Management Workspace (Process Workspace) to view and update all tasks assigned to the users who report to them.
This chapter includes the following sections:
For information about troubleshooting human workflow issues, see Human Workflow Troubleshooting in Administering Oracle SOA Suite and Oracle Business Process Management Suite.
7.1 Managing the Availability of Users in Process Workspace
If a user is unavailable for a period of time and must delegate some or all assigned tasks to another user, then the user rules can automatically reassign the tasks based on certain conditions.
More specifically, if a user is going on vacation, then a vacation period can be associated with a rule to create a vacation rule.
For more information about creating user rules, see How to Create User Rules in Process Workspace.
For more information about setting a vacation rule, see How to Enable a Vacation Period in Process Workspace.
7.2 Distributing Work among Users in a Group
To distribute work among users in a group, create rules for that group.
Creating group rules is similar to creating a user rule, with the addition of a list of the groups that you, as the logged-in user, manage.
For information about creating user rules, see How to Create User Rules.
Examples of group rules include:
-
Assigning tasks from a particular customer to a member of the group.
-
Ensuring an even distribution of task assignments to members of a group by using round-robin assignment.
-
Ensuring that high-priority tasks are routed to the least busy member of a group.
For information about creating a group rule, see How to Create Group Rules.
7.3 Setting Rules
Rules act on tasks. These tasks can be a specific task type or all of the tasks assigned to a user or group.
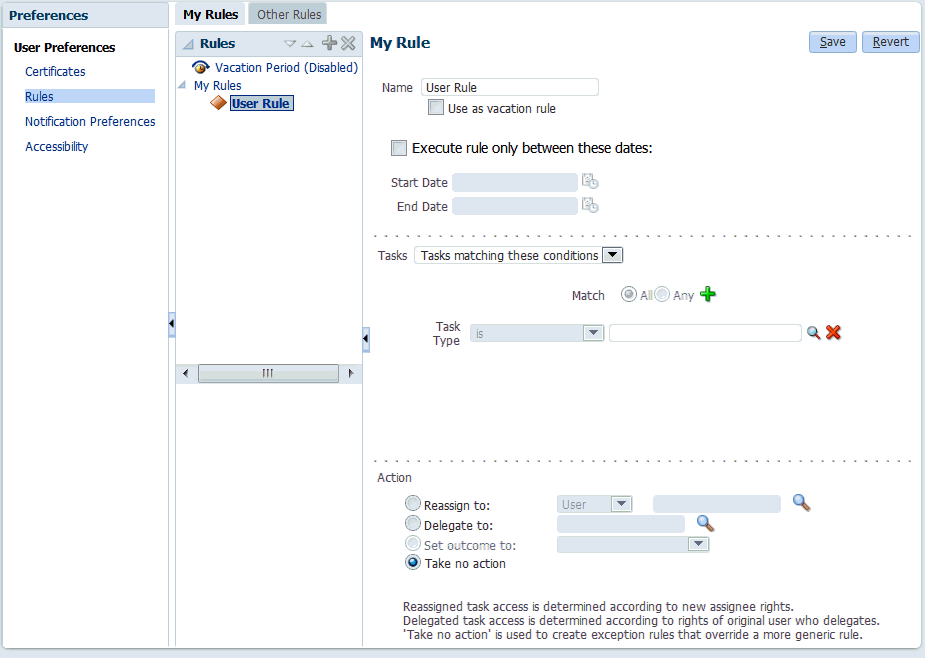
Figure 7-1 shows where you set rules, including vacation rules (different from the vacation period settings described in How to Enable a Vacation Period in Process Workspace).
A rule cannot always apply in all circumstances in which it is used. For example, if a rule applies to multiple task types, it may not be possible to set the outcome for all tasks, since different tasks can have different outcomes.
Rules are executed in the order in which they are listed. Rules can be reordered by using the up and down buttons in the header, as shown in Figure 7-1.
If a rule meets its filter conditions, then it is executed and no other rules are evaluated. For your rule to be executed, you must be the only user assigned to that task. If the task is assigned to multiple users (including you), the rule does not execute.
You cannot specify business rules for To-Do tasks.
7.3.1 How To Create User Rules
Specify the following when creating a user rule:
-
Rule name.
-
If the rule is a vacation rule, see How to Enable a Vacation Period in Process Workspace, for how to set the vacation period that is synchronized with the vacation rule.
-
Which task or task type the rule applies to—If unspecified, then the rule applies to all tasks.
If a task type is specified, then any attributes mapped for that task type can be used in the rule condition.
-
When the rule applies.
-
Conditions on the rule—These are filters that further define the rule, such as specifying that a rule acts on priority 1 tasks only, or that a rule acts on tasks created by a specific user.
The conditions can be based on standard task attributes and any mapped attributes that have been mapped for the specific tasks. See How to Specify Mapped Attributes, for more information.
User rules do the following actions:
-
Reassign to—You can reassign tasks to subordinates or groups you manage.
-
Delegate to—You can delegate to any user or group. Any access rights or privileges for completing the task are determined according to the original user who delegated the task. (Any subsequent delegations or re-assignments do not change this from the original delegating user).
-
Set outcome to—You can specify an automatic outcome if the workflow task was designed for those outcomes, for example, accepting or rejecting the task. The rule must be for a specific task type. If a rule is for all task types, then this option is not displayed.
-
Take no action—Use this action to prevent other more general rules from applying. For example, to reassign all your tasks to another user while you are on vacation, except for loan requests, for which you want no action taken, then create two rules. The first rule specifies that no action is taken for loan requests; the second rule specifies that all tasks are reassigned to another user. The first rule prevents reassignment for loan requests.
To create a user rule:
7.3.2 How To Create Group Rules
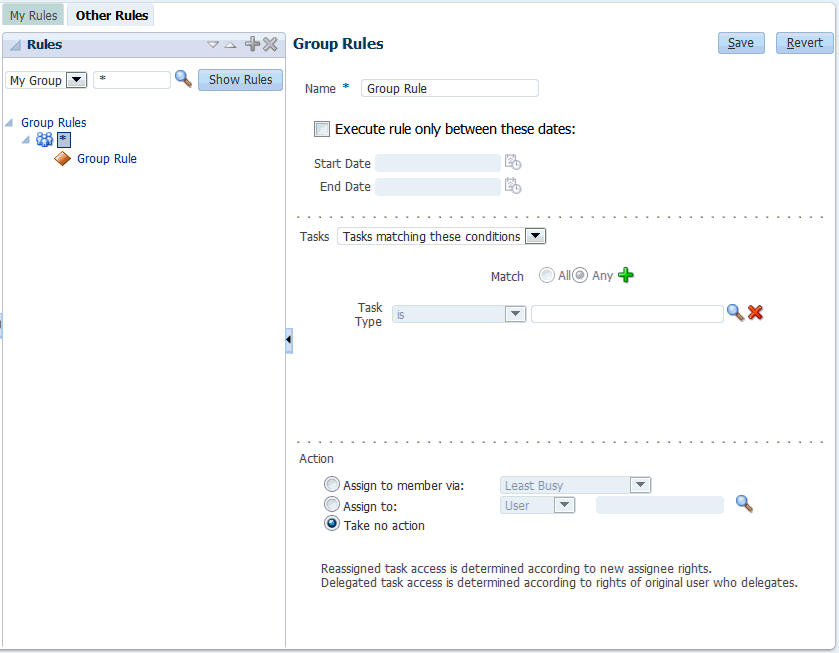
Creating a group rule is similar to creating a user rule, with the addition of a list of the groups that you (as the logged-in user) manage. Examples of group rules include:
-
Assigning tasks from a particular customer to a member of the group
-
Ensuring an even distribution of task assignments to members of a group by using round-robin assignment
-
Ensuring that high-priority tasks are routed to the least busy member of a group
Group rules do the following actions:
-
Assign to member via—You can specify a criterion to determine which member of the group gets the assignment.
This dynamic assignment criterion can include round-robin assignment, assignment to the least busy group member, or assignment to the most productive group member. You can also add your custom functions for allocating tasks to users in a group.
-
Assign to—As with user rules, you can assign tasks to subordinates or groups you directly manage.
-
Take no action—As with user rules, you can create a rule with a condition that prevents a more generic rule from being executed.
To create a group rule:
7.4 Setting Assignment Rules for Tasks with Multiple Assignees
If a task has multiple assignees, then assignment rules are not evaluated for the task, and the task is not automatically routed. This is because each of the task's assignees can define assignment rules, which can potentially provide conflicting actions to take on the task. Only tasks that are assigned exclusively to a single user are routed by the assignment rules.
For example, consider the following sequence:
-
A rule is created for user cdickens to reassign all assigned requests to user jstein.
-
User jcooper reassigns the allocated tasks to cdickens and cdoyle.
-
Cdickens claims the task, and the task appears in their inbox.
The task is not automatically reassigned to jstein. The task is routed to jstein, following the assignment rule set for cdickens, only if user jcooper explicitly reassigns the task to cdickens alone, instead of reassigning the task to multiple users (cdickens and cdoyle).
7.5 Reassigning or Delegating Tasks in Process Workspace
Supervisors and users can reassign or delegate tasks.
A supervisor can reassign or delegate tasks to reportees. A user with BPMWorkflowReassign privileges can delegate a task to anyone.
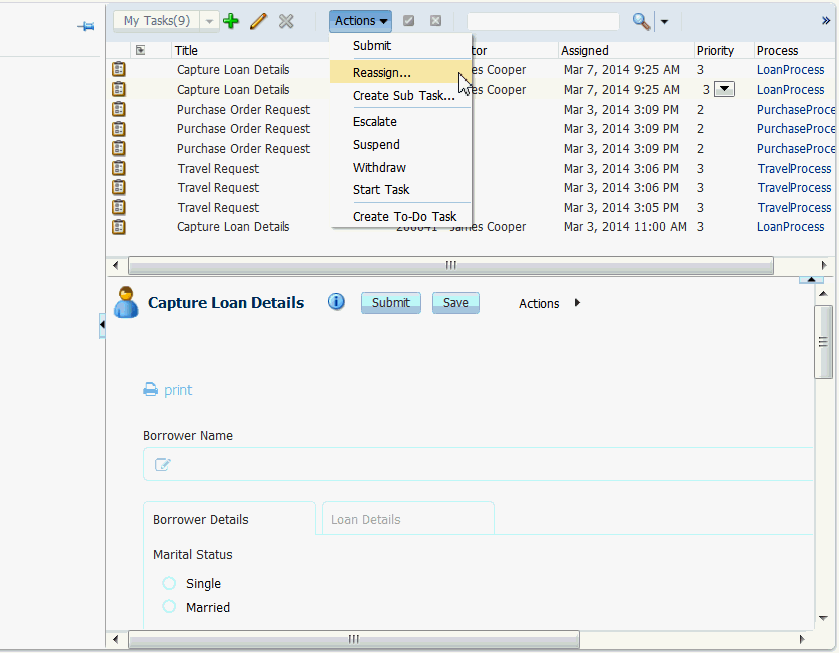
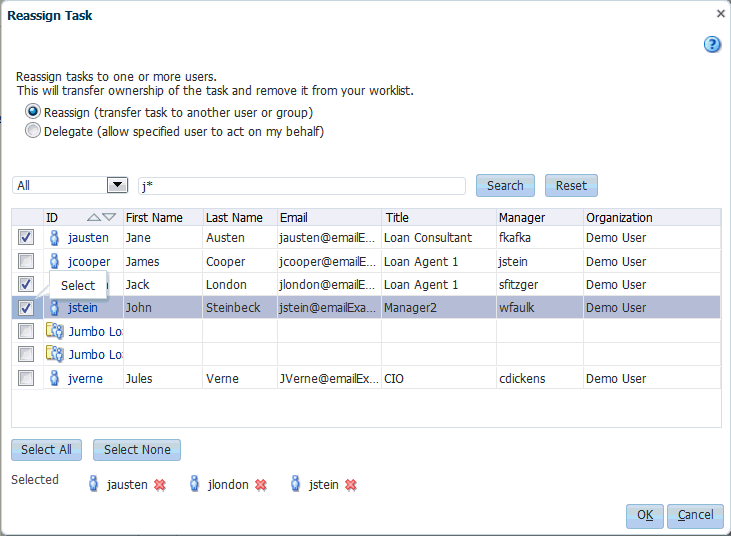
To reassign or delegate a task:
7.6 Using Reports to Manage Workflows in Process Workspace
Reports are available on the Tasks page in the Reports panel. Report results cannot be saved.
Figure 7-6 shows the Reports panel displaying the standard report types available.
Figure 7-6 Oracle Business Process Management Workspace Reports
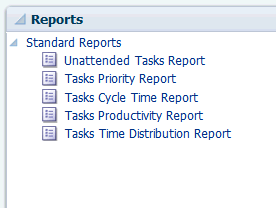
Description of "Figure 7-6 Oracle Business Process Management Workspace Reports"
For more information about reports, see Oracle Fusion Middleware Developer's Guide for Oracle SOA Suite.
7.7 Using Dashboards to Manage Workflows in Process Workspace
Dashboards provide a variety of analytical information about the workload on users for the different processes being executed.
For example, if a specific user has many tasks assigned to her, and she is making little progress, this would indicate that all those corresponding processes are blocked. Having this information enables you to reassign those tasks to someone else and, if necessary some user or group routing rules can be specified to manage the issue in the short term.
For more information about dashboards, see Using Dashboards in Process Workspace.
7.8 Handling Escalations in Process Workspace
Escalations are among the system actions you can perform from the Task Details page. If a user escalates a task, it is automatically assigned to whomever is specified in the escalation path.
The escalation path is specified by the administrator. If no escalation path is specified, then the task escalates to the user's supervisor who can reassign it from there.
If a task is assigned to a role, but none of the role members have claimed the task, then the task is escalated as specified in the escalation path for that role. If the task is assigned to a role and a role member has claimed the task, then the escalation goes to the role member's supervisor.
For information about how an administrator specifies the escalation path, see How to Specify the Escalation Path for a Role.
For more information about the Task Details page, see Using the Process Workspace Task Details Page.
