2 Installing and Configuring Oracle Forms and Reports
This chapter describes how to install and configure Oracle Forms and Reports.
The following topics are covered:
-
Section 2.2, "Installing Oracle WebLogic Server (FMW Infrastructure)"
-
Section 2.3, "Installing Oracle Identity and Access Management"
-
Section 2.4, "Installing and Configuring Oracle Forms and Reports"
2.1 Preparing to Install
Before you begin, read this section carefully to make sure that your environment and other software needs are met prior to installing Oracle Forms and Reports.
-
Section 2.1.1, "Reviewing System Requirements and Specifications"
-
Section 2.1.3, "Reviewing Interoperability and Compatibility"
-
Section 2.1.4, "Understanding Oracle Fusion Middleware Concepts"
-
Section 2.1.5, "Obtaining the Oracle Fusion Middleware Software"
-
Section 2.1.6, "Installing Oracle Forms and Oracle Reports on Separate Servers"
-
Section 2.1.7, "Installing Oracle Forms and Reports in a New Oracle home"
-
Section 2.1.8, "Installing Oracle Forms and Reports as a Non-Default User"
2.1.1 Reviewing System Requirements and Specifications
Before performing any installation you should read the system requirements documentation to ensure that your environment meets the minimum installation requirements for the products you are installing.
The system requirements document covers information such as hardware and software requirements, database schema requirements, minimum disk space and memory requirements, and required system libraries, packages, or patches. This document can be found on the Oracle Fusion Middleware System Requirements and Specifications page.
2.1.2 Reviewing Certification Information
Before performing any upgrade or installation you should read the Oracle Fusion Middleware certification document for your particular release. It is located on the Oracle Fusion Middleware Supported System Configurations page.
2.1.3 Reviewing Interoperability and Compatibility
Before performing any upgrade or installation you should read the Oracle Fusion Middleware Interoperability and Compatibility Guide for Oracle Forms and Reports. This document contains important information regarding the ability of Oracle Fusion Middleware products to function with previous versions of other Oracle Fusion Middleware, Oracle, or third-party products. This information is applicable to both new Oracle Fusion Middleware users and existing users who are upgrading their existing environment.
2.1.4 Understanding Oracle Fusion Middleware Concepts
If you are new to Oracle Fusion Middleware, you should read Understanding Oracle Fusion Middleware to familiarize yourself with some of the concepts and terminology you will encounter.
2.1.5 Obtaining the Oracle Fusion Middleware Software
Depending on your specific needs, there are multiple places where you can obtain Oracle Fusion Middleware software. For details, see Oracle Fusion Middleware Download, Installation, and Configuration ReadMe Files page, where you can find the ReadMe file for your specific release.
To install and configure Oracle Forms and Reports, you will need to download the following software:
-
The installer for a certified version of Oracle WebLogic Server (FMW Infrastructure). Make sure you refer to the certification document (see Section 2.1.2, "Reviewing Certification Information") to determine which version of Oracle WebLogic Server (FMW Infrastructure) you should obtain.
-
The installer for Oracle Forms and Reports.
-
If you want to secure your Oracle Forms and Reports installation with Identity Management, you can also download Oracle Internet Directory with Oracle Access Management.
Make a note of the directory where you download each installer; you will need this information when it is time to run the installer for each product.
2.1.6 Installing Oracle Forms and Oracle Reports on Separate Servers
If you choose to install Oracle Forms and Oracle Reports on different servers, you must perform some manual configuration in order for these two products to be able to communicate properly with each other.
The instructions for doing so are available in "Communication Between Reports and Forms When Installed on Different Instances" in Oracle Fusion Middleware Publishing Reports to the Web with Oracle Reports Services.
2.1.7 Installing Oracle Forms and Reports in a New Oracle home
Oracle Forms and Reports must be installed inside an Oracle home directory, which is created when Oracle WebLogic Server is installed.
Oracle Forms and Reports must be installed in its own Oracle home directory that it does not share with any other Oracle Fusion Middleware products.
2.1.8 Installing Oracle Forms and Reports as a Non-Default User
On UNIX operating systems, the installation of Fusion Middleware products is owned and controlled as a known user (for example, "oracle"). The file permissions associated with this installation are configured to ensure the highest level of security possible, which by default are 700 (meaning all files are owned and accessible by the owner only).
Changing the default permissions settings will reduce the security of the installation and possibly your system. Therefore, making such a change is not recommended. If access to particular files or executables is required by other users, the UNIX sudo command (or other similar command) should be considered in lieu of changing file permissions.
Refer to your UNIX operating system Administrator's Guide or contact your operating system vendor if you need further assistance.
On Windows operating systems, the user must be a member of the Windows "Admin" group. This gives the user the proper permissions required to start and stop processes after the installation, including the Builders.
2.2 Installing Oracle WebLogic Server (FMW Infrastructure)
Oracle Forms and Reports requires Oracle WebLogic Server (FMW Infrastructure), which creates the Oracle home directory during installation. This section contains the following topics:
-
Section 2.2.1, "Planning Your Oracle home Location for Oracle Reports (Windows Only)"
-
Section 2.2.2, "Downloading the Correct Installer for your Operating System"
-
Section 2.2.3, "Finding Oracle WebLogic Server (FMW Infrastructure) Installation Instructions"
-
Section 2.2.4, "Stopping Node Manager Before Installing Oracle Forms and Reports (Windows Only)"
Make sure you read the Oracle Fusion Middleware certification document for your particular release to determine the minimum version of Oracle WebLogic Server (FMW Infrastructure) that is required. This document is located on the Oracle Fusion Middleware Supported System Configurations page.
2.2.1 Planning Your Oracle home Location for Oracle Reports (Windows Only)
If you are going to install Oracle Reports on a Windows operating system, make sure the path to your Oracle home directory is not too long. For more information, see Section C.3, "Verifying Environment Variable Lengths for Oracle Reports (Windows Only)".
2.2.2 Downloading the Correct Installer for your Operating System
See Section 2.1.5, "Obtaining the Oracle Fusion Middleware Software" for information on where to obtain your Oracle WebLogic Server (FMW Infrastructure) installer.
2.2.3 Finding Oracle WebLogic Server (FMW Infrastructure) Installation Instructions
For Oracle WebLogic Server (FMW Infrastructure) installation instructions, see "Running the Installation Program in Graphical Mode" in Installing and Configuring Oracle WebLogic Server and Coherence. The WebLogic Server installation must be completed so that a Oracle home directory is created; you do not have to create a WebLogic Server domain as the Oracle Forms and Reports installer will allow you to do this for your Oracle Forms and Reports products.
If you are installing on a Windows operating system, be sure to read Section 2.2.4, "Stopping Node Manager Before Installing Oracle Forms and Reports (Windows Only)" after your Oracle WebLogic Server (FMW Infrastructure) installation is complete.
2.2.4 Stopping Node Manager Before Installing Oracle Forms and Reports (Windows Only)
If you are installing Oracle Forms and Reports on a Microsoft Windows operating system, you must make sure that the Node Manager utility that was installed with Oracle WebLogic Server is stopped before you begin the installation:
-
Verify the Oracle WebLogic Server Node Manager utility is stopped. If it is running, kill the process.
-
Determine if the
nodemanager.propertiesfile is present in theWebLogic_Home\common\nodemanagerdirectory.-
If the
nodemanager.propertiesfile is not present, continue installing Oracle Forms and Reports. -
If the
nodemanager.propertiesfile does exist, open it and verify that theListenPortparameter is included and that it is set. If theListenPortparameter is not included or set, edit thenodemanager.propertiesfile so that it is similar to the following, whereNODE_MANAGER_LISTEN_PORTrepresents the port the Node Manager listens on, such as 5556:ListenPort=NODE_MANAGER_LISTEN_PORT
-
2.3 Installing Oracle Identity and Access Management
Your Oracle Forms and Reports installation can be protected with Identity Management (see Section 1.2, "Securing Oracle Forms and Reports With Identity Management"). If you choose to secure your Oracle Forms and Reports with Oracle Internet Directory and Oracle Access Manager, you must download and install these products if you do not already have them.
Oracle Identity and Access Management must be installed in a separate Oracle home directory from your Oracle Forms and Reports installation (see Section 2.1.7, "Installing Oracle Forms and Reports in a New Oracle home"). For performance reasons, Oracle recommends that Oracle Forms and Reports is installed on a separate machine from your Oracle Identity Management product.
Installation instructions for Oracle Identity and Access Management can be found in "Installing and Configuring Oracle Identity and Access Management" in Oracle Fusion Middleware Installation Guide for Oracle Identity Management.
2.4 Installing and Configuring Oracle Forms and Reports
This section contains information and instructions for installing Oracle Forms and Reports. The following topics are covered:
-
Section 2.4.1, "Running the rootpre.sh Script on IBM AIX Operating Systems"
-
Section 2.4.2, "Starting the Oracle Forms and Reports Installer"
-
Section 2.4.4, "Configuring Your Oracle Inventory (UNIX Only)"
-
Section 2.4.5, "Installing Using Oracle Universal Installer"
-
Section 2.4.8, "Configuring Reports Using the Configuration Wizard"
-
Section 2.4.9, "Configuring Form Builder Standalone 12c Using the Configuration Wizard"
2.4.1 Running the rootpre.sh Script on IBM AIX Operating Systems
If you are installing on an IBM AIX operating system, you must run the rootpre.sh script as the root user from the Disk1 directory before you start the installer. The rootpre.sh script should be run only once on a system, to load the right kernel extensions required for Oracle Database or Oracle Fusion Middleware.
Once the installer is started on IBM AIX, the following message appears:
 Answer 'y' if root has run 'rootpre.sh' so you can proceed with Oracle installation.
  Answer 'n' to abort installation and then ask root to run 'rootpre.sh'.

  Has 'rootpre.sh' been run by root? [y/n] (n)

  Answer 'y', if root has run 'rootpre.sh' so that you can proceed with Oracle installation.
  Answer 'n', to abort installation and then ask root to run 'rootpre.sh'.
To skip this message on systems where rootpre.sh has run before, set the SKIP_ROOTPRE environment variable to TRUE.
2.4.2 Starting the Oracle Forms and Reports Installer
To start the installer, go to the directory where you downloaded the Oracle Forms and Reports installer and unpacked the archive file. Switch to the Disk1 directory.
On Windows operating systems, double-click on the setup.exe file in the Disk1 directory.
On UNIX operating systems, use the runInstaller command:
cd unpacked_archive_directory/Disk1
./runInstaller
2.4.3 Viewing the Installation Log Files
The installer writes logs files to the Oracle_Inventory_Location/log (on UNIX operating systems) or Oracle_Inventory_Location\logs (on Windows operating systems) directory. Refer to Section C.2.1, "Installation Log Files" for more information about the log files and their contents.
2.4.4 Configuring Your Oracle Inventory (UNIX Only)
If you are installing on a UNIX operating system, and if this is the first time any Oracle product is being installed on your system with the Oracle Universal Installer, you will be asked to provide the location of an inventory directory. This is where the installer will set up subdirectories and maintain inventory data for each Oracle product that is installed on this system.
Use the inventory screens in Table 2-1 to configure the inventory directory and group information. For more help, select the screen name in the table, or click the Help button in the GUI.
Table 2-1 Inventory Directory and Group Screens
| Screen | Description |
|---|---|
|
Specify Inventory Directory |
Specify the Oracle inventory directory and group permissions for that directory. The group must have write permissions to the Oracle inventory directory. |
|
Inventory Location Confirmation |
Run the |
If you do not wish to use the Oracle central inventory, you can create a file called oraInst.loc and in this file, include the full path of the inventory directory of your choice. For example, a typical oraInst.loc file would contain the following:
inventory_loc=/home/username/oraInventory
inst_group=group
Then, you can start the installer and point to the oraInst.loc file. For example:
./runInstaller -invPtrLoc location_of_oraInst.loc_file
2.4.5 Installing Using Oracle Universal Installer
Follow these instructions to install Oracle Forms and Reports using Oracle Universal Installer. After invoking Oracle Universal Installer as described in Section 2.4.2, "Starting the Oracle Forms and Reports Installer":
-
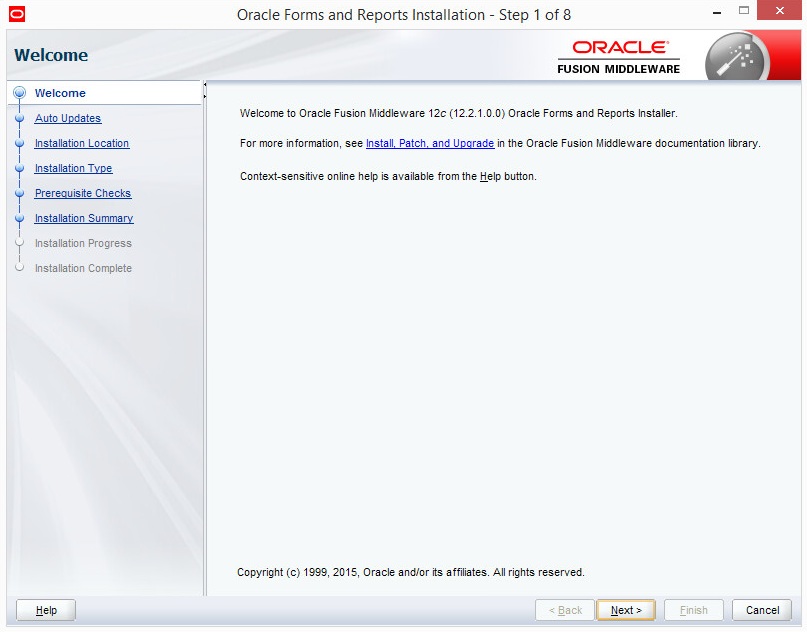
Welcome page. This page welcomes you to the installation. Click Next.
-
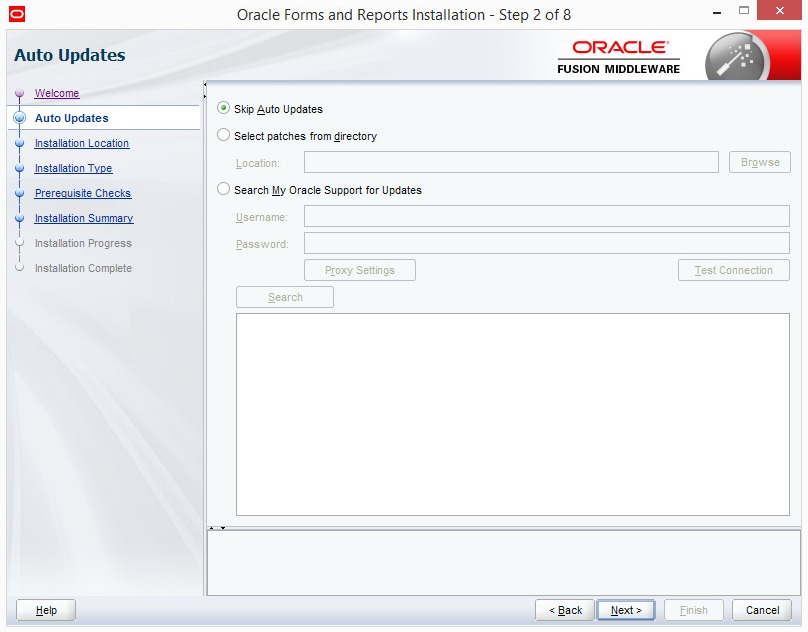
The Auto Updates page appears. This page enables you to choose to automatically receive software updates for your components from Oracle Corporation. make your choices, then click Next.
-
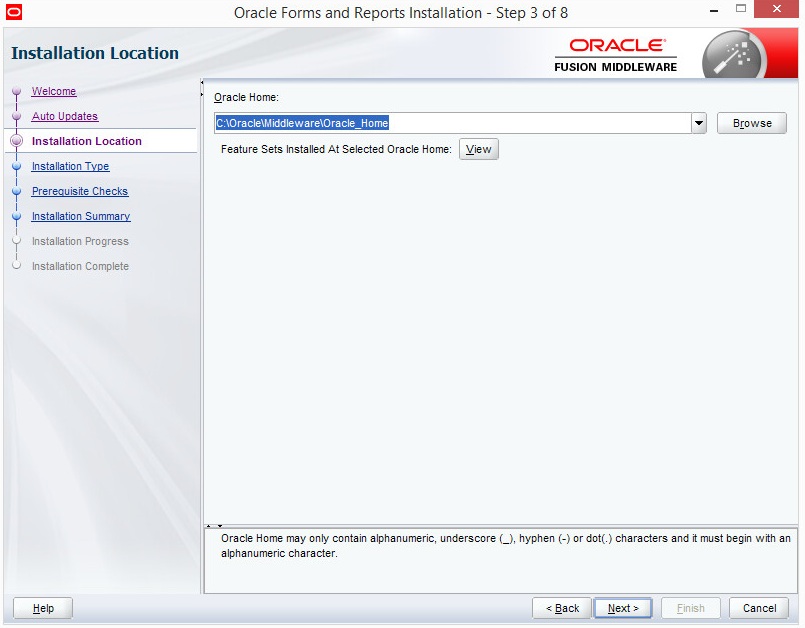
The Installation Location page appears. Specify the Oracle home location into which you want to install the product(s). Click Next.
-
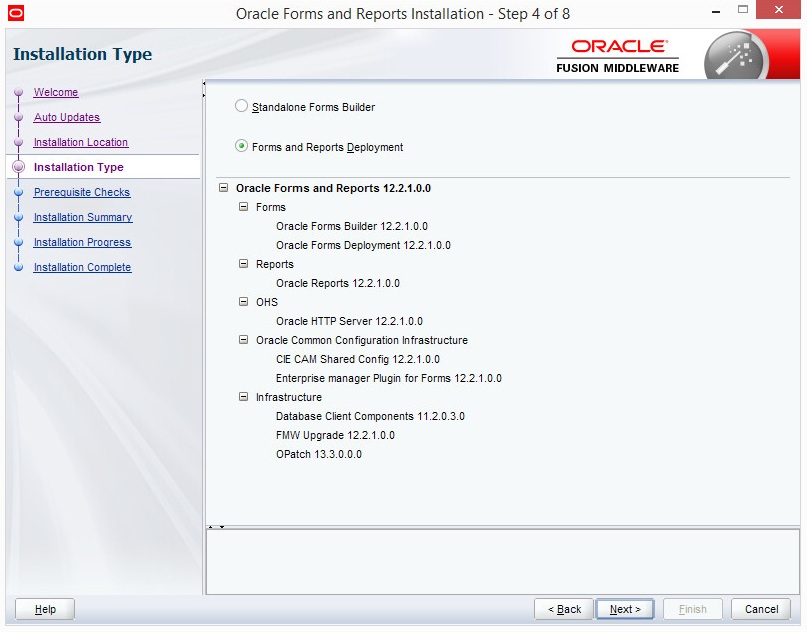
The Installation Type page appears. You can select Standalone Forms Builder if you want only that functionality, or choose Forms and Reports Deployment to install all of the products. Click Next.
-
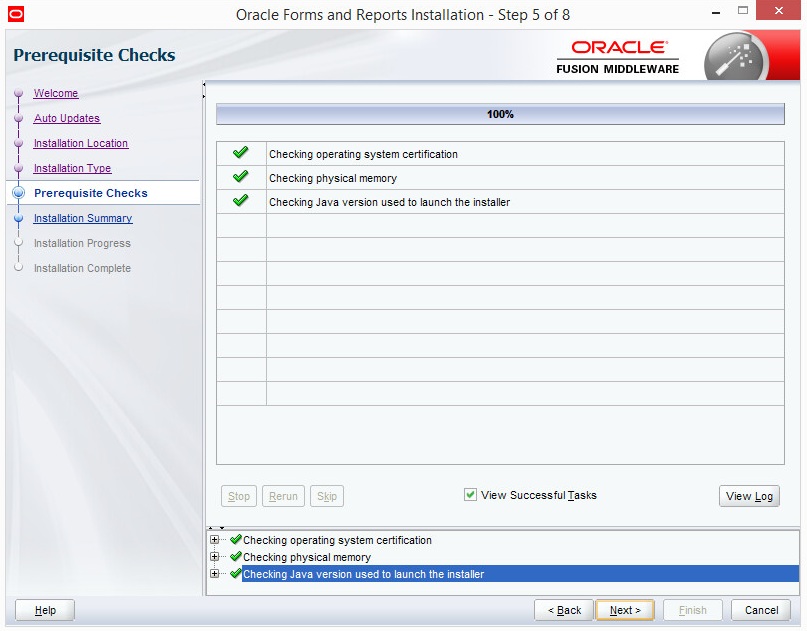
The Prerequisites Checks page appears. This pages shows you the progress of the system checking the prerequisites on your system prior to installation. If you are lacking any prerequisites, a message will appear telling you so. You do not need to take any actions on this page, though you can view the log from here. Click Next.
-
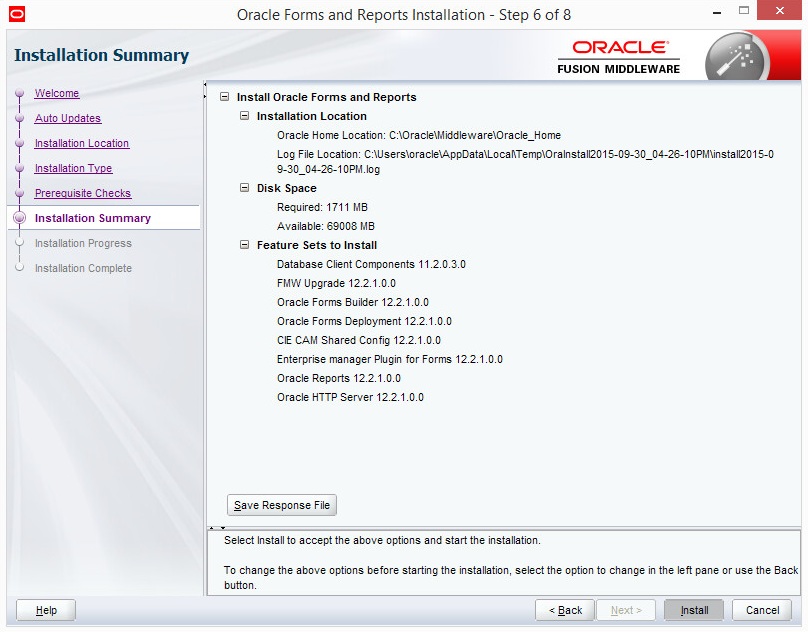
The Installation Summary page appears, showing you what components and features are about to be installed. If you need to make changes, click Back, otherwise, click Install to start the installation.
-
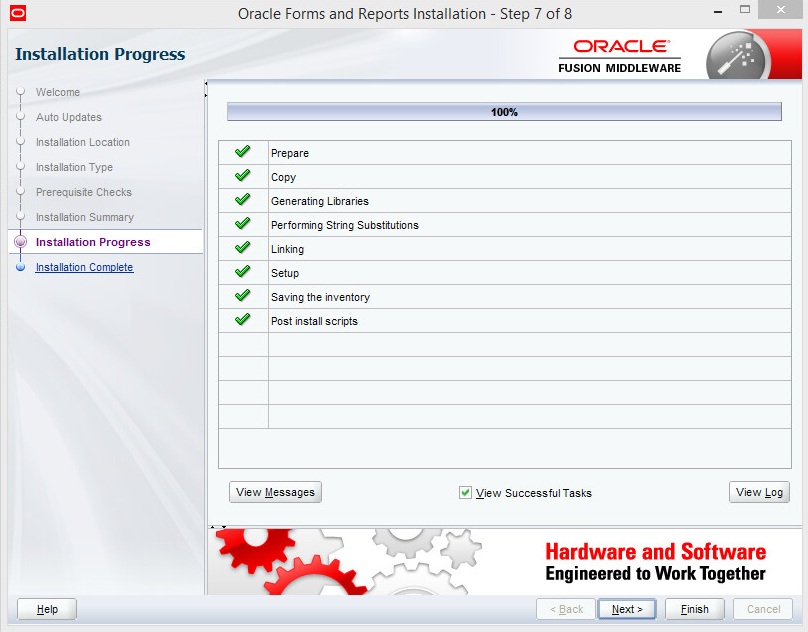
The Installation Progress page appears. This page shows you the progress of the installation, and will warn you if there are any problems.You can view messages and logs from this page, but typically no action is required here. When progress is complete, click Next (go to a Summary page). Alternatively, you can click Finish.
-
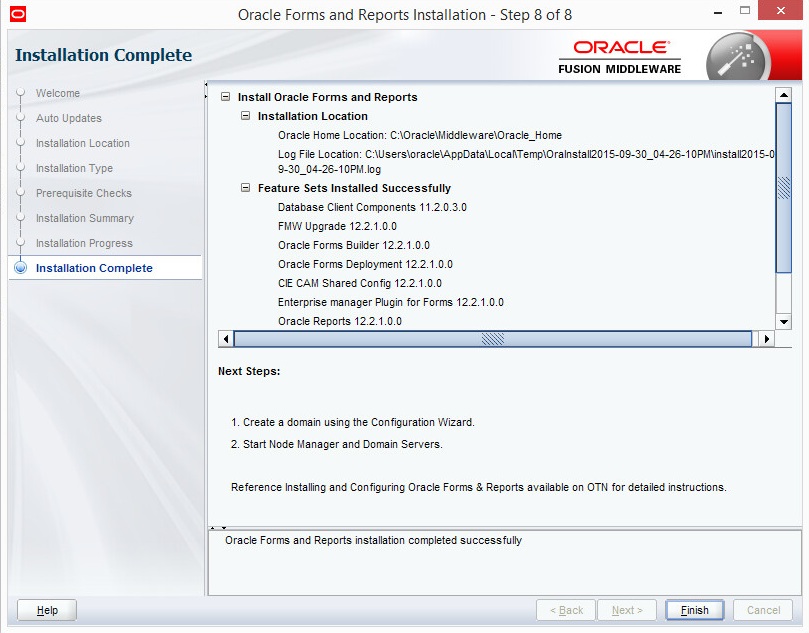
If you clicked Next, the Installation Complete page appears, showing you the components that have been installed. Click Finish.
2.4.6 Repository Creation Utility
Before proceeding to the next tasks, use the Repository Creation Utility (RCU). RCU is available with the Oracle Fusion Middleware Infrastructure distribution. Follow these steps.
-
Run
$FMW_HOME/oracle_common/bin/rcu.sh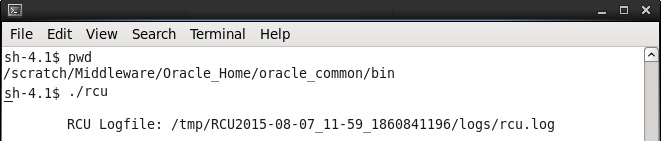
Description of the illustration ''rcu1.jpg''
-
The Welcome page appears. Click Next.
-
The Create Repository page appears. Select CreateRepository, and System Load and Product Load (default). Click Next.
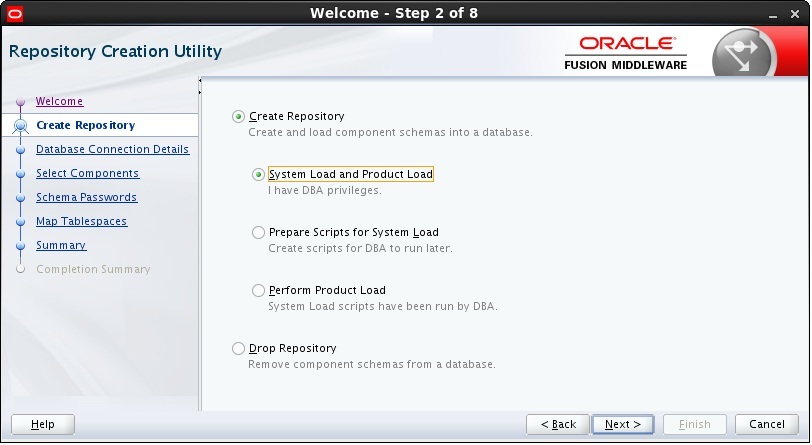
Description of the illustration ''rcu2.jpg''
-
The Database Connection Details page appears. Enter the RCU DB connection information as shown in the screen below. Click Next.
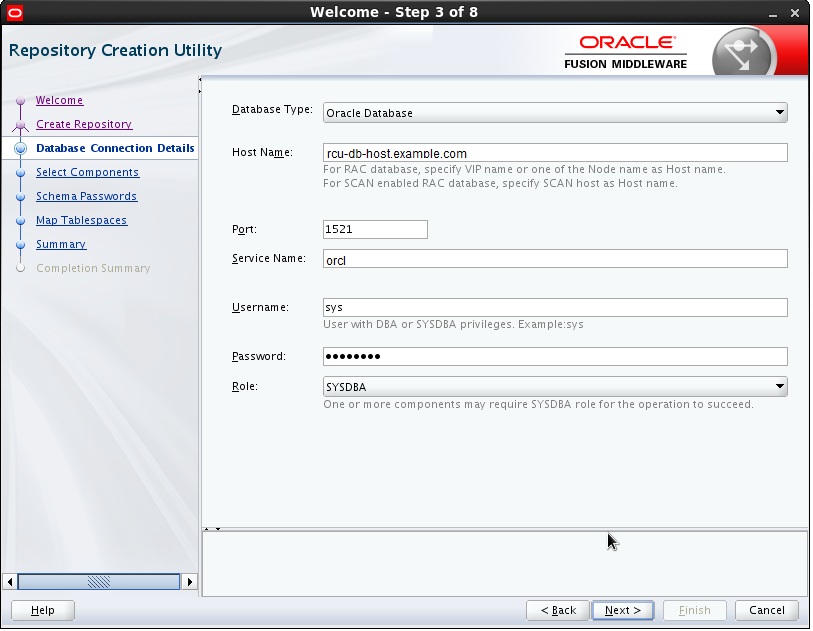
Description of the illustration ''rcu3.jpg''
-
The Checking Prerequisites box pops up. It shows the progress of prerequisites checking. When it is complete, click OK.

Description of the illustration ''rcu4.jpg''
-
The Select Components page appears. Select the Create newprefix radio button and provide a schema prefix (such as DEMO). Select the following components: Oracle Platform Security Services, Audit Services, Audit Services Append and Audit Services Viewer. Click Next.

Description of the illustration ''rcu5.jpg''
-
The Checking Prerequisites box pops up. It shows the progress of prerequisites checking. When it is complete, click OK.
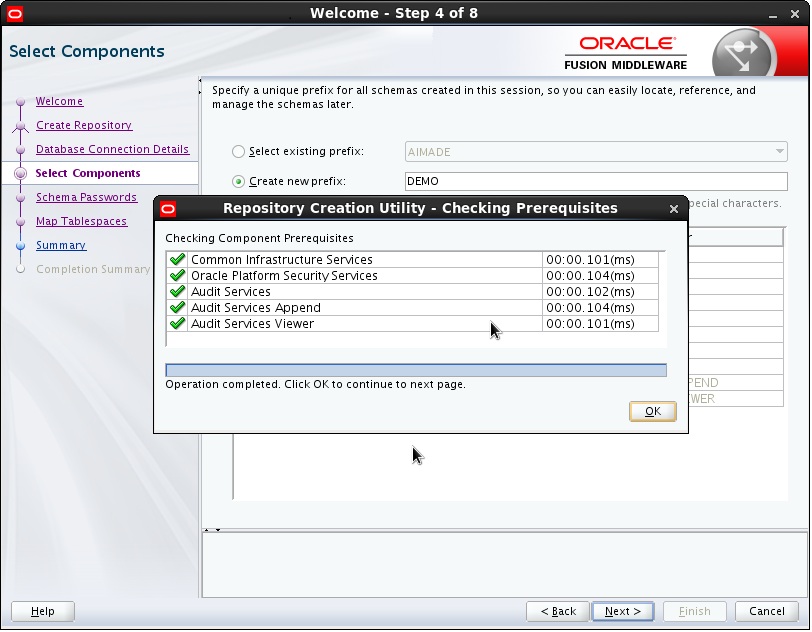
Description of the illustration ''rcu6.jpg''
-
The Schema Passwords page appears.Leave the default Use same passwords for all schemas radio button selected, and enter the password in the Password field. Click Next.
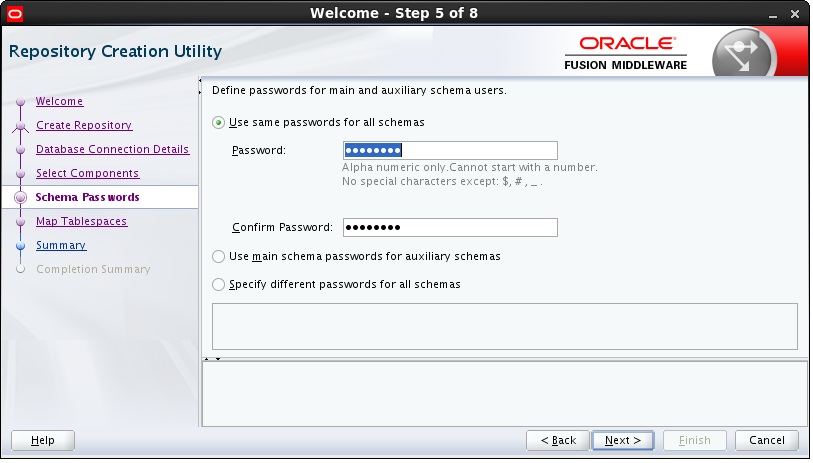
Description of the illustration ''rcu7.jpg''
-
The Map Tablespaces page appears. Mp action is required. Click Next.
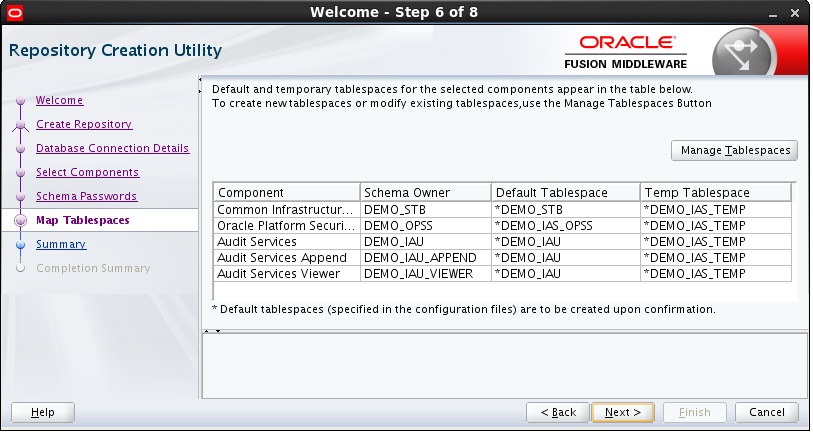
Description of the illustration ''rcu8.jpg''
-
A Repository Creation Utility box pops up, requiring your confirmation. Click OK.
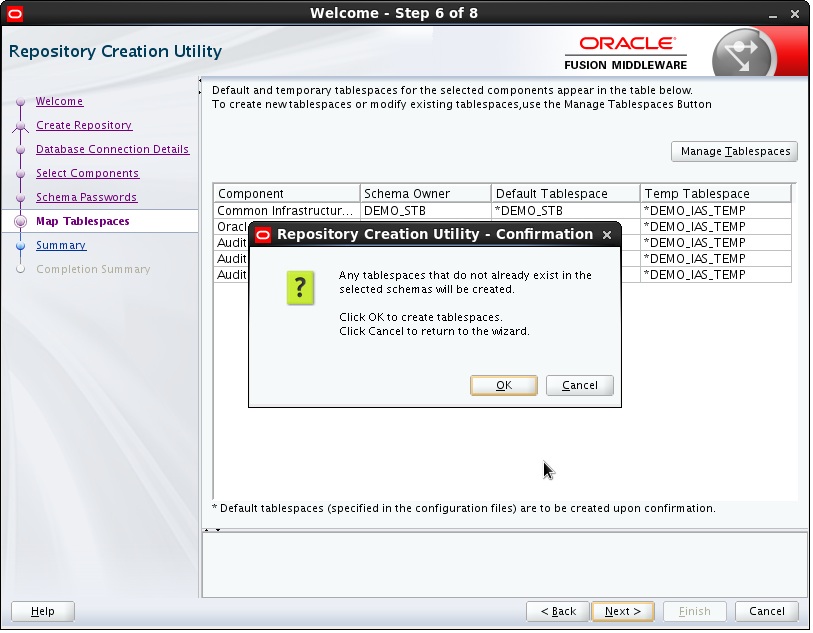
Description of the illustration ''rcu9.jpg''
-
A Creating Tablespaces pop up appears, showing the progress of tablespace creation. Click OK, then Next.
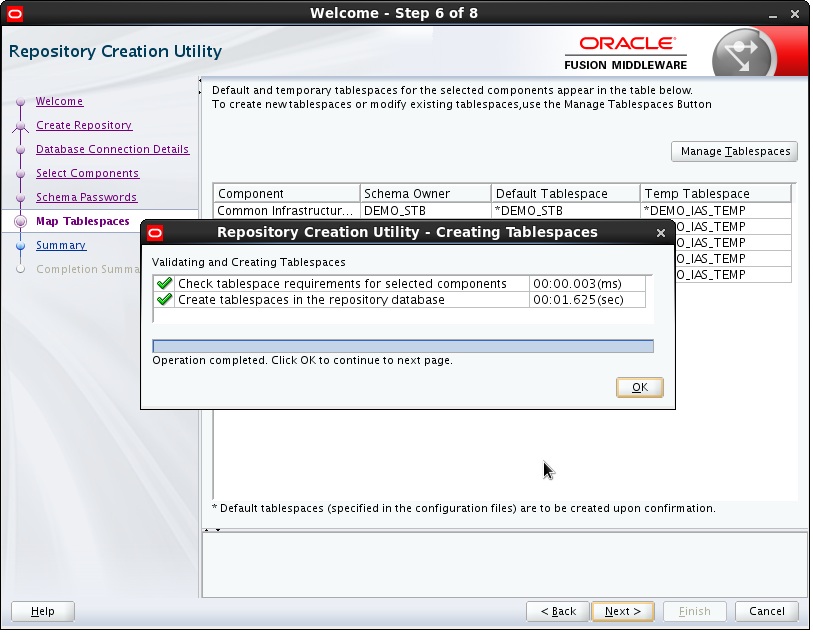
Description of the illustration ''rcu10.jpg''
-
The Summary page appears, showing your actions and choices. Click Create.
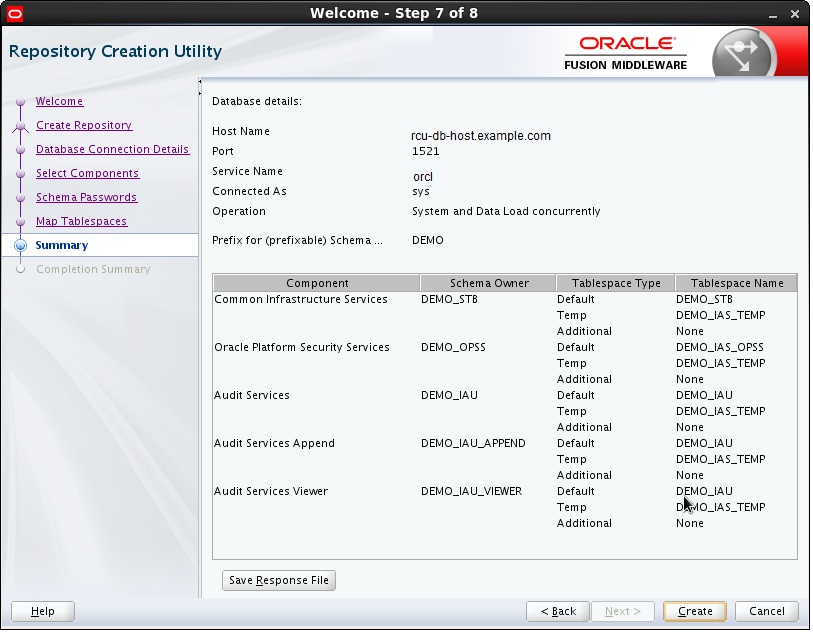
Description of the illustration ''rcu11.jpg''
-
A System Load progress box appears, showing progress.The box will disappear when complete.
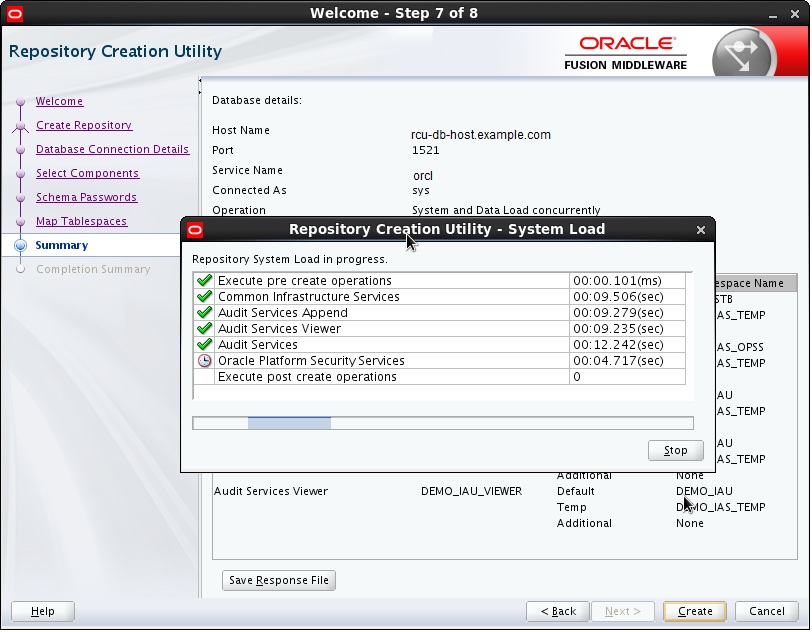
Description of the illustration ''rcu12.jpg''
-
Click Close.
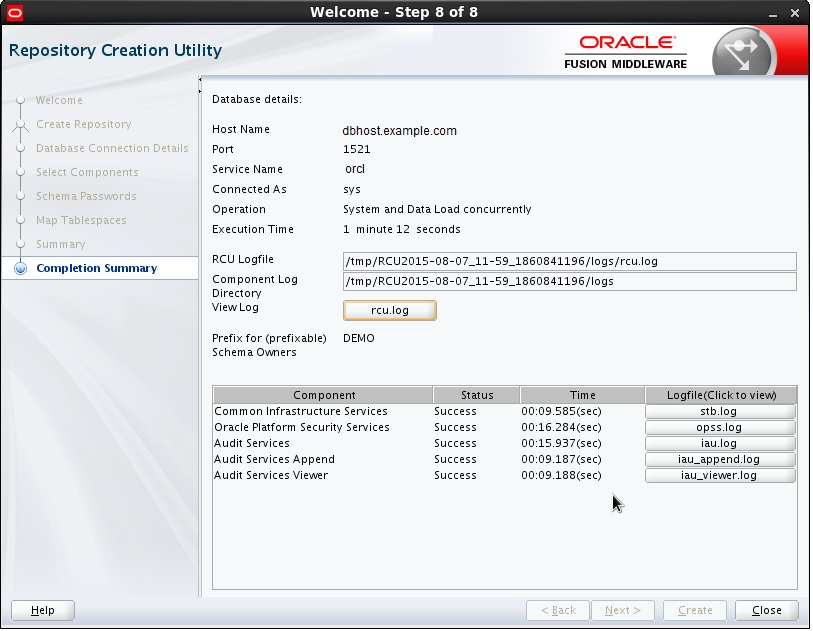
Description of the illustration ''rcu13.jpg''
2.4.7 Configuring Forms Using the Config Wizard
This section describes using the Config Wizard to configure Oracle Forms.
Note:
In order to complete the configuration, Windows DOS shells must be run with Administrator permissions and Unix shells must be owned by the same user who performed the installation (for example, oracle). Failure to follow this instruction may result in the configuration failing silently.Follow these steps to configure Oracle Forms using the Config Wizard.
-
Run the config wizard using config.sh located in the Run the config wizard using config.sh located in the
ORACLE_HOME/oracle_common/common/bindirectory.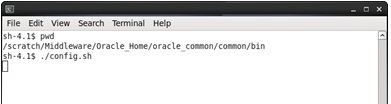
Description of the illustration ''config1.jpg''
The first screen of the Config Wizard appears (Create Domain).
-
Choose Create a new domain, and enter the desired domain home path.

Description of the illustration ''config2.jpg''
-
Click Next. The Templates screen appears. Keep the default selection (Create Domain using Product Templates), and select Oracle Forms – 12.2.1 components and Oracle Reports– 12.2.1components. Other templates can be selected. Refer to those individual component documents for details.
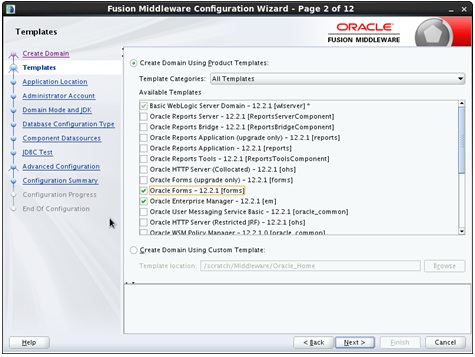
Description of the illustration ''config3.jpg''
-
Click Next. The Application Location screen appears. Keep the default value for Application location.
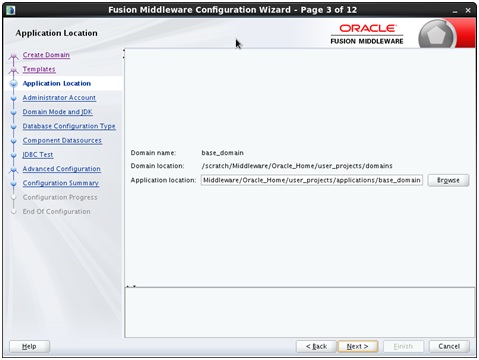
Description of the illustration ''config4.jpg''
-
Click Next. The Administrator Account screen appears. Enter the WebLogic Domain administration username and password. This information will be needed to access WebLogic Server Control and Fusion Middleware Control.
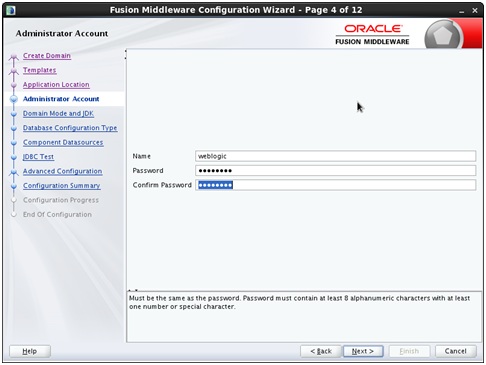
Description of the illustration ''config5.jpg''
-
Click Next. The Domain Mode and JDK screen appears. Select the Domain Mode (either Development or Production). For our purposes, select Production. Leave the default JDK selection as it appears, unless using another version of the JDK desired.
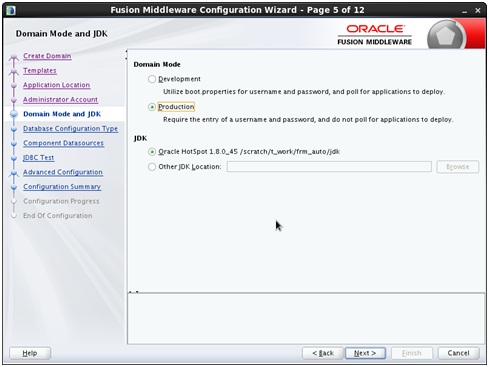
Description of the illustration ''config6.jpg''
-
Click Next. The Database Configuration Type screen appears. Enter the RCU DB connection information.
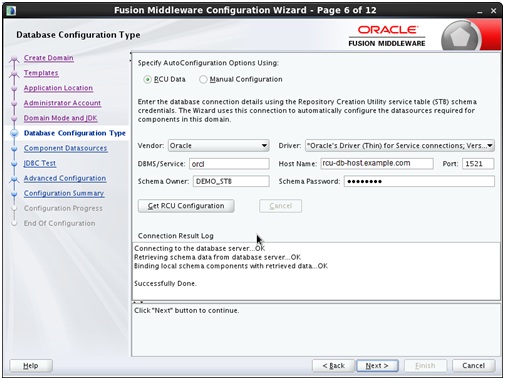
-
Select Vendor and Driver from the drop-down lists.
-
Enter DBMS/Service, Host Name and Port.
Enter the Schema Owner and Schema Password. Schema Owner value refers to the schemas created while running the Repository Creation Utility (RCU) in a previous step of the installation process. The trailing _STB should be included along with the prefix value chosen at the time RCU was run previously. For example, if the prefix you provided during the Repository creation was DEMO then the entry for Schema Owner will be DEMO_STB.
Click Get RCU Configuration. You should receive a success message.
-
-
Click Next. The JDBC Component Schema screen appears. These instructions assume each Repository schema uses the same password. If not, enter the correct schema passwords.
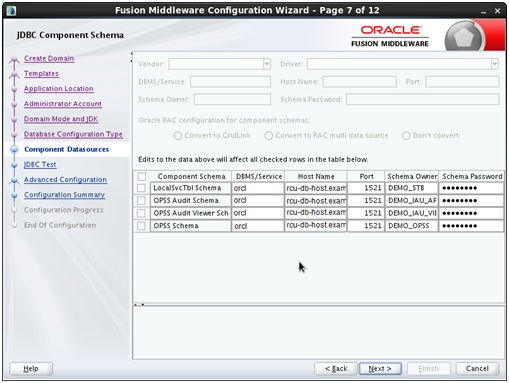
Description of the illustration ''config8.jpg''
-
Click Next. The JDBC Component Schema Test screen appears. The tests are run and the results given.
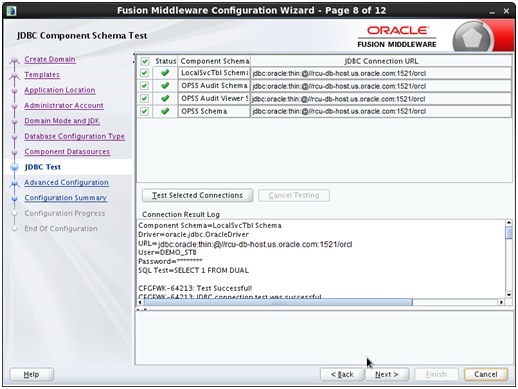
Description of the illustration ''config9.jpg''
-
Click Next. The Advanced Configuration screen appears. Select Managed Server, Clusters and Coherence and System Components.

Description of the illustration ''config10.jpg''
-
Click Next. The Administration Server screen appears. The default values will be appropriate for most cases. However, if desired the Administration Server port can be changed here.
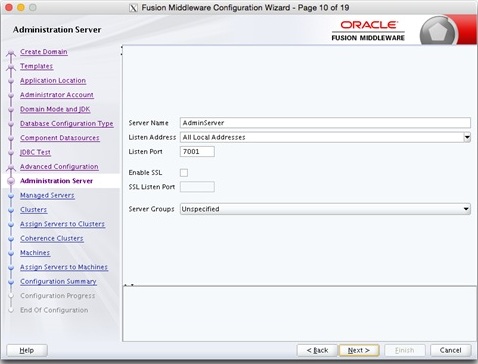
Description of the illustration ''config11.jpg''
-
Click Next. The Managed Servers screen appears. Verify that the Server Groups is set to FORMS-MAN-SVR (for Forms). The screen can also be used to add additional managed servers. Add REPORTS-APP-SERVERS (for Reports).

Description of the illustration ''config12.jpg''
-
Click Next. The Clusters screen appears. Default entries will be acceptable in most cases, unless adding new clusters is desirable.

Description of the illustration ''config13.jpg''
-
Click Next. The Assign Servers to Clusters screen appears. The default values will be appropriate for most cases. However, if new managed servers were added in the previous step, they should be added to the cluster here.
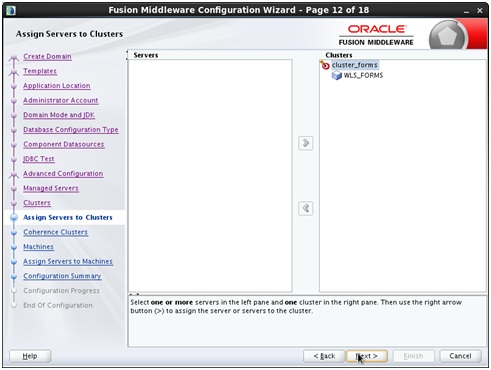
Description of the illustration ''config14.jpg''
-
Click Next. The Coherence Clusters screen appears. The default values will be appropriate for most cases.
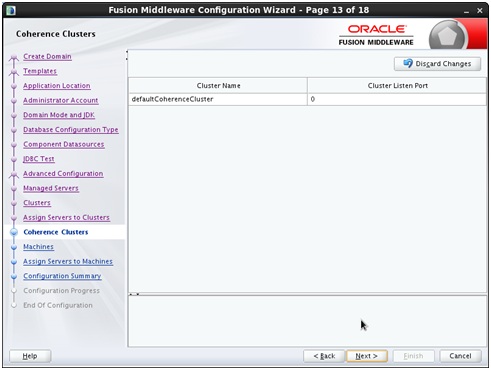
Description of the illustration ''config15.jpg''
-
Click Next. The Machines screen appears. You can use this screen to override the machine name or add addition Machine names for extend domain scenarios (add remote Forms nodes).
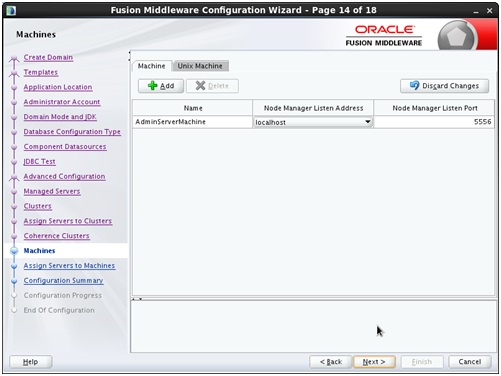
Description of the illustration ''config16.jpg''
-
Click Next. The Assign Servers to Machines screen appears. Move the AdminServer to the AdminServerMachine by clicking the > button.
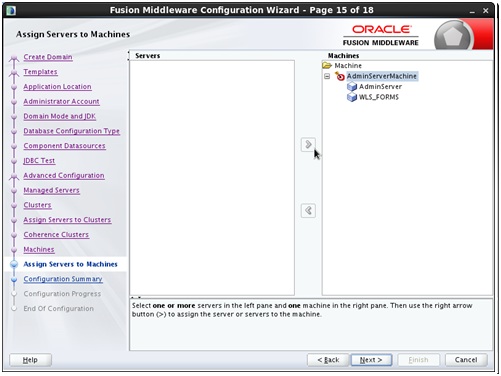
Description of the illustration ''config17.jpg''
-
Click Next. The System Components screen appears. The default values will be appropriate for most cases. You can add additional Forms or other System Component instances on this screen (for extend domain scenario). For example, if adding OHS, it would appear here.
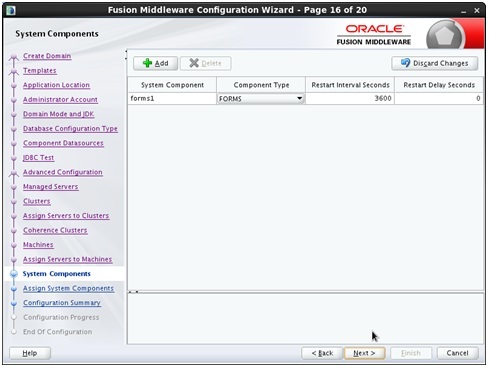
Description of the illustration ''config18.jpg''
-
Click Next. The Assign System Components screen appears. The default values will be appropriate for most cases.
Note:
In case of extend domain scenario; assign the Forms System Component to the relevant Machine.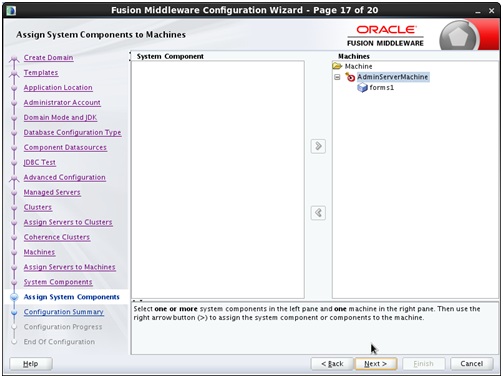
Description of the illustration ''config19.jpg''
-
Click Next. The Configuration Summary screen appears.
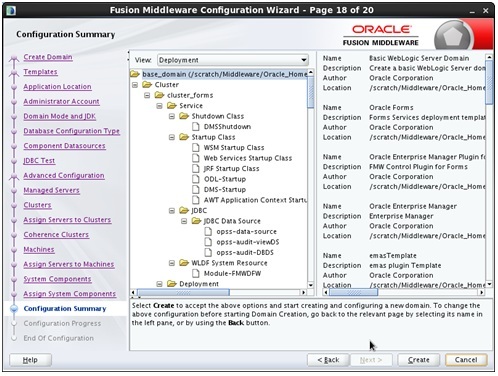
Description of the illustration ''config20.jpg''
-
Click Create. The Configuration Progress screen appears.
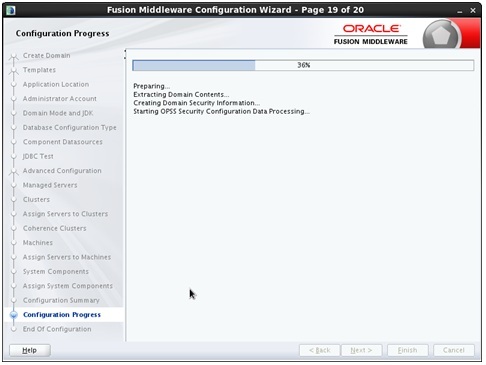
Description of the illustration ''config21.jpg''
-
Wait for this part of the configuration to complete. Depending on the location and performance of the Repository database, this process may take a few minutes. Click Finish. The End of Configuration screen appears.

Description of the illustration ''config22.jpg''
In order to complete the Configuration, Node Manager and the Admin Server must be successfully started.
On Unix/Linux platforms, the shell used to start these servers the first time, must be the installation owner's (for example, oracle).
On Microsoft Windows, the DOS shell used to start these servers the first time must have Administrator permissions. To enable an Administrator shell session, right-click on the Command Prompt shortcut and select Run as Administrator. The shell that opens will indicate that it has Administrator privileges in its title bar, as shown in the following figure.
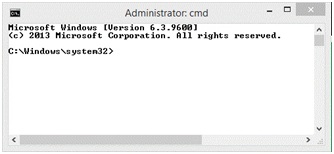
Description of the illustration ''config23.jpg''
2.4.8 Configuring Reports Using the Configuration Wizard
This section describes using the Config Wizard to configure Oracle Reports.
Note:
In order to complete the configuration, Windows DOS shells must be run with Administrator permissions and Unix shells must be owned by the same user who performed the installation (for example, oracle). Failure to follow this instruction may result in the configuration failing silently.Follow these steps to configure Oracle Reports using the Config Wizard.
-
Run the config wizard using config.sh located in the Run the config wizard using config.sh located in the
ORACLE_HOME/oracle_common/common/bindirectory. -
In the Create Domain page, choose Create New expanded domain, and enter the desired domain home path.
-
Click Next. The Templates screen appears. Select Reports Server, Reports Tools, Reports Bridge, Reports Application, and OHS. Skip Reports Upgrade Only Template; this is only used for upgrades.
-
Click Next. The Application Location screen appears. Keep the default value for Application location.
-
Click Next. The Administrator Account screen appears. Enter the WebLogic Domain administration username and password. This information will be needed to access WebLogic Server Control and Fusion Middleware Control.
-
Click Next. The Domain Mode and JDK screen appears. Select the Domain Mode (either Development or Production). For our purposes, select Production. Leave the default JDK selection as it appears, unless using another version of the JDK desired.
-
Click Next. The Database Configuration Type screen appears. Enter the RCU DB connection information.
-
Select Vendor and Driver from the drop-down lists.
-
Enter DBMS/Service, Host Name and Port.
Enter the Schema Owner and Schema Password. Schema Owner value refers to the schemas created while running the Repository Creation Utility (RCU) in a previous step of the installation process. The trailing _STB should be included along with the prefix value chosen at the time RCU was run previously. For example, if the prefix you provided during the Repository creation was DEMO then the entry for Schema Owner will be DEMO_STB.
Click Get RCU Configuration. You should receive a success message.
-
-
Click Next. The JDBC Component Schema screen appears. These instructions assume each Repository schema uses the same password. If not, enter the correct schema passwords.
-
Click Next. The JDBC Component Schema Test screen appears. The tests are run and the results given.
-
Click Next. The Advanced Configuration screen appears. Select Administration Server, Node Manager, Managed Servers, Clusters and Deployment and Services.
-
Click Next. The Administration Server screen appears. The default values will be appropriate for most cases.
-
Click Next. The Managed Servers screen appears. Create WLS_REPORTS. Verify that the Server Groups is set to REPORTS-APP-SERVERS. The Listen address is All Local Addresses. Add WLS_REPORTS to reports_cluster.
-
Click Next. The Clusters screen appears. Default entries will be acceptable in most cases, unless adding new clusters is desirable.
-
Click Next. The Assign Servers to Clusters screen appears. The default values will be appropriate for most cases. However, if new managed servers were added in the previous step, they should be added to the cluster here.
-
Click Next. The Coherence Clusters screen appears. The default values will be appropriate for most cases.
-
Click Next. The Machines screen appears. Add a machine, for example: AdminServerMachine (default).
-
Click Next. The Assign Servers to Machines screen appears. Add AdminServer and WLS_REPORTS to AdminServerMachine by clicking the > button. The Reports App is targeted to WLS_REPORTS by default.
Development Configuration can be used for development mode where sufficient system resources are not available. To do this, follow these steps:
-
In the Admin Server screen, in "Server groups" drop down list, select "REPORTS-APP-SVR" as one of the groups. This will configure AdminServer with reports.
-
The rest of the steps are the same as before.
Note:
One ReportsTools component is compulsory. Reports Server and Reports Bridge are optional.This configuration is not supported for use with production, multi-user environments. It is further not recommended in cases where sufficient system resources are available. This configuration should only be used on development environments where adequate resources such as system memory are limited.
Oracle Forms is not supported for use in this configuration.
-
-
Click Next. The System Components screen appears. The default values will be appropriate for most cases. You can add additional Forms or other System Component instances on this screen (for extend domain scenario). For example, if adding OHS, it would appear here.
-
Click Next. The Assign System Components screen appears. The default values will be appropriate for most cases.
Note:
In case of extend domain scenario; assign the Forms System Component to the relevant Machine. -
Click Next. The Configuration Summary screen appears.
-
Click Create. The Configuration Progress screen appears.
2.4.8.1 Provisioning a Machine
Follow these steps to provision a machine for Oracle Reports.
-
Start Node manager
$DOMAIN_HOME/bin/startNodeManager.sh -
Start Adminserver
$DOMAIN_HOME/bin/startWebLogic.sh -
Use WLST to create Reports Components
-
Create a reports tools targeted to machine 'AdminServerMachine' - <reportsToolsName>
-
Create a reports server targeted to machine 'AdminServerMachine' - <reportsServerName> (optional)
give credentials of adminserver to connect
connect("weblogic","welcome1", "localhost:7001")createReportsToolsInstance(instanceName='<reportsToolsName>', machine='AdminServerMachine')createReportsServerInstance(instanceName='<reportsServerName>', machine='AdminServerMachine')exit()
-
-
Start WLS_REPORTS
$DOMAIN_HOME/bin/startManagedWebLogic.sh WLS_REPORTS(Inprocess server starts)Create a reports tools targeted to machine 'AdminServerMachine'- reptools1
Create a reports server targeted to machine 'AdminServerMachine' - repsvr_<hostname>
2.4.8.2 Configure Reports Builder "Run to web"
To configure Reports Builder as "Run to web", follow these steps.
-
Locate the directory.
$DOMAIN_HOME/servers/WLS_REPORTS/tmp/_WL_user/reports_12.2.1/<random_number>/war -
Add it to builder config file (below element, <pluginParam> as shown below.
$DOMAIN_HOME/config/fmwconfig/components/ReportsToolsComponent/reptools1/rwbuilder.conf</pluginParam><webLayout port="9002" docroot="/scratch/rrpai/wls2/user_projects/domains/test1/servers/WLS_REPORTS/tmp/_WL_user/reports_12.2.1/5ah7s6/war"/>The port is the OHS port. If OHS is not there, it should be the WLS_REPORTS port.
2.4.9 Configuring Form Builder Standalone 12c Using the Configuration Wizard
Note:
In order to complete the configuration, Windows DOS shells must be run with Administrator permissions and Unix shells must be owned by the same user who performed the installation (for example, oracle). Failure to follow this instruction may result in the configuration failing silently.This process assumes that the Forms/Reports software has been successfully installed.
-
Install the Form Builder Standalone 12c software.
-
Launch the Form Builder Configuration assistant using one of the following methods:
-
Choose to run it at the end of the Form Builder Standalone software installation (by checking the box at the end of the installation that offers to launch the Configuration Assistant), Or
-
Launch the configuration tool later from the location $FMW_HOME/form/common/bin/config_builder.sh (config_builder.bat for MS Windows).
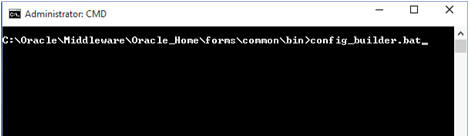
Description of the illustration ''cmd.jpg''
-
-
In the first screen of the Configuration Wizard, enter the Form Builder Instance path and Click Next.
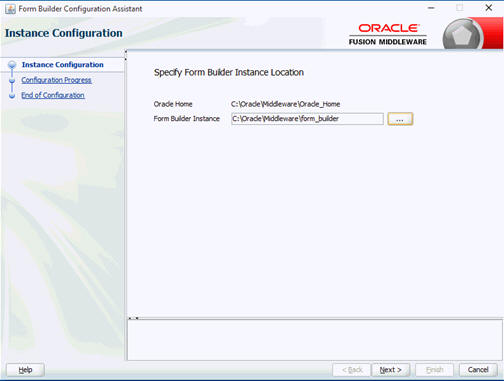
Description of the illustration ''instconfig.jpg''
-
Upon successful completion of the configuration, the following screen appears. Click Next.
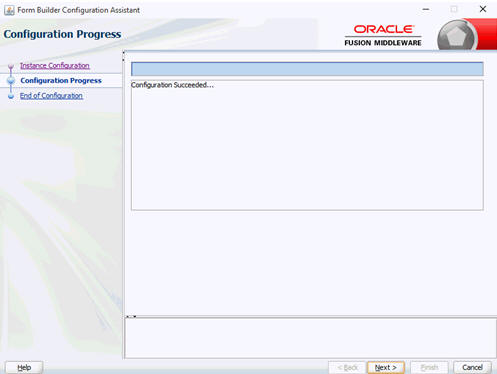
Description of the illustration ''configprogress.jpg''
-
Click Finish. The End of Configuration screen appears.
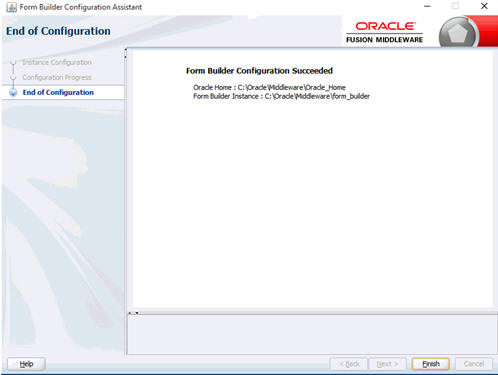
Description of the illustration ''endofconfig.jpg''