8 Creating and Managing Personal Pages
This chapter includes the following topics:
Permissions
To perform the tasks in this chapter, you need the application-level permission Pages: Create, Edit, and Delete Pages. Users with this permission can create and manage their personal pages in the Home portal.
8.1 About Personal Pages
Note:
The system administrator may choose to prohibit the creation of personal pages in the Home portal, allowing only the display of business role pages and system pages, over which you have less control.
With appropriate permissions, you can create, secure, edit, copy, and delete your own personal pages in the Home portal, and populate them with components and content such as Message Board, Events, Discussions, portlets, and documents.
By default, personal pages can be seen in the Home portal only by the user who created them, but users can also allow other users to see their personal pages (see Setting Security for a Personal Page). While individuals are primarily responsible for managing the content of their personal pages, a system administrator has the authority to administer all personal pages in WebCenter Portal administration, as described in Managing Personal Pages in Administering Oracle WebCenter Portal.
Personal pages are functionally similar to portal pages, but their purpose is different: personal pages are for an individual user's use in the Home portal, whereas portal pages are created by a portal manager for use by all members of a portal. For more information about the different types of pages in WebCenter Portal, see What Are Pages?
8.2 Creating a Personal Page in the Home Portal
After setting page creation defaults, you can create a personal page in the Home portal:
8.2.1 Setting Page Creation Defaults for Personal Pages
If your system administrator has made the option available, you can set page creation defaults to reduce the number of steps required to create a personal page in the Home portal. That is, you can specify the page style that is selected by default when you open the Create Page dialog. You can also select to bypass the Create Page dialog, which enforces the default page style.
The settings you establish for yourself override any page creation settings set by the system administrator.
To set personal page creation defaults:
- In the Home portal (see How do I access the Home portal?), open the Personalize Pages page.
Tip:
The way you access this page depends on the page template in use. For example, you may access it through an Actions
 menu.
menu. - On the Personalize Pages page, click Set Page Defaults to open the Set Page Defaults dialog (Figure 8-1).

8.2.2 Creating a Personal Page
Depending on how your portal navigation is implemented and the page template design in use, there may be several ways to create a personal page in your view on the Home portal.
To create a personal page in the Home portal:
- In the Home portal (see How do I access the Home portal?), click Create Page.
Tip:
The location of the Create Page link depends on the page template in use. For example, in a side navigation template, you may access it through an Actions menu. You can also find it on the Personalize Pages page.
WebCenter Portal will either:
Open the Create Page dialog (Figure 8-2).
Immediately create a new page with a default style, if specified in the Set Page Defaults dialog (see Setting Page Creation Defaults for Personal Pages).
Note:
Your system administrator can control the options that appear in the Create Page dialog, so your view may differ from that depicted in Figure 8-2. Additionally, the system administrator can set an attribute on a custom page style that determines whether a newly created page that is based on that style opens in page edit mode or page view mode.
Tip:
Make sure that the page style you select does not contain any content publishing components. Content publishing is not supported in personal pages. Built-in page styles that you can use are Product Information, Blank, Blog, Portal, Wiki, and Web Information.

8.3 Changing the Layout of a Personal Page
When you create a new page, the first page of the wizard enables you to select a page style for the page. Every page style includes a default layout, which you can modify in the page editor.
Note:
With the exception of the Wiki, Blog, and Web Page page styles, pages based on the built-in page styles allow you to modify the default layout in the page editor, selecting a new built-in or custom layout.
To change the page layout for a personal page:
- Click the Page Properties icon (Figure 8-3) to open the Page Properties dialog.
Figure 8-3 Page Properties Icon

- On the Layout tab (Figure 8-4), click the Layout menu and select one of the available layouts. The selections show both built-in and custom layouts that are listed on the application-level Shared Assets page.
For more information about page layout, see Working with Page Layouts in Building Portals with Oracle WebCenter Portal.
Figure 8-4 Changing Page Layout: Layout Menu

Description of "Figure 8-4 Changing Page Layout: Layout Menu"
8.4 Changing Display Options for a Personal Page
Page display options provide a means of specifying a page background color and image, and applying additional CSS encoding to the page.
Note:
To access other page parameters, which you can use in wiring pages to page components, see Adding or Modifying Parameters for a Personal Page. To set properties that control page security settings, see Setting Security for a Personal Page.
To change display options for a personal page:
- Next to the page name, click the Page Properties icon (Figure 8-5) to open the Page Properties dialog.
Figure 8-5 Page Properties Icon
- In the Page Properties dialog, click the Display Options tab (Figure 8-6).
Figure 8-6 Page Properties: Display Options

Description of "Figure 8-6 Page Properties: Display Options" - To set the page background color, open the color picker next to Background Color, and select a background color for the page in one of the following ways:
Select a color by clicking it.
Enter the color's RGB equivalent in the Background Color field.
Tip:
Enter RGB values in the format
RRGGBBor#RRGGBBorr,g,bCreate a custom color by clicking Custom Color in the picker and selecting a color and a saturation level using the selector and the slider provided (Figure 8-7).
Click OK to enter the color value in the Background Color field.

8.5 Adding or Modifying Parameters for a Personal Page
Page parameters allow communication between components and the pages that contain them by providing a means of storing values for passing to page components that have been configured to consume them.
For example, imagine a page that contains stock ticker and stock news components. You want the ticker and the news components to both consume the same parameter value so that they both show information for the same company.
Note:
If you change a page parameter value, the new value is immediately saved. You cannot revert back to the prior value. Therefore, take note of parameter values before you change them in case you want to set them back to their original values.
To add or modify page parameters for a personal page:
- Click the Page Properties icon (Figure 8-8) to open the Page Properties dialog.
Figure 8-8 Page Properties Icon
- On the Parameters tab, modify existing parameters as required or add new parameters by clicking Add a page parameter (Figure 8-9). In the Add a Page Parameter dialog, enter a new parameter Name, then click Add Parameter to add the parameter to the Parameters tab, with a value entry field. Optionally, enter a value for the new parameter.
All parameter values provide access to an Expression Language (EL) editor, which you can use to select or specify a variable value instead of a constant value. Click the
 icon next to a parameter, then select to open the editor. If you need EL assistance, an application developer can provide an EL expression; see Expression Language Expressions in Developing WebCenter Portal
Assets and Custom Components with Oracle JDeveloper.
icon next to a parameter, then select to open the editor. If you need EL assistance, an application developer can provide an EL expression; see Expression Language Expressions in Developing WebCenter Portal
Assets and Custom Components with Oracle JDeveloper.

8.6 Managing Your Personal Pages
To manage a personal page, or a page you have permission to manage:
- In the Home portal (see How do I access the Home portal?), open the Personalize Pages page (Figure 8-10).
Tip:
The way you access this page depends on the page template in use. For example, you may access it through an Actions
menu. - On the Personalize Pages page, select a page, then choose any of the actions available to you on the Actions menu for the page (Figure 8-11):
Figure 8-11 Personalize Pages: Page Actions Menu

Description of "Figure 8-11 Personalize Pages: Page Actions Menu"Edit Page. Open a page that you own or have privileges to edit in the page editor. See Editing a Personal Page.
Reset Layout. Remove all of your user customizations from a selected page. This action removes such personal changes as rearrangement, resizing, or collapsing of components in only your view of the page. See Resetting All of Your User Customizations on a Page in the Home Portal.
Copy Page. Make a personal copy of a page. See Copying a Personal Page.
Rename Page. Rename a page that you own or have privileges to manage. See Renaming a Personal Page.
Set Page Access. Add or remove access to a page by user name or role. See Setting Security for a Personal Page.
Edit Source. View and edit page source in HTML. See Editing the Source of a Personal Page
Delete Page. Delete a page that you own or have privileges to manage. See Deleting a Personal Page.
Send Mail. Send a link to a page that you own or have privileges to manage. See Sending Mail with a Link to a Personal Page.
About This Page. View information about a page. See Viewing Information About a Personal Page.

8.7 Setting Security for a Personal Page
By default, the personal pages you create in the Home portal are accessible only to you and the system administrator. You can set page security to allow other users to view and work with your personal pages or revoke access.
When you grant access to one of your personal pages to another user, the other user must deliberately show the page in their view of the Home portal. The user must take this step for each session because shared pages are not automatically shown on login.
See Also:
For information about how to show a hidden page, see Showing or Hiding Pages in Your View of the Home Portal.
You may want to open a personal page to many users, but limit the exposure of a particular page component to a specific user, a user group, or to users who are assigned a specific application role. This is an advanced task, described in Setting Component Access in Building Portals with Oracle WebCenter Portal.
You can grant or revoke access to a personal page as described in the following sections:
8.7.1 Accessing Personal Page Security Using the Page Properties Dialog
To access security settings for a personal page using the Page Properties dialog:
- Next to the page name, click the Page Properties icon (Figure 8-12).
Figure 8-12 Page Properties Icon
- In the Page Properties dialog, click the Security tab (Figure 8-13).
Figure 8-13 Personal Page: Security Tab in Page Properties Dialog

Description of "Figure 8-13 Personal Page: Security Tab in Page Properties Dialog"
8.7.2 Accessing Personal Page Security Using the Set Page Access Dialog
To access security settings for a personal page using the Set Page Access dialog:
- In the Home portal (see How do I access the Home portal?), open the Personalize Pages page.
Tip:
The way you access this page depends on the page template in use. For example, you may access it through an Actions
menu. - On the Personalize Pages page, click the Actions icon for the page, and choose Set Page Access to open the Set Page Access dialog (Figure 8-14).
Figure 8-14 Set Page Access Dialog: Personal Page

Description of "Figure 8-14 Set Page Access Dialog: Personal Page"
8.7.3 Setting Personal Page Security
To set security on a personal page in either the Page Properties dialog or the Set Page Access dialog:
- To grant page access permissions to all public users (that is, users who have not logged in to WebCenter Portal) click Add Public Access.
The role
anonymous-roleis added under Role or User with default View access to the page (Figure 8-15).Figure 8-15 Authenticated and Public User Read Access to a Page

Description of "Figure 8-15 Authenticated and Public User Read Access to a Page" - To grant page access permissions to selected users and roles, click Add Access to open the Add Access dialog (Figure 8-16).
- In the Set Page Access dialog, set the Page Access permissions as desired for each user or role (Table 8-1).
Table 8-1 Page Access Privileges in the Set Page Access Dialog
Page Access Role or User Permissions  View Page
Access the page for viewing, but cannot perform any other actions on the page. Other permissions do not implicitly include this privilege
 Edit Page
Edit the page using the page editor. This includes adding, rearranging, and deleting content; renaming the page; and changing page properties. This permission additionally requires the View Page permission.
 Delete Page
Delete the page. This permission additionally requires the View Page permission.
 Perform All Page Actions
Perform all actions on the page.
 Personalize Page
Adjust a user's own view of a page. This includes rearranging page content, collapsing and restoring page content, and removing page content. This permission additionally requires the View Page permission.
Tip:
By default, all authenticated users and user roles that you add are granted page view access. The other access privileges must be explicitly granted.

8.8 Editing a Personal Page
When you edit a personal page, you can add or remove content, set properties on content and on the page itself, and perform additional customizations that affect the view of everyone who has access to the page.
To edit a personal page:
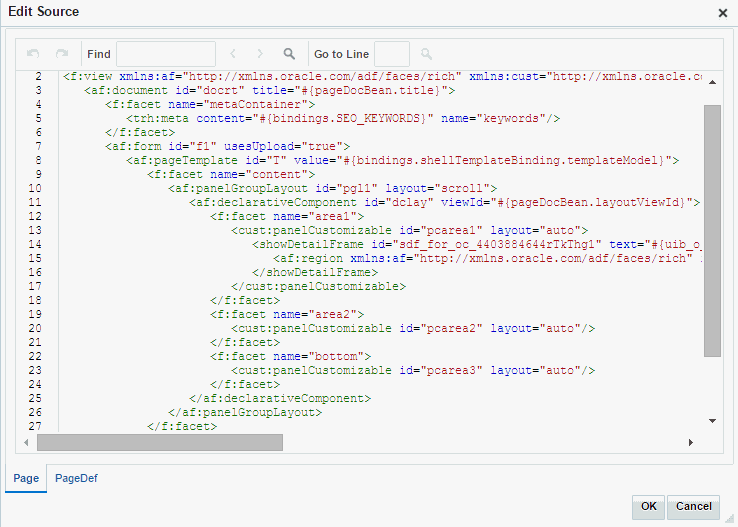
8.9 Editing the Source of a Personal Page
You can edit the source of a personal page without opening the page in the page editor.
To edit the source of a personal page:
- In the Home portal (see How do I access the Home portal?), open the Personalize Pages page.
Tip:
The way you access this page depends on the page template in use. For example, you may access it through an Actions
menu. - On the Personalize Pages page, click the Actions icon for the page, and choose Edit Source to open the Edit Source dialog (Figure 8-17).
Figure 8-17 Personal Page: Edit Source
8.10 Copying a Personal Page
When you copy a page, all content from the original page is also copied. The copy opens in the page editor so that you can start immediately making adjustments to the copy.
Note that a copy does not also include the original page's access settings. You must set access on the copy as a new page (see Setting Security for a Personal Page).
To copy a personal page:
- In the Home portal (see How do I access the Home portal?), open the Personalize Pages page.
Tip:
The way you access this page depends on the page template in use. For example, you may access it through an Actions
menu.
8.11 Renaming a Personal Page
When you rename a page, any pretty URLs that use the old name will be broken. Also note that system pages, such as the Announcements, Lists, and Events pages, cannot be renamed.
To copy a personal page, or a page you have permission to manage:
- In the Home portal (see How do I access the Home portal?), open the Personalize Pages page.
Tip:
The way you access this page depends on the page template in use. For example, you may access it through an Actions
menu.
8.12 Sending Mail with a Link to a Personal Page
If you own or have manage permissions on a page in the Home portal, you can send other users a link to the page.
To send mail to other users populated with a link to a personal page:
- In the Home portal (see How do I access the Home portal?), open the Personalize Pages page.
Tip:
The way you access this page depends on the page template in use. For example, you may access it through an Actions
menu.
8.13 Viewing Information About a Personal Page
To view information about a personal page:
- In the Home portal (see How do I access the Home portal?), open the Personalize Pages page.
Tip:
The way you access this page depends on the page template in use. For example, you may access it through an Actions
menu.
8.14 Deleting a Personal Page
To delete a personal page:
- In the Home portal (see How do I access the Home portal?), open the Personalize Pages page.
Tip:
The way you access this page depends on the page template in use. For example, you may access it through an Actions
menu.