29 Introducing Developer Tools Features in Eclipse
In the WebCenter Sites-integrated Eclipse IDE, you can create projects, workspaces, and a variety of views, export and import data, and do much more.
Topics:
29.1 About the Oracle WebCenter Sites Perspective
All Developer Tools functionality in Eclipse is grouped under the Oracle WebCenter Sites perspective. However, you do not have to open the perspective to work with WebCenter Sites components. These components are available as long as Eclipse is integrated with a WebCenter Sites instance.
To open the Oracle WebCenter Sites perspective, select Window, then select Open Perspective, then Other, and then Oracle WebCenter Sites.
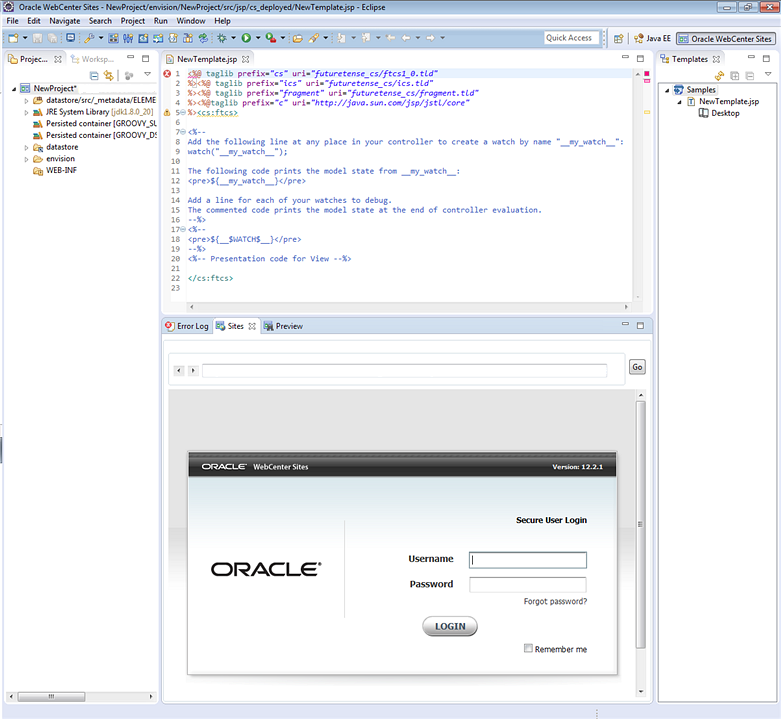
The following figure shows the Oracle WebCenter Sites perspective:
Figure 29-1 Oracle WebCenter Sites Perspective
Description of "Figure 29-1 Oracle WebCenter Sites Perspective"
-
Project Explorer and Sites Work (displayed in the left navigation pane)
-
Templates View (displayed in the right navigation pane)
-
Error Log, Sites UI, and Sites Preview Browser (displayed on the bottom of the Eclipse IDE)
-
Wizards (displayed in the WebCenter Sites toolbar, at the top of the Eclipse IDE)
-
Sites Log
-
Sites Logging Configuration
-
Sites Developer Reference
See About Developer Tools Viewsand Understanding Projects and Workspaces in Eclipse.
29.2 Understanding the Configuration Form
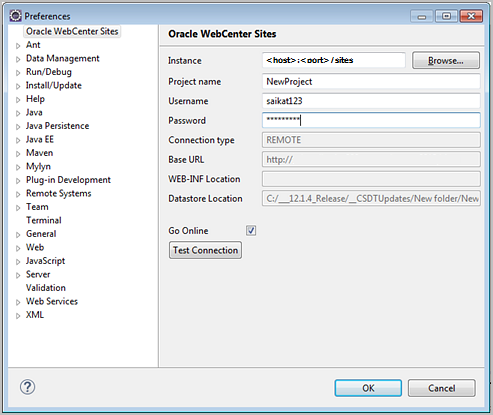
The configuration form opens automatically the first time you access a WebCenter Sites-integrated Eclipse. In this form you specify the WebCenter Sites instance with which you want to work.
On subsequent access, you can open the configuration form by selecting the ConfigurePreference wizard on the WebCenter Sites toolbar.
The configuration form requires the path to the WebCenter Sites installation directory, a WebCenter Sites user that is part of the RestAdmin group, and a project name for the WebCenter Sites instance. After you fill in all the required information, Developer Tools determines several other parameters for your WebCenter Sites instance, showing them in read-only fields. In addition, the Test Connection button enables you to determine whether Developer Tools is connected to the specified WebCenter Sites instance. The Go Online checkbox provides you the option of working online or offline. If you deselect this box, you will still have access to all the WebCenter Sites vies in Eclipse, however, you will not be able to create or edit WebCenter Sites resources. Click OK to create the project. If you chose to work online, clicking OK also logs you in to the WebCenter Sites instance and refreshes all the WebCenter Sites views.
29.3 Understanding Projects and Workspaces in Eclipse
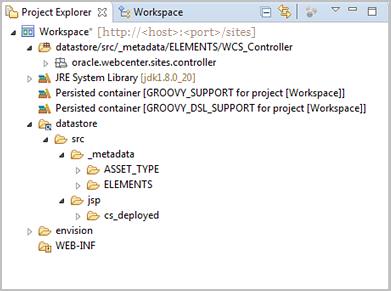
Each WebCenter Sites instance that you access through Eclipse is assigned an Eclipse project. The Eclipse project's folder is displayed in the Project Explorer view. You’ll need this project for tracking Developer Tools workspace items. Only one project is created by default for each WebCenter Sites instance and only one WebCenter Sites instance can be serviced by a project.
Note:
The main purpose of the project is to facilitate information tracking and process Eclipse events. Projects are managed by the Developer Tools plug-in. Do not open, close, or modify the project.
Each Eclipse project includes the following elements:
-
datasource: This folder is linked to the location to which all your data is exported. For local connections, this folder is linked directly to theconfigfolder under<sites-home>in your file system. For remote connections, this folder is created inside the project (envision) folder, which is linked to the datastore of the WebCenter Sites instance to which you are connected. -
src: By default, Developer Tools provides you with onesrcfolder which contains all the Controller assets you have exported from WebCenter Sites. The resources in this folder can be checked in to a version control system. This folder remains empty until you export Controllers from WebCenter Sites to your Eclipse workspace. -
WEB-INF: This folder contains links to the current WebCenter Sites instance'sWEB-INFfolder. For remote connections, you must manually link this folder to theWEB-INFfolder for the WebCenter Sites instance to which you are connected. See How to Enable Code Completion for Remote Hosts.
This figure shows a sample Eclipse project folder.
29.4 About Developer Tools Views
Several different views are available to help you preview different aspects of your site. For instance, you can preview code-related resources, assets, template assets in their hierarchy, pages, and even Admin and Contributor interfaces in an embedded browser.
See these topics about the views available in Developer Tools:
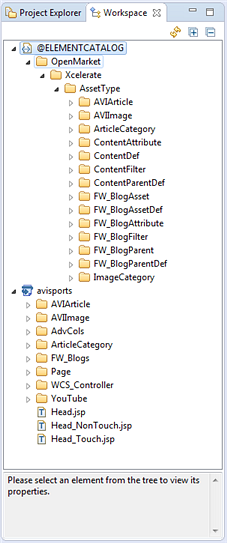
29.4.1 Workspace
This view provides access to code-related resources. The resources are grouped according to their site affiliation. When you select a resource, a quick summary of that resource is shown in the text box at the bottom of the view.
Right-click a resource in the tree to view the available management options. The options that are displayed depend on the resource you select:
-
Show Metadata: Shortcut to the
.main.xmlfile, which contains the metadata of the selected item. -
Site Entry: View the resource's site entry, share the site entry with other sites, create a new site entry, and delete a site entry.
-
Share: Manage the sites with which this resource is associated.
-
Properties: Manage properties of this resource, such as cache criteria and default arguments.
-
Delete: Delete this resource.
29.4.2 Log Viewer
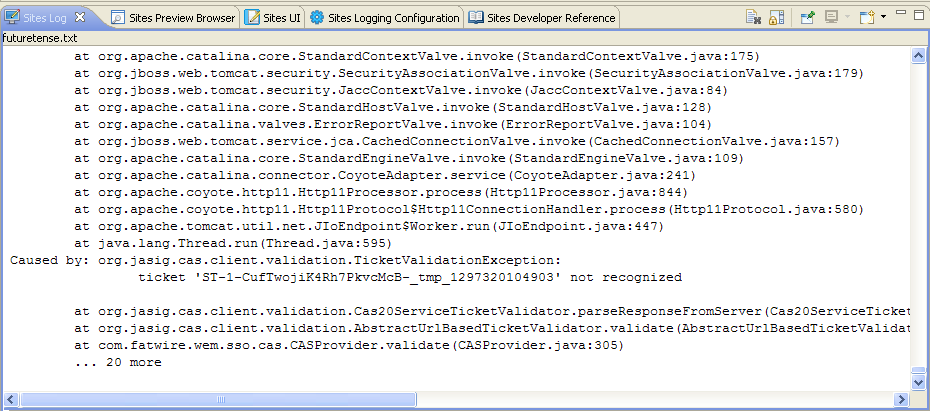
This view shows a dynamically updating record of the WebCenter Sites log file. This view can be used to monitor the behavior of your Eclipse-integrated WebCenter Sites instance.
29.4.3 Templates View
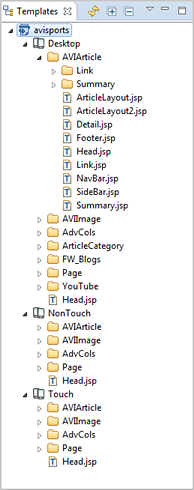
This view provides a hierarchical view of the Template assets you created in Eclipse and any Template assets you exported from WebCenter Sites into Eclipse. Click the Sort option to group templates by either their associated device groups or sites.
The following figure shows the Template view in the Eclipse IDE.
29.4.4 Preview View
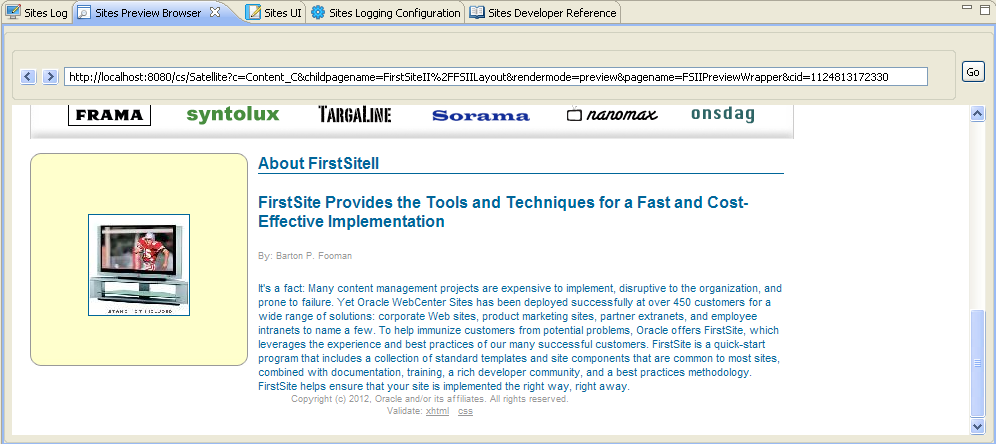
This view provides a quick way to preview pages. To preview a web page with this view, enter the URL of the page in the address bar and press Enter or click Go. To refresh the current page, use the Ctrl + R keyboard shortcut or click Go.
29.4.5 Sites View
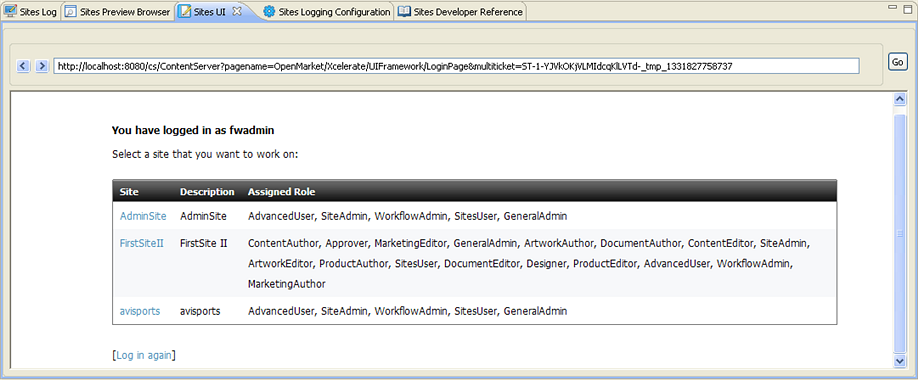
This view shows the Admin and Oracle WebCenter Sites: Contributor interfaces in an embedded browser. This is equivalent to using either the Admin interface or Contributor interface in a standalone browser.
29.4.6 Controllers View
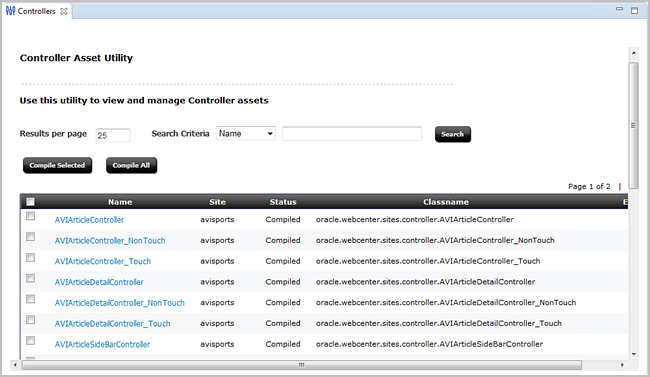
This view shows the Controller Asset Utility form, which is used to view and manage Controller assets.
This form is also available in the Admin interface (select the General Admin tree, expand Admin, then System Tools, and then double-click Controller).
Figure 29-9 Controllers View
29.4.7 Logging Configuration View
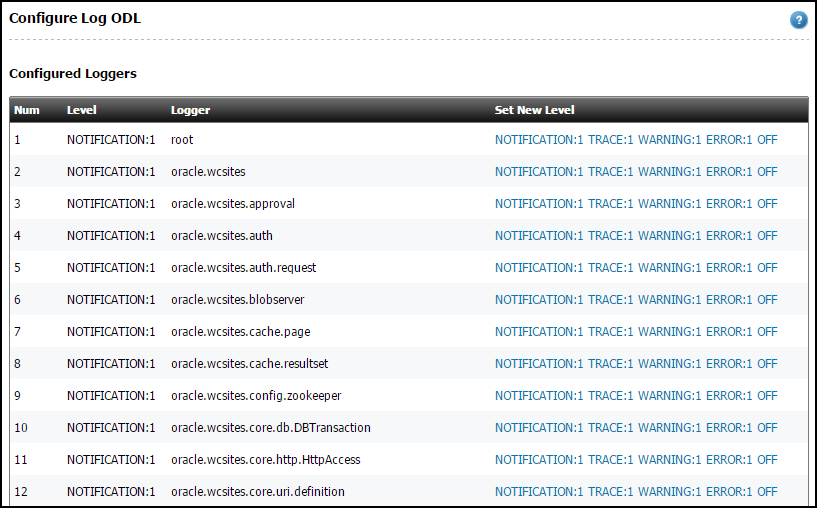
If your WebCenter Sites system is using ODL, this view shows a dynamically updating Configure Log ODL form. The Configure Log ODL form enables you to view current loggers, change logger levels, add new loggers, and search logs.
See Using the Configure Log ODL Tool in Administering Oracle WebCenter Sites.
29.4.8 Developer Reference View
This view contains tabs for Tag Reference for Oracle WebCenter Sites, Java API Reference for Oracle WebCenter Sites, and Java API Reference for Oracle WebCenter Sites: Visitor Services.
29.4.9 Wizards
Wizards can be invoked from either the Oracle menu or the WebCenter Sites toolbar. They enable you to create code-based WebCenter Sites resources.
The following wizards are available: Create New Template, Create New Controller, Create New Element, Create New SiteEntry, Create New Element Catalog Entry, and Create New SiteCatalog Entry.
29.5 Data Synchronization (Export/Import) Tool
This tool lets you synchronize resources in your workspace with those in your WebCenter Sites instance, and vice versa.
The data synchronization tool, accessible from the SynchUp wizard on the WebCenter Sites toolbar, provides you with two tabs:
29.5.1 Export (Sync Resources to Workspace from WebCenter Sites)
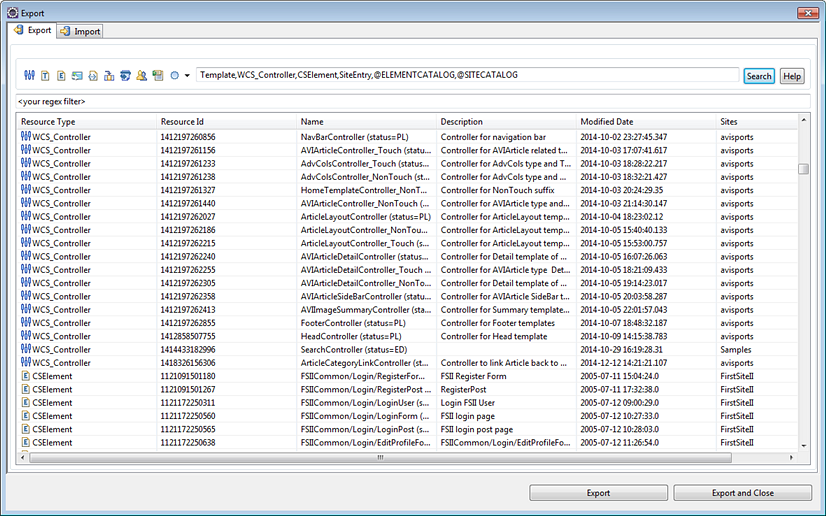
The Export tab is used to export data from the IDE-integrated WebCenter Sites to your Developer Tools workspace. In the process, Developer Tools serializes selected resources (transforms database representations into files) and copies the serialized representation to the Developer Tools workspace. You then can modify the resources in Eclipse.
The following figure shows the Export tab in the Synchronize Data form:
To export items from WebCenter Sites to your workspace:
29.5.2 Import (Sync Resources to WebCenter Sites from the Workspace)
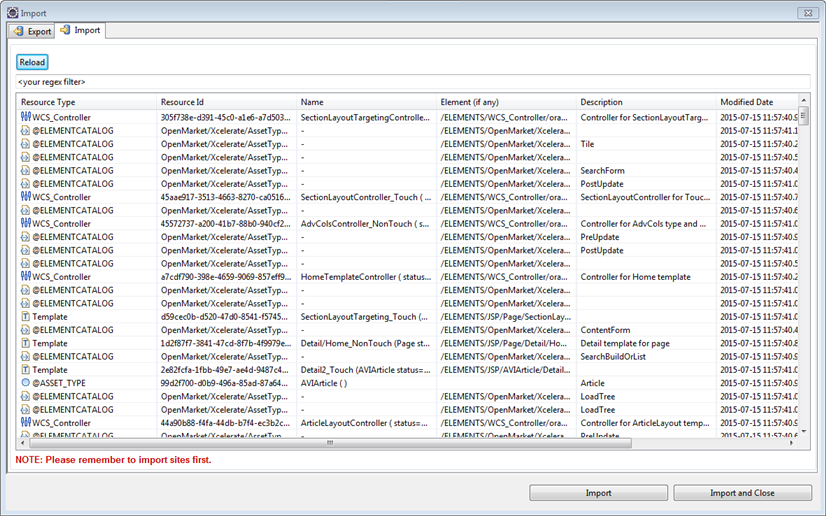
The Import tab is used to import resources from your Developer Tools workspace into the IDE-integrated WebCenter Sites. In the process, Developer Tools transforms the selected resource to its native WebCenter Sites representation and copies it to the WebCenter Sites database.
The following figure shows the Import tab in the Synchronize Data form.
To import items into WebCenter Sites from the Workspace:
- Select the items you want to import. To narrow down the list of items, go to the regex search bar and enter the name of the asset type you are searching for.
- Click Import and Close.
