Adding a New Parameter
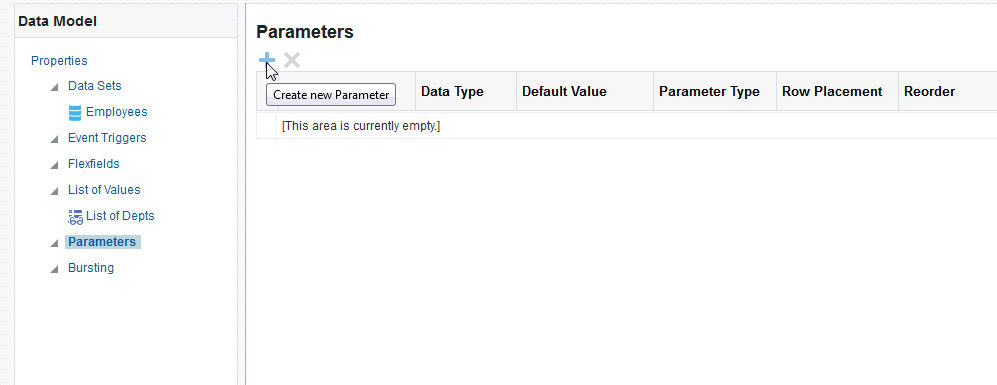
Create a new parameter by assigning it a name and other properties.
The parameter name you choose must not exceed the maximum length allowed for an identifier by your database. Refer to your database documentation for identifier length limitations.
Supported types are:
-
Text - Allows the user to enter a text entry to pass as the parameter. See Creating a Text Parameter.
-
Menu - Presents a list of values to the user. See Creating a Menu Parameter.
-
Date - Passes a date parameter. The Data Type must also be Date. See Defining a Date Parameter.
Default parameter values are also used to preview the report output when you design report layouts using Oracle BI Publisher Layout Editor.
BI Publisher supports parameters that are of type text entry or menu (list of values) but not both. You cannot define a combination parameter that enables a user to enter a text value or choose from a menu list of values.
You can configure row placement at the report level. The report definition supports additional display options for parameters. For more information, see Configuring Parameter Settings for the Report in Report Designer's Guide for Oracle Business Intelligence Publisher.
Creating a Text Parameter
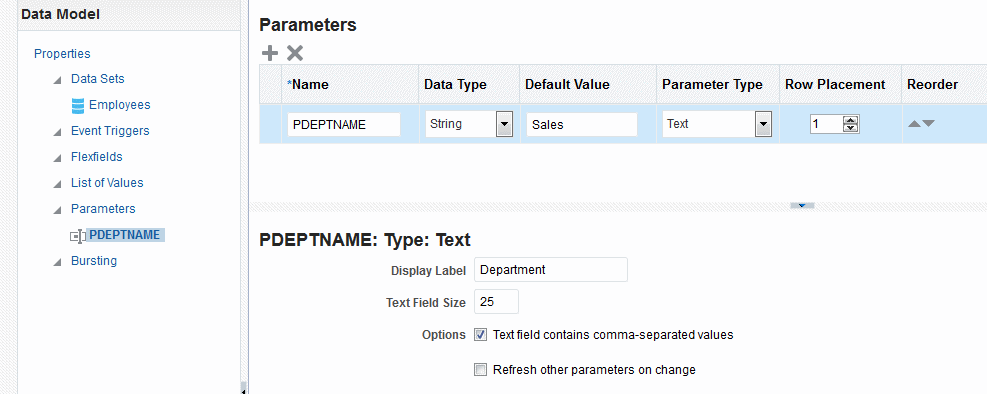
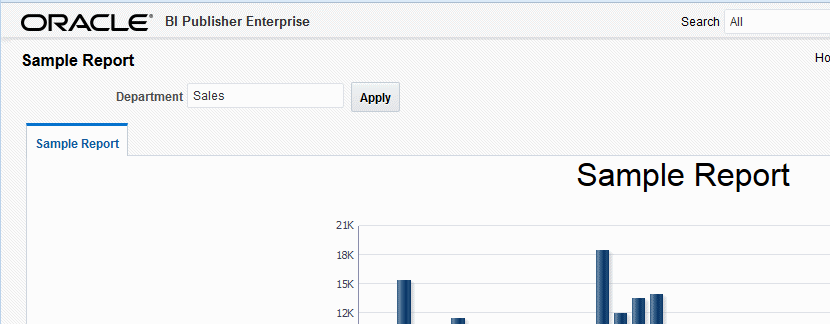
The Text type parameter provides a text box to prompt the user to enter a text entry to pass as the parameter to the data source.
The figure below shows a text parameter definition.
The figure below shows how the Department parameter displays to the report consumer.
Creating a Menu Parameter
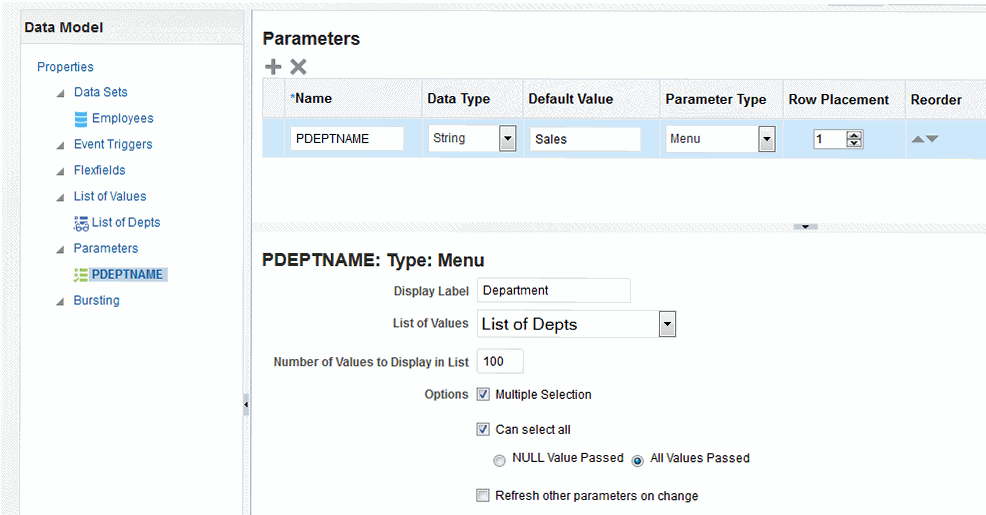
A Menu type parameter presents a list of values to the user.
You must define the list of values first. See Adding Lists of Values. The Menu type parameter supports the data types of String and Integer only.
The Menu parameter definition includes various options, as shown in the figure below.
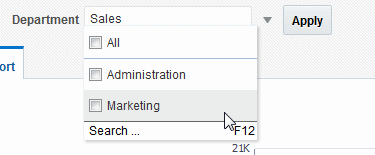
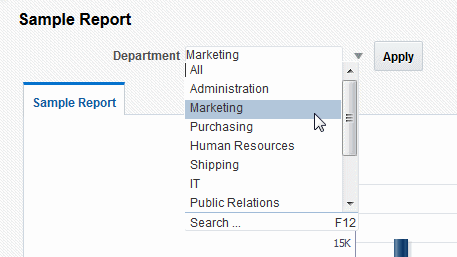
The figure below shows how the Department menu type parameter displays to the report consumer when multiple selection is not enabled.
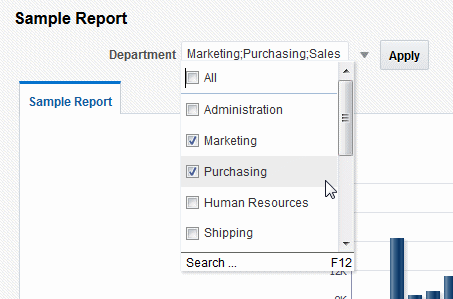
The figure below shows how the Department menu type parameter displays to the report consumer when multiple selection is enabled.
Customizing the Display of Menu Parameters
The display of menu parameters in the report can be further customized in the report definition.
Menu type parameters support the additional display option as a static list of checkboxes or radio buttons. For more information, see Configuring Parameter Settings for the Report in Report Designer's Guide for Oracle Business Intelligence Publisher.
Defining a Date Parameter
The Date type parameter provides a date picker to prompt the user to enter a date to pass as the parameter to the data source.
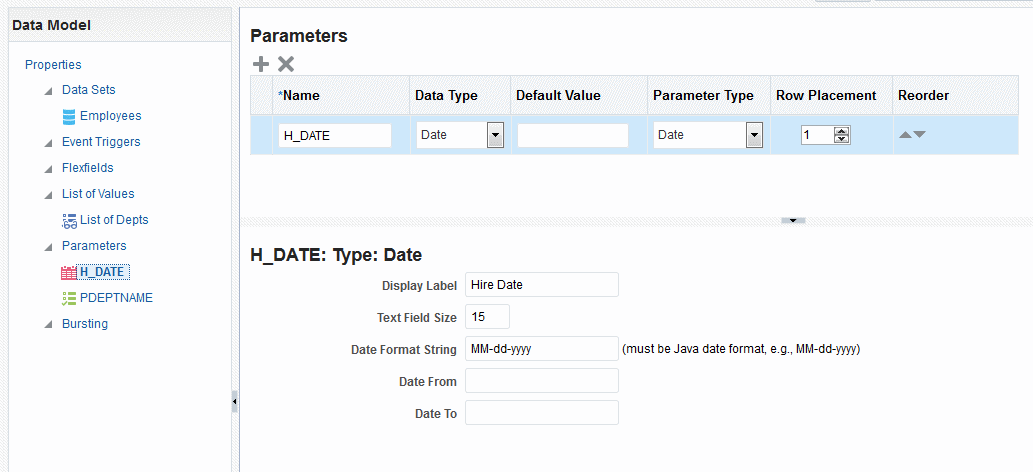
The figure shows the date parameter definition.
- Select Date from the Parameter Type list. The lower pane displays the appropriate fields for your selection.
- Enter the Display Label. The display label is the label that displays to users when they view the report. For example: Hire Date.
- Enter the Text Field Size as an integer. This field determines the number of characters that the user can enter into the text box for the date entry. For example: 10.
- Enter the Date Format String. The format must be a Java date format, for example, MM-dd-yyyy.
- Optionally, enter a Date From and Date To. The dates entered here define the date range that are presented to the user by the date picker. For example if you enter the Date From as 01-01-1990, the date picker does not allow the user to select a date before 01-01-1990. Leave the Date To blank to enable all future dates.
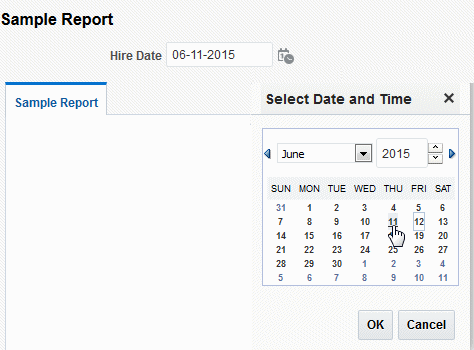
The figure shows how the Hire Date parameter displays to the report consumer.
