J Setting Up B2B Communication By Using Remote JNDI Queue

This appendix discusses the process of setting up B2B communication by using remote JNDI queue.

In Oracle B2B, you can configure third-party JMS providers to exchange messages. For this, you can configure a remote JNDI queue so that B2B can publish messages to a queue or topic on a remote server, or a queue or topic on a third-party JMS server.

This appendix contains the following topic:

J.1 Configuring B2B Communication By Using Foreign JNDI

You can bind any remote server JNDI context to a Weblogic server by using the Foreign JNDI Provider option in the Weblogic Server console.

This procedure has two steps:

  1. Creating the target JMS server, module, and queue.
  2. Setting up an environment for B2B to write to the JMS queue.

J.1.1 Creating a Target JMS Server, Module, and Queue

To set up a target JMS server, module, and queue in a computer (say Host1):
  1. Install Weblogic server.
  2. Install Admin server and SOA server.
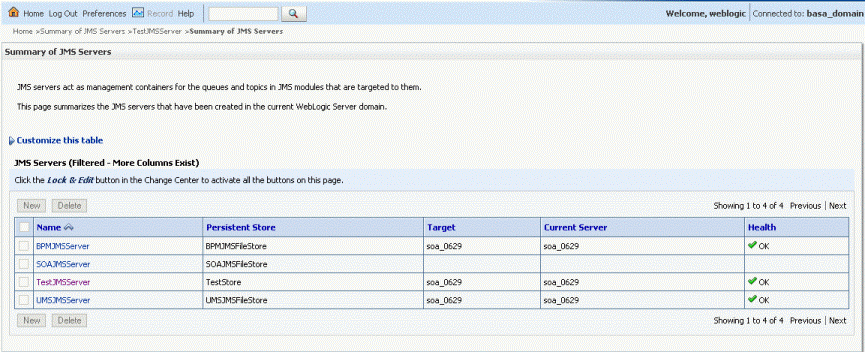
  3. Create a test JMS server by selecting the SOA server as the target as shown in Figure J-1.

    Figure J-1 Creating a Test JMS Server

    Description of Figure J-1 follows
    Description of "Figure J-1 Creating a Test JMS Server"
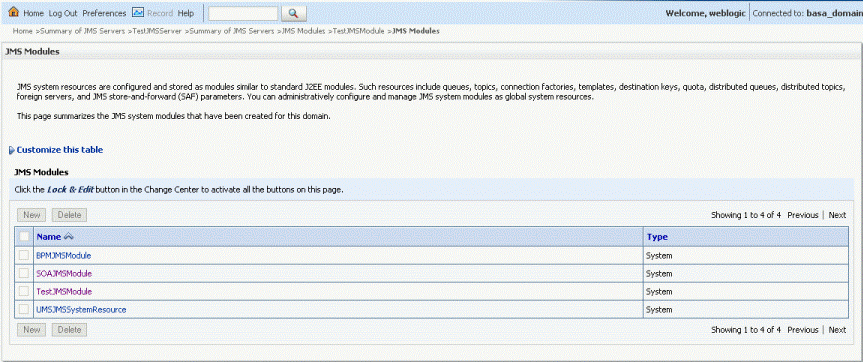
  4. Create a test JMS module as shown in Figure J-2.

    Figure J-2 Creating a Test JMS Module

    Description of Figure J-2 follows
    Description of "Figure J-2 Creating a Test JMS Module"
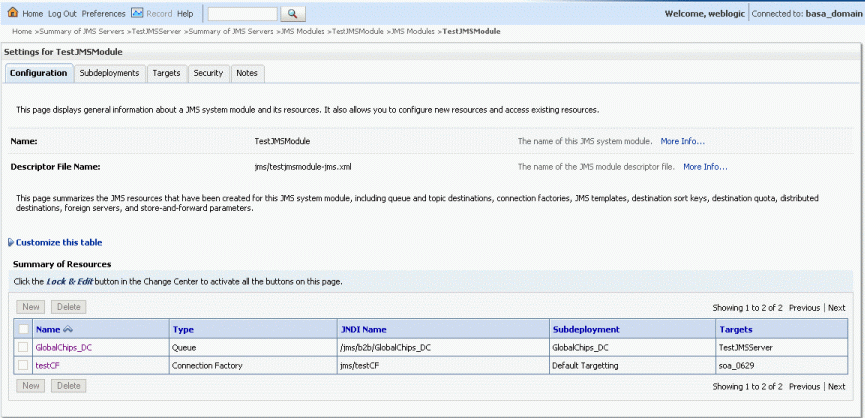
  5. Launch the test JMS module that you created and create a connection factory with target as SOA server. Create a JMS Queue and with the target as the created test JMS server as shown in Figure J-3.

    Figure J-3 Creating a Test JMS Queue

    Description of Figure J-3 follows
    Description of "Figure J-3 Creating a Test JMS Queue"

J.1.2 Setting Up an Environment to Connect to the JMS queue

After you have created a test JMS server, module, and queue on Host1, you need to set up another computer (say Host2) to enable B2B to write to the JMS queue on Host1.

To set up Host2:

  1. Install Weblogic server and SOA server.

    Note:

    Ensure that all the server names and the domain names for Host2 are different from the ones that you have specified for Host1.

  2. Log on to the Weblogic server console.
  3. Navigate to Foreign JNDI Providers under Services on the left-hand navigation panel.
  4. In the Foreign JNDI Providers page, click New to add a test JNDI provider called TestJNDIProvider.
  5. Click the newly added JNDI provider name and under the General tab, enter values corresponding to the Weblogic server credentials of Host1.

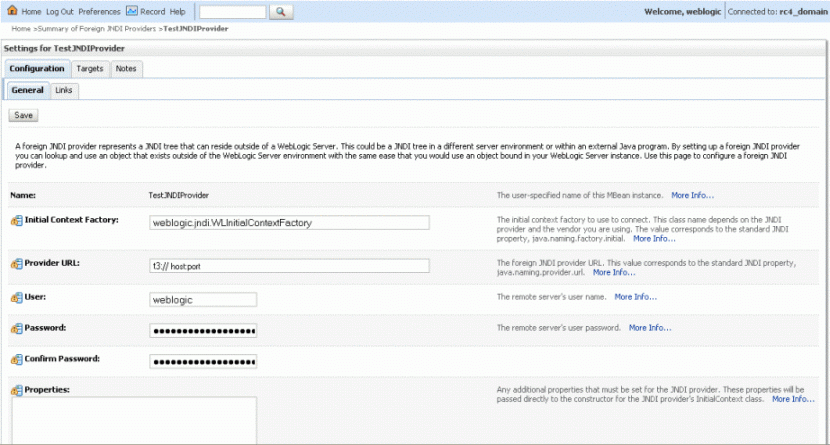
    For example, specify weblogic.jndi.WLInitialContextFactory as the Initial Context Factory name and t3://<host:port> for the Provider URL as shown in Figure J-4.

    Figure J-4 Configuring Connection to Remote Server

    Description of Figure J-4 follows
    Description of "Figure J-4 Configuring Connection to Remote Server"
  6. Save the changes to complete setting up connection to the remote server.
  7. Click the Links tab.
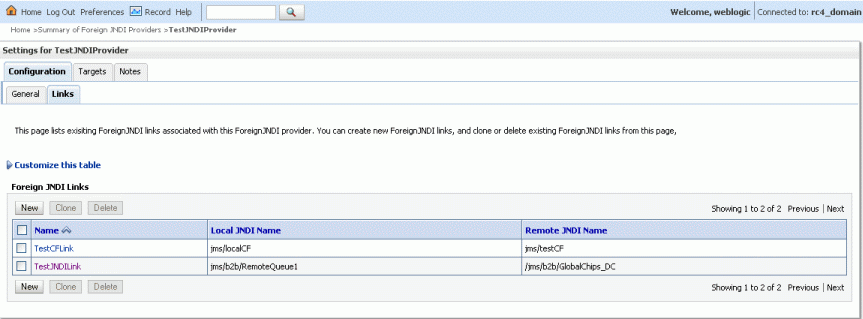
  8. Create a link to point to the connection factory and to the queue on the JMS server on Host1 by specifying the following:
    • Name: Any user-defined name

    • Local JNDI Name: Any user-defined JNDI name

    • Remote JNDI Name: JNDI names of the connection factory and queue on the JMS server on Host1

      Figure J-5 shows the Foreign JNDI Links table displaying a list of foreign JNDI links.

      Figure J-5 Foreign JNDI Links

      Description of Figure J-5 follows
      Description of "Figure J-5 Foreign JNDI Links"
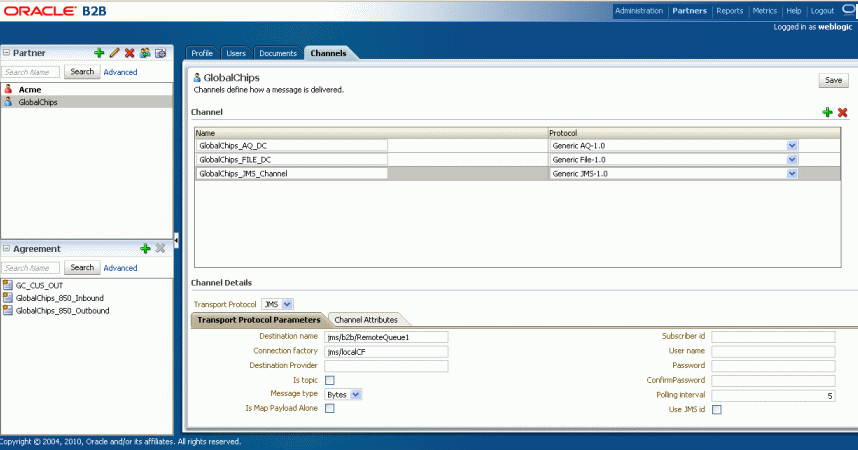
  9. In the B2B user interface, create a JMS channel by specifying the local JNDI names (created to point to the remote JNDI queue and remote connection factory) in the Destination name and Connection factory fields as shown in Figure J-6.

    Figure J-6 Creating a JMS Channel in the B2B User Interface

    Description of Figure J-6 follows
    Description of "Figure J-6 Creating a JMS Channel in the B2B User Interface"